

Figmaでコンポーネントを元に戻す方法
Figma でコンポーネントを解除し、通常のフレームや要素に戻す方法を学びましょう。デザインをすばやく調整するための簡単な手順です。
手順を順番に見ていきましょう:
インスタンスを作成:メインコンポーネントを選択し、(Ctrl/Cmd + D を使用して)複製してインスタンスを作成します。
インスタンスをデタッチ:インスタンスを右クリックし、「Detach Instance」を選択します。あるいは、インスタンスが選択されているときに右側サイドバーの「Instance Options」セクションにある「インスタンスをデタッチ」オプションを見つけることもできます。また、キーボードショートカット Ctrl/Cmd + Alt + B も使用できます。
元のコンポーネントを削除:キャンバスから元のメイン コンポーネント を削除します。
ステップごとのガイド:Figmaでコンポーネントを元に戻す方法
ステップ 1
まず、Figma内で元に戻したいコンポーネントを選択します。選択されてハイライト表示されていることを確認してください。

ステップ 2
コンポーネントを選択したら、右側のメニューに移動し、「More Actions」オプションを探します。それをクリックしてください。
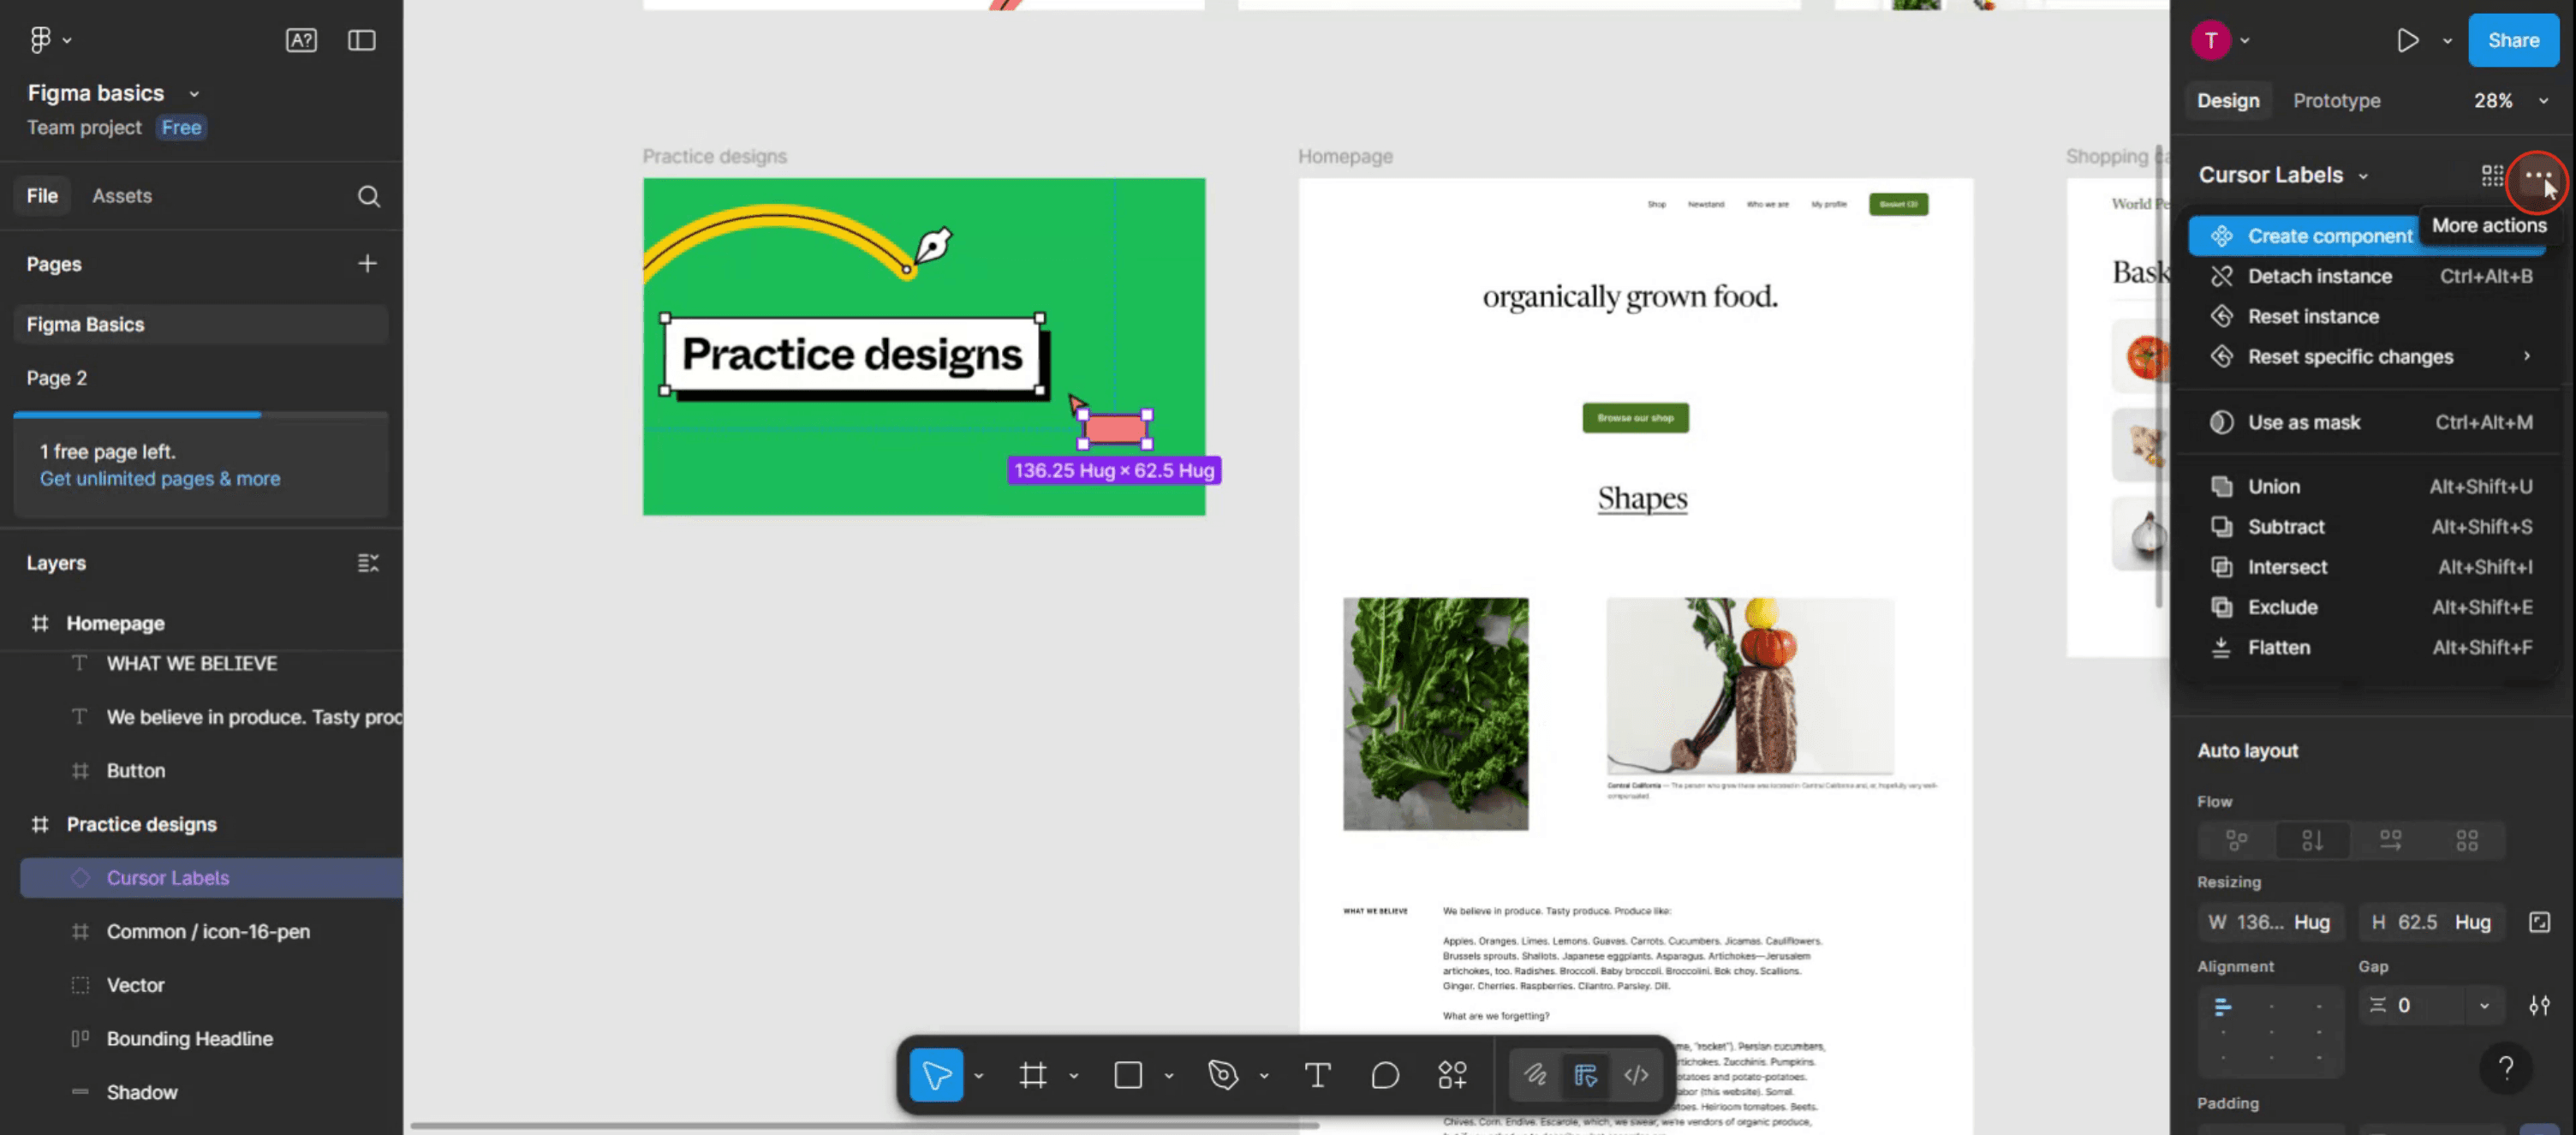
ステップ 3
Figmaでコンポーネントを実質的に元に戻すには、「Detach Instance」オプションを選択します。

ステップ 4
これらの手順に従えば、Figmaでコンポーネントを正常に元に戻すことができます。このガイドをご利用いただきありがとうございます。
Figmaでコンポーネントを元に戻すためのプロのヒント
Undoショートカットを使う
Ctrl + Z(Windows)または Cmd + Z(Mac)を押すと、コンポーネントの作成を含む直前の操作をすばやく取り消せます。右クリックして「インスタンスを解除」
コンポーネントを配置して編集可能なレイヤーに戻したい場合は、インスタンスを右クリックして「Detach Instance」を選択します。解除する前に名前を変更する
コンポーネントを解除して編集する予定があるなら、先に名前を変更しておくと変更を追跡しやすくなります。編集する前に複製する
元のコンポーネントが後で必要になるかもしれない場合は、解除する前に複製してきれいなコピーを残しておきましょう。マスターコンポーネントの場所を確認する
マスターコンポーネントを誤って削除または変更してしまった場合は、Assetsパネルから見つけて、変更を加える前に復元してください。
よくある落とし穴とその回避方法
誤ってマスターコンポーネントを削除する
マスターコンポーネントを削除すると、リンクされたすべてのインスタンスが壊れる可能性があります。元に戻せない変更を行う前には、必ず複製してください。「Detach Instance」とUndoを混同する
解除はレイヤーの性質を変えるのに対し、Undoは直前の手順を元に戻します。目的に応じて適切な方法を使いましょう。マスターではなくインスタンスを編集する
インスタンスに加えた変更は、すべてのコンポーネントには反映されません。一貫した変更にしたい場合は、メインコンポーネントを編集してください。解除後にオーバーライドを失う
一度解除すると、そのインスタンス内のテキストやスタイルのオーバーライドは失われます。保持したい場合はコピーを保存しておきましょう。Undo履歴の制限
FigmaのUndo履歴はセッション単位です。ファイルを閉じると履歴はリセットされるため、何かを元に戻す必要がある場合はすぐに操作してください。
Figmaでコンポーネントを取り消すことに関するよくある質問
コンポーネントの作成を元に戻すにはどうすればよいですか?
作成後すぐに Ctrl + Z(Windows)または Cmd + Z(Mac)を押すと、個別のレイヤーに戻せます。「Detach Instance」は何をしますか?
インスタンスとマスターコンポーネントのリンクを解除し、完全に स्वतंत्रに編集できるようにします。削除したマスターコンポーネントを復元できますか?
はい、ファイルのバージョン履歴にまだ残っていれば可能です。復元するには「ファイル → バージョン履歴を表示」に進んでください。切り離しは他のインスタンスに影響しますか?
いいえ、切り離しは選択したインスタンスにのみ影響し、マスターコンポーネントや他のインスタンスには影響しません。切り離したインスタンスを再リンクできますか?
いいえ、一度切り離すと自動的に再リンクすることはできません。新しいコンポーネントインスタンスに置き換える必要があります。Macで画面録画するには?
Macで画面録画するには、Trupeer AI を使用できます。画面全体をキャプチャでき、AIアバターの追加、ボイスオーバーの追加、動画内のズームイン・ズームアウトなどのAI機能を提供します。trupeer の AI動画翻訳機能を使えば、動画を30以上の言語に翻訳できます。画面録画にAIアバターを追加するには?
画面録画にAIアバターを追加するには、AI画面録画ツールを使用する必要があります。Trupeer AI はAI画面録画ツールで、複数のアバターを使った動画の作成を支援し、さらに動画用に自分自身のアバターを作成するのにも役立ちます。Windowsで画面録画するには?
Windowsで画面録画するには、ビルトインのゲームバー(Windows + G)を使うか、Trupeer AI のような高度なAIツールを使うと、AIアバター、ボイスオーバー、翻訳などのより高度な機能を利用できます。動画にボイスオーバーを追加するには?
動画にボイスオーバーを追加するには、trupeer ai の Chrome拡張機能をダウンロードしてください。サインアップ後、音声付きの動画をアップロードし、trupeer から希望のボイスオーバーを選択して、編集済み動画を書き出します。画面録画でズームインするにはどうすればよいですか?
画面録画中にズームインするには、Trupeer AI のズーム効果を使用します。これにより、特定の瞬間にズームイン・ズームアウトでき、動画コンテンツの視覚的インパクトを高められます。
おすすめ記事
関連チュートリアル

