
Canvaでテキストをカーブさせる方法 – 簡単ステップバイステップガイド
Canvaで曲線テキストを使いたいですか?Curve Text機能を使って、ロゴやラベルなどの文字を簡単に曲げる方法を学びましょう。
このガイドでは、Canvaでテキストを曲線にする方法をステップごとに説明します。
これらのわかりやすい手順に従って、曲線テキスト要素でデザインプロジェクトを強化しましょう。
Canvaでテキストを曲線にすると、ロゴ、見出し、デザインのアクセントに、動きのある円形または半円形のタイポグラフィを作成するのに最適です。
ステップバイステップガイド
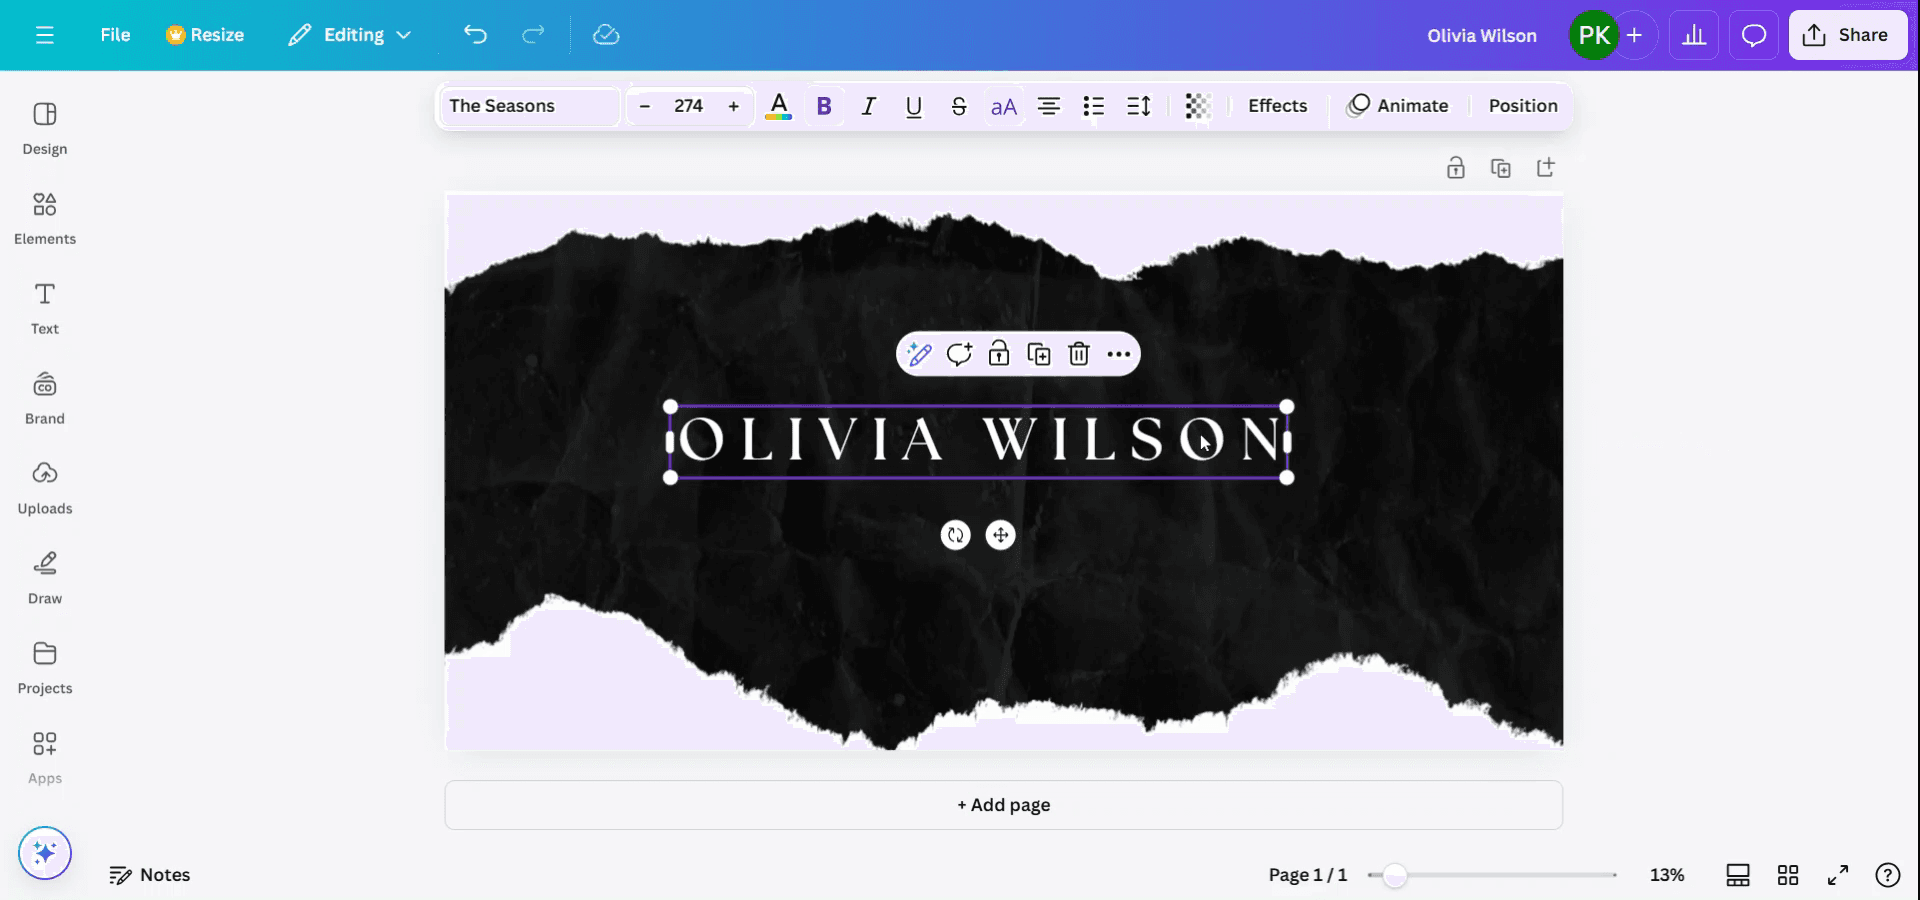
テキストを選択する
曲線にしたいテキストボックスをクリックします。
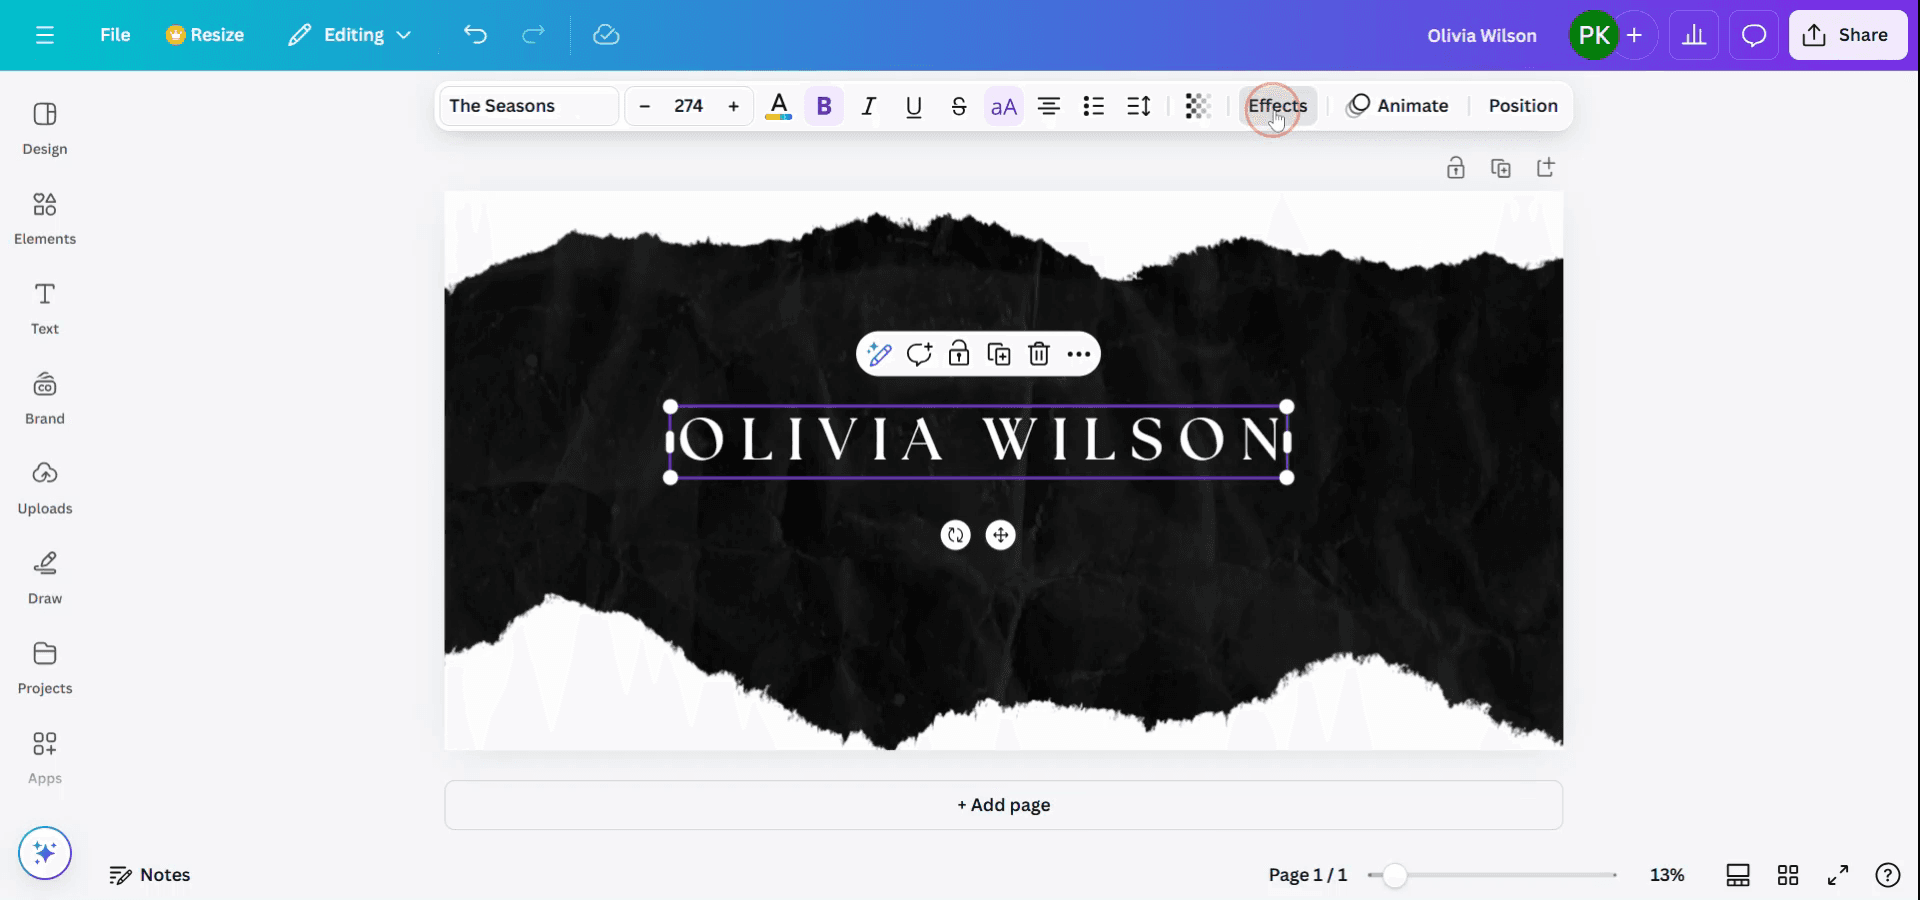
エフェクトパネルを開く
上部ツールバーで「エフェクト」をクリックします。
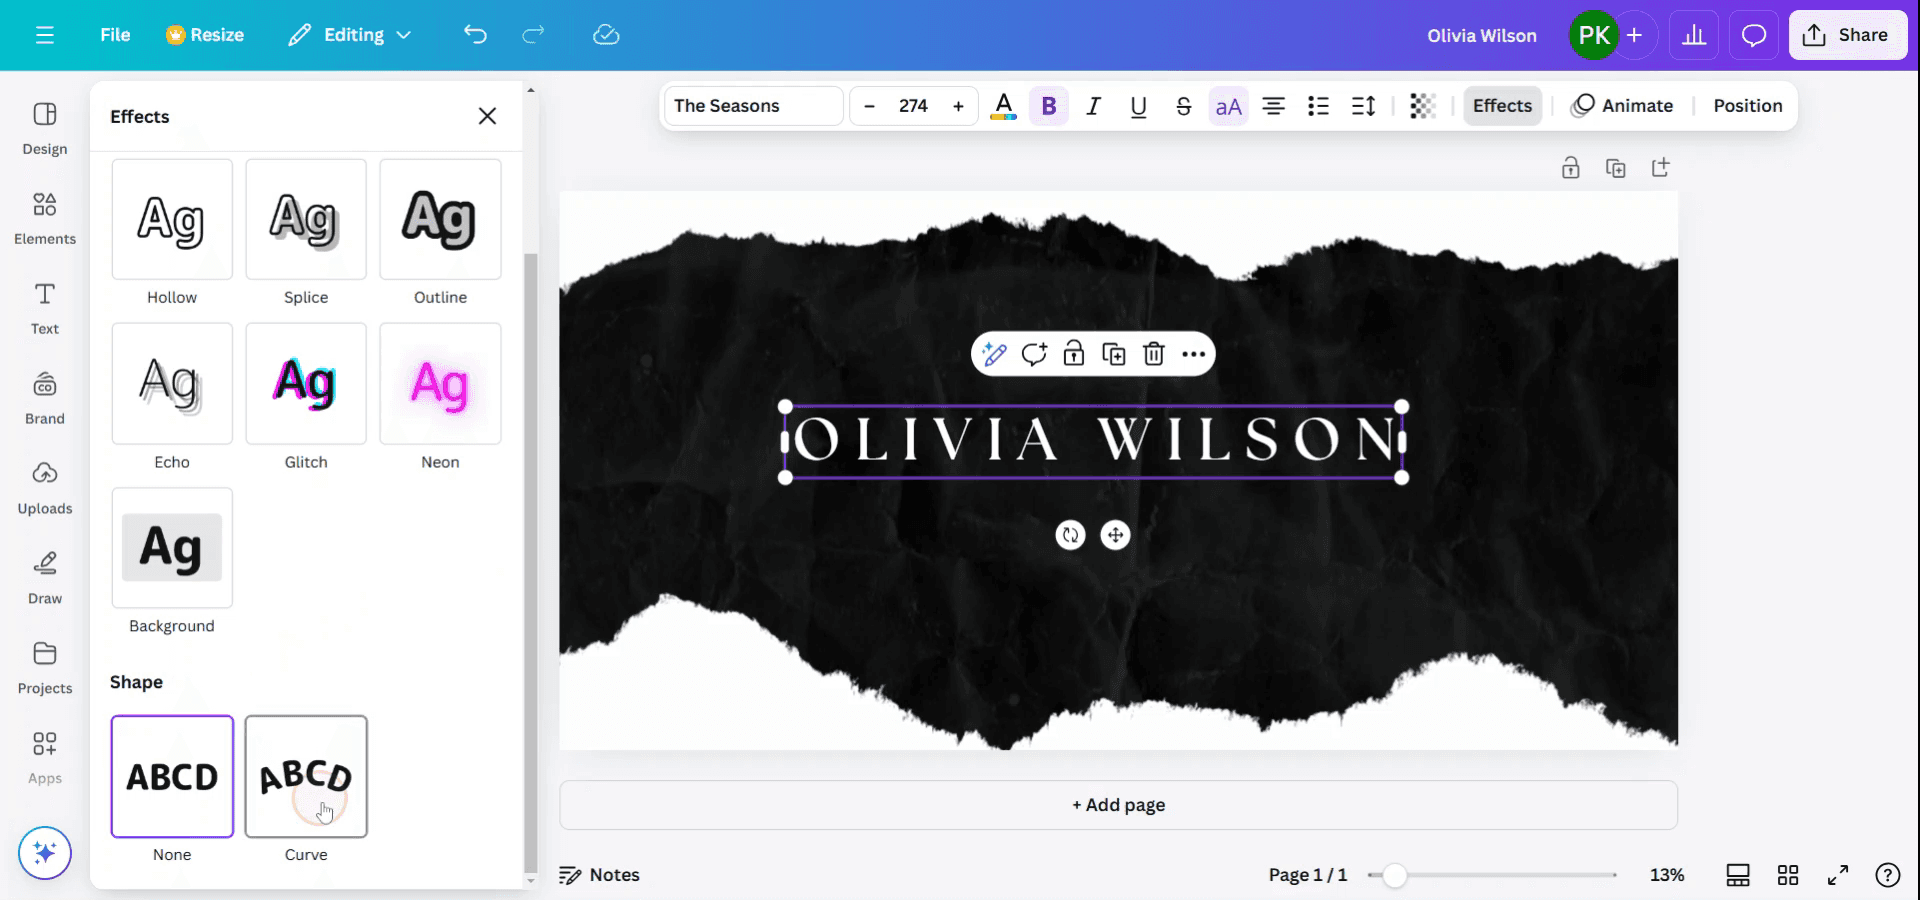
曲線エフェクトを適用する
テキストエフェクト の下で「カーブ」を選択します。
テキストは標準の弧状にすぐ曲がります。
曲線を調整する
カーブスライダーを使用して、曲率を調整します:
右にスライドして曲線を大きくします(上向きの弧)。
左にスライドすると逆カーブになります(下向きの弧)。
微調整(オプション)
文字間隔を使って文字の間隔を広げ、よりきれいなカーブにします。
行間またはフォントサイズと組み合わせることで、さらに細かく調整できます。
ステップバイステップガイド:Canvaでテキストを曲線にする方法
ステップ1
Canvaでデザインを開き、曲線にしたいテキストを選択するところから始めます。
ステップ2
テキストを選択すると、画面上部にツールバーが表示されます。「エフェクト」オプションをクリックします。
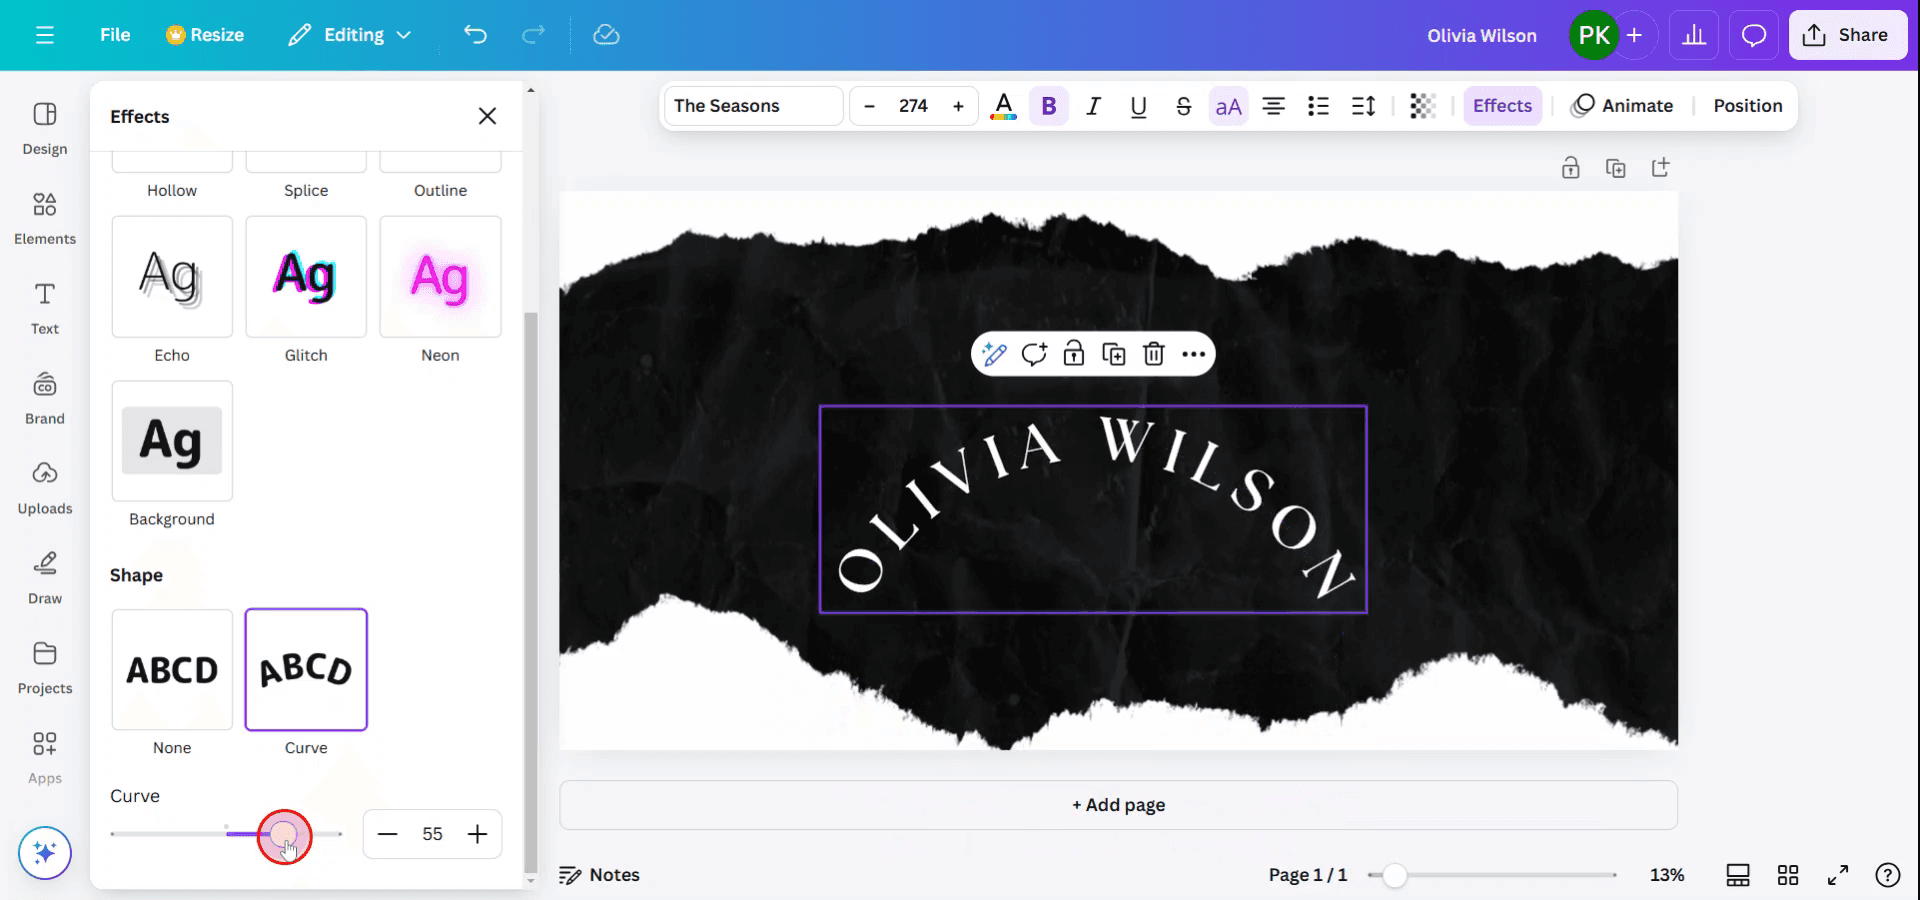
ステップ3
「エフェクト」を選択したら、インターフェース下部に表示されるさまざまなスタイルと形状を確認します。
使用可能な形状から「カーブ」オプションを選びます。
ステップ4
テキストが曲線になっていることを確認します。曲線設定を変更して、好みに合わせて曲率を調整できます。
Canvaでテキストを曲げる方法のプロのコツ
テキストを選択する:
曲げたいテキストボックスをクリックします。「エフェクト」パネルを開く:
テキストを選択したら、上部ツールバーの「エフェクト」ボタンをクリックします。「カーブ」エフェクトを選ぶ:
「エフェクト」パネルで下にスクロールし、「カーブ」オプションを選択します。カーブを調整する:
カーブを選択したら、スライダーを使って曲線の強さを調整します。デザインの必要に応じて、左または右にドラッグして、テキストの曲がり具合を強めたり弱めたりします。位置を微調整する:
必要に応じて回転ハンドルを使ってテキストの向きを調整し、曲線に合うようにテキストボックスのサイズや位置も調整します。
Canvaでテキストを曲げる際によくある落とし穴とその回避方法
テキストが曲がりすぎてしまう:
対処法: 読みづらくなるほど極端なカーブ設定は避けましょう。スタイルと読みやすさのバランスが取れるまで、少しずつカーブを調整してください。カーブ後にテキストを調整できない:
対処法: 一度テキストを曲げても、Canvaでは他のテキストと同様に編集できます。テキストボックスをクリックするだけで、内容やスタイルを変更できます。カーブがデザインに合わない:
対処法: カーブを適用する前に、テキストボックスのサイズが適切に調整されていることを確認してください。カーブによってテキストが大きく崩れる場合は、可読性を保つためにボックスのサイズを変更してみてください。カーブ後の配置に問題がある:
対処法: カーブ後は、テキストがデザインに対して正しく配置されているか確認してください。必要に応じて、Canvaの配置ツールで調整できます。複数行のテキストを曲げられない:
対処法: テキストが複数行の場合は、各行を個別に調整するか、カーブ効果を適用する前にテキストを1行に変換する必要があるかもしれません。
Canvaでテキストを曲げる際のよくある質問
Canvaで任意のテキストを曲げられますか?
はい、Canvaで作成したテキストボックスであれば、任意のテキストを曲げることができます。曲線の向きを変更するにはどうすればよいですか?
「エフェクト」パネルでスライダーを左または右にドラッグすると、テキストを上向きまたは下向きに曲げることができます。複数行のテキストに曲線を適用できますか?
複数行を曲げることはできますが、同じデザイン内のすべての行を同じように曲げたい場合は、各行に個別で効果を適用する必要があります。適用後に曲線を調整できますか?
はい、テキストを選択して「エフェクト」パネルの曲線スライダーを調整すれば、いつでも変更できます。テキストを曲げる機能はCanvaで無料で使えますか?
はい、テキストを曲げる機能はCanvaの無料版で利用できます。Macで画面録画するには?
Macで画面録画するには、Trupeer AIを使用できます。画面全体をキャプチャできるほか、AIアバターの追加、ナレーションの追加、動画の拡大・縮小などのAI機能も備えています。trupeerのAI動画翻訳機能を使えば、動画を30以上の言語に翻訳できます。AIアバターを画面録画に追加するには?
画面録画にAIアバターを追加するには、AI画面録画ツールを使用する必要があります。Trupeer AIはAI画面録画ツールで、複数のアバターを使った動画の作成を支援するほか、動画用の自分自身のアバター作成もサポートします。Windowsで画面録画するには?
Windowsで画面録画するには、標準搭載のGame Bar(Windows + G)を使うか、AIアバター、ナレーション、翻訳などのより高度な機能を備えたTrupeer AIのような高度なAIツールを使うことができます。動画にナレーションを追加するには?
動画にナレーションを追加するには、trupeer aiのChrome拡張機能をダウンロードしてください。サインアップ後、音声付きの動画をアップロードし、trupeerから希望のナレーションを選んで、編集した動画をエクスポートします。画面録画でズームインするには?
画面録画中にズームインするには、Trupeer AIのズーム効果を使用します。これにより、特定の瞬間にズームイン・ズームアウトでき、動画コンテンツの視覚的なインパクトを高められます。
おすすめの読み物
関連チュートリアル

