
Come curvare il testo in Canva – Guida rapida passo passo
Vuoi del testo curvo in Canva? Scopri come usare la funzione Testo curvo per piegare facilmente il testo per loghi, etichette e altro ancora.
Questa guida fornisce un processo passo passo su come curvare il testo in Canva.
Segui queste istruzioni chiare per migliorare i tuoi progetti di design con elementi di testo curvi.
Curvare il testo in Canva è un ottimo modo per creare una tipografia dinamica, circolare o semicircolare per loghi, intestazioni o elementi decorativi del design.
Guida passo passo
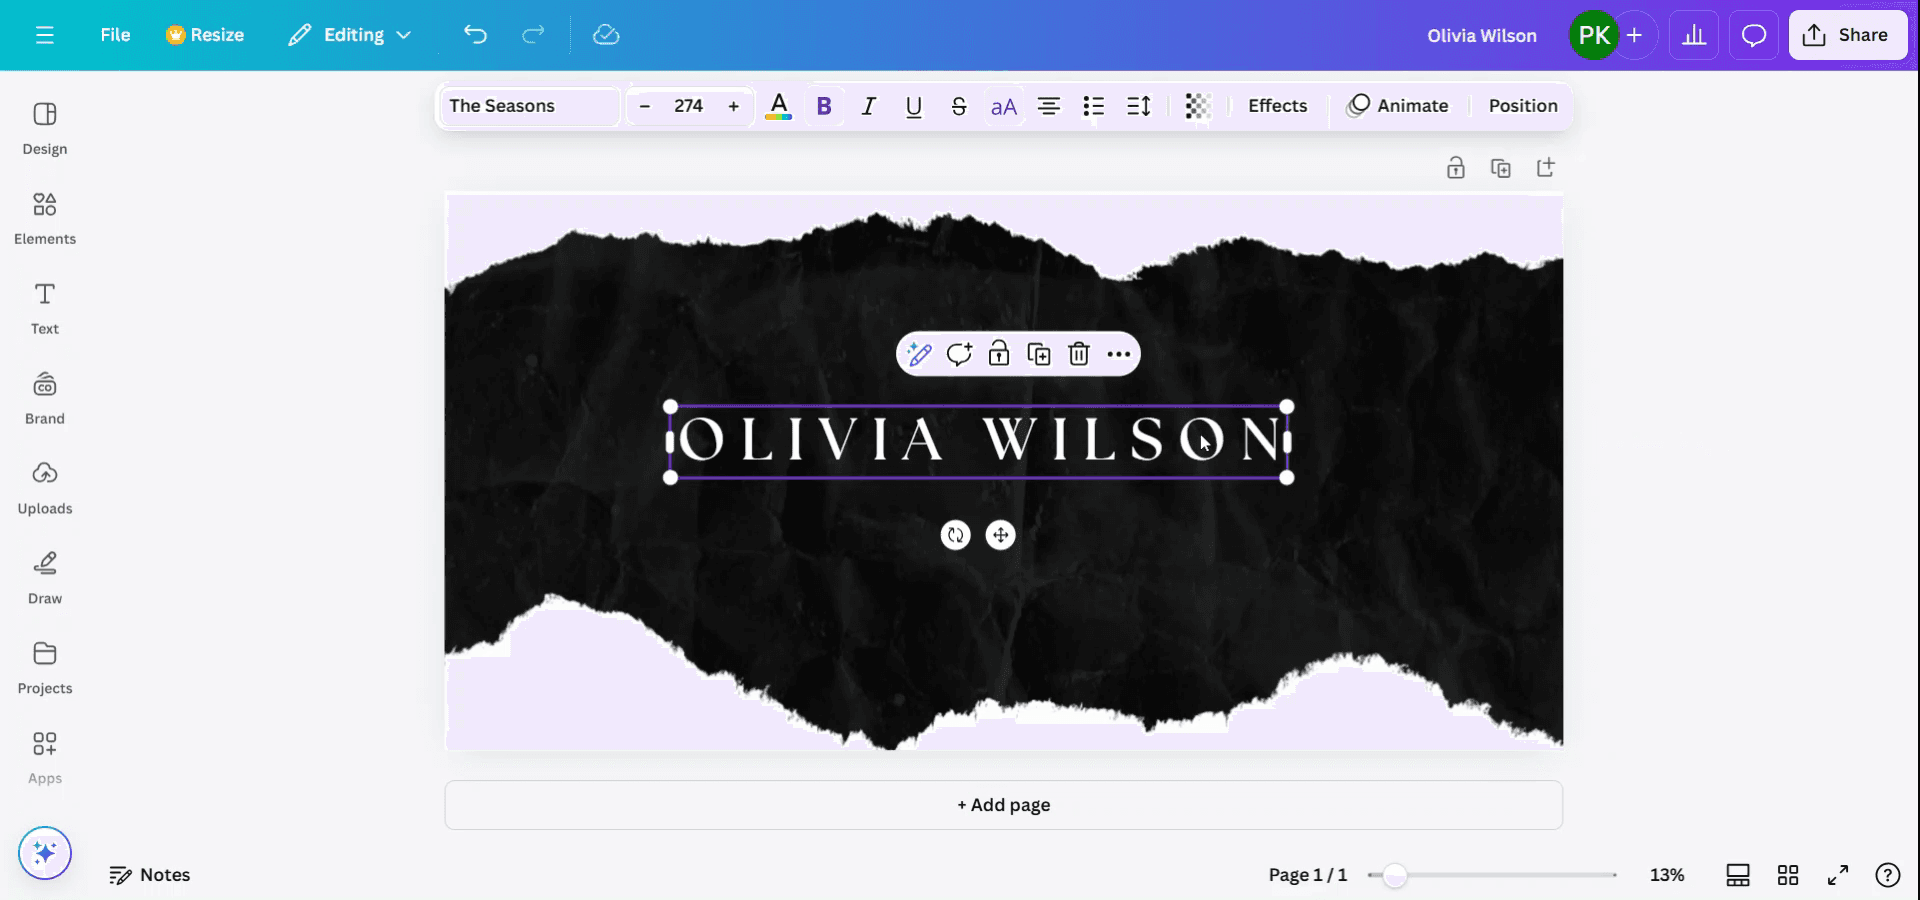
Seleziona il testo
Fai clic sulla casella di testo che desideri curvare.
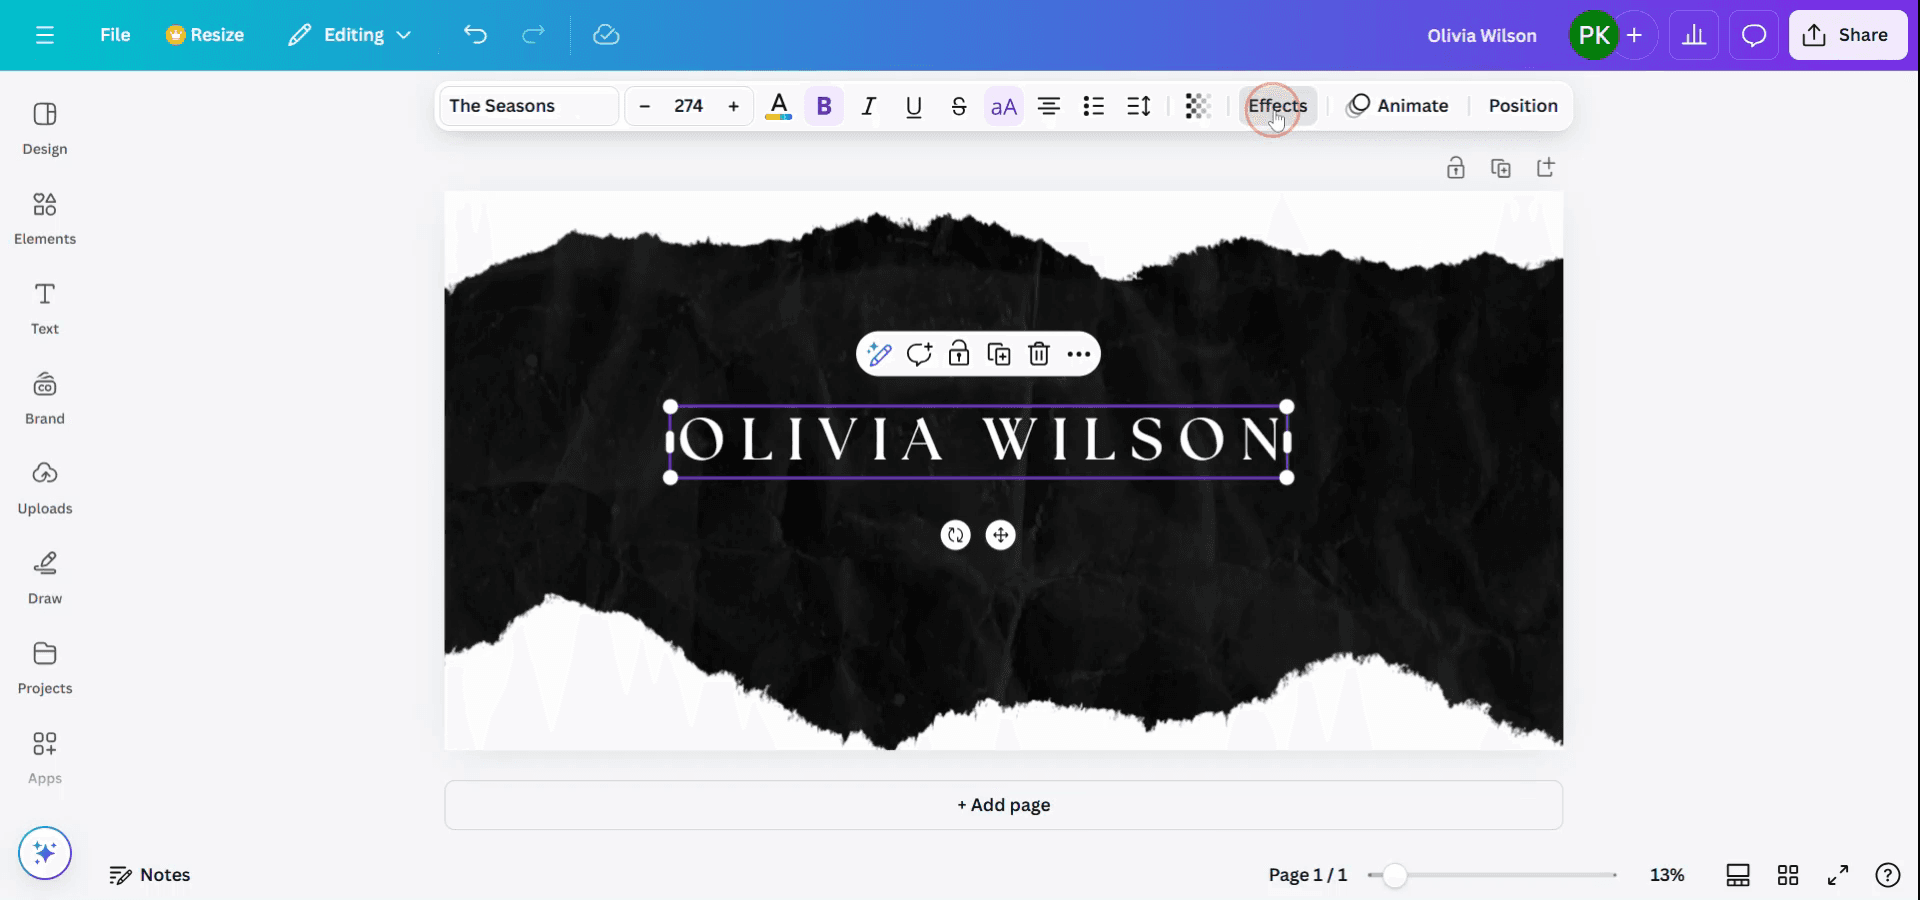
Apri il pannello Effetti
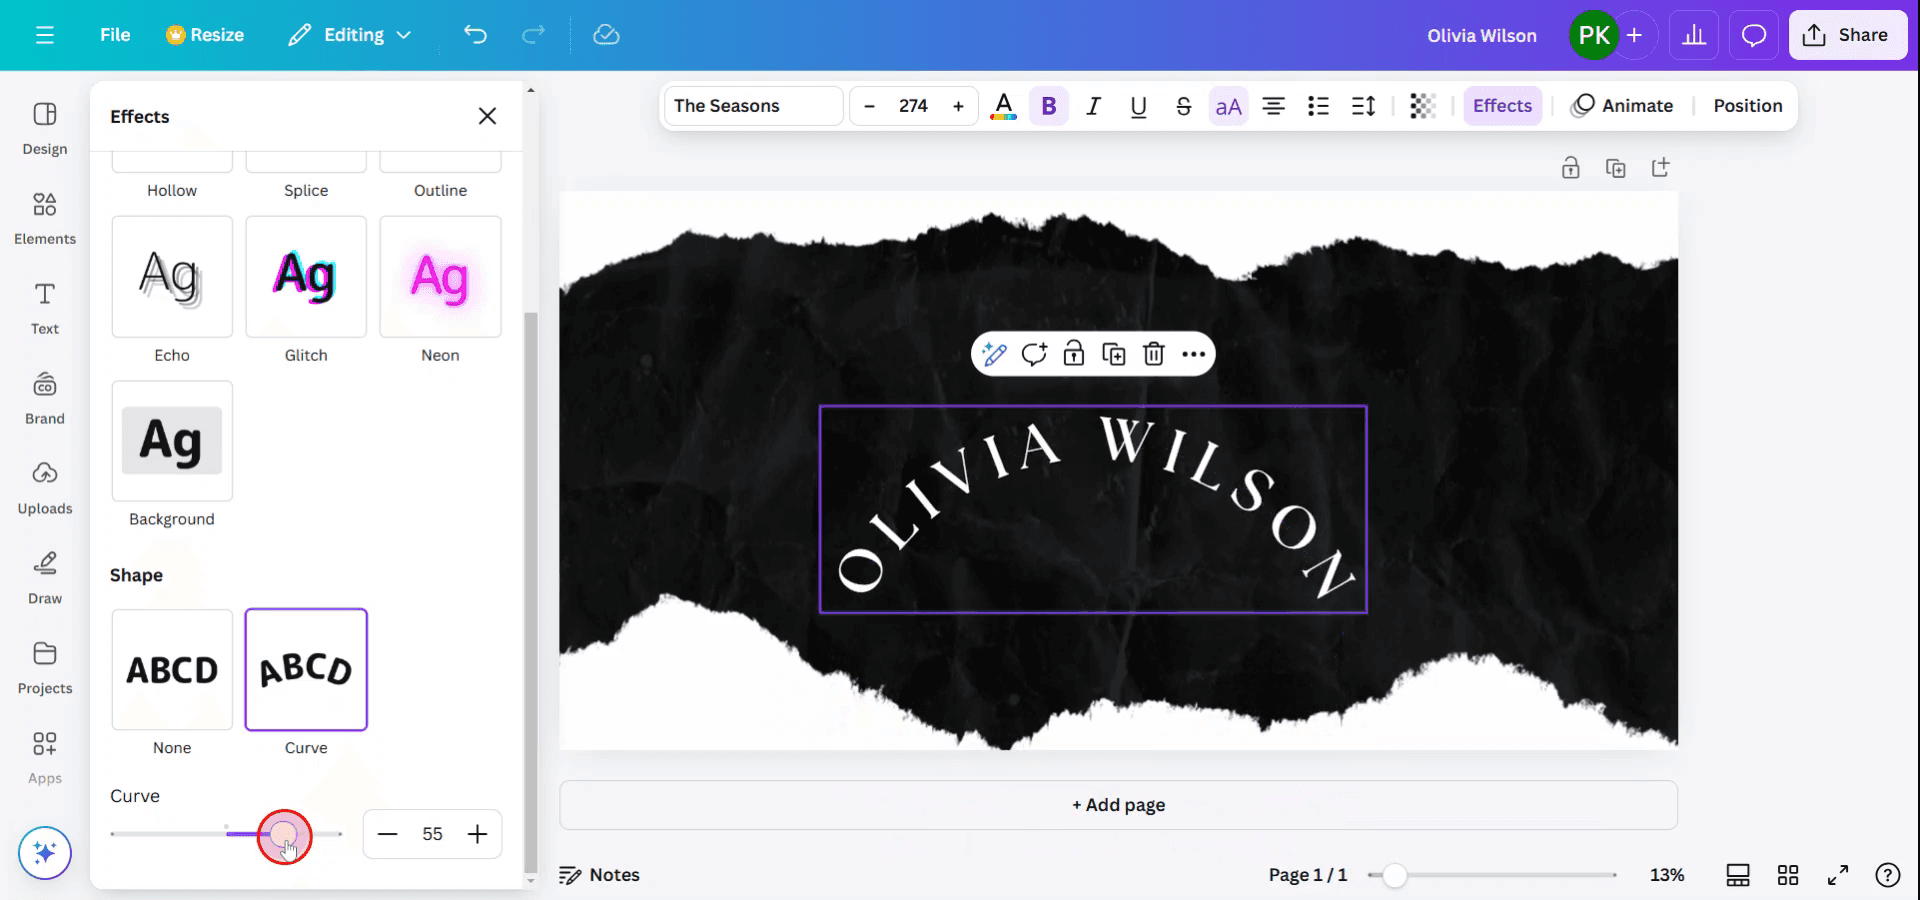
Nella barra degli strumenti in alto, fai clic su “Effetti”.
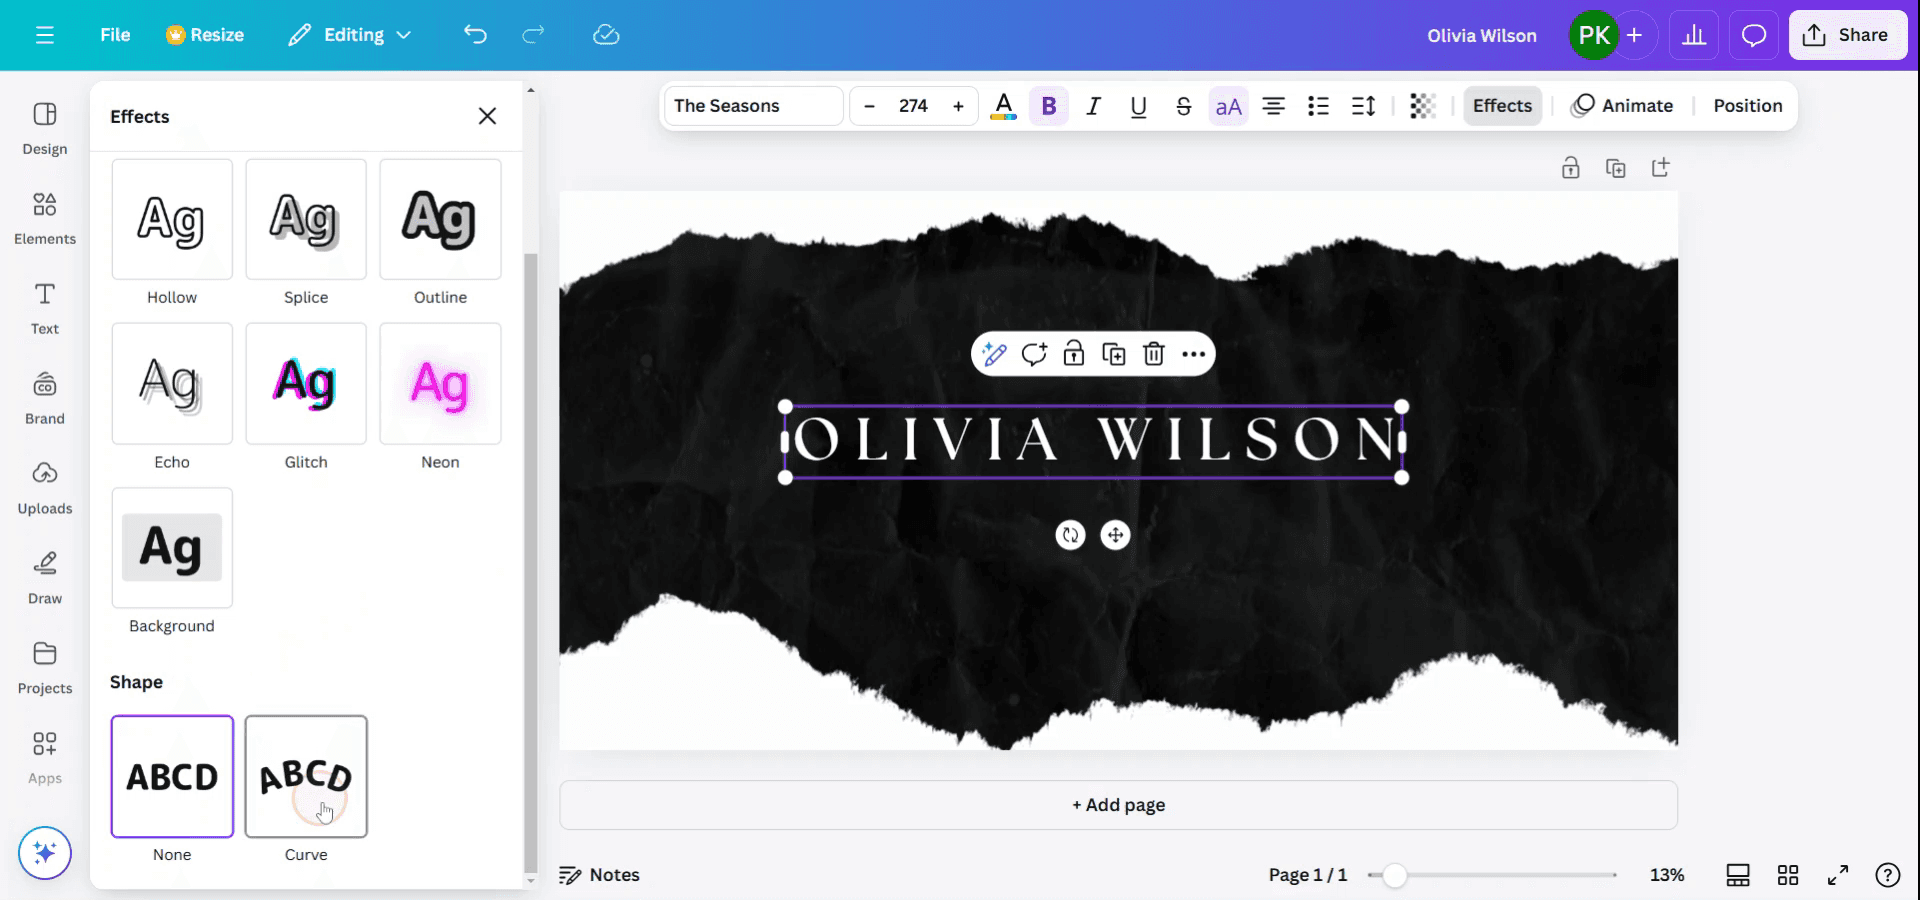
Applica l'effetto Curva
In Effetti testo, seleziona “Curva”.
Il testo si curverà istantaneamente in un arco standard.
Regola la curva
Usa il cursore Curva per controllare la curvatura:
Sposta a destra per aumentare la curva (arco verso l'alto).
Sposta a sinistra per una curva inversa (arco verso il basso).
Rifinisci (facoltativo)
Usa la spaziatura tra le lettere per distanziare i caratteri e ottenere una curva più pulita.
Combinalo con la spaziatura delle linee o la dimensione del carattere per un controllo aggiuntivo.
Guida passo passo: come curvare il testo in Canva
Passaggio 1
Inizia aprendo il tuo design in Canva e selezionando il testo che desideri curvare.
Passaggio 2
Una volta selezionato il testo, nella parte superiore dello schermo apparirà una barra degli strumenti. Fai clic sull'opzione 'Effetti'.
Passaggio 3
Dopo aver selezionato 'Effetti', esplora i vari stili e forme presentati nella parte inferiore dell'interfaccia.
Scegli l'opzione 'Curva' tra le forme disponibili.
Passaggio 4
Osserva che il testo è ora curvo. Puoi regolare la curvatura in base alle tue preferenze modificando le impostazioni della curva.
Consigli professionali su come rendere il testo curvo in Canva
Seleziona il tuo testo:
Fai clic sulla casella di testo che desideri curvare.Apri il pannello "Effetti":
Una volta selezionato il testo, fai clic sul pulsante “Effetti” nella barra degli strumenti in alto.Scegli l'effetto "Curva":
Nel pannello “Effetti”, scorri verso il basso e seleziona l'opzione “Curva”.Regola la curva:
Dopo aver selezionato la curva, usa il cursore per regolare l'intensità della curva. Trascinalo a sinistra o a destra per rendere il testo più o meno curvo, a seconda delle esigenze del tuo design.Regola con precisione la posizione:
Usa le maniglie di rotazione per regolare l'orientamento del testo, se necessario, e modifica le dimensioni o la posizione della casella di testo per adattarla correttamente alla curva.
Errori comuni e come evitarli per curvare il testo in Canva
Il testo diventa troppo distorto:
Soluzione: Evita di usare impostazioni di curva estreme che rendono il testo difficile da leggere. Regola la curva gradualmente finché non trovi un equilibrio tra stile e leggibilità.Impossibile modificare il testo dopo averlo curvato:
Soluzione: Una volta curvato il testo, puoi ancora modificarlo come qualsiasi altro testo in Canva. Ti basta fare clic sulla casella di testo e apportare modifiche al contenuto o allo stile.La curva non si adatta al design:
Soluzione: Assicurati che le dimensioni della casella di testo siano regolate in modo appropriato prima di applicare la curva. Se la curva distorce troppo il testo, prova a ridimensionare la casella per mantenerne la leggibilità.Problemi di allineamento dopo la curvatura:
Soluzione: Dopo aver curvato il testo, assicurati che sia ancora allineato correttamente con il tuo design. Puoi usare gli strumenti di allineamento di Canva per regolarlo secondo necessità.Impossibile curvare più righe di testo:
Soluzione: Se il tuo testo ha più righe, potresti dover regolare ciascuna riga separatamente o convertire il testo in un'unica riga prima di applicare l'effetto curva.
FAQ comuni per curvare il testo in Canva
Posso curvare qualsiasi testo in Canva?
Sì, puoi curvare qualsiasi testo in Canva, purché sia una casella di testo creata all'interno della piattaforma.Come cambio la direzione della curva?
Puoi regolare la direzione della curva trascinando il cursore a sinistra o a destra nel pannello “Effetti” per far curvare il testo verso l'alto o verso il basso.Posso applicare una curva a più righe di testo?
Anche se puoi curvare più righe, dovrai applicare l'effetto a ciascuna riga singolarmente se vuoi che tutte siano curve nello stesso design.Posso regolare la curva dopo averla applicata?
Sì, puoi sempre regolare la curva selezionando il testo e modificando il cursore della curva nel pannello “Effetti”.Curvare il testo è una funzione gratuita in Canva?
Sì, la curvatura del testo è disponibile nella versione gratuita di Canva.Come registrare lo schermo su Mac?
Per registrare lo schermo su un Mac, puoi usare Trupeer AI. Ti consente di catturare l'intero schermo e offre funzionalità IA come l'aggiunta di avatar IA, l'aggiunta di una voce narrante, lo zoom avanti e indietro nel video. Con la funzione di traduzione video con IA di trupeer, puoi tradurre il video in oltre 30 lingue.Come aggiungere un avatar IA a una registrazione dello schermo?
Per aggiungere un avatar IA a una registrazione dello schermo, dovrai usare uno strumento di registrazione dello schermo con IA. Trupeer AI è uno strumento di registrazione dello schermo con IA, che ti aiuta a creare video con più avatar e ti aiuta anche a creare il tuo avatar per il video.Come registrare lo schermo su Windows?
Per registrare lo schermo su Windows, puoi usare la Game Bar integrata (Windows + G) oppure uno strumento IA avanzato come Trupeer AI per funzionalità più avanzate come avatar IA, voce narrante, traduzione ecc.Come aggiungere una voce narrante a un video?
Per aggiungere una voce narrante ai video, scarica l'estensione Chrome di trupeer ai. Una volta registrato, carica il tuo video con audio, scegli la voce narrante desiderata da trupeer ed esporta il video modificato.Come faccio a ingrandire in una registrazione dello schermo?
Per ingrandire durante una registrazione dello schermo, usa gli effetti zoom in Trupeer AI, che ti permettono di ingrandire e ridurre in momenti specifici, migliorando l'impatto visivo dei contenuti del tuo video.
Letture suggerite
Generatore di documentazione tecnica
Come trasformare un'immagine in una pagina da colorare in Canva
Come stampare fronte e retro su Canva
Come allungare il testo in Canva
Tutorial correlati

