

Come aggiungere un calendario selettore di date alle celle in MS Excel
Scopri come aggiungere un calendario selettore di date alle celle di Excel usando gli strumenti per sviluppatori o i componenti aggiuntivi per una selezione rapida della data. Segui questo tutorial passo dopo passo e crea guide con Trupeer.
Per aggiungere un calendario selettore di date alle celle in MS Excel, puoi usare il controllo integrato "Selettore di date" (noto anche come "Microsoft Date and Time Picker Control") dalla scheda Sviluppo. In alternativa, puoi utilizzare un componente aggiuntivo come "Mini Calendar and Date Picker" per un'esperienza più semplice e intuitiva.
Ecco una panoramica dei metodi:
1. Utilizzo della scheda Sviluppo (controllo integrato):
1. Abilita la scheda Sviluppo: fai clic con il pulsante destro del mouse sulla barra multifunzione, seleziona "Personalizza barra multifunzione" e seleziona la casella "Sviluppo".
2. Inserisci il controllo: vai alla scheda Sviluppo, fai clic su "Inserisci" e scegli il controllo "Selettore di date" sotto "Controlli ActiveX". Se non è visibile, potrebbe essere necessario fare clic su "Altri controlli" e selezionare "Microsoft Controllo Selettore data e ora 6.0 (SP6)" dopo averlo registrato, se necessario.
3. Posiziona e configura: fai clic sulla cella in cui desideri il selettore di date, quindi fai clic con il pulsante destro del mouse sul controllo e seleziona "Formato controllo" per personalizzarne le proprietà, inclusa la cella collegata.
4. Utilizzo: fai clic sulla cella per attivare il selettore di date, seleziona una data e verrà inserita nella cella.
2. Utilizzo del componente aggiuntivo "Mini Calendar and Date Picker":
Ottieni il componente aggiuntivo: vai alla scheda "Inserisci", fai clic su "Ottieni componenti aggiuntivi" e cerca "Mini Calendar and Date Picker".
Installa e apri: aggiungi il componente aggiuntivo e aprilo dal pulsante "Componenti aggiuntivi" nella scheda Home.
Seleziona e usa: fai clic sulla cella desiderata e poi seleziona la data dal calendario.
Guida passo passo: come aggiungere un calendario selettore di date alle celle in MS Excel
Passaggio 1
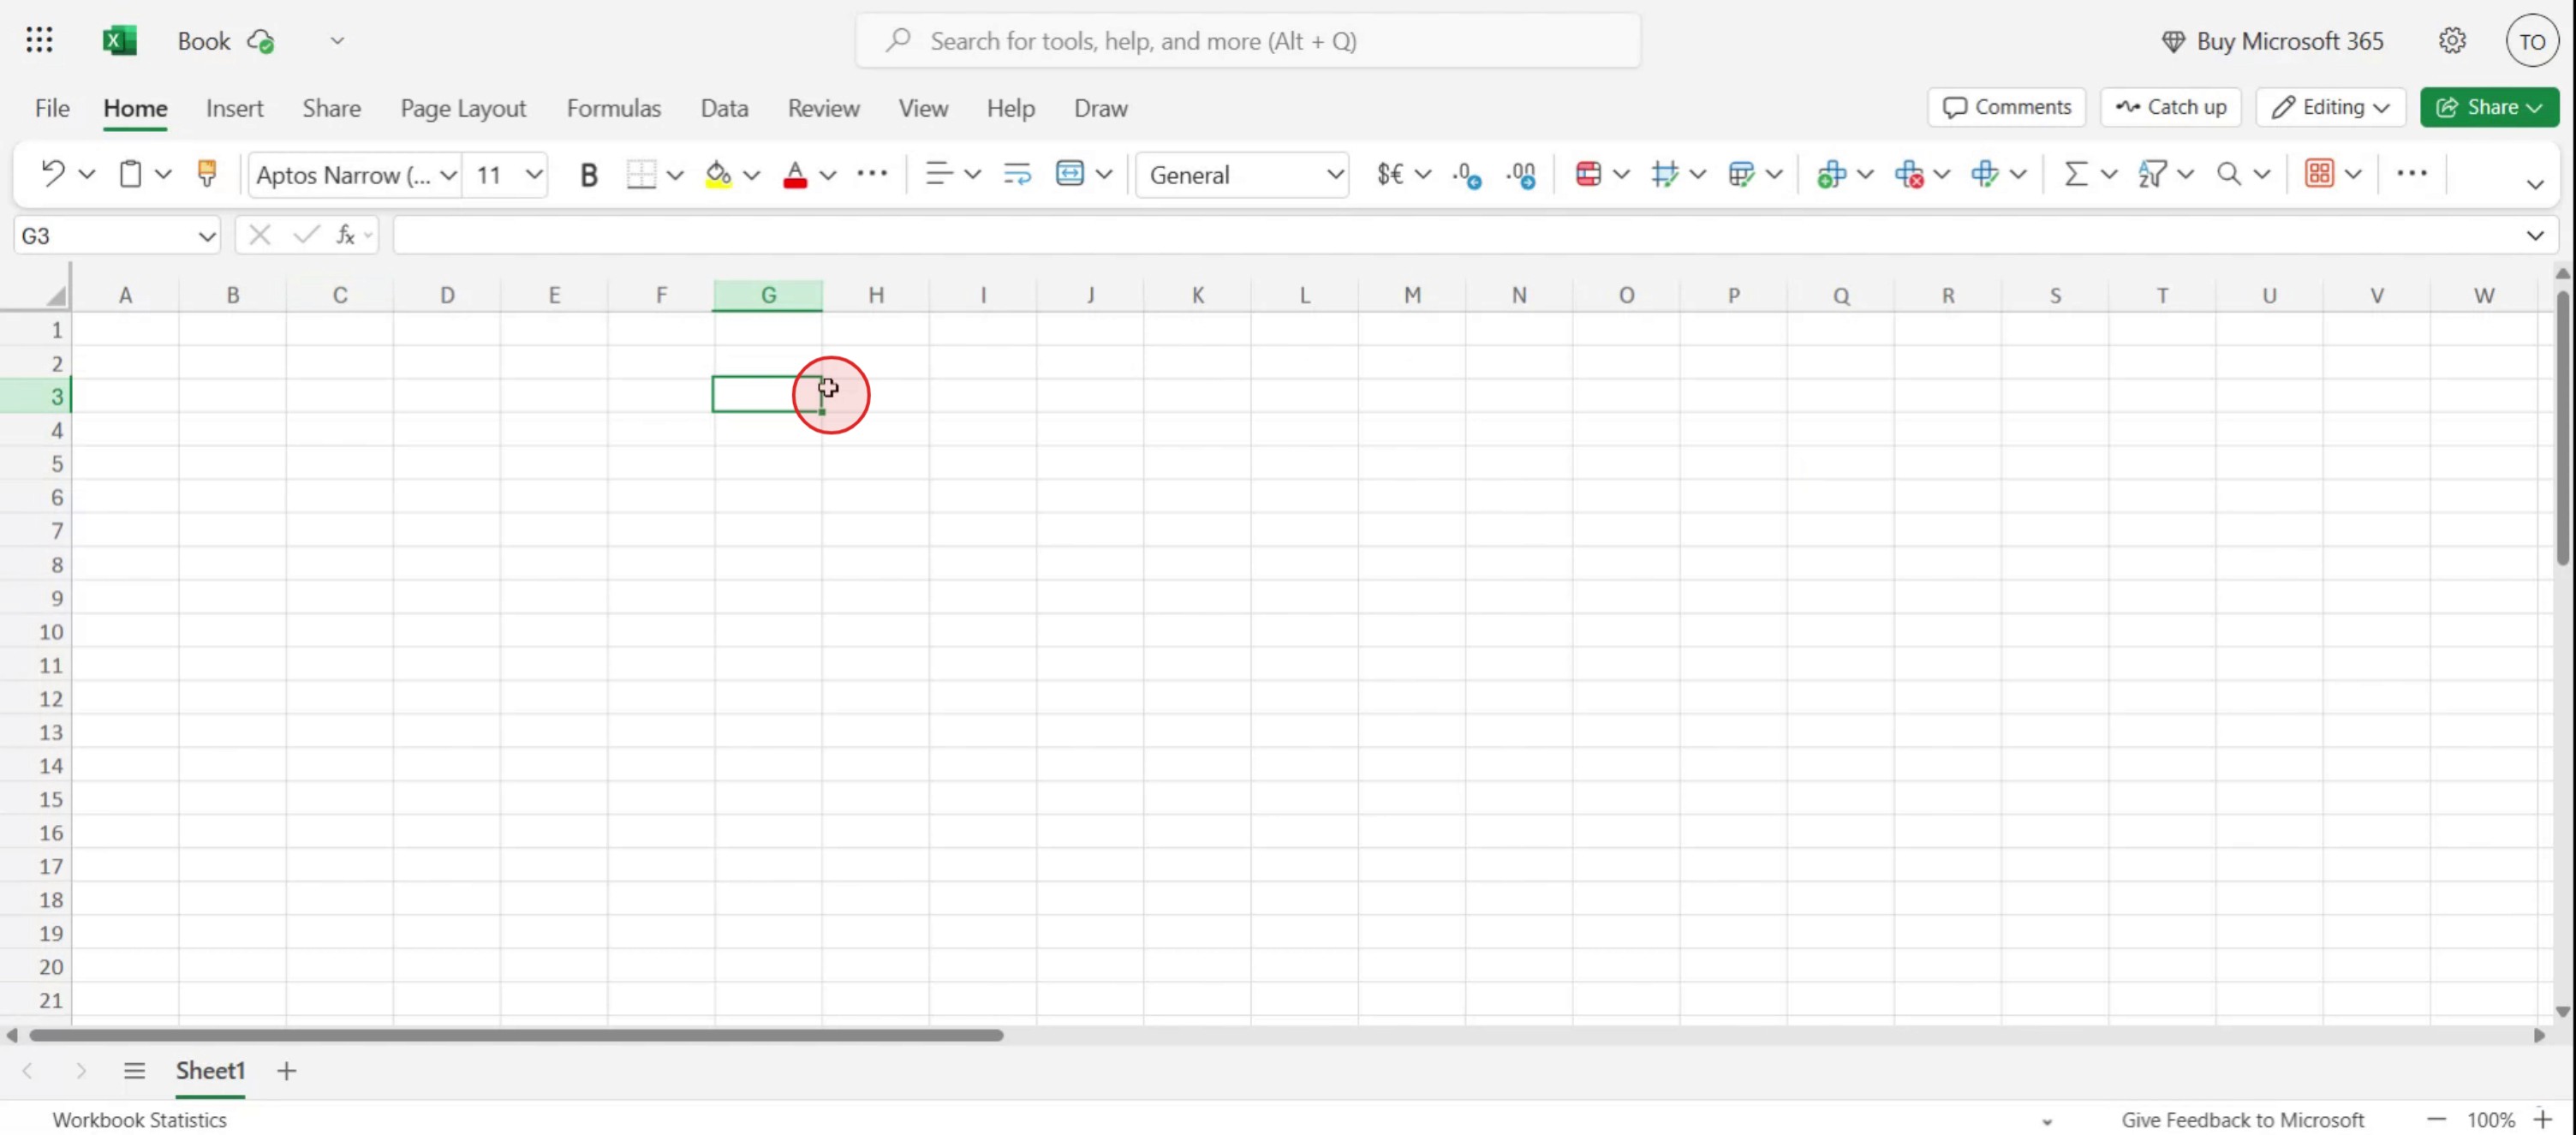
Seleziona una cella specifica in cui desideri inserire il selettore di date.
Passaggio 2
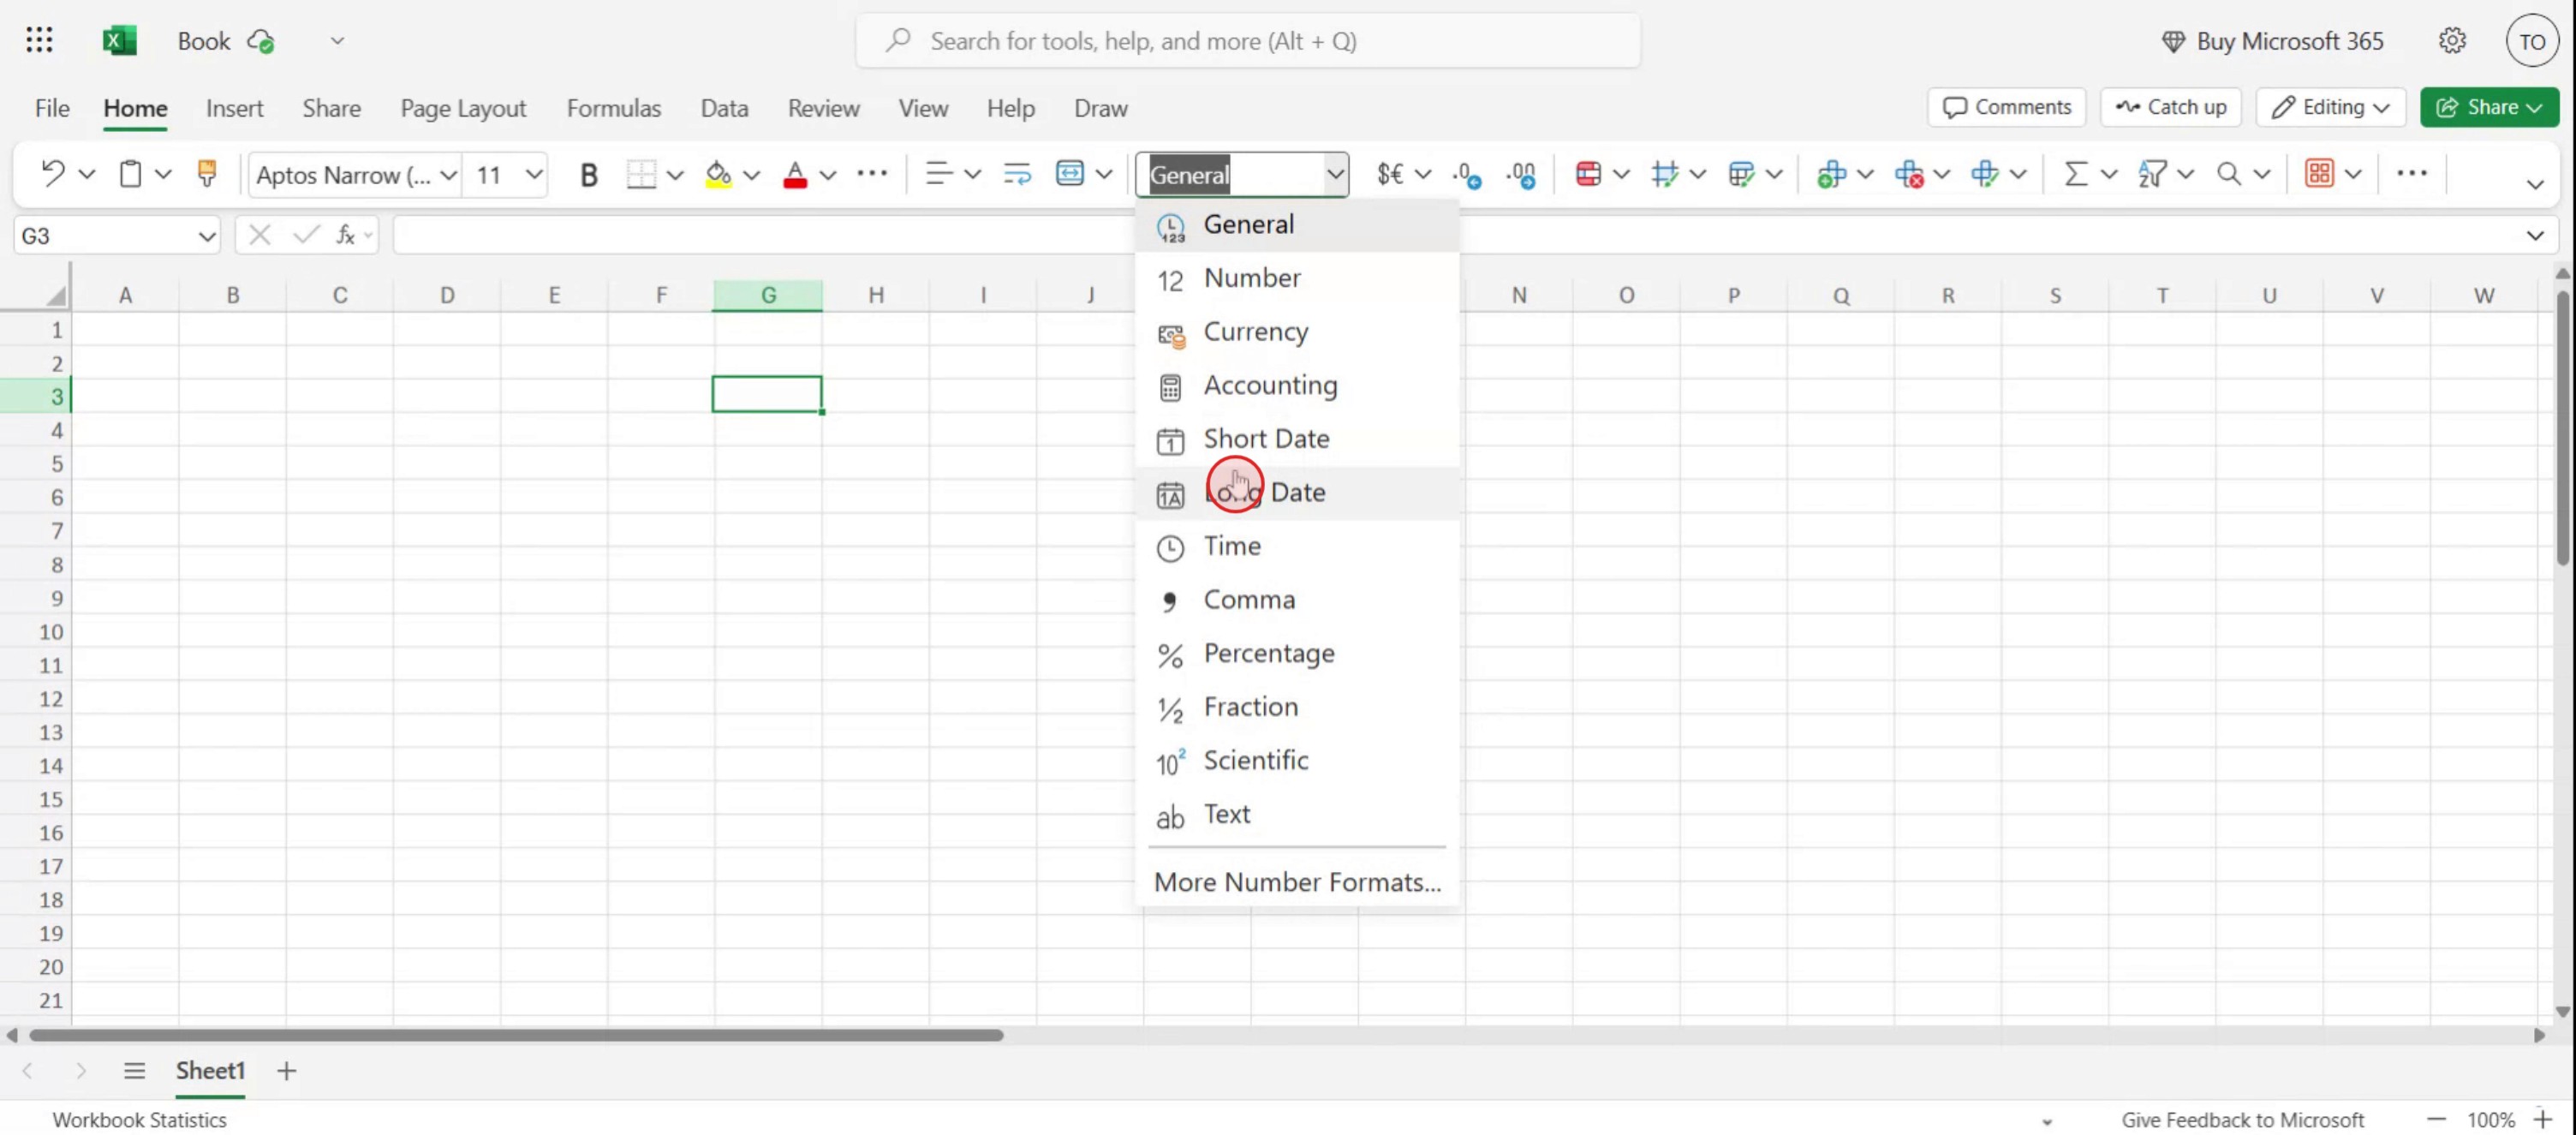
Dalla barra degli strumenti di formattazione, seleziona l'opzione di formato numero.

Passaggio 3
Dal menu a discesa, scegli l'opzione 'Data estesa',
Passaggio 4
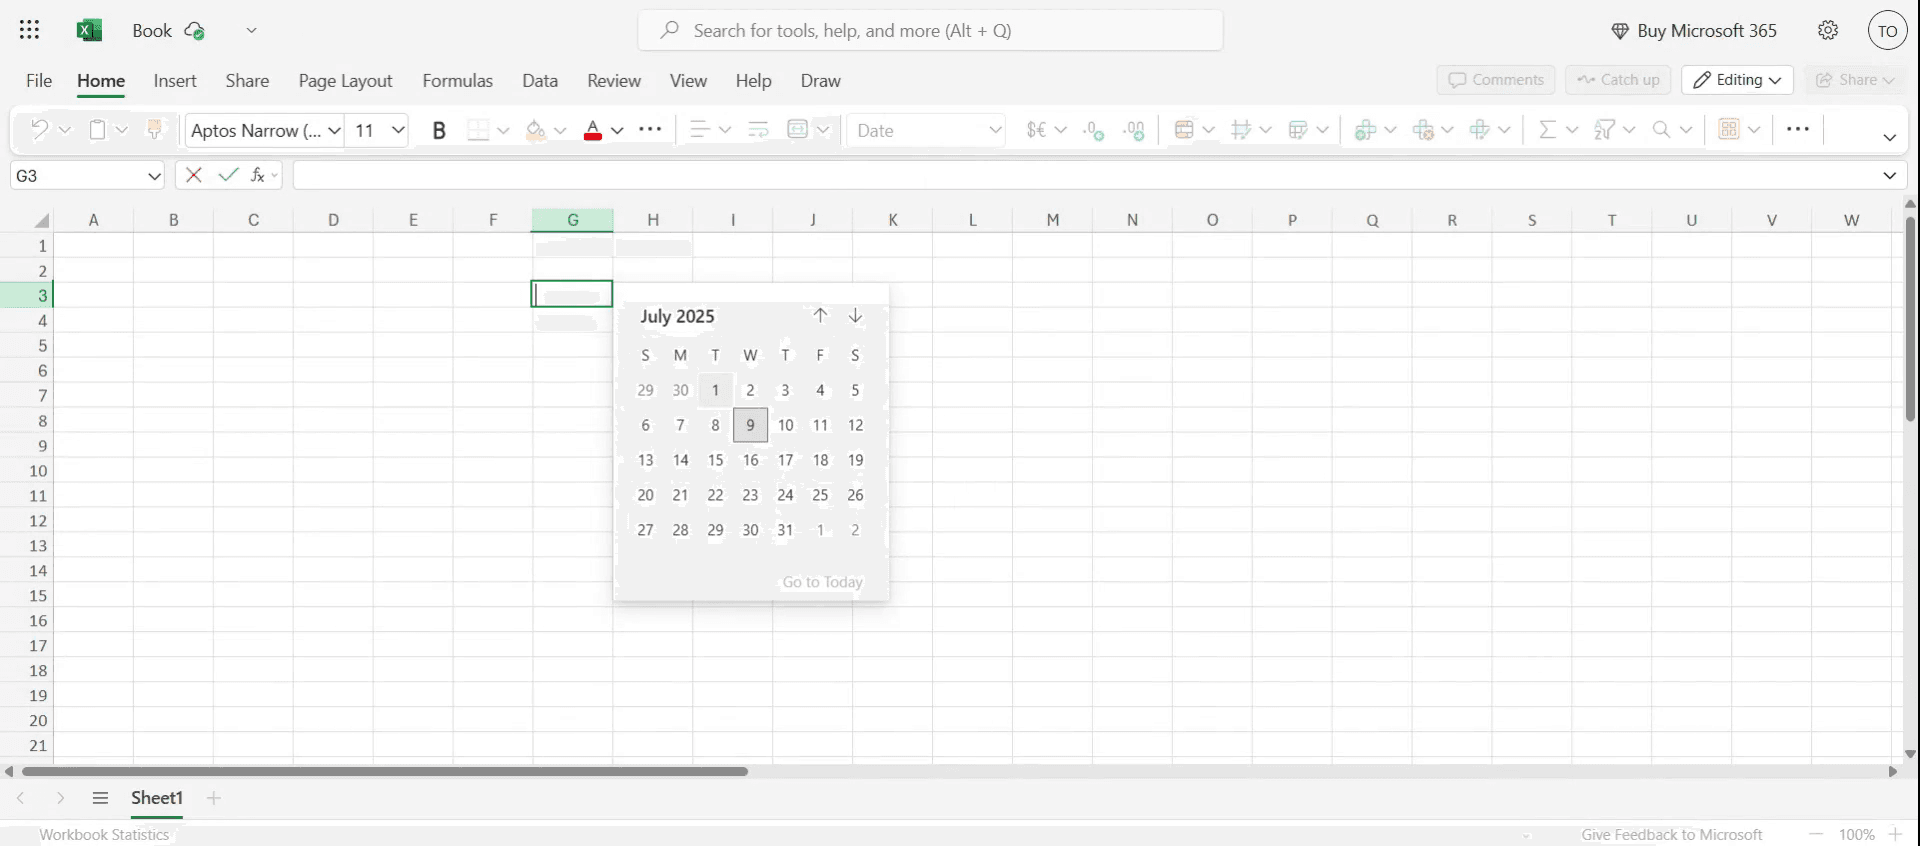
Facendo doppio clic sulla cella, la data apparirà come specificato.
Suggerimenti professionali per aggiungere un calendario Date Picker alle celle in MS Excel
Apri il tuo file Excel
Avvia Microsoft Excel e apri la cartella di lavoro in cui vuoi aggiungere il selettore data.Abilita la scheda Sviluppo
Vai alla barra multifunzione, fai clic su File → Opzioni → Personalizza barra multifunzione, quindi seleziona la casella Sviluppo per renderla visibile.Inserisci il controllo Date Picker
Nella scheda Sviluppo, fai clic su Inserisci → Altri controlli (l'icona della chiave inglese e del martello). Scorri verso il basso e seleziona “Microsoft Date and Time Picker Control” e fai clic su OK.Disegna il Date Picker sul foglio
Il cursore cambierà in una croce. Fai clic e trascina per disegnare il calendario sul foglio di lavoro.Collega il Date Picker a una cella
Fai clic destro sul Date Picker, scegli Proprietà e imposta la proprietà LinkedCell sulla cella in cui vuoi che venga visualizzata la data.Prova il Date Picker
Fai clic sul calendario e seleziona una data. La cella collegata dovrebbe visualizzare automaticamente la data selezionata.
Errori comuni e come evitarli
Date Picker non disponibile nell'elenco dei controlli
Il controllo Date Picker è disponibile solo nelle versioni a 32 bit di Excel. Se utilizzi la versione a 64 bit, prendi in considerazione metodi alternativi come i form calendario ActiveX o soluzioni VBA.Scheda Sviluppo mancante
Se non vedi la scheda Sviluppo, assicurati che sia abilitata tramite Opzioni di Excel → Personalizza barra multifunzione.La cella collegata non si aggiorna
Assicurati che il riferimento della cella sia digitato correttamente nella proprietà LinkedCell, senza errori di battitura.Il calendario appare troppo grande o troppo piccolo
Ridimensiona il Date Picker trascinando i bordi per adattarlo meglio al tuo layout.Data non formattata correttamente nella cella
Formatta la cella di destinazione come Data (clic destro sulla cella → Formato celle → Data) per una visualizzazione coerente.
FAQ comuni sull'aggiunta di un selettore data in Excel
Il selettore data è disponibile in tutte le versioni di Excel?
No, è disponibile solo in Excel a 32 bit e potrebbe non essere presente nelle versioni più recenti a 64 bit.E se sto usando Excel a 64 bit?
Puoi usare VBA per creare un selettore data personalizzato oppure componenti aggiuntivi di Excel di terze parti.Posso applicare un selettore data a più celle?
No, ogni selettore data deve essere collegato a una cella specifica. Puoi copiarlo e configurarlo per più celle singolarmente.Il selettore data funzionerà dopo aver condiviso il file?
Solo se il destinatario ha anche il controllo Date Picker installato e abilitato in Excel.Posso usare la convalida dati come alternativa?
Sì, usare la convalida dati con un elenco di date è una soluzione di base, ma non fornisce un calendario cliccabile.Come registrare lo schermo su Mac?
Per registrare lo schermo su un Mac, puoi usare Trupeer AI. Ti consente di acquisire l'intero schermo e offre funzionalità AI come l'aggiunta di avatar AI, l'aggiunta di voiceover, l'aggiunta di zoom avanti e indietro nel video. Con la funzione di traduzione video AI di Trupeer, puoi tradurre il video in oltre 30 lingue.Come aggiungere un avatar AI a una registrazione dello schermo?
Per aggiungere un avatar AI a una registrazione dello schermo, dovrai usare uno strumento di registrazione dello schermo con AI. Trupeer AI è uno strumento di registrazione dello schermo con AI, che ti aiuta a creare video con più avatar e ti aiuta anche a creare il tuo avatar per il video.Come registrare lo schermo su Windows?
Per registrare lo schermo su Windows, puoi usare la Game Bar integrata (Windows + G) oppure uno strumento AI avanzato come Trupeer AI per funzionalità più avanzate come avatar AI, voiceover, traduzione ecc.Come aggiungere un voiceover al video?
Per aggiungere un voiceover ai video, scarica l'estensione Chrome di Trupeer AI. Una volta registrato, carica il tuo video con voce, scegli il voiceover desiderato da Trupeer ed esporta il video modificato.Come faccio a zoomare in una registrazione dello schermo?
Per ingrandire durante una registrazione dello schermo, usa gli effetti zoom in Trupeer AI che ti consentono di ingrandire e ridurre in momenti specifici, migliorando l'impatto visivo dei contenuti video.
Letture suggerite
Generatore di documentazione tecnica
Come abilitare il righello in Microsoft Excel
Come mantenere visibile la riga superiore in Microsoft Excel
Come inserire un nuovo foglio di lavoro in Microsoft Excel
Come creare un registro voti in MS Excel
Come fare riferimento a una cella da un altro foglio in Microsoft Excel
Tutorial correlati

