

Comment supprimer un ticket Jira
Découvrez comment supprimer un ticket Jira en utilisant le menu d'actions et en confirmant sa suppression définitive. Suivez ce tutoriel étape par étape et créez des guides de workflow avec Trupeer.
Ce document fournit un guide concis sur la façon de supprimer un ticket Jira. Le processus consiste à accéder au projet, à localiser le ticket et à exécuter la commande de suppression à travers une série d'étapes guidées.
Pour supprimer un ticket Jira, accédez au ticket et sélectionnez "Supprimer" dans le menu des actions, puis confirmez la suppression. Notez qu'il s'agit d'une action permanente et qu'elle ne peut pas être annulée.
Étapes pour supprimer un ticket Jira :
Ouvrez le ticket : accédez au ticket Jira spécifique que vous souhaitez supprimer. Accédez au menu des actions : recherchez un menu (souvent représenté par trois points ou un bouton "Plus"). Sélectionnez "Supprimer" : choisissez l'option "Supprimer" dans le menu. Confirmez la suppression : il vous sera probablement demandé de confirmer votre action, car la suppression d'un ticket Jira est permanente. Finalisez la suppression : cliquez à nouveau sur "Supprimer" pour terminer le processus.
Considérations importantes :
Pérennité : la suppression d'un ticket est irréversible. Envisagez plutôt de l'archiver si vous pourriez avoir besoin des informations plus tard. Autorisations : assurez-vous de disposer des autorisations nécessaires pour supprimer des tickets dans le projet. Données historiques : la suppression des tickets les retire du système, ce qui peut affecter les données historiques et les rapports.
Guide étape par étape : comment supprimer un ticket Jira
Étape 1
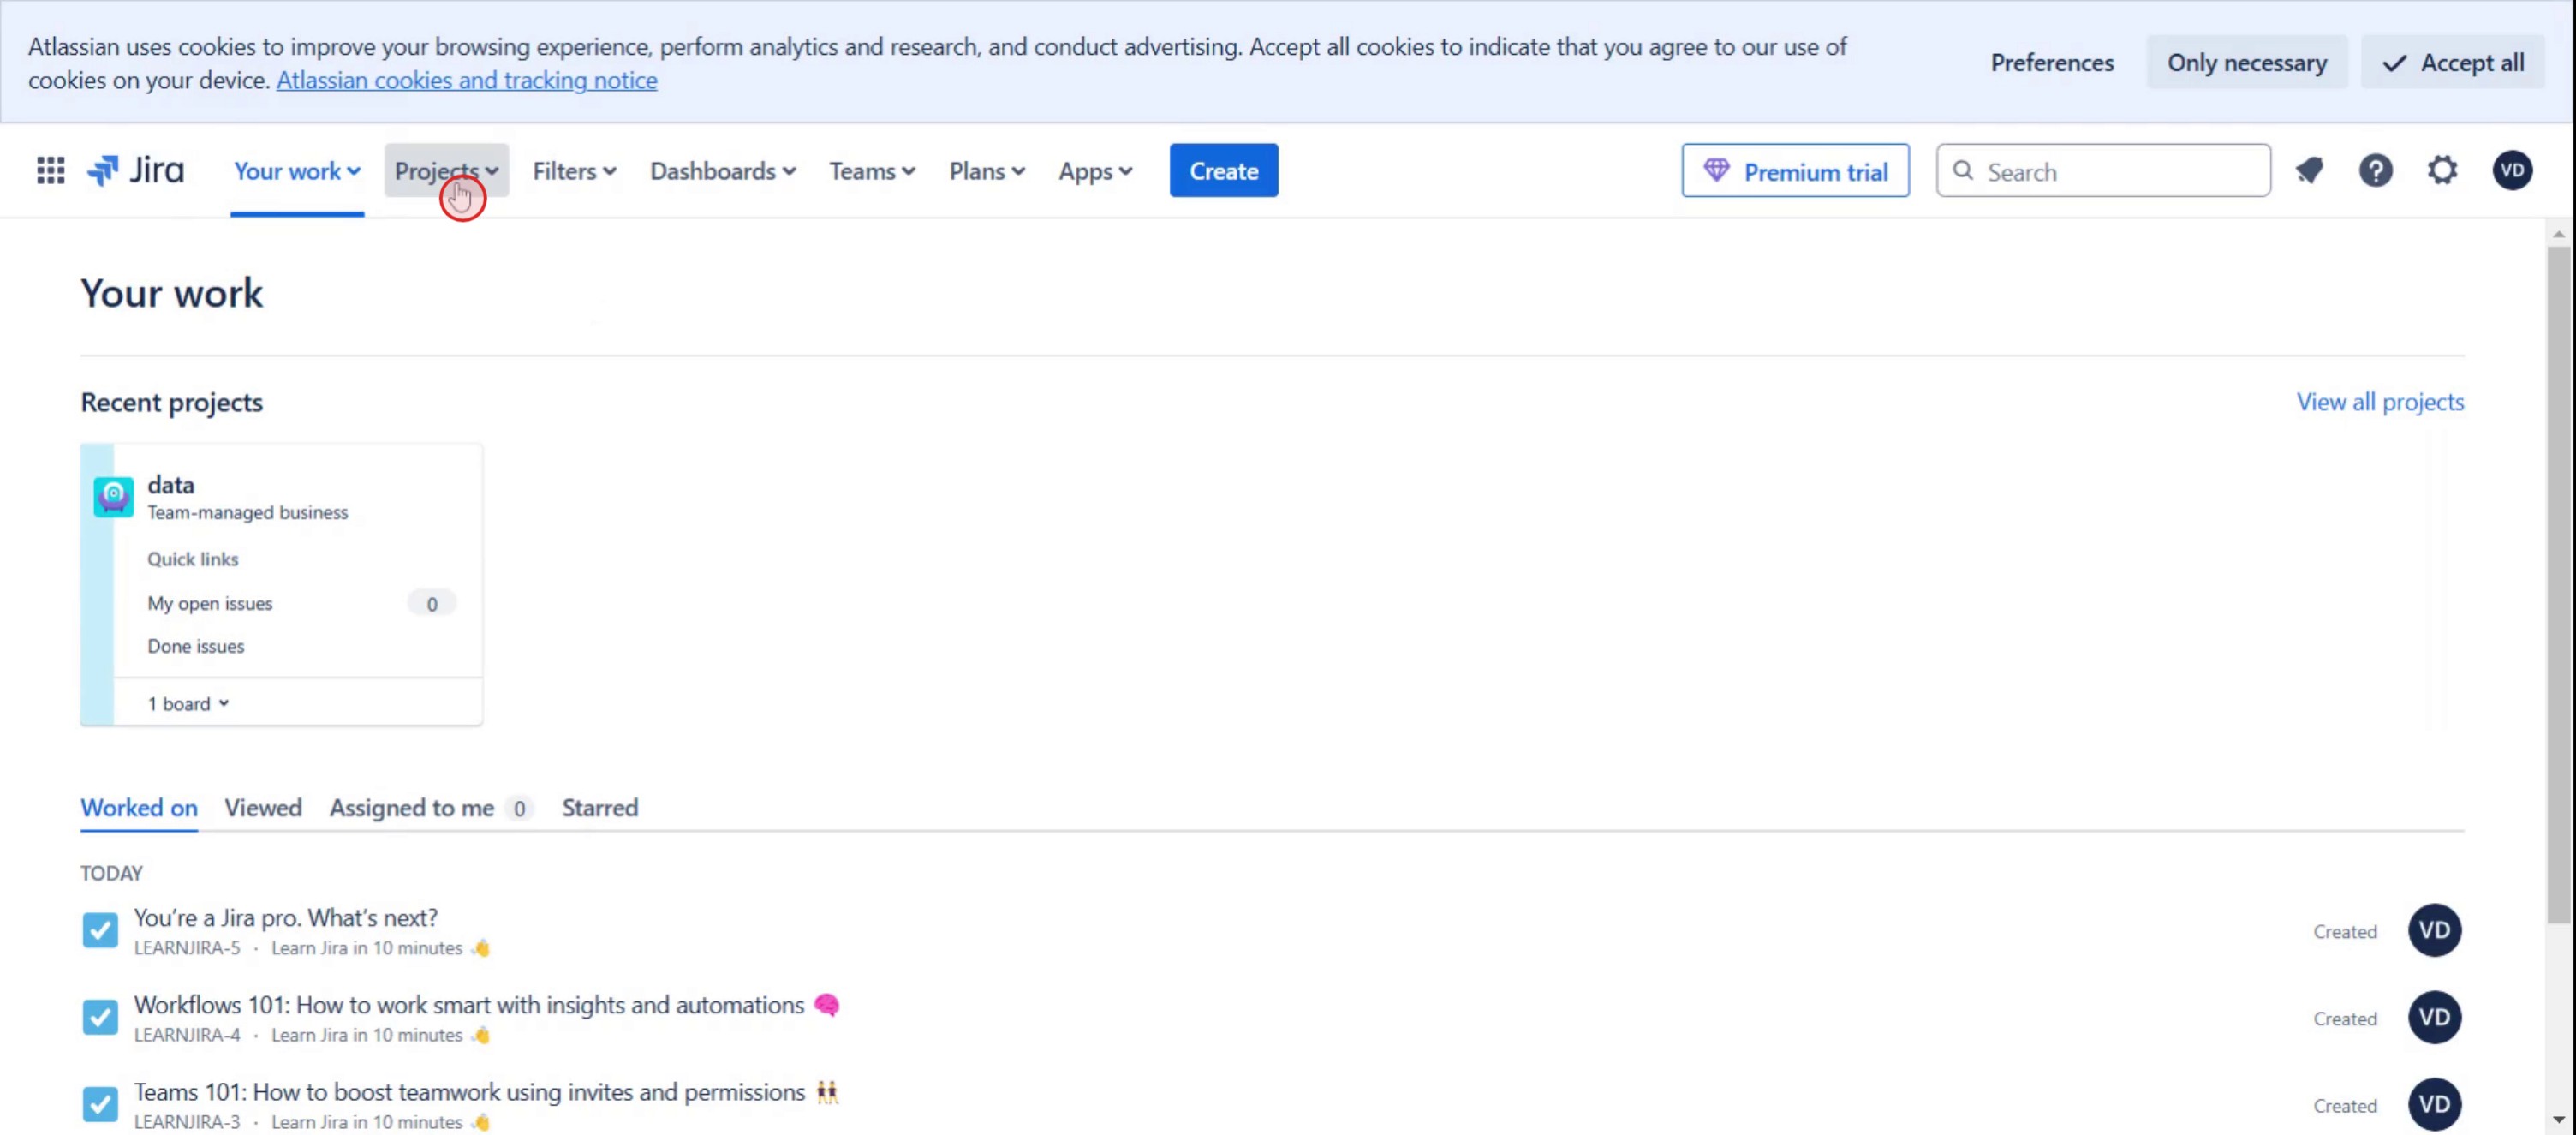
Cliquez sur la section Projets.
Étape 2
Sélectionnez le projet récent sur lequel vous souhaitez travailler.

Étape 3
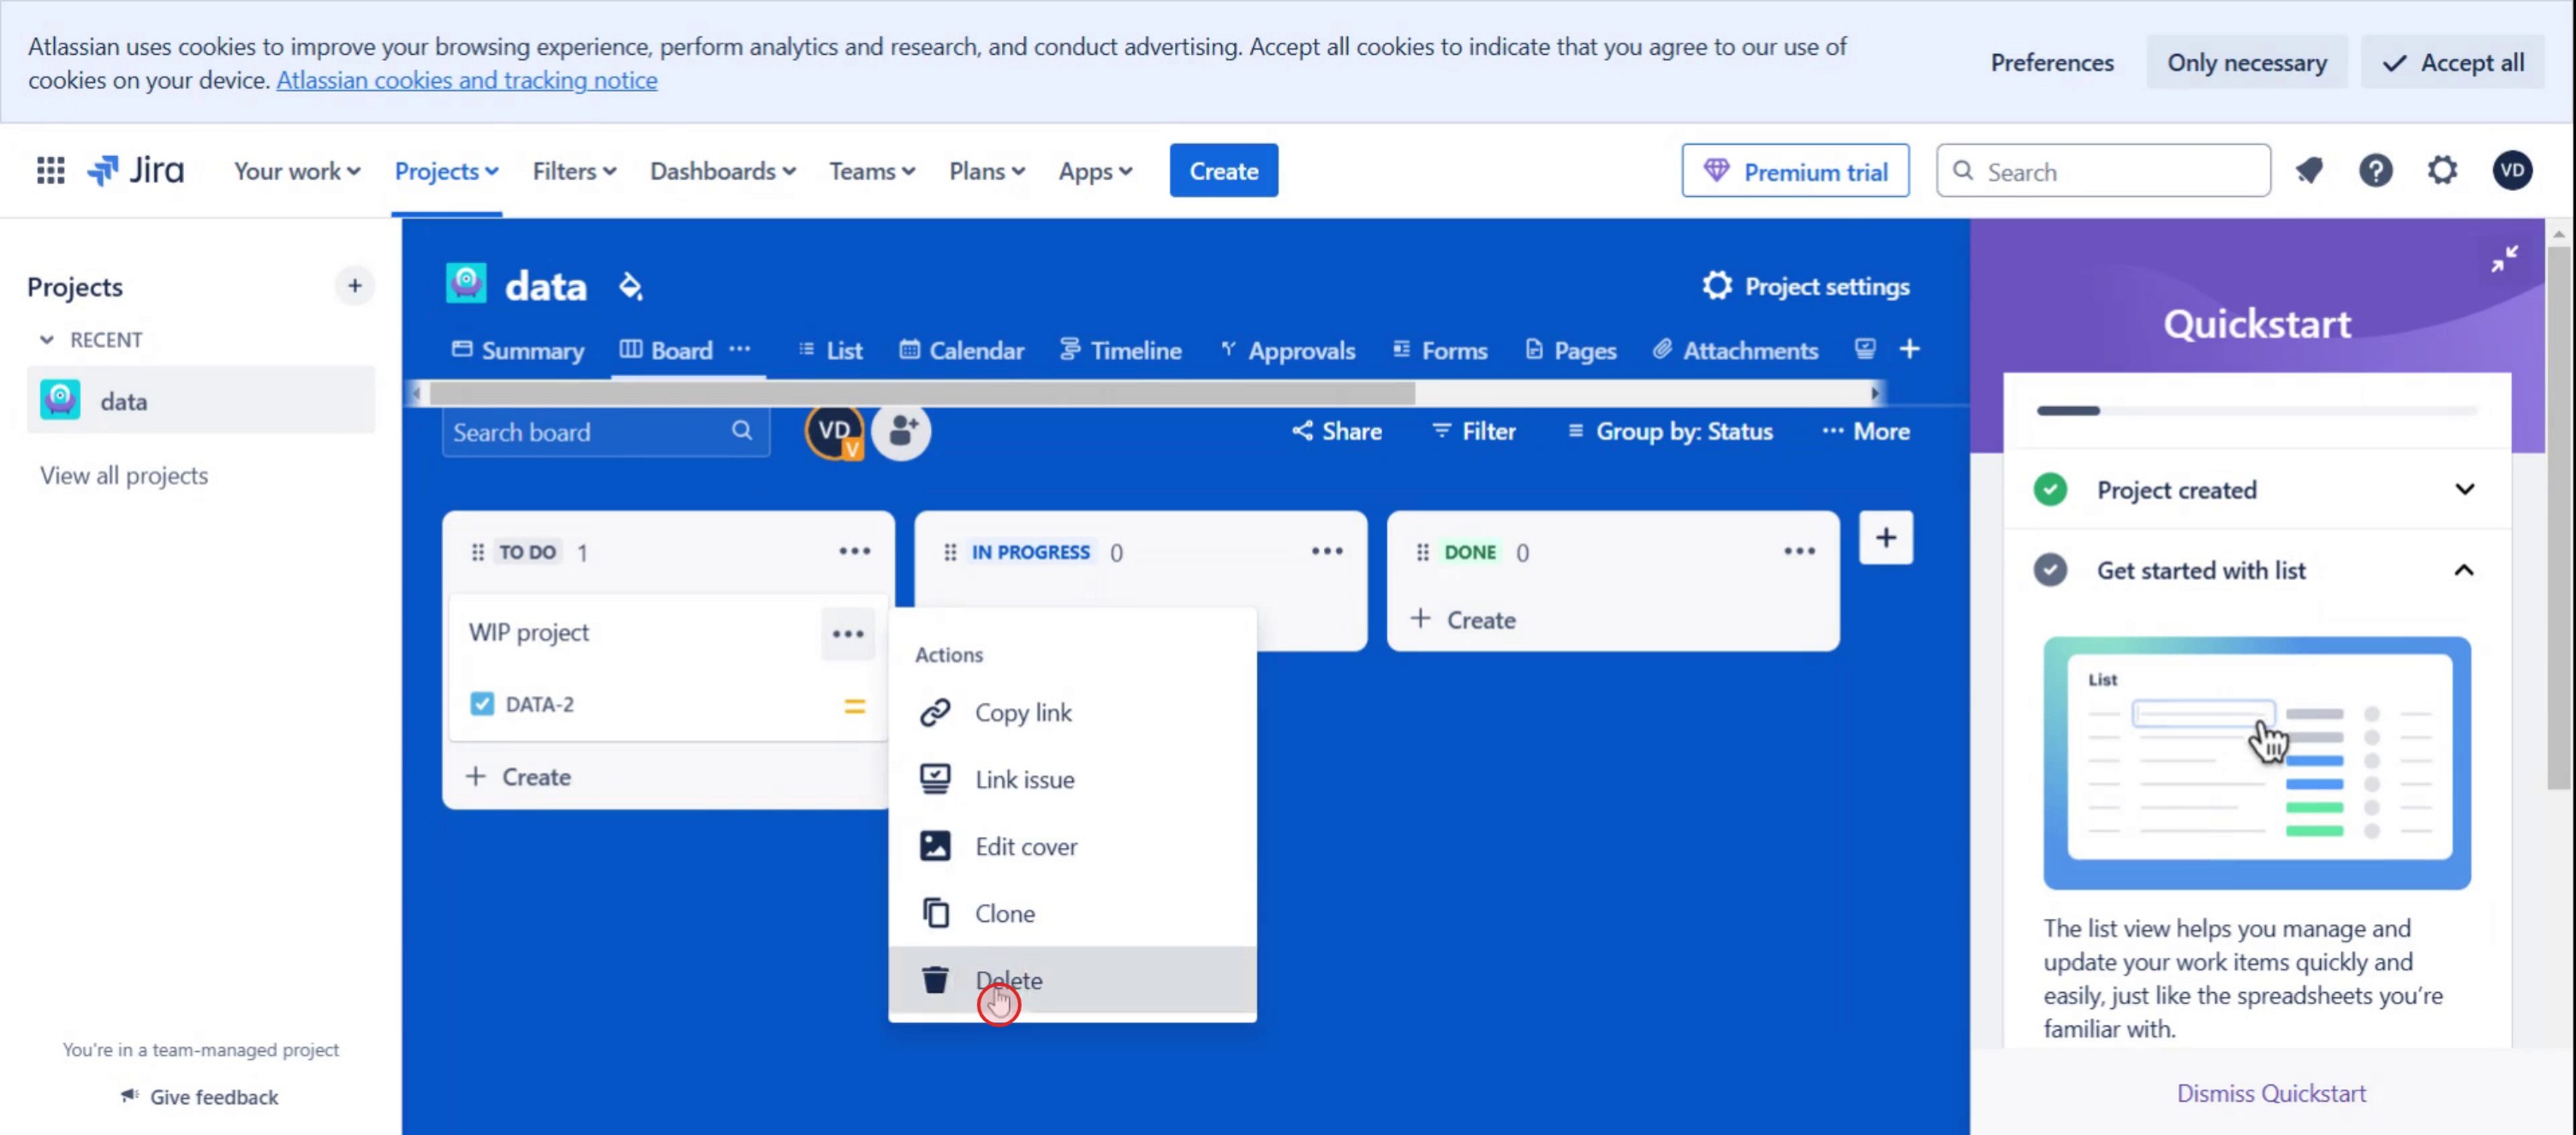
Sélectionnez l'option Tableau.

Étape 4
Cliquez sur les trois points.

Étape 5
Puis sélectionnez l'option de suppression.
Étape 6
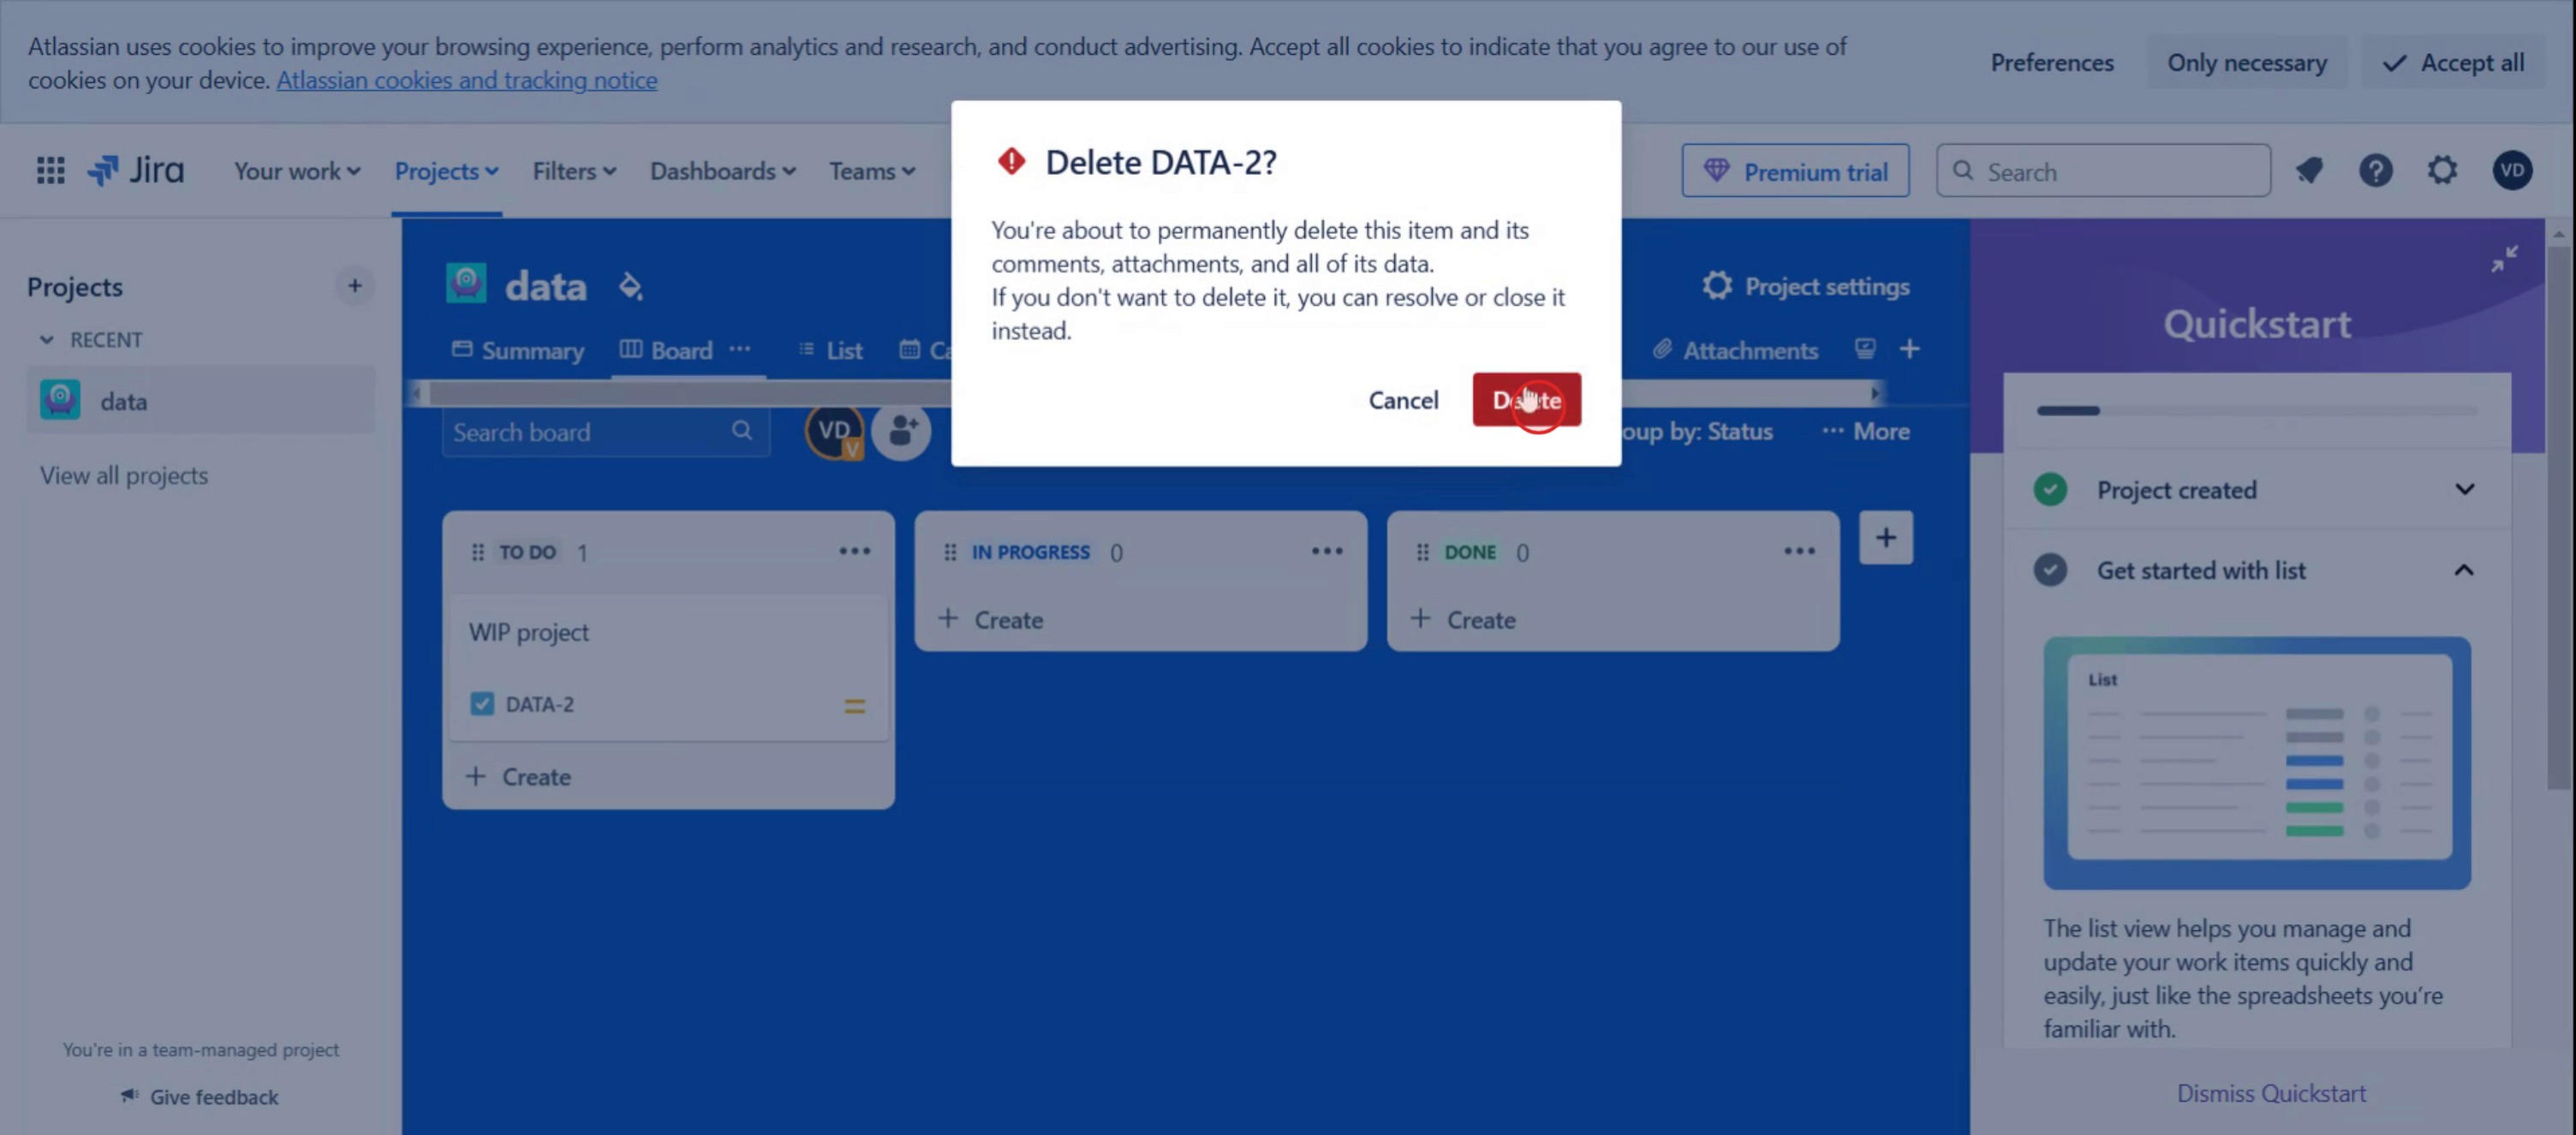
Et cliquez sur Supprimer,
Conseils de pro pour supprimer un ticket Jira
Vérifiez vos autorisations – Seuls les utilisateurs disposant de l'autorisation Delete Issues dans Jira peuvent supprimer un ticket. Si vous ne voyez pas l'option de suppression, demandez l'accès à votre administrateur Jira.
Envisagez plutôt l'archivage – Si vous ne souhaitez pas perdre le ticket définitivement, envisagez de le résoudre ou de l'archiver plutôt que de le supprimer.
Soyez prudent lors de la suppression – Une fois qu'un ticket Jira est supprimé, il ne peut pas être récupéré. Assurez-vous d'avoir une sauvegarde ou une capture d'écran avant la suppression.
Erreurs fréquentes & comment les éviter
Absence d'autorisations de suppression – Si vous ne pouvez pas supprimer un ticket, demandez à votre administrateur Jira de vous accorder les autorisations nécessaires.
Suppression accidentelle – Les tickets supprimés ne peuvent pas être restaurés. Confirmez toujours avant de continuer.
Suppression sans informer les membres de l'équipe – Informez votre équipe avant de supprimer un ticket, surtout s'il est lié à d'autres problèmes.
Essayer de supprimer un ticket de sprint – Les tickets liés à des sprints actifs peuvent nécessiter une réaffectation ou une clôture avant leur suppression.
FAQ courantes pour supprimer un ticket Jira
Puis-je récupérer un ticket Jira supprimé ?
Non, Jira ne dispose pas d’une fonction de restauration intégrée pour les tickets supprimés. Une fois supprimé, le ticket est définitivement supprimé.Pourquoi ne vois-je pas l’option de suppression ?
Vous n’avez peut-être pas l’autorisation de supprimer des tickets. Contactez votre administrateur Jira pour demander l’accès.Puis-je supprimer plusieurs tickets Jira à la fois ?
Oui, vous pouvez utiliser la fonction de suppression en masse de Jira. Allez dans le navigateur des tickets, sélectionnez plusieurs tickets et choisissez l’option de suppression. Assurez-vous de vérifier deux fois avant de confirmer.Comment enregistrer l’écran sur Mac ?
Pour enregistrer l’écran sur un Mac, vous pouvez utiliser Trupeer AI. Il vous permet de capturer l’écran entier et offre des capacités d’IA telles que l’ajout d’avatars IA, l’ajout d’une voix off, l’ajout de zoom avant et arrière dans la vidéo. Avec la fonctionnalité de traduction vidéo par IA de Trupeer, vous pouvez traduire la vidéo en plus de 30 langues.Comment ajouter un avatar IA à un enregistrement d’écran ?
Pour ajouter un avatar IA à un enregistrement d’écran, vous devrez utiliser un outil d’enregistrement d’écran IA. Trupeer AI est un outil d’enregistrement d’écran IA, qui vous aide à créer des vidéos avec plusieurs avatars et vous aide également à créer votre propre avatar pour la vidéo.Comment enregistrer l’écran sur Windows ?
Pour enregistrer l’écran sur Windows, vous pouvez utiliser la Game Bar intégrée (Windows + G) ou un outil d’IA avancé comme Trupeer AI pour des fonctionnalités plus avancées telles que les avatars IA, la voix off, la traduction, etc.Comment ajouter une voix off à une vidéo ?
Pour ajouter une voix off aux vidéos, téléchargez l’extension Chrome Trupeer AI. Une fois inscrit, importez votre vidéo avec voix, choisissez la voix off souhaitée dans Trupeer et exportez votre vidéo modifiée.Comment zoomer sur un enregistrement d’écran ?
Pour zoomer pendant un enregistrement d’écran, utilisez les effets de zoom de Trupeer AI qui vous permettent de zoomer avant et arrière à des moments précis, renforçant l’impact visuel de votre contenu vidéo.
Lectures suggérées
Générateur de documentation technique
Logiciel de base de connaissances
Comment exporter le backlog Jira vers Excel
Comment modifier le type de ticket dans Jira
Comment effectuer une mise à jour en masse dans Jira
Tutoriels associés

