
Comment ajouter des fonds perdus dans Canva pour des créations prêtes à imprimer
Découvrez comment ajouter des fonds perdus dans Canva pour garantir que vos créations s’impriment sans bords blancs. Idéal pour les cartes de visite, les flyers et les brochures.
Ce document décrit un processus simple pour ajouter un fond perdu à vos projets de design dans Canva. Cela garantit que vos créations sont prêtes à imprimer et évite tout bord blanc indésirable après l'impression.
L'ajout d'un fond perdu garantit que vos créations imprimées présentent des couleurs nettes jusqu'au bord, sans bordures blanches involontaires.
Guide étape par étape :
1. Activer le fond perdu à l'impression
Ouvrez votre design dans Canva.
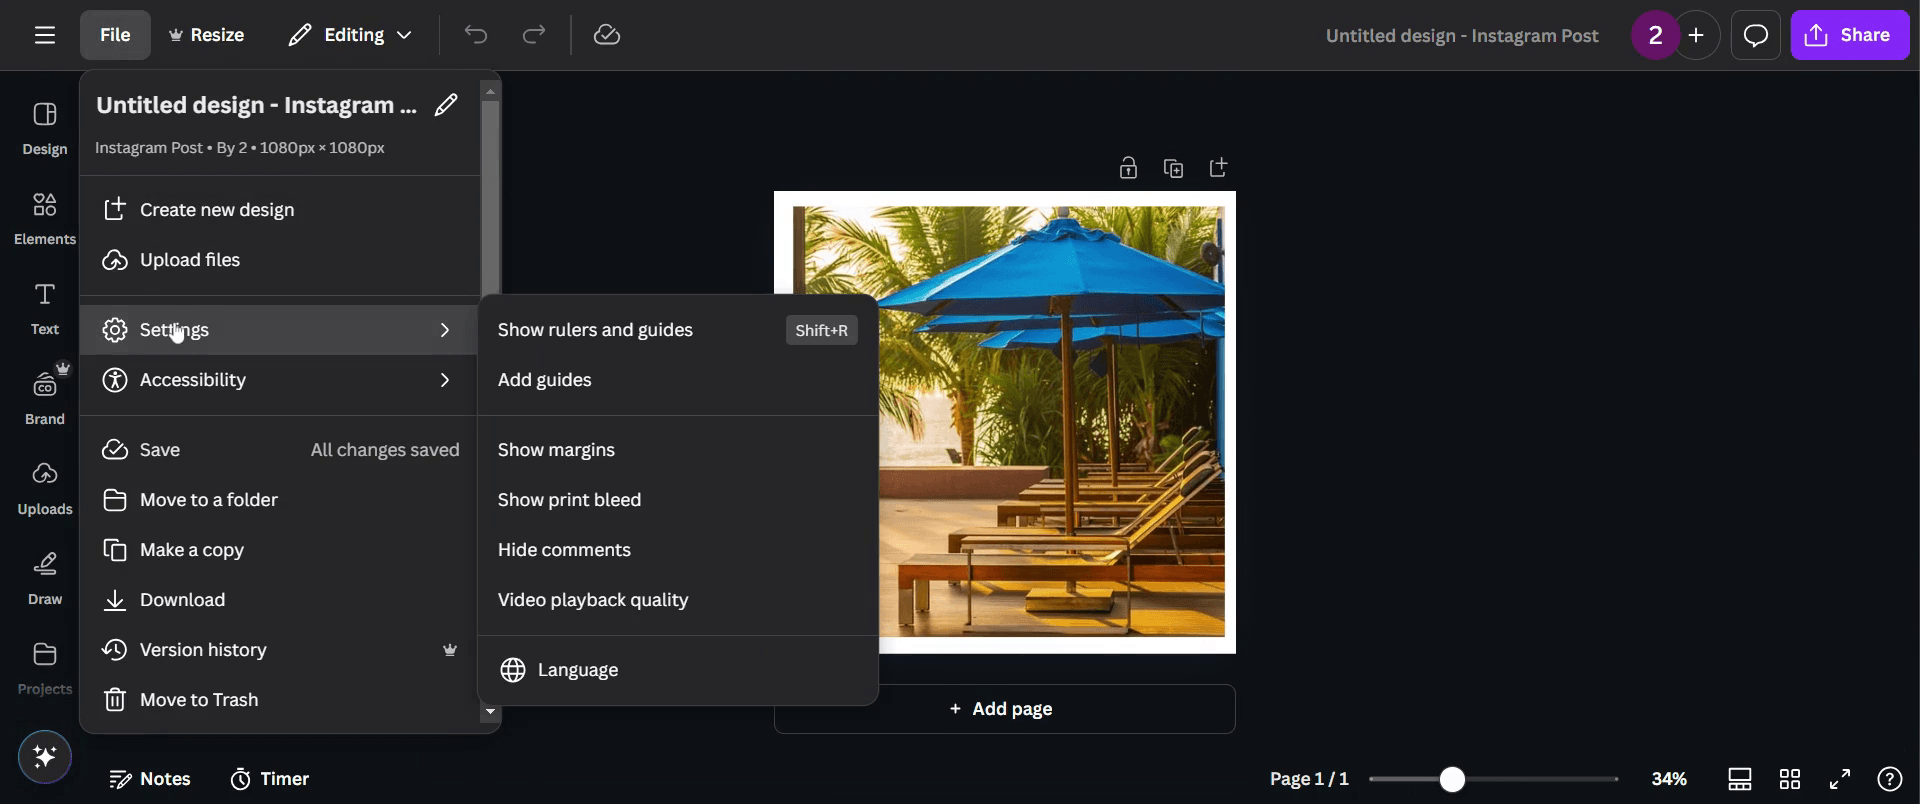
Allez dans le menu supérieur, cliquez sur Fichier > Afficher le fond perdu.
Une ligne pointillée apparaîtra près des bords ; elle indique où commence le fond perdu.
2. Étendre les éléments du design
Les arrière-plans, images et couleurs doivent dépasser la ligne pointillée jusqu'au bord de la toile.
Gardez le texte et les éléments graphiques clés à l'intérieur de la zone de sécurité (à l'intérieur de la ligne pointillée) afin d'éviter les problèmes de découpe.
3. Télécharger le fichier prêt à imprimer
Cliquez sur Partager > Télécharger.
Définissez le type de fichier sur PDF pour impression.
Cochez "Repères de coupe et fond perdu".
Cliquez sur Télécharger.
Guide étape par étape : comment ajouter un fond perdu dans Canva pour l'impression
Étape 1
Sélectionnez le projet existant que vous souhaitez modifier.

Étape 2
Ensuite, accédez à l'option 'Fichier' et cliquez dessus.

Étape 3
Allez dans 'Paramètres'.
Étape 4
Cliquez sur 'Afficher le fond perdu à l'impression'.

Étape 5
Ajustez votre image pour couvrir tout espace blanc autour des bords.

Étape 6
Une fois ajusté, poursuivez en cliquant sur le bouton 'Partager'.

Étape 7
Puis cliquez sur 'Télécharger'.

Étape 8
Maintenant, changez le type de fichier en 'PDF pour impression'.
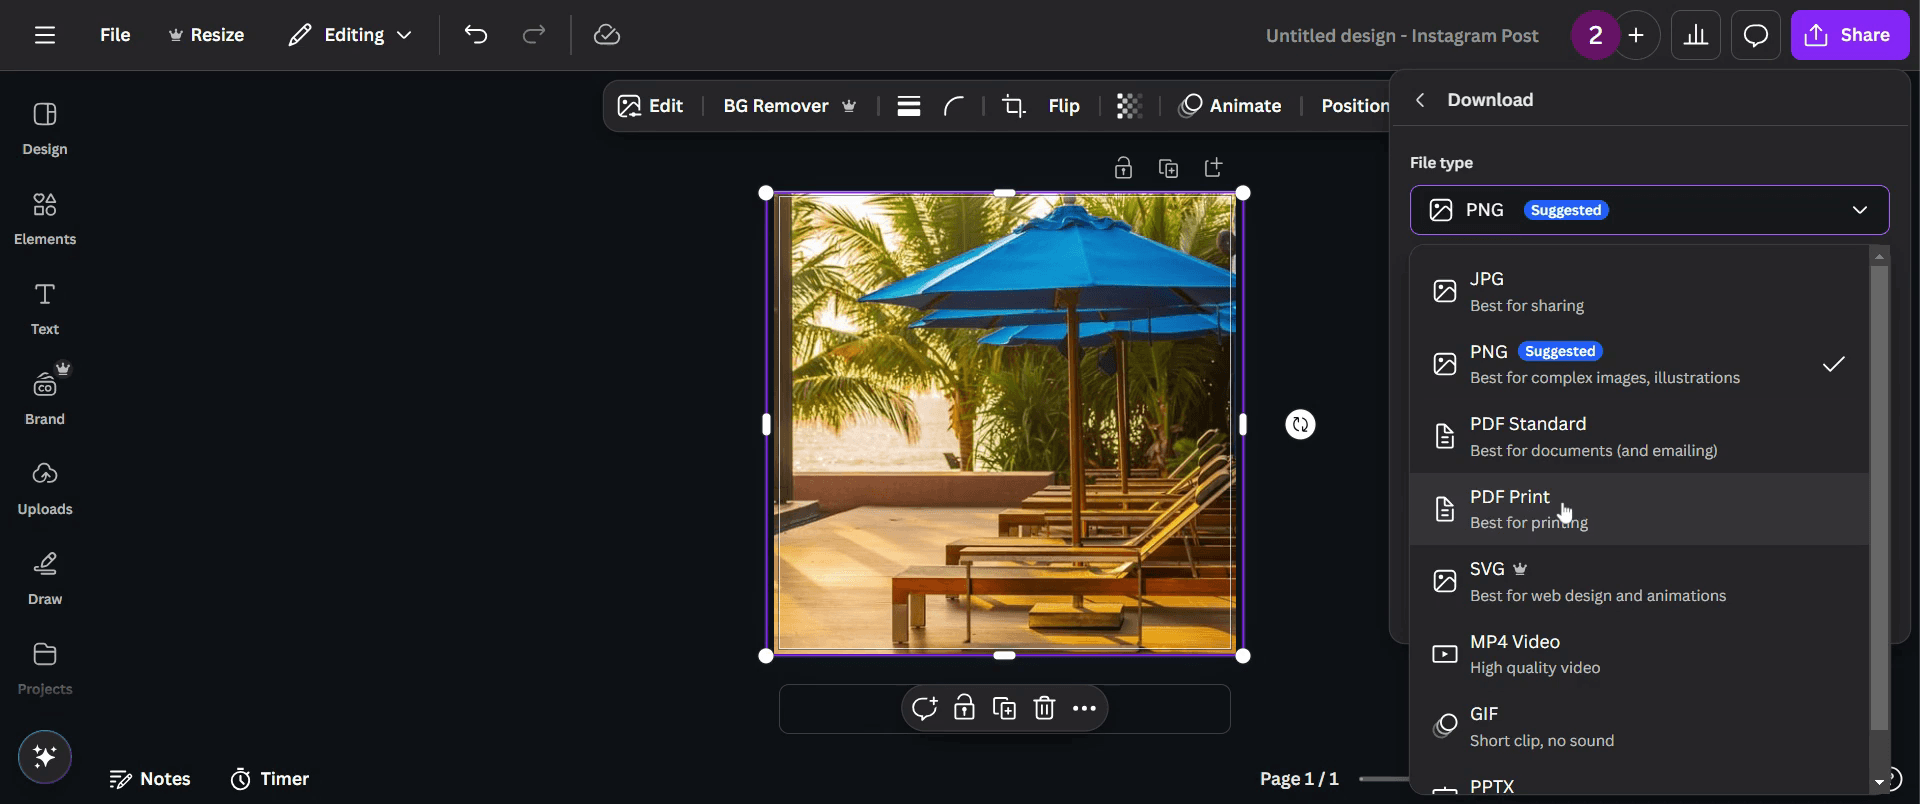
Étape 9
Assurez-vous de cliquer sur 'Repères de coupe et fond perdu'.

Étape 10
Enfin, cliquez sur 'Télécharger'. Enfin, votre design est prêt.

Conseils pratiques pour ajouter un fond perdu dans Canva
Activer le paramètre de fond perdu dans le menu Fichier de Canva pour garantir que les éléments de conception importants ne soient pas coupés lors de l’impression
Étendre les images et les couleurs d’arrière-plan au-delà des lignes de fond perdu pour éviter les bords blancs après la découpe
Toujours télécharger le design au format PDF avec des repères de coupe et un fond perdu pour des résultats d’impression professionnels
Erreurs courantes & comment les éviter lors de l’ajout d’un fond perdu dans Canva
Oublier d’activer les paramètres de fond perdu peut entraîner des bordures blanches indésirables ; vérifiez toujours les paramètres de fond perdu avant de finaliser
Placer le texte ou les éléments importants trop près de la zone de fond perdu peut les faire être coupés ; gardez-les bien à l’intérieur de la marge de sécurité
Ne pas utiliser le bon format d’exportation peut affecter la qualité d’impression ; téléchargez toujours au format PDF Impression avec repères de coupe et fond perdu
FAQ courantes pour ajouter un fond perdu dans Canva
1. Pourquoi le fond perdu est-il important dans les designs Canva ?
Le fond perdu garantit que votre design dépasse la ligne de coupe, évitant ainsi des bords blancs indésirables à l'impression
2. Puis-je ajuster la taille du fond perdu dans Canva ?
Canva définit automatiquement une marge de fond perdu standard, et elle ne peut pas être ajustée manuellement dans la plateforme
3. Comment exporter un design Canva avec fond perdu pour l'impression ?
Cliquez sur Télécharger, choisissez le format PDF pour impression et cochez l'option Repères de coupe et fond perdu avant d'enregistrer
4. La zone de fond perdu sera-t-elle visible lors de l'impression de mon design ?
Non, la zone de fond perdu sera coupée, ne laissant que le design final sans bordures indésirables
5. Comment enregistrer l'écran sur Mac ?
Pour enregistrer l'écran sur un Mac, vous pouvez utiliser Trupeer AI. Il vous permet de capturer l'écran entier et offre des fonctionnalités d'IA telles que l'ajout d'avatars IA, l'ajout de voix off, l'ajout de zoom avant et arrière dans la vidéo. Grâce à la fonctionnalité de traduction vidéo par IA de Trupeer, vous pouvez traduire la vidéo dans plus de 30 langues.
6. Comment ajouter un avatar IA à un enregistrement d'écran ?
Pour ajouter un avatar IA à un enregistrement d'écran, vous devrez utiliser un outil d'enregistrement d'écran IA. Trupeer AI est un outil d'enregistrement d'écran IA, qui vous aide à créer des vidéos avec plusieurs avatars, et vous aide également à créer votre propre avatar pour la vidéo.
7. Comment enregistrer l'écran sur Windows ?
Pour enregistrer l'écran sur Windows, vous pouvez utiliser la barre de jeu intégrée (Windows + G) ou un outil d'IA avancé comme Trupeer AI pour des fonctionnalités plus avancées telles que des avatars IA, la voix off, la traduction, etc.
8. Comment ajouter une voix off à une vidéo ?
Pour ajouter une voix off à des vidéos, téléchargez l'extension Chrome trupeer ai. Une fois inscrit, téléversez votre vidéo avec voix, choisissez la voix off souhaitée dans Trupeer et exportez votre vidéo modifiée.
9. Comment zoomer dans un enregistrement d'écran ?
Pour zoomer pendant un enregistrement d'écran, utilisez les effets de zoom dans Trupeer AI, qui vous permettent de zoomer avant et arrière à des moments précis, améliorant l'impact visuel de votre contenu vidéo.
Les gens demandent aussi
Générateur de documentation technique
Logiciel de base de connaissances
Comment transformer une image en page à colorier dans Canva
Comment imprimer recto verso dans Canva
Comment étirer le texte dans Canva
Comment télécharger plusieurs fichiers à la fois depuis Canva
Tutoriels associés

