
كيفية جعل الزوايا مستديرة في كانفا
تعرّف على كيفية جعل الزوايا مستديرة في Canva باستخدام أدوات نصف قطر الزوايا والإطارات وإعدادات الحدود لإنشاء صور وأشكال ناعمة. اتبع هذا الدرس السريع وأنشئ أدلة باستخدام Trupeer.
لتدوير زوايا العناصر في Canva، حدِّد العنصر (صورة، شكل، إلخ)، ثم انقر على "نمط الحدود" في شريط الأدوات، وبعد ذلك استخدم شريط التمرير أو حقل الإدخال الخاص بـ"تقريب الزوايا" لتعديل نصف قطر الزوايا المستديرة
إليك شرحًا أكثر تفصيلًا:
تحديد العنصر: انقر على الصورة أو الشكل أو أي عنصر تريد تعديله.
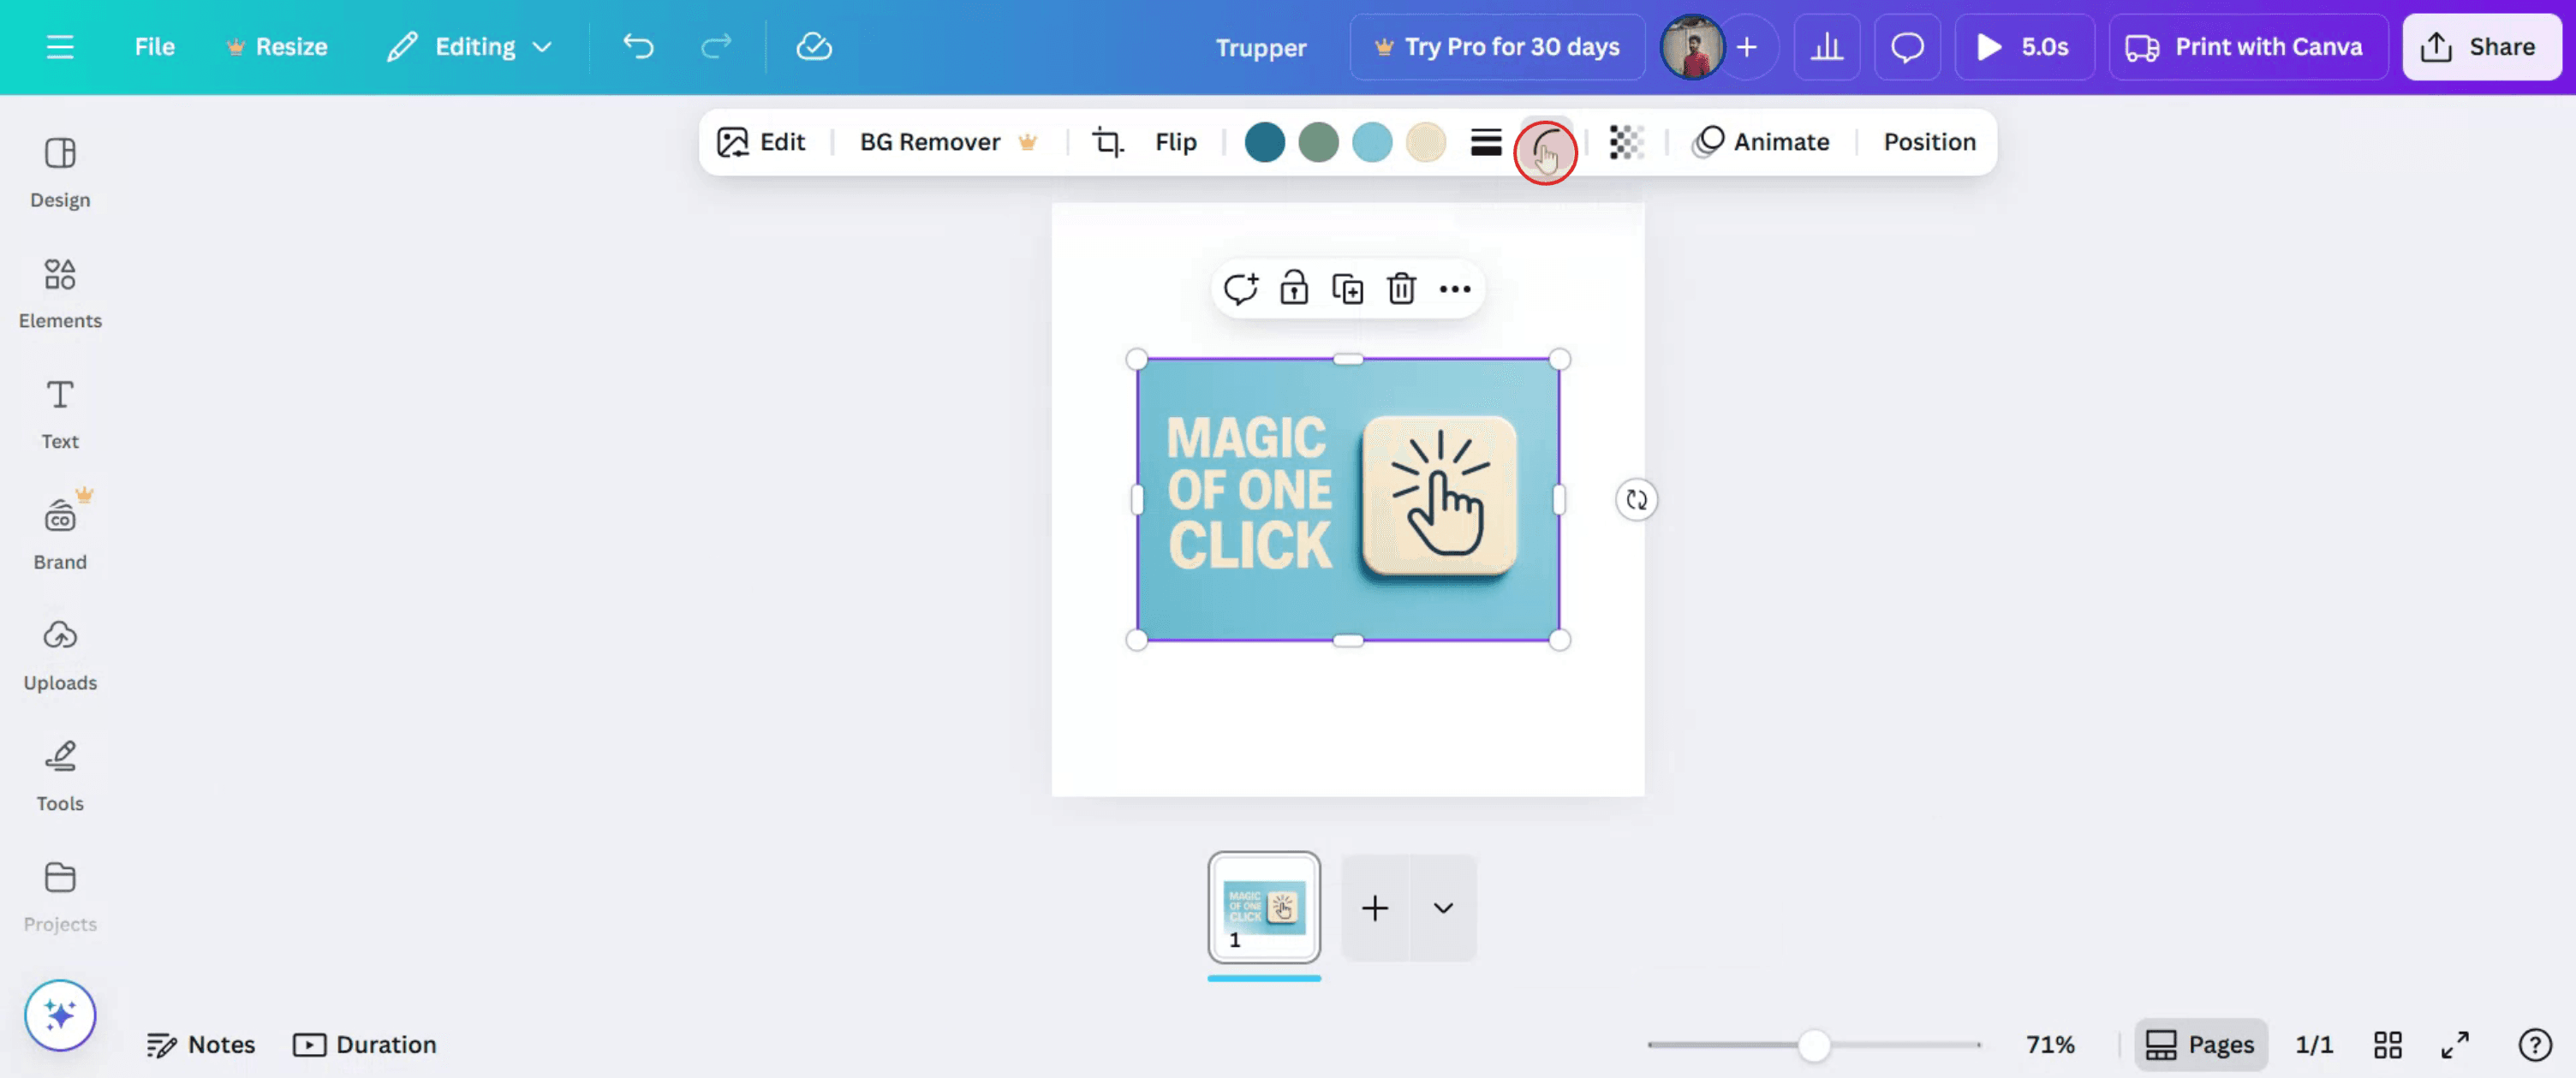
افتح "نمط الحدود": في شريط الأدوات أعلى المحرر، انقر على "نمط الحدود".
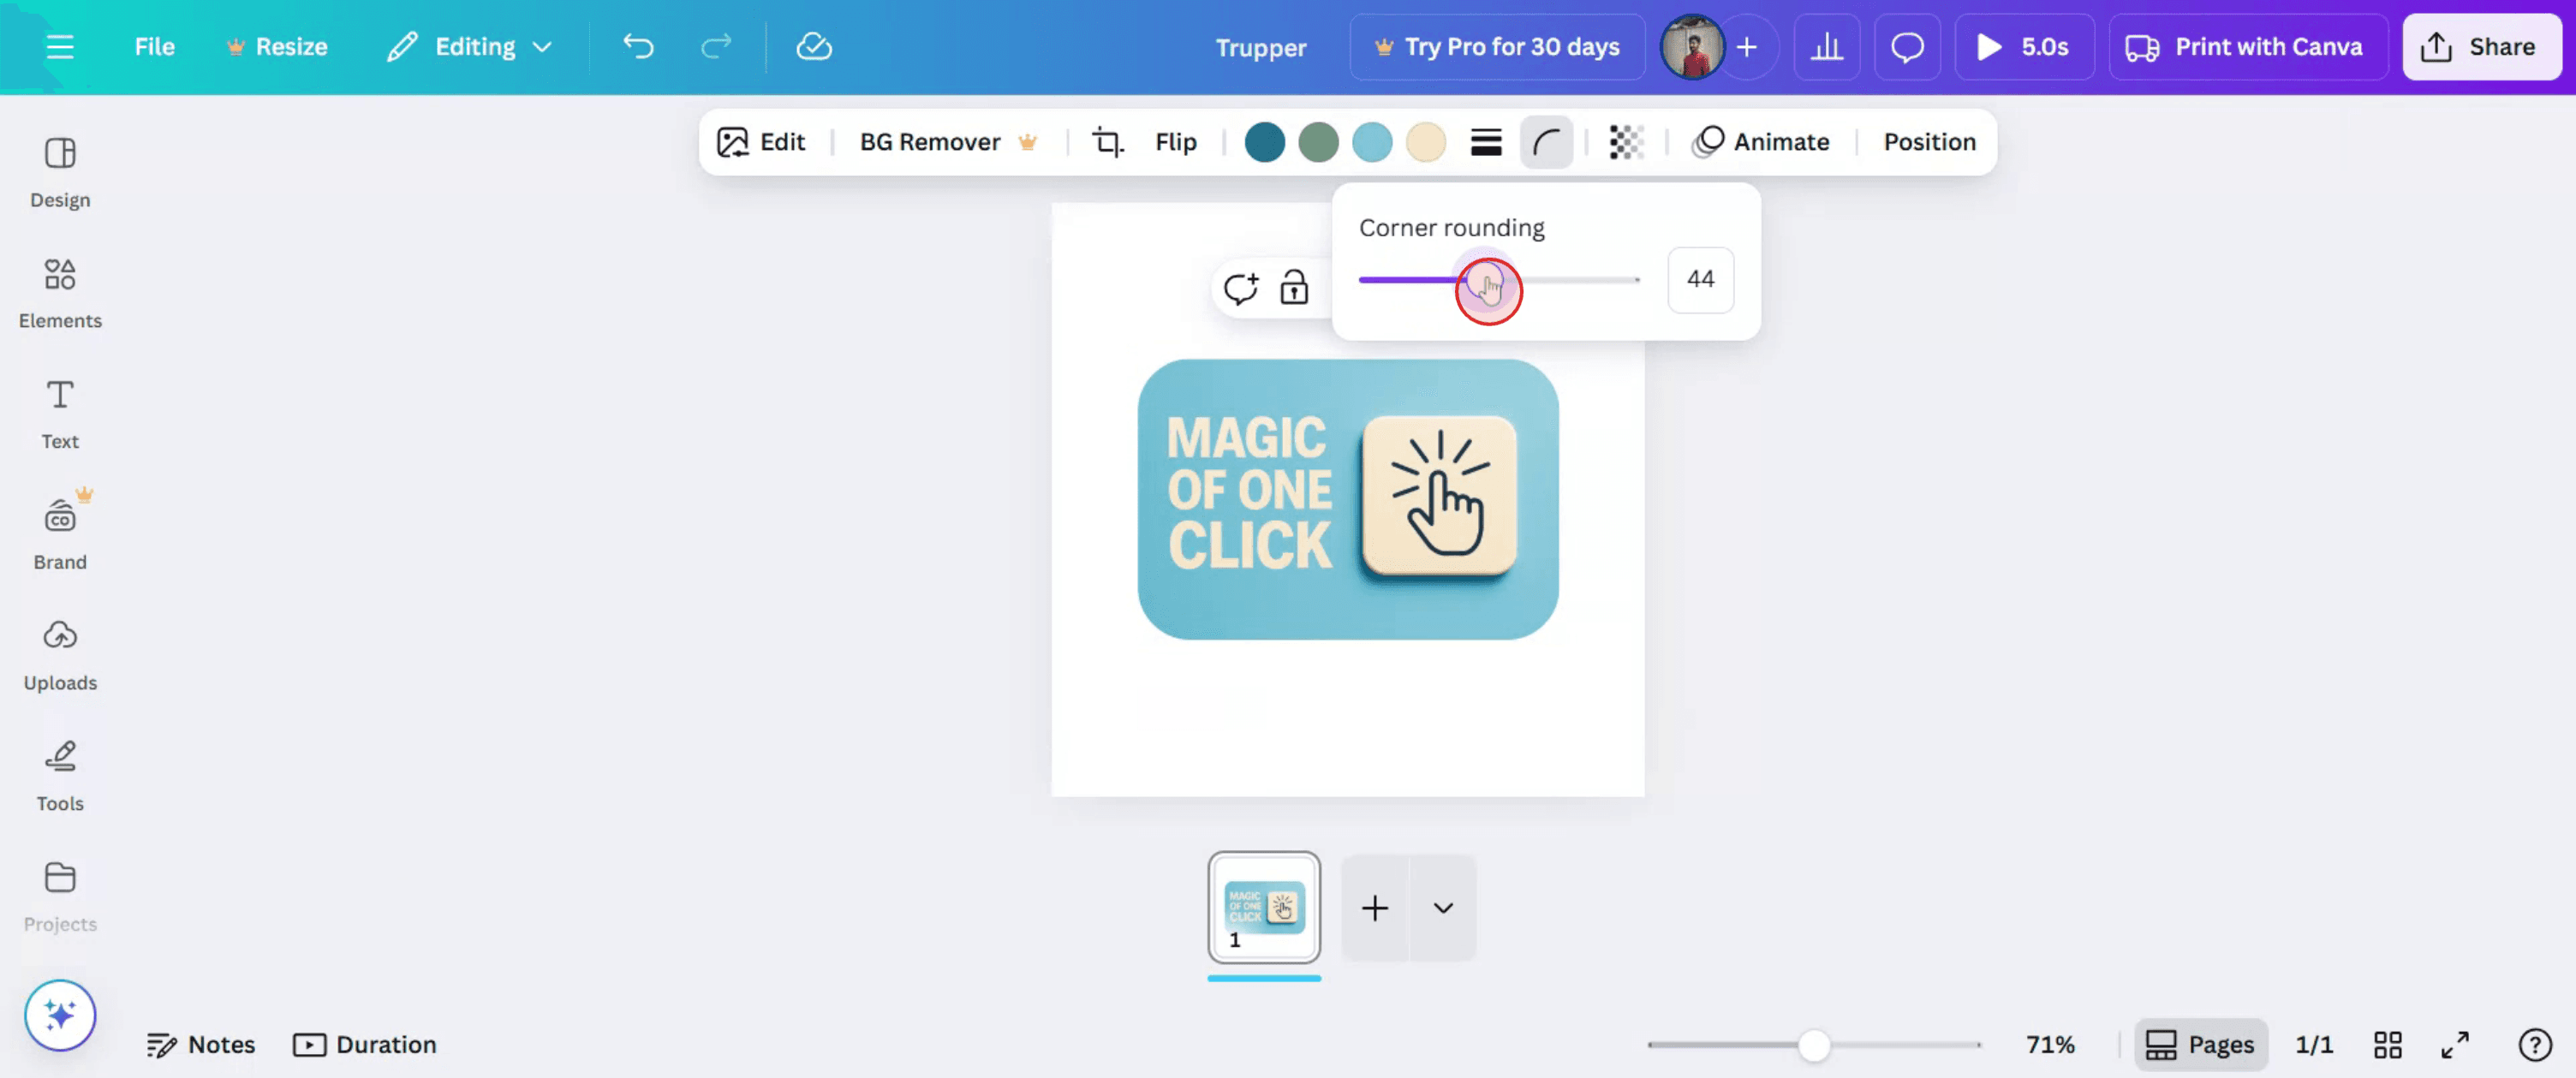
اضبط تقريب الزوايا: استخدم شريط التمرير الخاص بـ"تقريب الزوايا" لزيادة أو تقليل استدارة الزوايا. يمكنك أيضًا إدخال قيمة رقمية مباشرةً في حقل الإدخال بجوار شريط التمرير.
(اختياري) أضف حدًا: إذا كنت تريد حدًا مرئيًا حول العنصر، يمكنك أيضًا ضبط سمك الحد ولونه باستخدام الخيارات الأخرى في لوحة "نمط الحدود".
دليل خطوة بخطوة: كيفية تقريب الزوايا في Canva
الخطوة 1
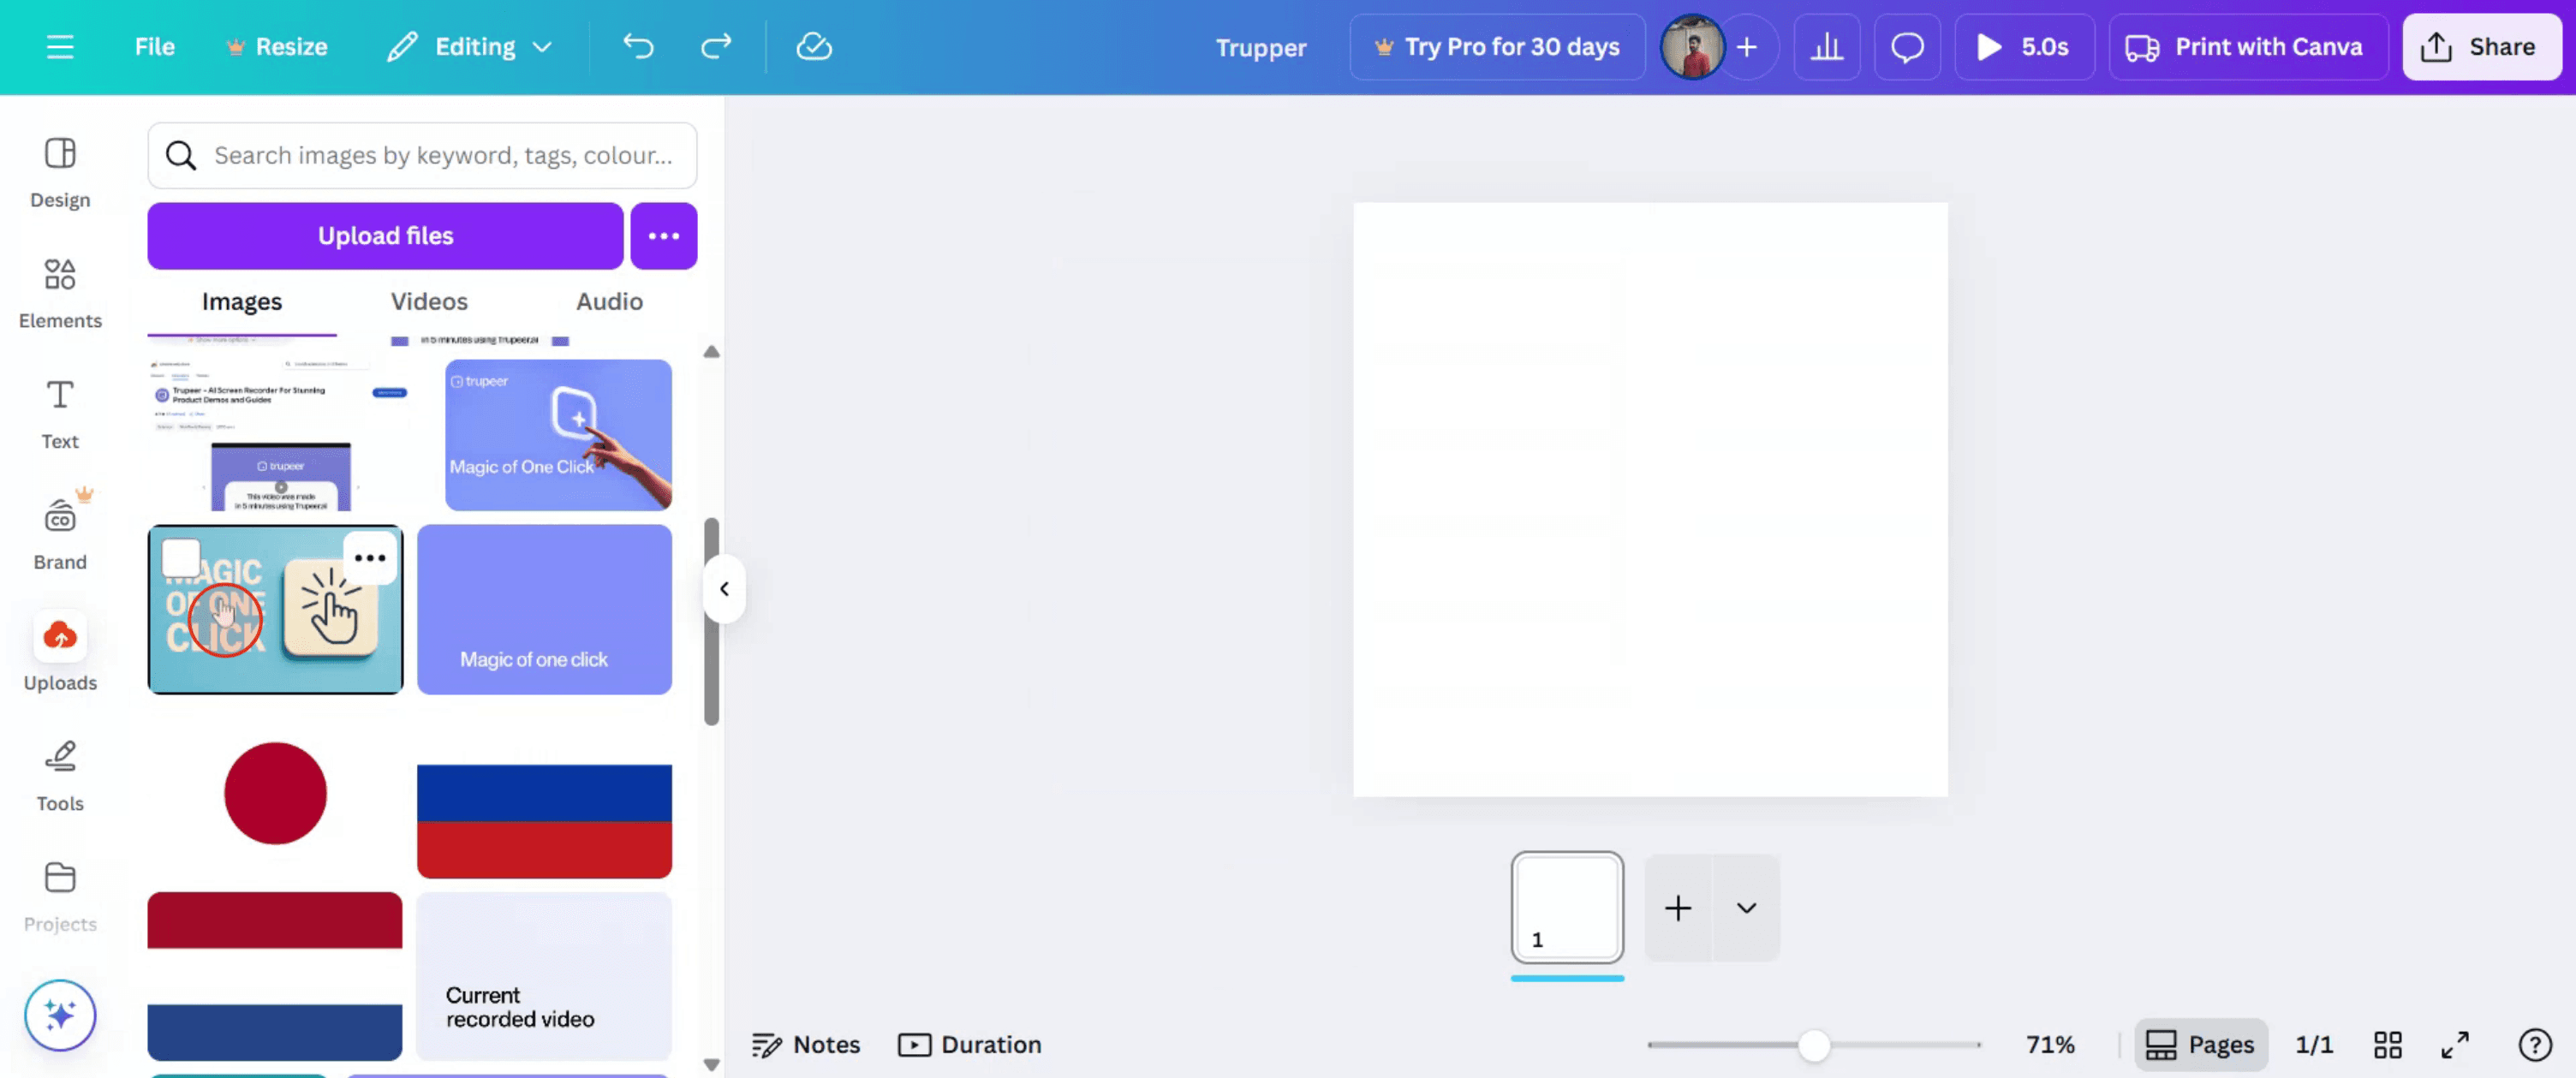
ابدأ بالانتقال إلى قسم التحميلات في Canva والنقر عليه.

الخطوة 2
حدِّد صورة من قسم التحميلات.
الخطوة 3
بعد تحديد الصورة، ابحث عن خيار "تقريب الزوايا" وانقر عليه.
الخطوة 4
اضبط درجة التقريب لتحقيق انحناء الزوايا المطلوب لصورتك.
الخطوة 5
بعد أن تصبح راضيًا عن الزوايا المستديرة، انقر على زر "مشاركة" لمشاركة الصورة مع الآخرين.

نصائح احترافية لتدوير زوايا العناصر في كانفا
افتح تصميمك في كانفا
سجّل الدخول وافتح التصميم الذي تريد تدوير زوايا أحد العناصر فيه.حدّد الصورة أو الشكل
انقر على الصورة أو الشكل أو العنصر الذي تريد تعديله.انقر على «تعديل الصورة» للصور
إذا كنت تعدّل صورة فوتوغرافية، فحدّد الصورة ثم انقر على خيار «تعديل الصورة» من شريط الأدوات العلوي.طبّق إطارًا لتدوير زوايا الصورة
استخدم علامة تبويب العناصر وابحث عن إطار بزوايا مستديرة. اسحب الصورة إلى الإطار لتصبح الزوايا مستديرة.استخدم شريط تمرير نصف قطر الحدود للأشكال
بالنسبة إلى بعض الأشكال، يتيح لك كانفا ضبط نصف قطر الزوايا مباشرةً باستخدام مقابض تدوير الزوايا أو أشرطة التمرير في شريط الأدوات.غيّر الحجم وأعد التمركز حسب الحاجة
بعد تدوير الزوايا، عدّل الحجم والموقع ليتناسبا مع تصميمك العام.
الأخطاء الشائعة وكيفية تجنبها
محاولة تدوير زوايا العناصر غير المدعومة
لا تدعم جميع العناصر تدوير الزوايا. جرّب استخدام الأطر أو الأشكال التي تسمح بتعديل نصف القطر.استخدام أطر تشوّه الصورة
قد تؤدي بعض الأطر المستديرة إلى تمديد صورتك أو قصّها. اختر إطارًا يطابق حجم وتناسبات التخطيط لديك.عدم ظهور الزوايا مستديرة بعد التنزيل
إذا بدت الزوايا حادّة في الملف الذي تم تنزيله، فتأكد من تطبيق التأثير بشكل صحيح واستخدم تنسيق PNG للحصول على دقة بصرية أفضل.سحب الصور إلى الأطر بشكل غير صحيح
تأكد من أن الصورة تثبت داخل الإطار. إذا لم يحدث ذلك، فلن ترث الزوايا المستديرة.لا يوجد خيار لتدوير مربعات النص
لا يمكن تدوير مربعات النص مباشرةً. استخدم شكلاً مستديرًا خلف النص للحصول على تأثير مشابه.
الأسئلة الشائعة حول تدوير الزوايا في كانفا
كيف أدير زوايا صورة في كانفا
استخدم إطارًا مستدير الزوايا من تبويب العناصر واسحب صورتك إليه.هل يمكنني تدوير زوايا شكل
نعم، لبعض الأشكال يمكنك استخدام مقابض نصف قطر الحدود لتدوير الزوايا.هل توجد أداة مباشرة لتدوير الزوايا في كانفا
هذه الميزة متاحة فقط لبعض العناصر. الإطارات والأشكال توفر أكبر قدر من المرونة.هل يمكنني تدوير زوايا مربع النص
لا، لكن يمكنك وضع النص فوق شكل مستطيل بزوايا دائرية للحصول على تأثير مشابه.هل ميزة تدوير الزوايا متاحة للمستخدمين المجانيين
نعم، يمكنك استخدام الإطارات وأدوات الزوايا المتاحة في النسخة المجانية.كيف أسجل الشاشة على ماك؟
لتسجيل الشاشة على جهاز ماك، يمكنك استخدام Trupeer AI. يتيح لك التقاط الشاشة بالكامل ويوفر إمكانات الذكاء الاصطناعي مثل إضافة صور رمزية بالذكاء الاصطناعي، وإضافة تعليق صوتي، وإضافة التكبير والتصغير في الفيديو. مع ميزة ترجمة الفيديو بالذكاء الاصطناعي من trupeer، يمكنك ترجمة الفيديو إلى أكثر من 30 لغة.كيف أضيف صورة رمزية بالذكاء الاصطناعي إلى تسجيل الشاشة؟
لإضافة صورة رمزية بالذكاء الاصطناعي إلى تسجيل الشاشة، ستحتاج إلى استخدام أداة لتسجيل الشاشة بالذكاء الاصطناعي. Trupeer AI هي أداة لتسجيل الشاشة بالذكاء الاصطناعي، وتساعدك على إنشاء مقاطع فيديو بعدة صور رمزية، كما تساعدك أيضًا في إنشاء صورتك الرمزية الخاصة للفيديو.كيف أسجل الشاشة على ويندوز؟
لتسجيل الشاشة على Windows، يمكنك استخدام Game Bar المدمج (Windows + G) أو أداة ذكاء اصطناعي متقدمة مثل Trupeer AI للحصول على ميزات أكثر تقدمًا مثل الصور الرمزية بالذكاء الاصطناعي، والتعليق الصوتي، والترجمة، إلخ.كيف أضيف تعليقًا صوتيًا إلى الفيديو؟
لإضافة تعليق صوتي إلى مقاطع الفيديو، حمّل إضافة trupeer ai لمتصفح Chrome. بعد التسجيل، ارفع الفيديو الخاص بك مع الصوت، واختر التعليق الصوتي المطلوب من trupeer ثم صدّر الفيديو المعدّل.كيف أُكبّر أثناء تسجيل الشاشة؟
لتكبير الجزء أثناء تسجيل الشاشة، استخدم تأثيرات التكبير في Trupeer AI التي تتيح لك التكبير والتصغير في لحظات محددة، مما يعزز التأثير البصري لمحتوى الفيديو الخاص بك.
قراءات مقترحة
كيفية الطباعة على الوجهين في كانفا
دروس ذات صلة

