
كيفية عكس الألوان في كانفا
تعلم كيفية عكس الألوان في Canva باستخدام أدوات تعديل الصور والفلاتر وضبط الألوان يدويًا. اتبع هذا الشرح السريع وأنشئ أدلة خطوة بخطوة باستخدام Trupeer.
استخدام لوحة الضبط:
1. حدد العنصر: اختر الصورة أو النص أو الشكل الذي تريد عكسه.
2. انتقل إلى الضبط: انقر على "تحرير الصورة" (أو "التأثيرات" إذا كان نصًا) ثم ابحث عن لوحة "الضبط".
3. اعثر على مفتاح العكس: مرّر لأسفل إلى قسم "اللون" وفعّل مفتاح "عكس" لتفعيل عكس الألوان.
4. اضبط بدقة (اختياري): يمكنك ضبط الألوان بشكل إضافي باستخدام أشرطة التمرير للسطوع والتباين والتشبع.
استخدام فلتر ثنائي اللون:
1. حدد العنصر: اختر الصورة أو النص أو الشكل الذي تريد عكسه.
2. الوصول إلى ثنائي اللون: انتقل إلى "تحرير الصورة" (أو "التأثيرات" إذا كان نصًا) وابحث عن فلتر "ثنائي اللون".
3. اختر إعدادًا مسبقًا (اختياري): اختر إعدادًا مسبقًا مثل "كلاسيكي" أو استكشف غيره. يمكنك تخصيص الإبرازات والظلال بشكل أكبر.
4. اضبط الإبرازات والظلال: في الإعدادات المخصصة، اضبط الإبرازات والظلال لتحقيق تأثير العكس المطلوب.
العكس اليدوي (للأشكال الأساسية والنص):
حدد العنصر: اختر العنصر الذي تريد عكسه. غيّر الألوان يدويًا: استخدم أداة اختيار اللون لتغيير كل لون إلى اللون المقابل له. على سبيل المثال، غيّر الأبيض إلى الأسود، والبرتقالي إلى الأزرق.
دليل خطوة بخطوة: كيفية عكس الألوان في كانفا
الخطوة 1
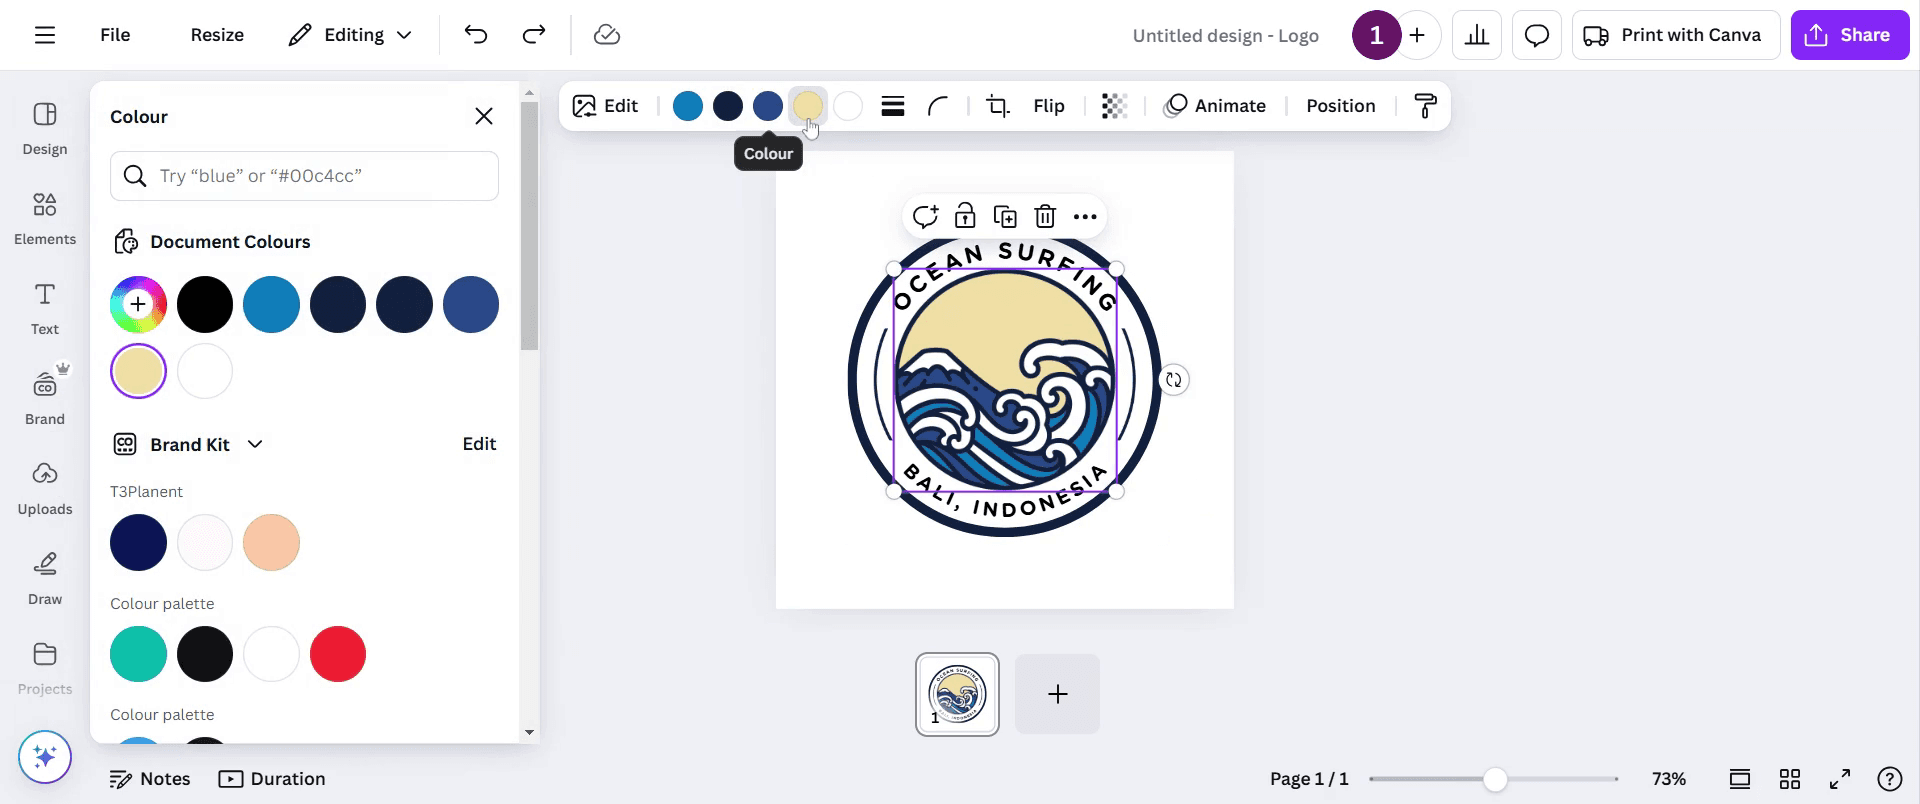
حدد العنصر الذي تريد عكس لونه.

الخطوة 2
ثم انتقل إلى خيارات الألوان في الأعلى كما هو موضح في لقطة الشاشة أدناه.
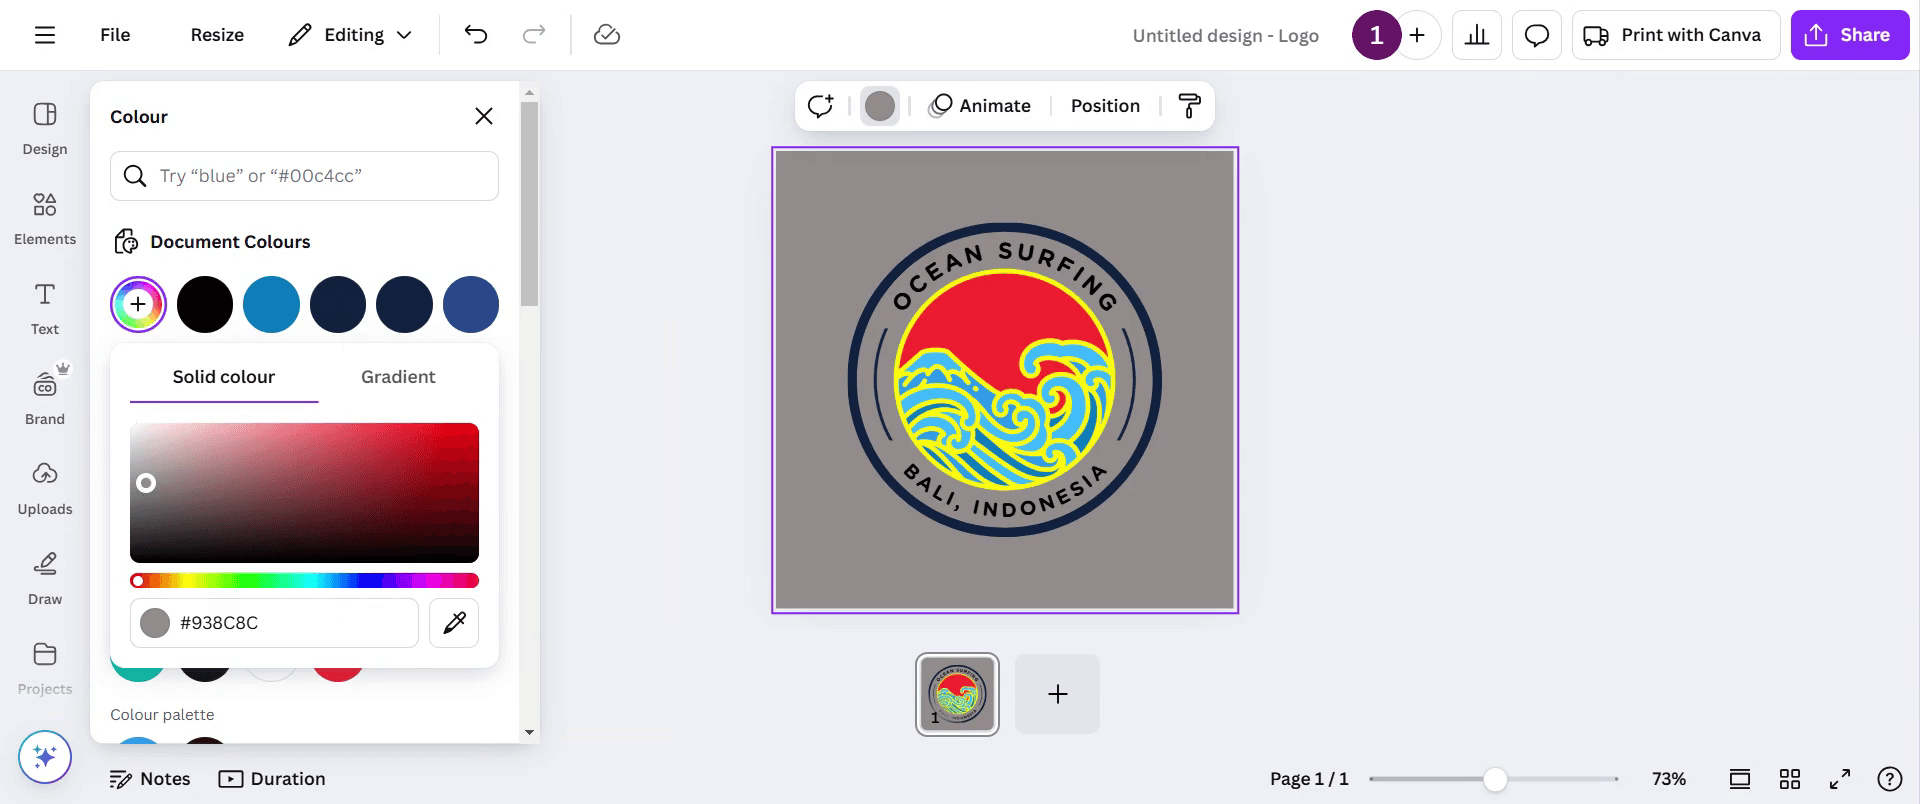
الخطوة 3
الآن استكشف تركيبات الألوان المختلفة حسب الحاجة.
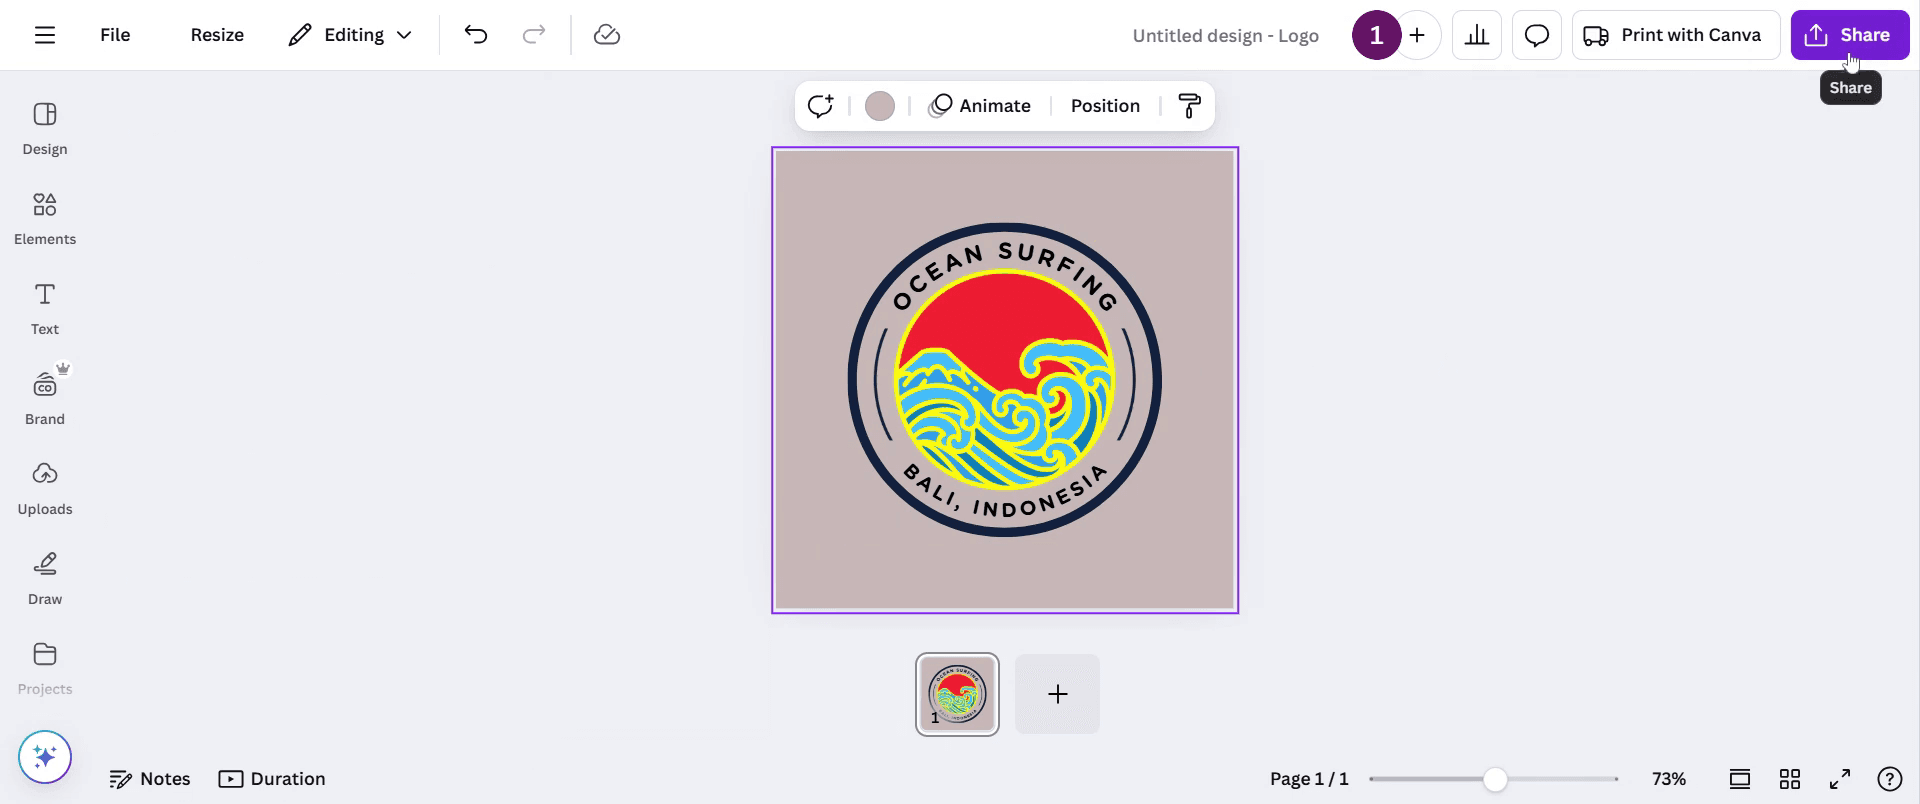
الخطوة 4
هذا كل شيء. بمجرد أن تغيّر الألوان يدويًا، شاركها بالنقر على خيار المشاركة.
نصائح احترافية لعكس الألوان في Canva
ارفع صورتك أو حدِّد العنصر الذي تريده
افتح تصميمك في Canva واختر الصورة أو العنصر أو الخلفية التي تريد عكس ألوانها.استخدم خيار تحرير الصورة
انقر على الصورة، ثم اختر "تحرير الصورة" من شريط الأدوات للوصول إلى إعدادات التعديل.اضبط السطوع والتباين والتشبع يدويًا
للتقريب من تأثير عكس الألوان، خفِّض السطوع، وزِد التباين، وجرّب مستويات التشبع. يمكن أن يخلق ذلك مظهرًا بألوان معكوسة.طبّق تأثير ثنائي اللون
اختر "التأثيرات"، ثم مرّر إلى "ثنائي اللون"، وطبّق أحد الإعدادات المسبقة. انقر على التأثير المطبَّق لتخصيص ألوان الإبراز والظل للحصول على مظهر قريب من الألوان المعكوسة.استخدم حيل الفلاتر للخلفيات أو الأشكال البسيطة
إذا كنت تعمل مع أشكال أو خلفيات بسيطة، فطبّق فلترًا مثل "Solar" أو عدّل التدرجات اللونية لإنشاء مخطط لوني معاكس.استخدم أداة إزالة الخلفية من Canva مع خلفية معكوسة
لتحكم أكبر، أزِل الخلفية من الصورة وضعها فوق خلفية ذات ألوان متباينة أو معكوسة.
الأخطاء الشائعة وكيفية تجنبها
البحث عن زر عكس مباشر
لا يوفّر Canva ميزة عكس الألوان بنقرة واحدة. ستحتاج إلى محاكاة التأثير يدويًا باستخدام الفلاتر أو التعديلات.عكس النص بدلًا من الخلفية
تأكد من أنك تحدد الطبقة الصحيحة. اقفل الطبقات الأخرى إذا لزم الأمر لتجنب التغييرات غير المقصودة.عدم تطبيق ثنائي اللون بشكل صحيح
تأكد من تحديد الصورة، ثم انقر على تأثير ثنائي اللون مرة واحدة لتطبيقه، ثم انقر مرة أخرى لفتح أدوات التعديل.عدم ظهور عكس الألوان بدقة
قد لا تتطابق التعديلات اليدوية تمامًا مع تأثير العكس التقليدي. استخدم ألوانًا عالية التباين لتحسين المظهر البصري.ظهور الصورة المعكوسة باهتة بعد التعديلات
اضبط السطوع والتباين تدريجيًا، وفكّر في إضافة طبقات أو خلفيات لتحسين النتيجة العامة.
الأسئلة الشائعة حول عكس الألوان في Canva
كيف أعكس الألوان في Canva؟
استخدم التعديلات اليدوية في لوحة تعديل الصورة أو طبّق تأثير ثنائي اللون وخصّص ألوان الإبراز والظل.هل يوجد خيار لعكس اللون بنقرة واحدة في Canva؟
لا، لا يوفّر Canva زرًّا مباشرًا للعكس. تحتاج إلى استخدام الفلاتر أو تعديل الإعدادات يدويًا.هل يمكنني عكس الخلفية والنص بشكل منفصل؟
نعم، حدّد كل عنصر وعدّله بشكل منفصل. يمكنك أيضًا قفل الطبقات لتجنب تعديل العنصر الخطأ.هل سيؤثر عكس الألوان على جودة الصورة؟
بشكل طفيف، حسب التعديلات المستخدمة. قم بإجراء تغييرات بسيطة وعاين المعاينة قبل إنهاء التصميم.هل يمكنني عكس عناصر SVG أو العناصر المتجهة في Canva؟
يمكنك تغيير ألوانها يدويًا، لكنها لا تدعم الفلاتر. انسخها واضبط ألوان التعبئة لمحاكاة العكس.كيفية تسجيل الشاشة على Mac؟
لتسجيل الشاشة على جهاز Mac، يمكنك استخدام Trupeer AI. يتيح لك التقاط الشاشة بالكامل ويوفّر إمكانات الذكاء الاصطناعي مثل إضافة صور رمزية بالذكاء الاصطناعي، وإضافة تعليق صوتي، وإضافة التكبير والتصغير في الفيديو. وباستخدام ميزة ترجمة الفيديو بالذكاء الاصطناعي من trupeer، يمكنك ترجمة الفيديو إلى أكثر من 30 لغة.كيفية إضافة صورة رمزية بالذكاء الاصطناعي إلى تسجيل الشاشة؟
لإضافة صورة رمزية بالذكاء الاصطناعي إلى تسجيل الشاشة، ستحتاج إلى استخدام أداة تسجيل شاشة بالذكاء الاصطناعي. Trupeer AI هي أداة تسجيل شاشة بالذكاء الاصطناعي، وتساعدك على إنشاء مقاطع فيديو بعدة صور رمزية، كما تساعدك في إنشاء صورتك الرمزية الخاصة للفيديو.كيفية تسجيل الشاشة على Windows؟
لتسجيل الشاشة على Windows، يمكنك استخدام Game Bar المدمج (Windows + G) أو أداة ذكاء اصطناعي متقدمة مثل Trupeer AI للحصول على ميزات أكثر تقدمًا مثل الصور الرمزية بالذكاء الاصطناعي، والتعليق الصوتي، والترجمة، إلخ.كيفية إضافة تعليق صوتي إلى الفيديو؟
لإضافة تعليق صوتي إلى مقاطع الفيديو، نزّل إضافة trupeer ai لمتصفح Chrome. بعد التسجيل، ارفع الفيديو الذي يحتوي على الصوت، واختر التعليق الصوتي المطلوب من trupeer ثم صدّر الفيديو المعدّل.كيف أقوم بالتكبير أثناء تسجيل الشاشة؟
للتكبير أثناء تسجيل الشاشة، استخدم تأثيرات التكبير في Trupeer AI التي تتيح لك التكبير والتصغير في لحظات محددة، مما يعزّز التأثير البصري لمحتوى الفيديو الخاص بك.
قراءات مقترحة
كيفية الطباعة على الوجهين في Canva
دروس ذات صلة

