
كيفية تصدير قائمة مهام Jira إلى Excel – خطوات سريعة وسهلة
تعرّف على كيفية تصدير قائمة الأعمال المتراكمة في Jira إلى Excel لأغراض التقارير أو التخطيط أو الوصول دون اتصال. دليل خطوة بخطوة للمشاريع الكلاسيكية والمشاريع من الجيل التالي.
توفّر هذه الوثيقة عملية شاملة لتصدير بيانات قائمة الأعمال المتراكمة من Jira إلى ملف Excel. اتبع هذه الخطوات لنقل معلومات قائمة الأعمال المتراكمة بكفاءة.
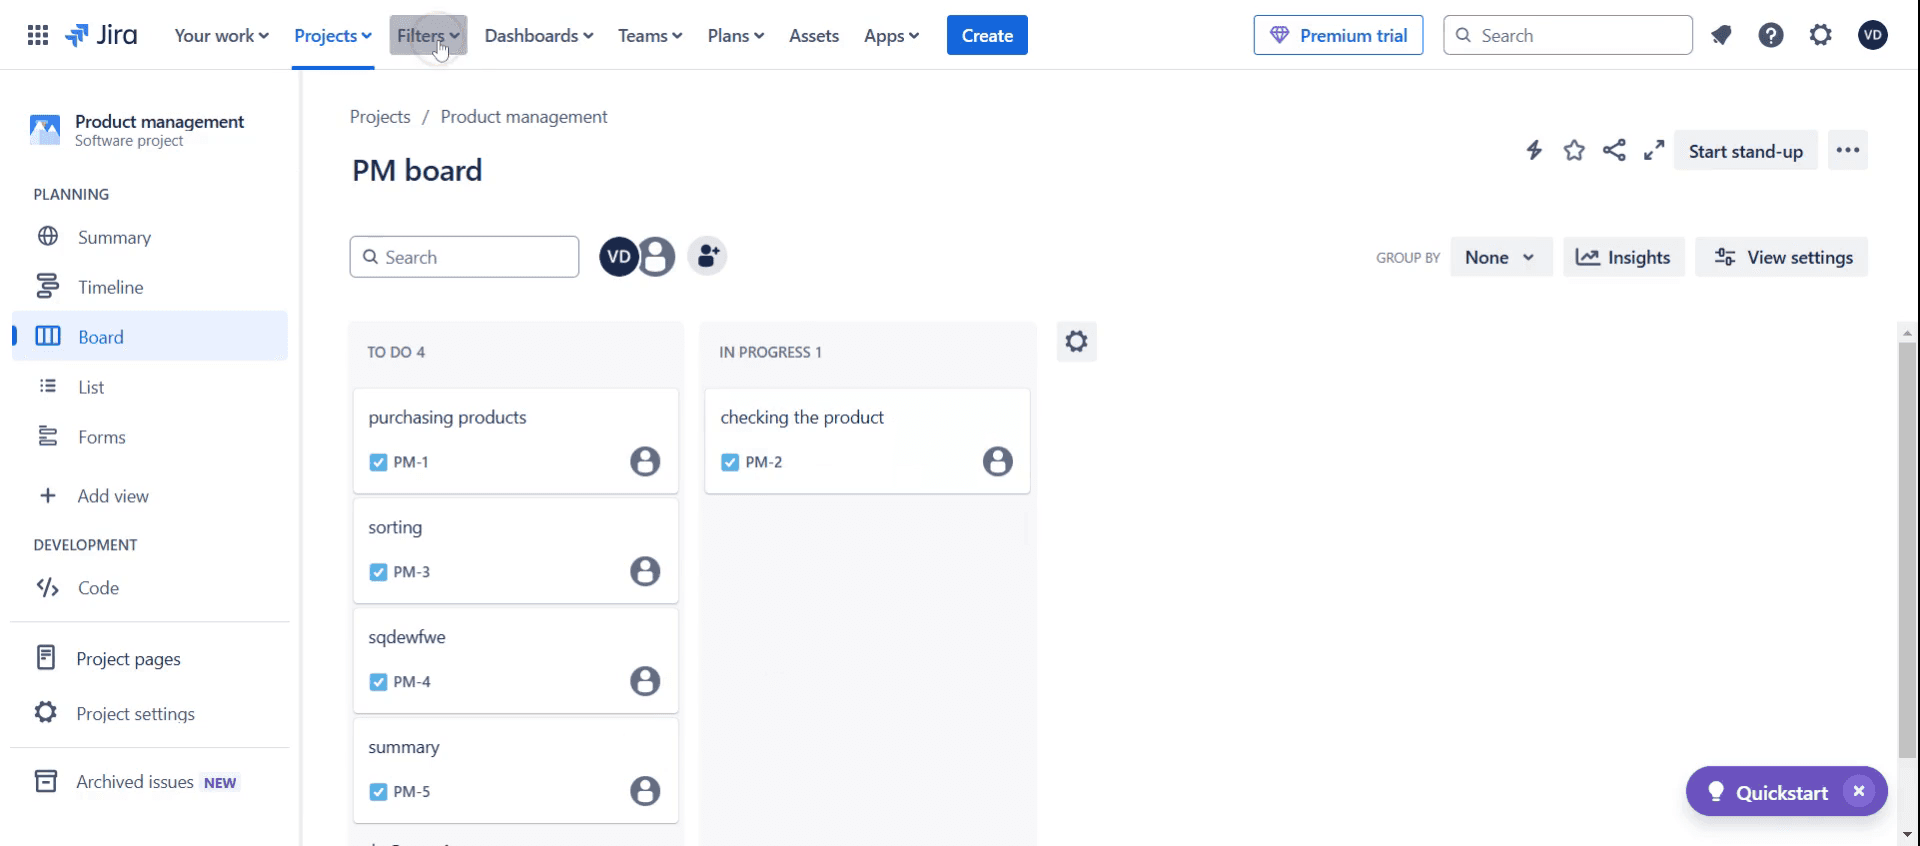
1. الوصول إلى قائمة الأعمال المتراكمة
افتح مشروع Jira الخاص بك.
انتقل إلى عرض “قائمة الأعمال المتراكمة” (ضمن قائمة اللوحة إذا كنت تستخدم Scrum).
2. تصفية القضايا (اختياري)
استخدم عوامل التصفية المتاحة (مثل: sprint، label، assignee) لتضييق نطاق عناصر قائمة الأعمال المتراكمة التي تريد تصديرها.
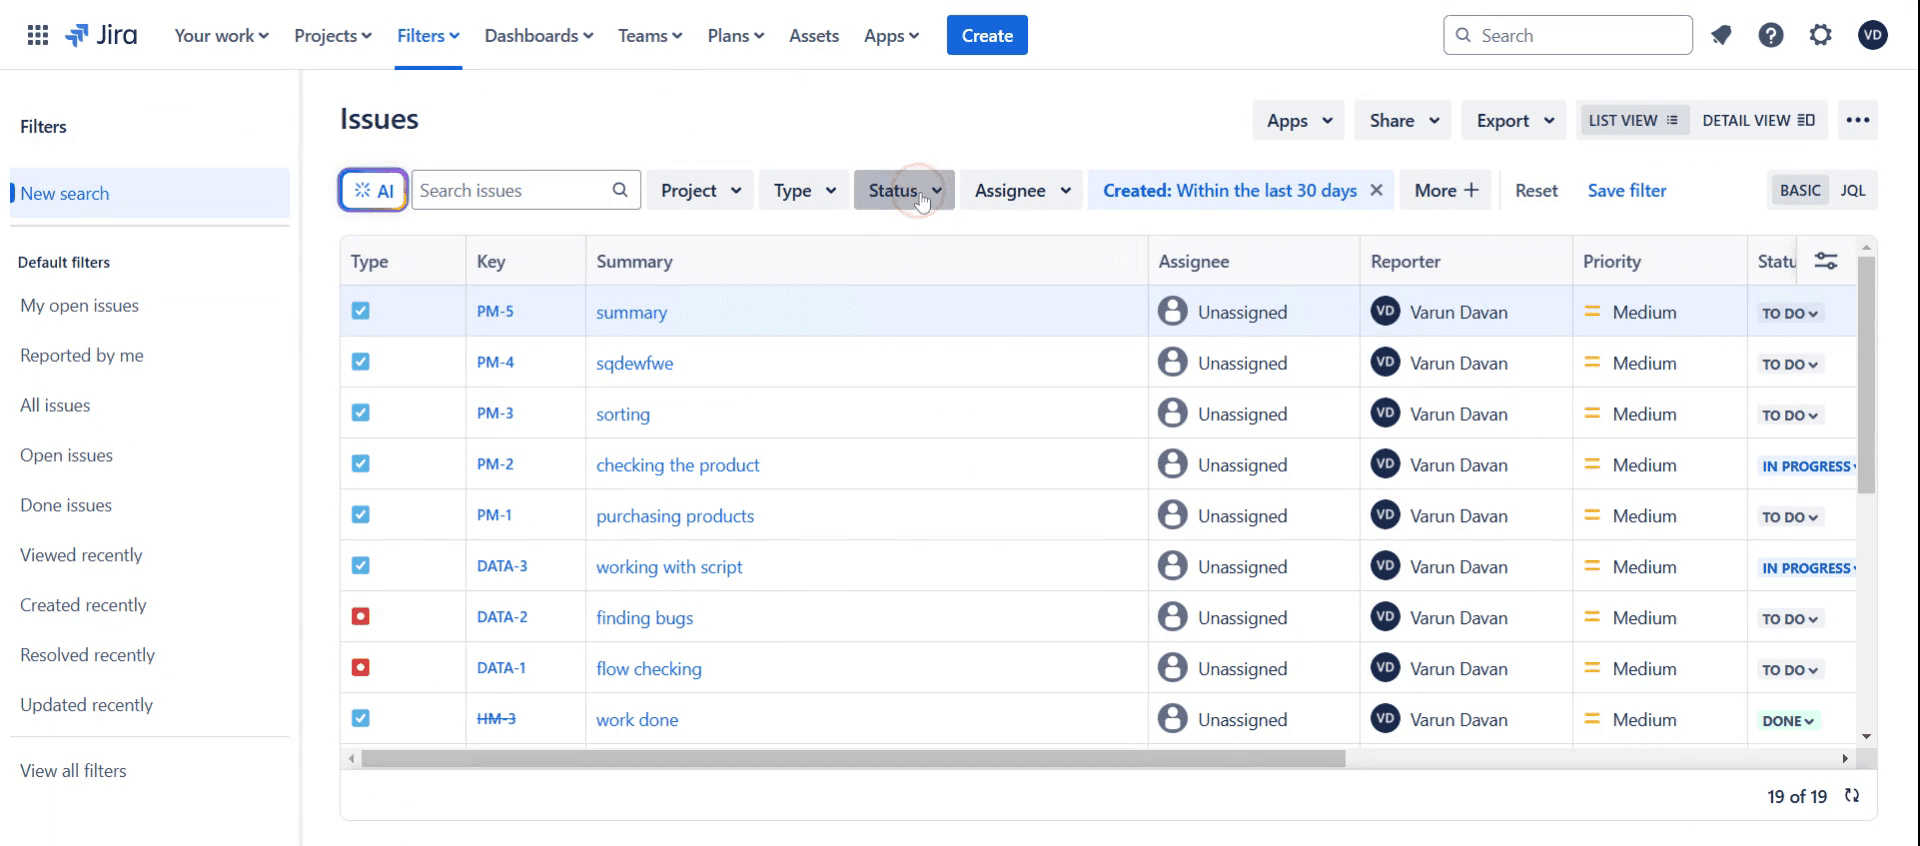
3. افتح البحث المتقدم عن القضايا
لا تحتوي قائمة الأعمال المتراكمة في Jira نفسها على زر “تصدير” مباشر، لذا تحتاج إلى:
انتقل إلى شريط التنقل العلوي → القضايا > البحث عن القضايا.
استخدم JQL أو عامل التصفية المستخدم في عرض قائمة الأعمال المتراكمة (مثل:
project = YOUR_PROJECT AND statusCategory != Done).
4. التصدير إلى Excel
بمجرد ظهور قائمة القضايا المصفاة:
انقر زر “تصدير” (أعلى يمين قائمة القضايا).
اختر أحد الخيارات التالية:
“Export Excel CSV (current fields)” – يصدّر الحقول الظاهرة فقط.
“Export Excel CSV (all fields)” – يتضمن جميع حقول القضايا المتاحة.
5. التنزيل والفتح
سيتم تنزيل ملف CSV إلى جهاز الكمبيوتر الخاص بك.
افتحه باستخدام Microsoft Excel أو Google Sheets أو أي محرر جداول بيانات.
دليل خطوة بخطوة: كيفية تصدير Jira Backlog إلى Excel
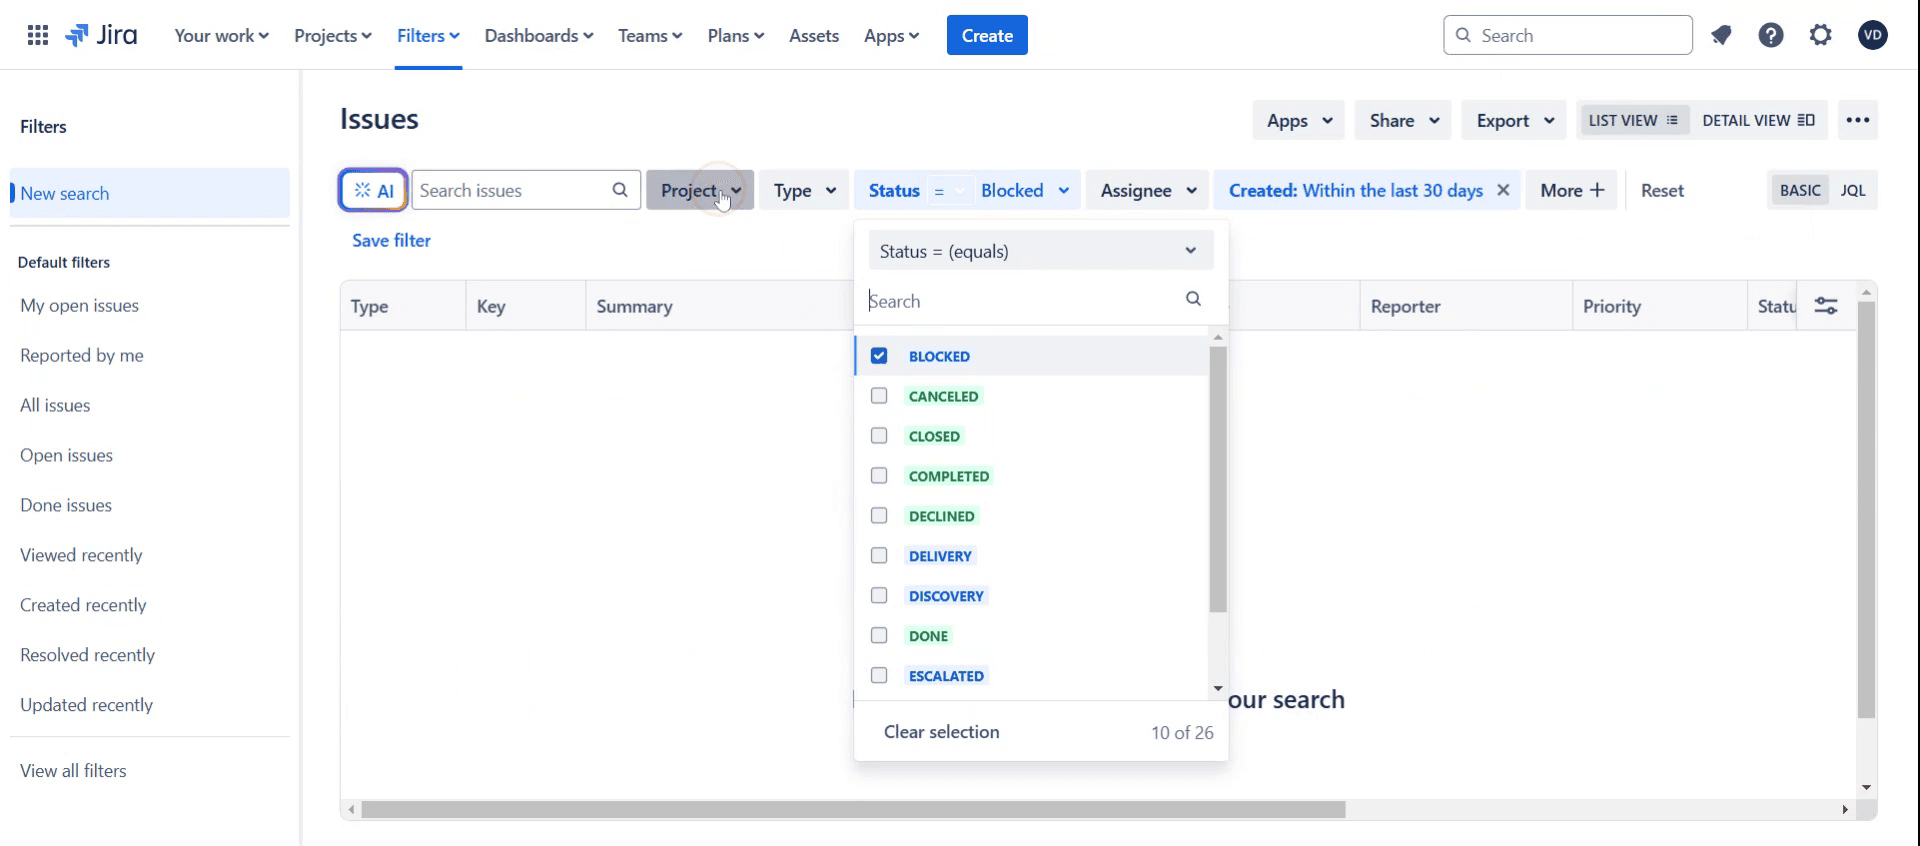
الخطوة 1
انقر على Filters.
الخطوة 2
ثم انقر على عرض جميع القضايا،

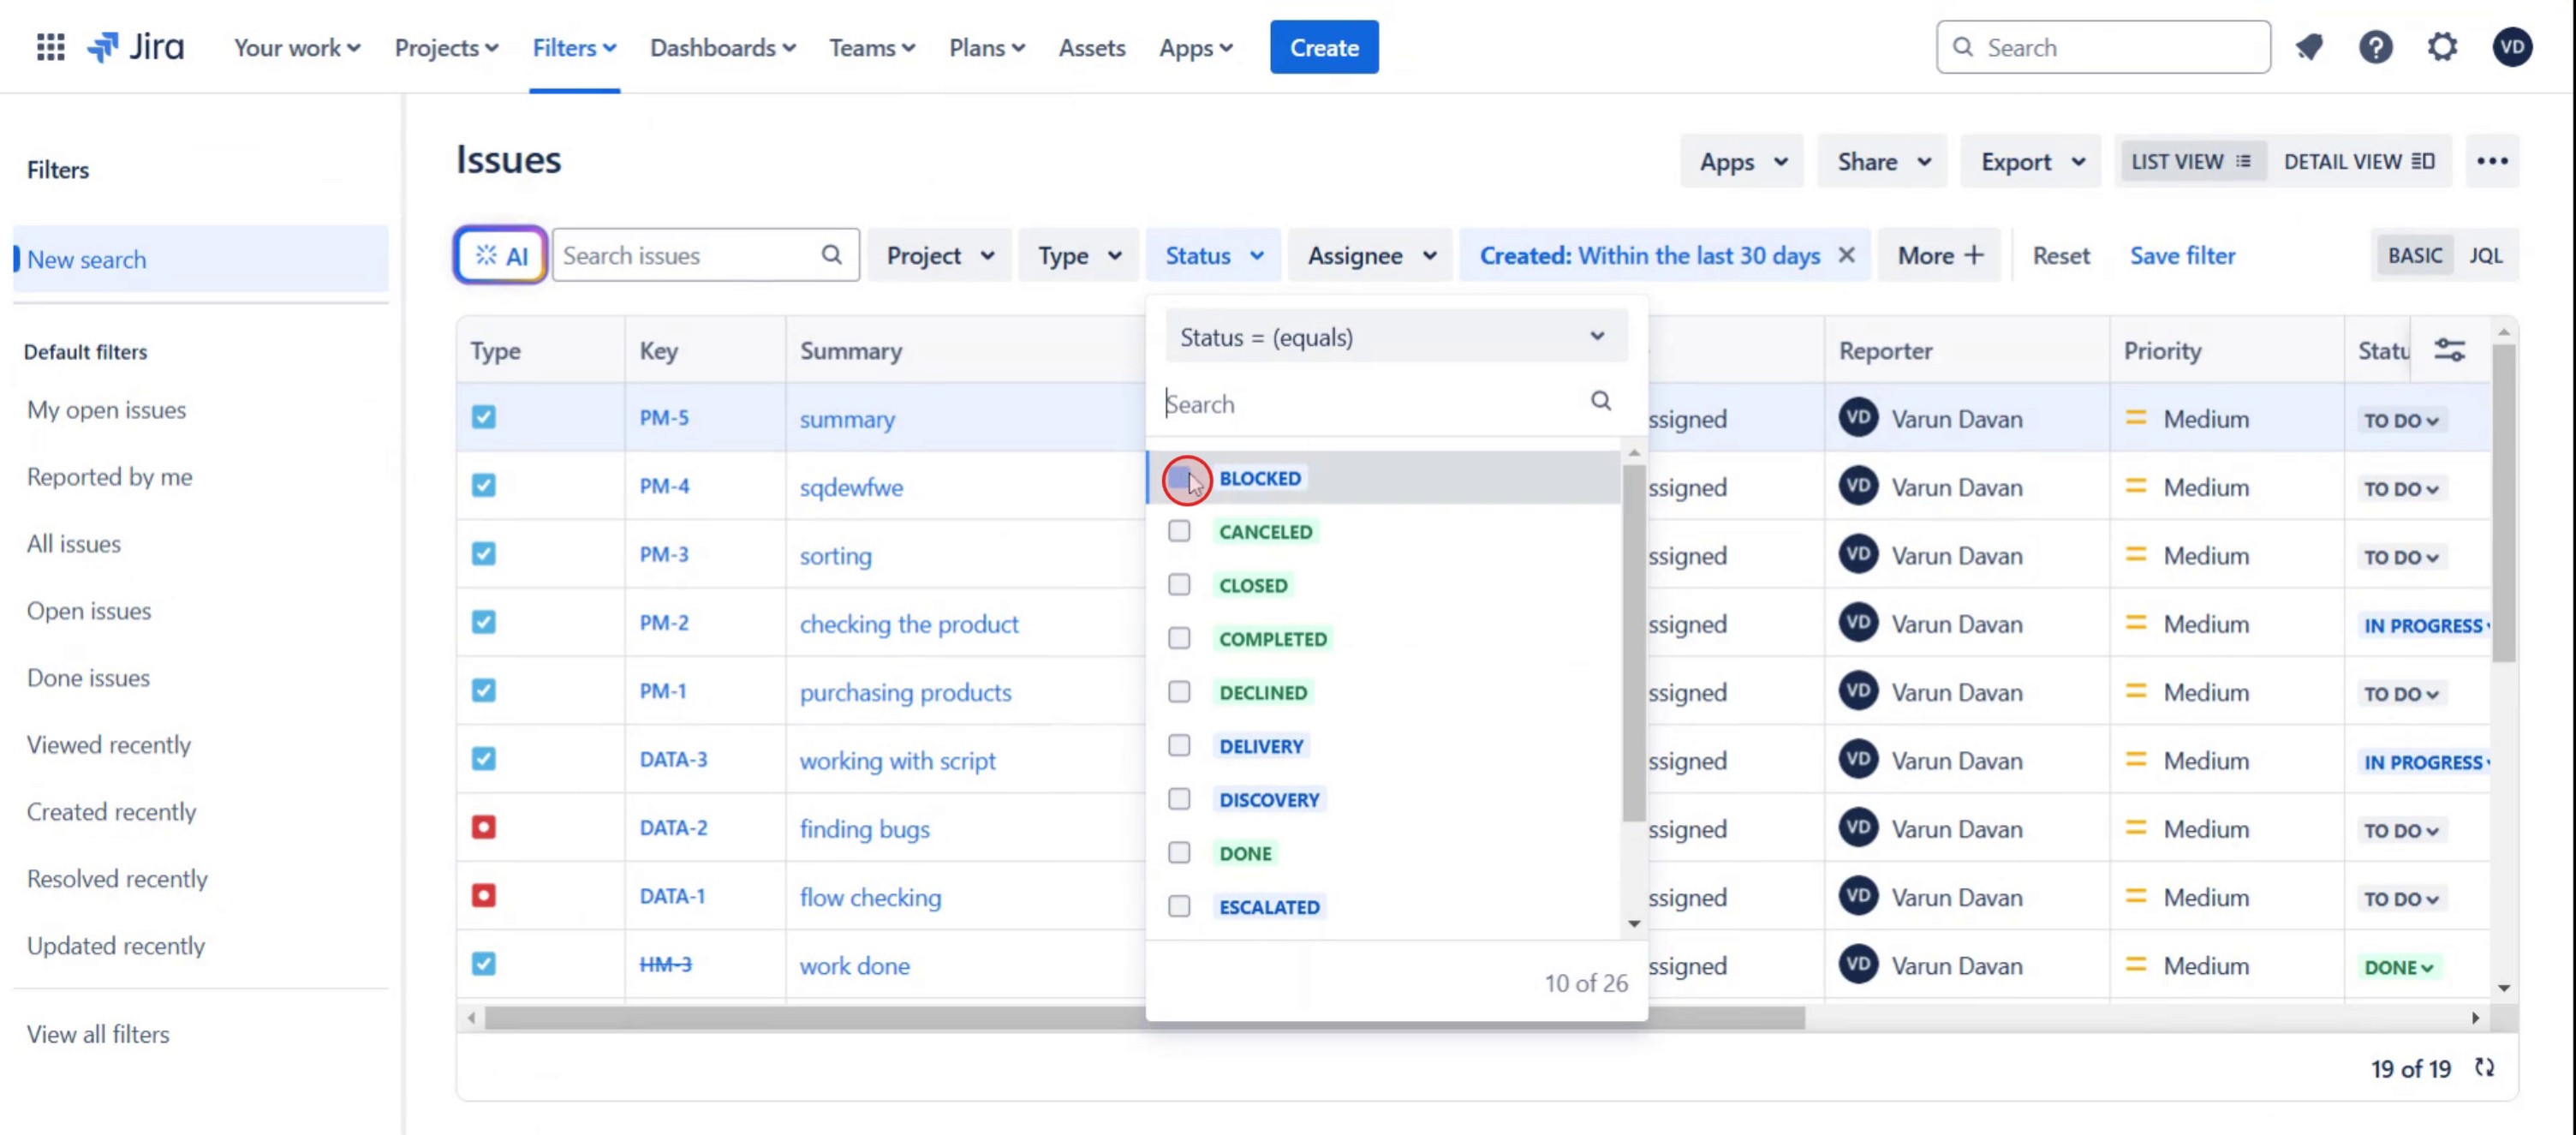
الخطوة 3
ثم انقر على Status،
الخطوة 4
اختر blocked.
الخطوة 5
انقر على المشاريع،
الخطوة 6
ثم اختر المشروع المحدد.

الخطوة 7
ثم انقر على التصدير،

الخطوة 8
ثم اختر نوع ملف التصدير.

نصائح احترافية لتصدير قائمة الأعمال المتراكمة من Jira إلى Excel
استخدم ميزة التصدير المدمجة في Jira – يتيح لك Jira تصدير عناصر الأعمال المتراكمة مباشرةً عبر مستعرض التذاكر. اختر Excel CSV لتصدير البيانات بشكل منظم.
طبّق عوامل التصفية قبل التصدير – استخدم JQL (لغة استعلام Jira) لتصفية عناصر الأعمال المتراكمة المحددة قبل التصدير للحصول على البيانات ذات الصلة فقط.
تحقق من تعيين الحقول – تأكد من تضمين الحقول الأساسية مثل مفتاح التذكرة، والملخص، والحالة، والمكلّف، وتاريخ الاستحقاق في التصدير لتحليل أفضل للبيانات.
المشكلات الشائعة وكيف تتجنبها
قيود التصدير – قد يحد Jira من عدد التذاكر التي يتم تصديرها في كل مرة. إذا كانت لديك قائمة أعمال متراكمة كبيرة، فقسّمها إلى عمليات تصدير أصغر باستخدام عوامل التصفية.
تنسيق البيانات غير الصحيح – أحيانًا قد تتغير تنسيقات التاريخ والأرقام عند التصدير. تحقق من إعدادات التنسيق في Excel بعد التصدير.
الحقول المفقودة – إذا كانت بعض الحقول المهمة غير موجودة، فخصّص أعمدة التصدير في مستعرض التذاكر قبل التصدير.
الأسئلة الشائعة الشائعة حول تصدير الأعمال المتراكمة من Jira إلى Excel
هل يمكنني أتمتة عمليات تصدير أعمال Jira المتراكمة إلى Excel؟
نعم، يمكنك استخدام أدوات أتمتة Jira أو الإضافات الخارجية أو نصوص API البرمجية لجدولة عمليات تصدير تلقائية لبيانات الأعمال المتراكمة إلى Excel.لماذا لا تظهر بعض الحقول في ملف Excel الذي تم تصديره؟
يُصدّر Jira فقط الحقول الظاهرة في نتائج البحث الخاصة بالمشكلات. خصّص عرض الأعمدة في Jira قبل التصدير لتضمين جميع الحقول المطلوبة.ما هو أفضل تنسيق لتصدير بيانات الأعمال المتراكمة لأغراض التقارير؟
يُعدّ تنسيق CSV (القيم المفصولة بفواصل) الخيار الأفضل للتوافق مع Excel، لأنه يحتفظ بجميع تفاصيل المشكلات ويسمح بإجراء تحليل إضافي.كيفية تسجيل الشاشة على جهاز Mac?
لـتسجيل الشاشة على جهاز Mac، يمكنك استخدام Trupeer AI. يتيح لك التقاط الشاشة بالكامل ويوفر إمكانات الذكاء الاصطناعي مثل إضافة صور رمزية بالذكاء الاصطناعي، وإضافة التعليق الصوتي، والتكبير والتصغير في الفيديو. مع ميزة ترجمة الفيديو بالذكاء الاصطناعي من Trupeer، يمكنك ترجمة الفيديو إلى أكثر من 30 لغة.كيفية إضافة صورة رمزية بالذكاء الاصطناعي إلى تسجيل الشاشة؟
لإضافة صورة رمزية بالذكاء الاصطناعي إلى تسجيل الشاشة، ستحتاج إلى استخدام أداة تسجيل شاشة بالذكاء الاصطناعي. Trupeer AI هي أداة تسجيل شاشة بالذكاء الاصطناعي، وتساعدك على إنشاء مقاطع فيديو باستخدام صور رمزية متعددة، كما تساعدك في إنشاء صورتك الرمزية الخاصة للفيديو.كيفية تسجيل الشاشة على Windows؟
لتسجيل الشاشة على Windows، يمكنك استخدام Game Bar المدمج (Windows + G) أو أداة ذكاء اصطناعي متقدمة مثل Trupeer AI للحصول على ميزات أكثر تقدّمًا مثل الصور الرمزية بالذكاء الاصطناعي، والتعليق الصوتي، والترجمة، إلخ.كيفية إضافة تعليق صوتي إلى الفيديو؟
لإضافة تعليق صوتي إلى مقاطع الفيديو، حمّل إضافة كروم الخاصة بـ trupeer ai. بعد التسجيل، ارفع الفيديو الخاص بك مع الصوت، واختر التعليق الصوتي المطلوب من trupeer ثم صدّر الفيديو المعدّل.كيف يمكنني التكبير في تسجيل الشاشة؟
للتكبير أثناء تسجيل الشاشة، استخدم تأثيرات التكبير في Trupeer AI التي تتيح لك التكبير والتصغير في لحظات محددة، مما يعزز التأثير البصري لمحتوى الفيديو الخاص بك.
يسأل الناس أيضًا
دروس ذات صلة

