
كيفية تغيير اتجاه الصفحة في كانفا – من عمودي إلى أفقي بسهولة
هل تريد التبديل من الوضع العمودي إلى الأفقي في Canva؟ تعلّم كيفية تغيير اتجاه الصفحة باستخدام أداة تغيير الحجم من Canva أو الأبعاد المخصّصة.
توضح هذه الوثيقة الخطوات اللازمة لتغيير اتجاه الصفحة في Canva، مما يمكّن المستخدمين من تخصيص عرض وارتفاع تصميمهم للحصول على نتيجة مخصصة.
اتباع هذه الخطوات سيسهّل الانتقال بسلاسة خلال عملية تغيير الحجم، وفي النهاية سيجهّز تصميمك للمشاركة.
سواء كنت تنتقل من الوضع الطولي إلى الوضع الأفقي أو العكس، فإن Canva تجعل الأمر بسيطًا، خاصةً إذا كنت تستخدم خطة Pro، Teams، Education، أو Nonprofits.
لمستخدمي Canva Pro وغيرهم من المستخدمين المميزين
افتح تصميمك
شغّل المشروع الذي تريد تغيير اتجاهه.انقر على “Resize & Magic Switch”
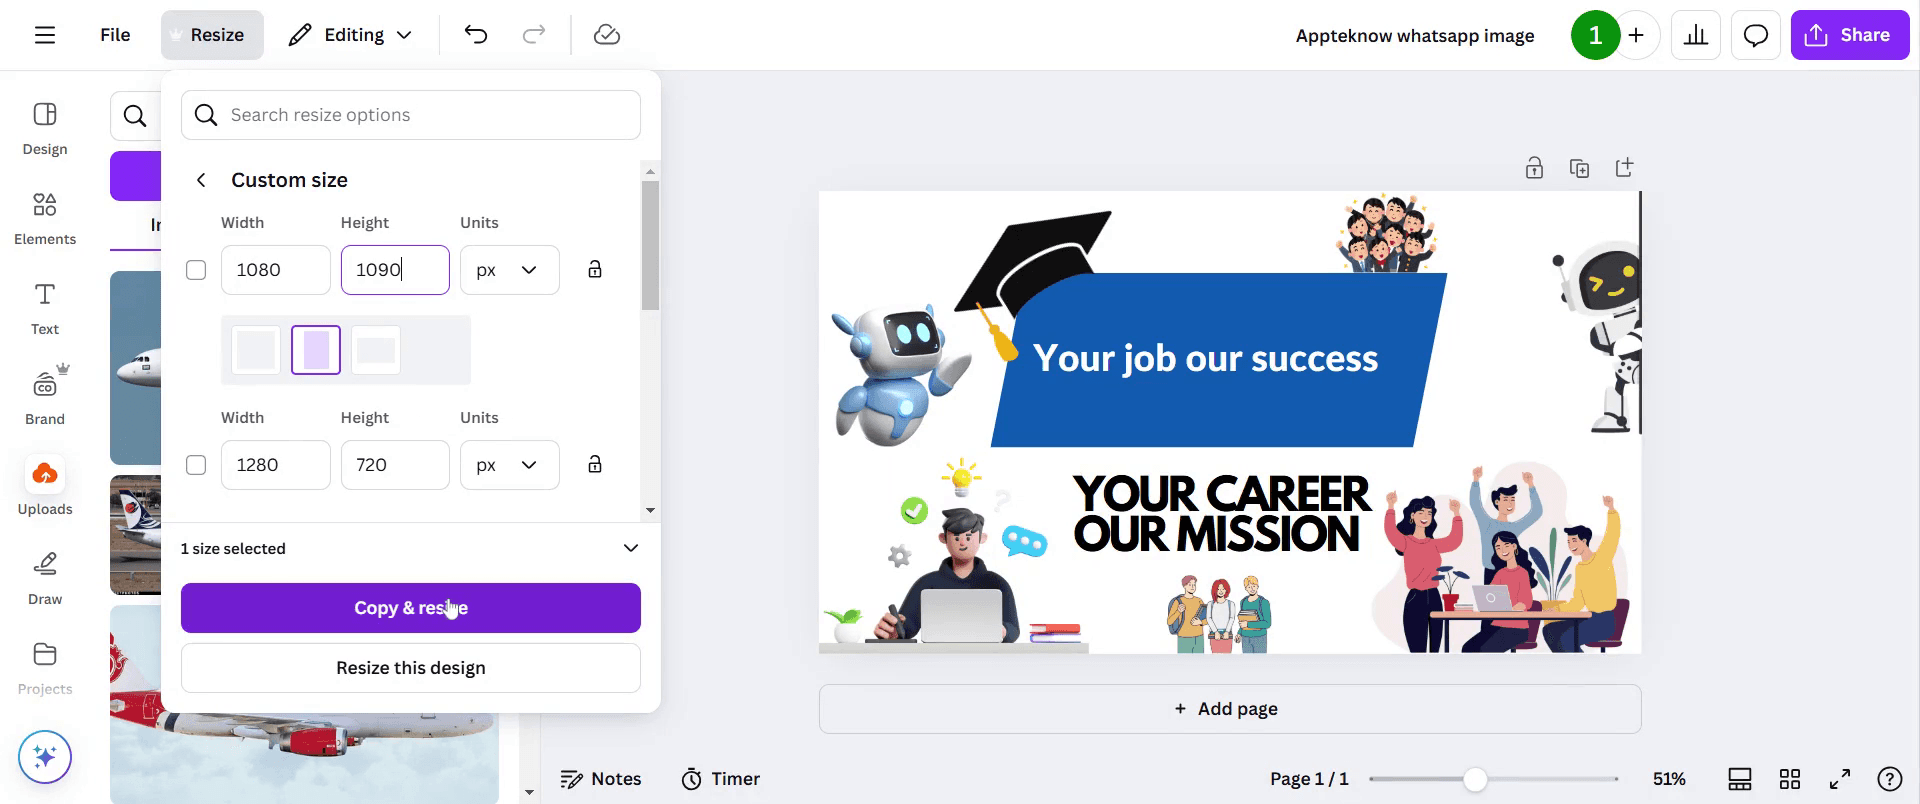
توجد في شريط الأدوات العلوي. تتيح هذه الميزة تغيير الحجم والتنسيق بشكل ديناميكي.اختر “الحجم المخصص”
أدخل الأبعاد الجديدة يدويًا. للتبديل من الوضع الطولي إلى الوضع الأفقي، بدّل قيم العرض والارتفاع (مثلًا من 800×1200 إلى 1200×800).اختر أحد الخيارين التاليين:
“Resize” لتغيير الملف الحالي
“Copy & Resize” للاحتفاظ بالملف الأصلي وإنشاء نسخة جديدة
لمستخدمي Canva المجانيين
أنشئ تصميمًا جديدًا بحجم مخصص
في الصفحة الرئيسية لـ Canva، انقر على “الحجم المخصص”، وأدخل العرض والارتفاع اللذين تريدهما.أعد إنشاء تصميمك يدويًا
ستحتاج إلى نسخ العناصر ولصقها يدويًا أو البدء من جديد باستخدام الاتجاه الجديد.
أمور يجب وضعها في الاعتبار
تغيّر تخطيط العناصر: قد يؤدي تبديل الاتجاه إلى إرباك التباعد والمحاذاة. اضبط العناصر لتناسب التنسيق الجديد.
التراجع عبر سجل الإصدارات: إذا أجريت تغييرًا ندمت عليه، فانتقل إلى ملف > سجل الإصدارات للعودة إلى إصدار سابق.
دليل خطوة بخطوة: كيفية تغيير اتجاه الصفحة في Canva
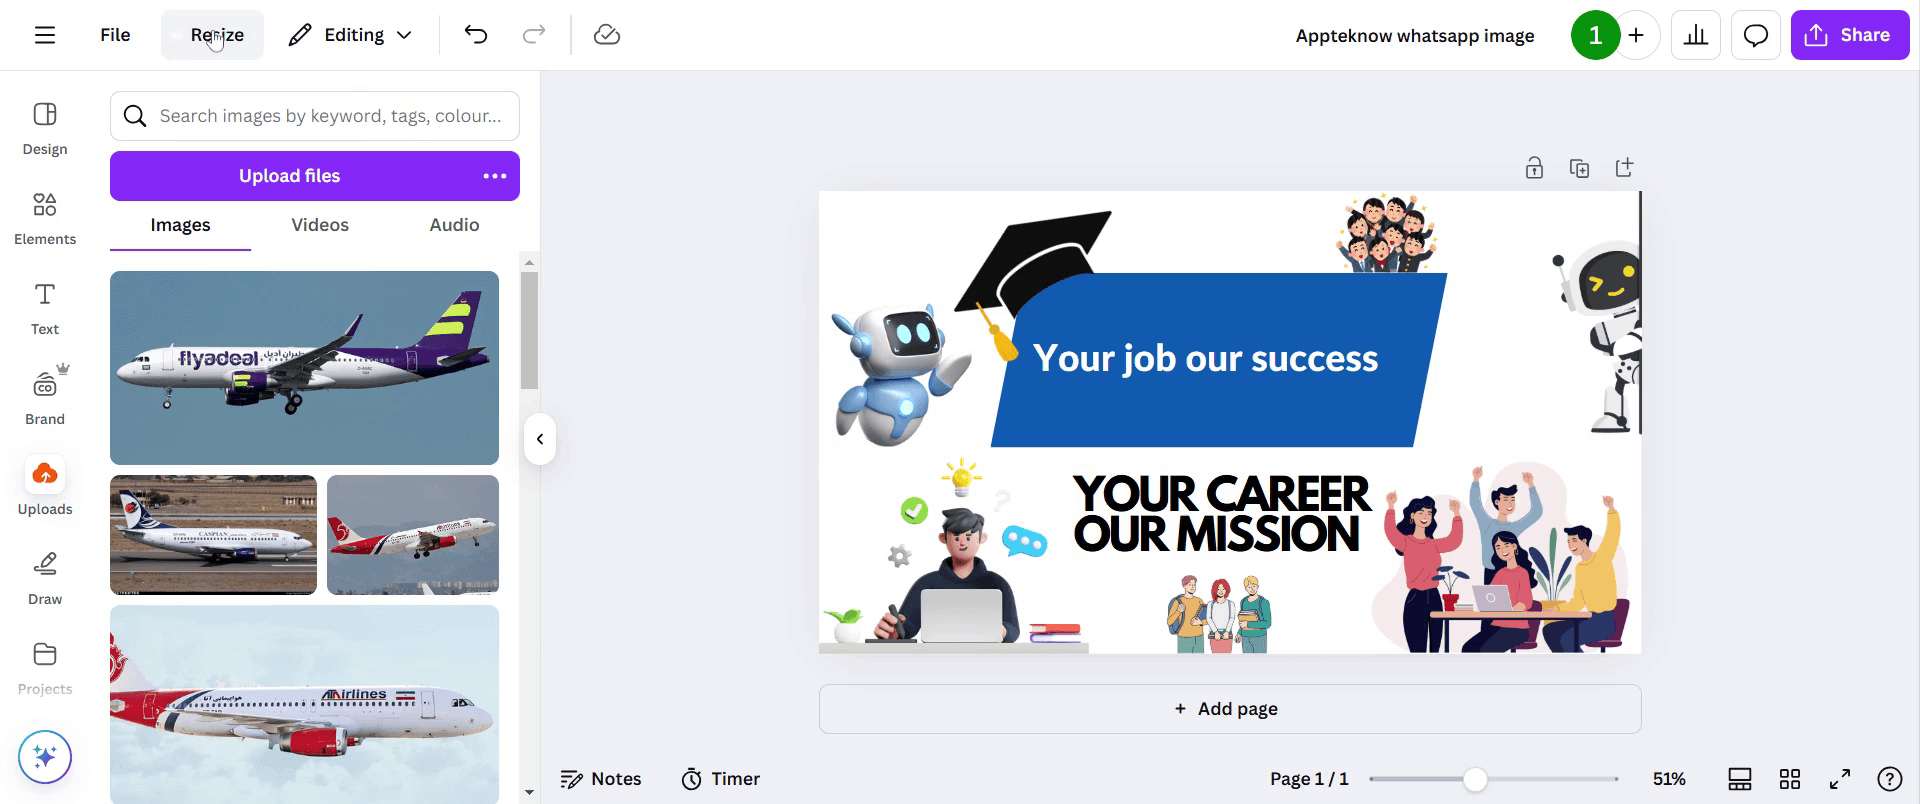
الخطوة 1
افتح تصميمك وانقر على خيار "تغيير الحجم".
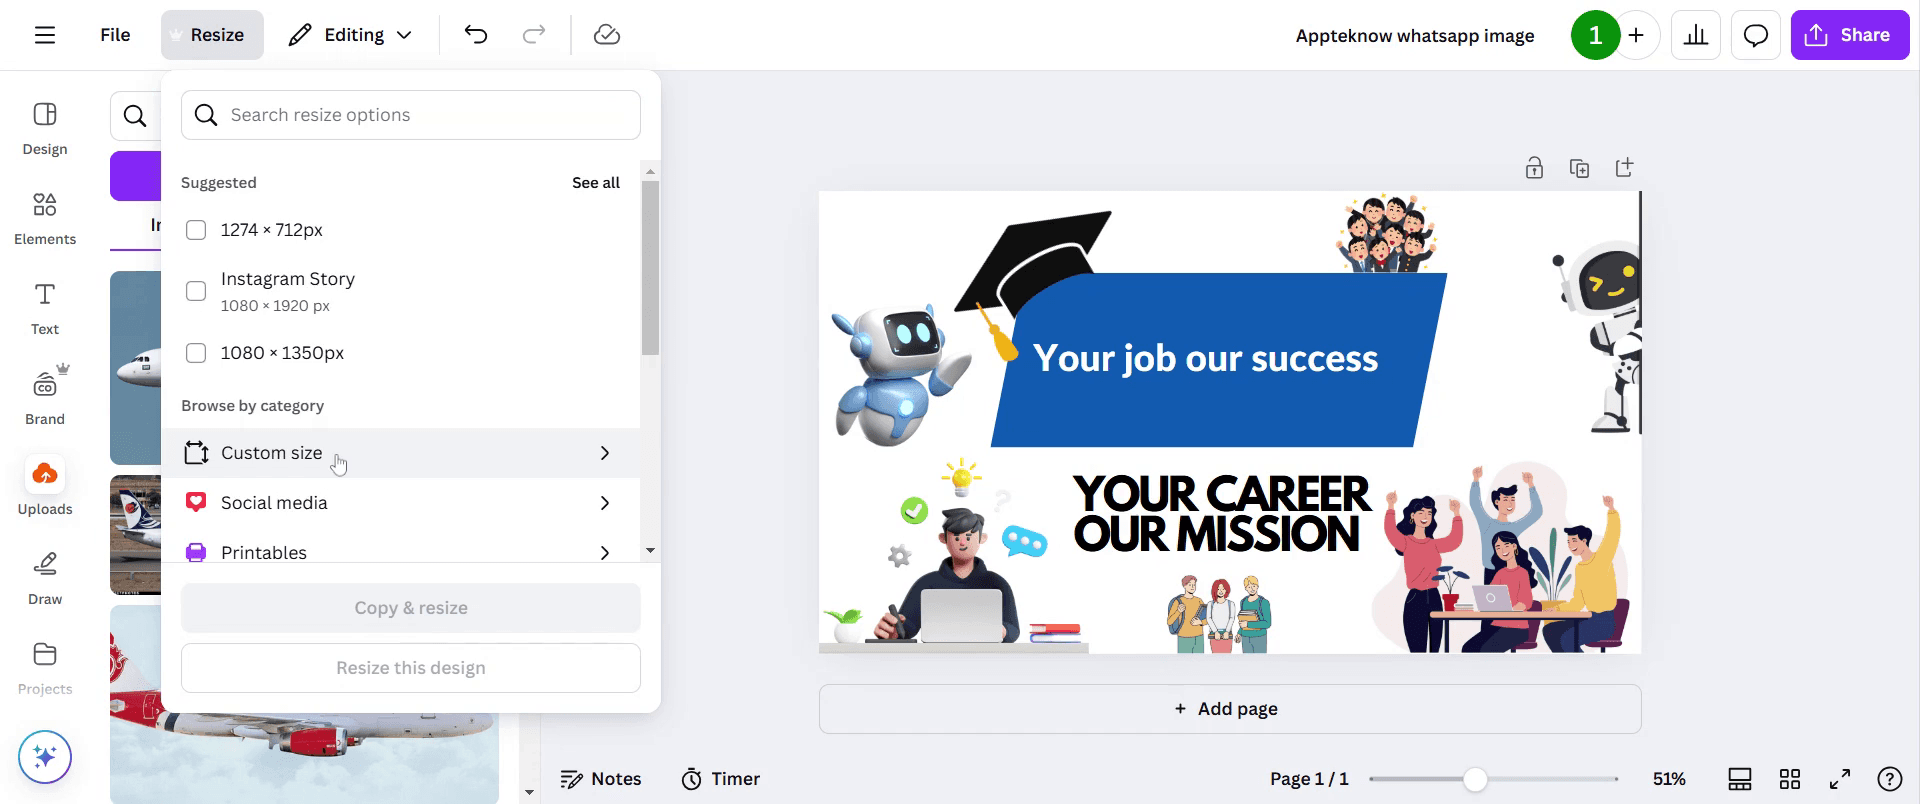
الخطوة 2
بعد ذلك، ابحث عن خيار "الحجم المخصص" وانقر عليه.
الخطوة 3
اضبط العرض والارتفاع على المقاسات التي تريدها.
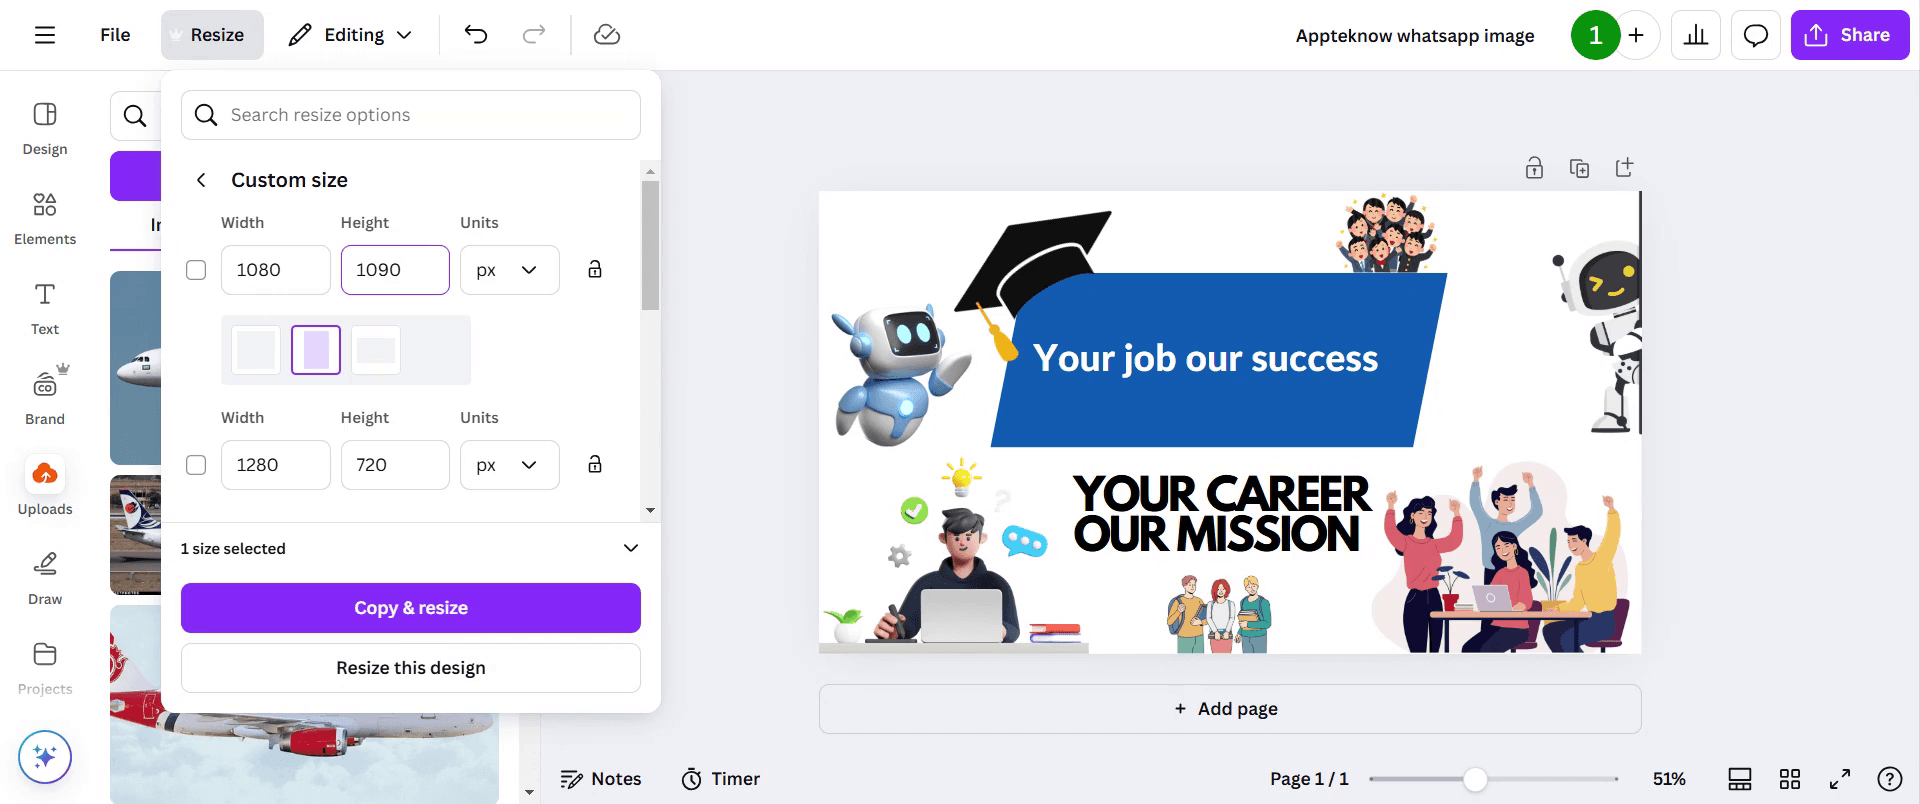
الخطوة 4
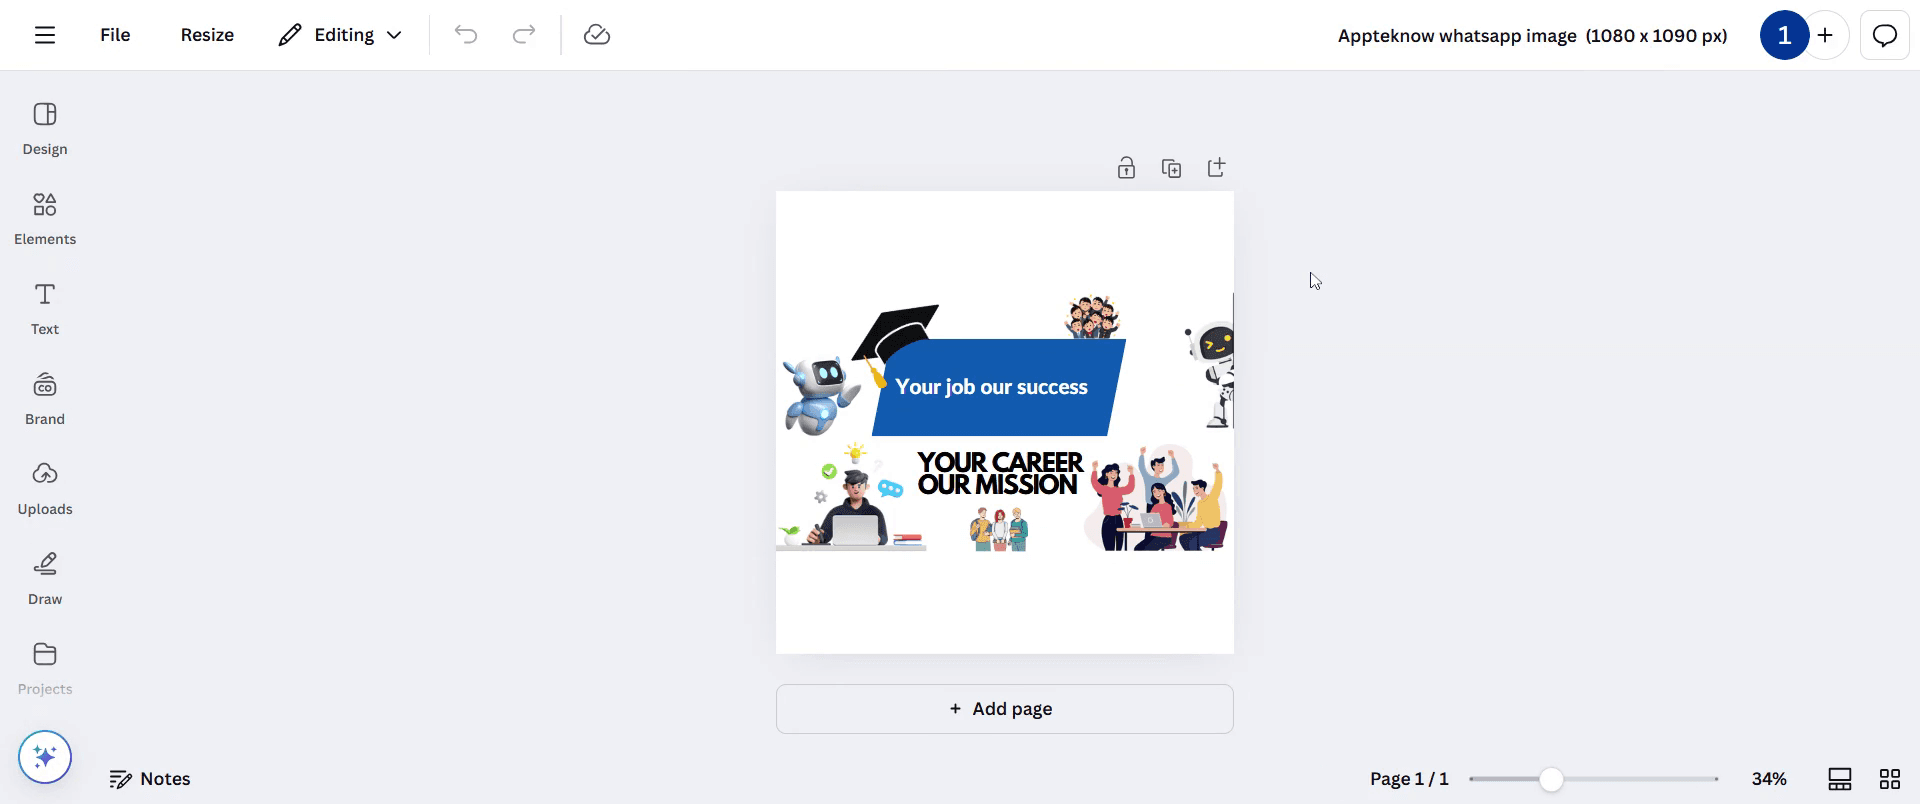
انقر على "نسخ وتغيير الحجم." اترك بعض الوقت حتى تكتمل العملية أثناء التحميل.
الخطوة 5
تصميمك الآن جاهز للمشاركة.
نصائح احترافية لتغيير اتجاه الصفحة في كانفا
افتح تصميمك، وانقر على «تغيير الحجم»، ثم عدّل الأبعاد للتبديل بين الوضعين الطولي والعرضي.
استخدم الأبعاد المخصصة لتعيين عرض وارتفاع دقيقين لتصميمك.
تأكد من محاذاة جميع العناصر بشكل صحيح بعد تغيير الاتجاه للحفاظ على مظهر احترافي.
الأخطاء الشائعة وكيفية تجنبها أثناء تغيير اتجاه الصفحة في كانفا
فقدان تنسيق التصميم؛ بعد تغيير الحجم، أعد ترتيب العناصر لتناسب الاتجاه الجديد بشكل صحيح.
عدم استخدام ميزة Pro؛ خيار تغيير الحجم متاح فقط لمستخدمي Canva Pro، لذا فكّر في الترقية إذا لزم الأمر.
الصور المشوّهة؛ تأكد من تحجيم الصور بشكل صحيح لمنع التمدد أو التكسّر عند تغيير الأبعاد.
الأسئلة الشائعة حول تغيير اتجاه الصفحة في Canva
كيف أبدّل بين الوضع العمودي والأفقي في Canva؟
استخدم خيار Resize في Canva Pro أو اضبط الأبعاد المخصصة لتصميمك يدويًا.هل يمكنني تغيير اتجاه الصفحة مجانًا في Canva؟
أداة Resize هي ميزة في Pro، لكن يمكن للمستخدمين المجانيين إنشاء تصميم جديد بالأبعاد المطلوبة ونسخ العناصر إليه.هل ستتكيّف عناصر التصميم تلقائيًا بعد تغيير الاتجاه؟
قد تتحرك بعض العناصر، لذلك يُنصح بإجراء تعديلات يدوية للحفاظ على المحاذاة الصحيحة.هل يمكنني تغيير اتجاه صفحة واحدة فقط في تصميم متعدد الصفحات؟
لا، يطبّق Canva إعدادات الاتجاه على التصميم بالكامل. قد تحتاج إلى إنشاء ملفات منفصلة للاتجاهات المختلفة.كيف أضمن دقة عالية بعد تغيير الحجم؟
استخدم صورًا عالية الدقة وتجنب التحجيم المفرط للحفاظ على الوضوح.هل يمكنني تعيين أبعاد مخصصة بدلًا من استخدام الاتجاهات المحددة مسبقًا؟
نعم، انتقل إلى الأبعاد المخصصة وأدخل العرض والارتفاع يدويًا للحصول على تحكم كامل في حجم الصفحة.كيف أسجّل الشاشة على ماك؟
لـ تسجيل الشاشة على جهاز Mac، يمكنك استخدام Trupeer AI. يتيح لك التقاط الشاشة بالكامل ويوفر إمكانات ذكاء اصطناعي مثل إضافة صور رمزية بالذكاء الاصطناعي، وإضافة تعليق صوتي، والتكبير والتصغير في الفيديو. مع ميزة ترجمة الفيديو بالذكاء الاصطناعي من trupeer، يمكنك ترجمة الفيديو إلى أكثر من 30 لغة.كيف أضيف صورة رمزية بالذكاء الاصطناعي إلى تسجيل الشاشة؟
لإضافة صورة رمزية بالذكاء الاصطناعي إلى تسجيل شاشة، ستحتاج إلى استخدام أداة تسجيل شاشة بالذكاء الاصطناعي. Trupeer AI هي أداة تسجيل شاشة بالذكاء الاصطناعي، تساعدك في إنشاء مقاطع فيديو بعدة صور رمزية، كما تساعدك في إنشاء صورتك الرمزية الخاصة للفيديو.كيف أسجّل الشاشة على ويندوز؟
لتسجيل الشاشة على Windows، يمكنك استخدام Game Bar المدمج (Windows + G) أو أداة ذكاء اصطناعي متقدمة مثل Trupeer AI للحصول على ميزات أكثر تقدمًا مثل الصور الرمزية بالذكاء الاصطناعي، والتعليق الصوتي، والترجمة، وغيرها.كيف أضيف تعليقًا صوتيًا إلى الفيديو؟
لإضافة تعليق صوتي إلى مقاطع الفيديو، حمّل إضافة trupeer ai على Chrome. بعد التسجيل، ارفع الفيديو الخاص بك مع الصوت، واختر التعليق الصوتي المطلوب من trupeer، ثم صدّر الفيديو المعدّل.كيف أقرّب في تسجيل الشاشة؟
للتكبير أثناء تسجيل الشاشة، استخدم تأثيرات التكبير في Trupeer AI التي تتيح لك التكبير والتصغير في لحظات محددة، مما يعزز التأثير البصري لمحتوى الفيديو الخاص بك.
قراءات مقترحة
كيفية إنشاء دفتر يوميات في Canva
كيفية الطباعة على الوجهين في Canva
دروس ذات صلة

