

كيفية تغيير نوع التذكرة في Jira – خطوات سريعة وسهلة
تعرّف على كيفية تغيير نوع المشكلة في Jira باستخدام خيار النقل للتبديل بين المهام أو الأخطاء أو القصص مع الاحتفاظ بالحقول وبيانات سير العمل كما هي. اتبع هذا الدليل السريع مع Trupeer.
توفّر هذه الوثيقة عمليةً خطوة بخطوة لتغيير نوع الطلب في Jira، مما يضمن سير عمل سلسًا للمستخدمين. اتبع هذه التعليمات بعناية لتحديث نوع الطلب دون أي عناء.
يمكنك تغيير نوع الطلب بطريقتين: باستخدام ميزة "Move" (الطريقة الأكثر موثوقية) أو، في بعض حالات Jira، مباشرةً عبر أيقونة نوع الطلب (إذا كانت مفعّلة).
الطريقة 1: استخدام خيار النقل
افتح الطلب
انتقل إلى الطلب الذي تريد تعديله.انقر على المزيد (•••) > نقل
يفتح هذا معالج النقل حيث يمكنك تغيير نوع الطلب والمشروع وخصائص أخرى.اختر نوع الطلب الجديد
اختر نوع الطلب المطلوب (على سبيل المثال، من "خطأ" إلى "مهمة").قم بربط الحقول
سيطلب منك Jira مطابقة الحقول المطلوبة من النوع الحالي إلى النوع الجديد. املأ أي معلومات ناقصة.راجع وأكِّد
تحقق من التغييرات ثم انقر على "تأكيد" لتطبيقها.
الطريقة 2: التغيير من أيقونة نوع الطلب (إذا كانت متاحة)
افتح الطلب
انتقل إلى عرض تفاصيل الطلب.انقر على أيقونة نوع الطلب
الموجودة بالقرب من ملخص الطلب أو مفتاحه.اختر نوع الطلب الجديد
اختر نوعًا جديدًا من القائمة المنسدلة. قد يعيد Jira التحميل أو يطلب التأكيد.
دليل خطوة بخطوة: كيفية تغيير نوع الطلب في Jira
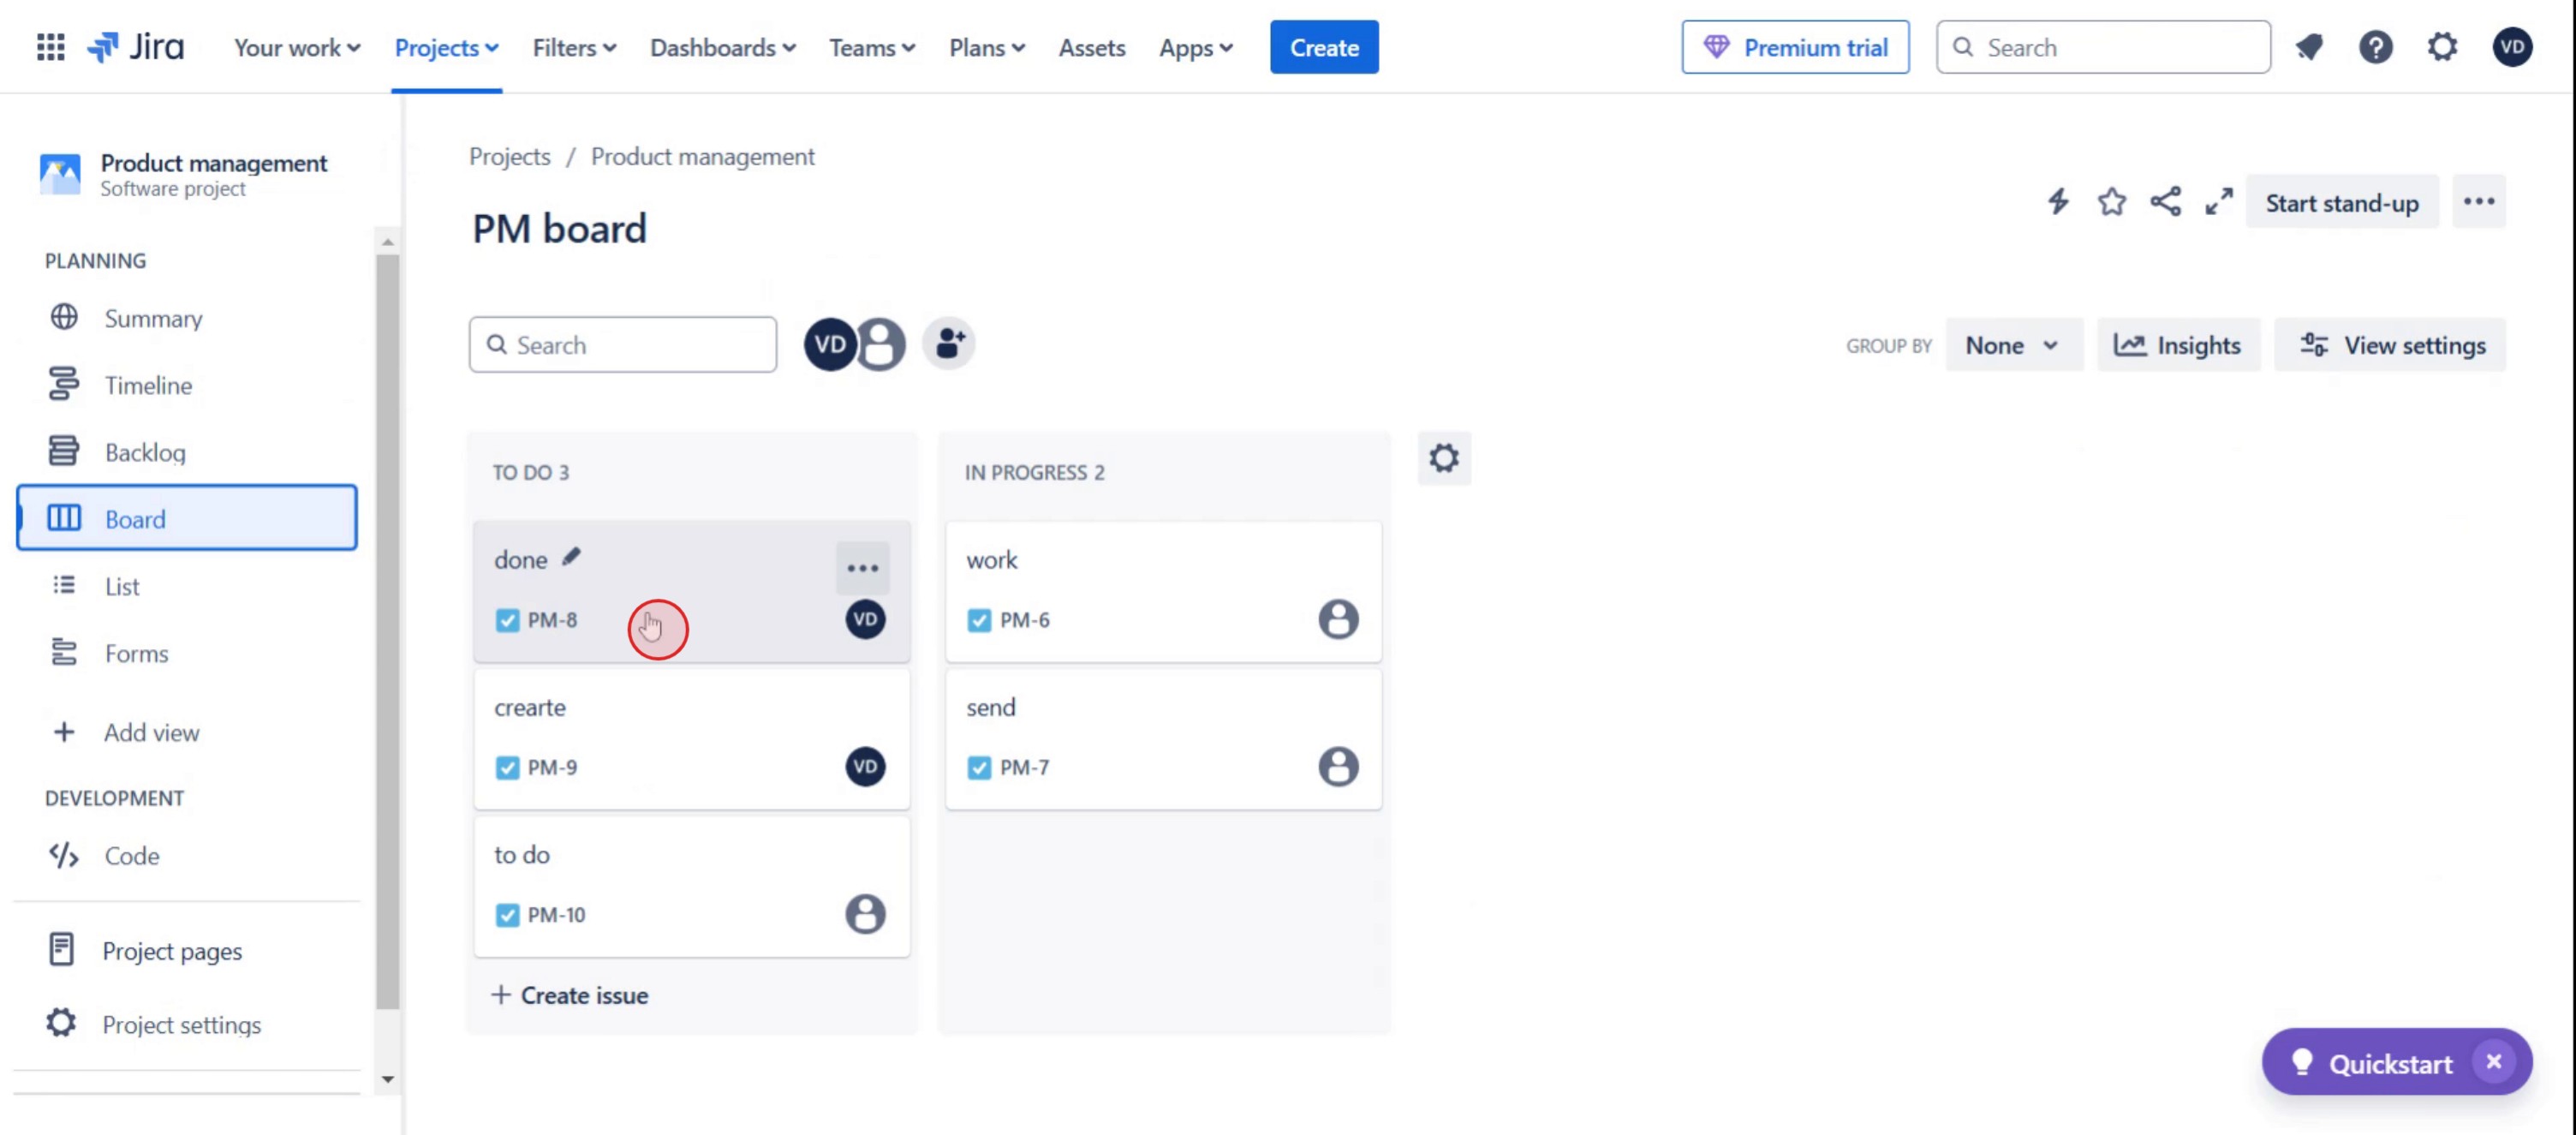
الخطوة 1
انقر على خيار اللوحة.

الخطوة 2
ثم اختر تذكرة Jira المحددة.
الخطوة 3
انقر على المزيد من الخيارات.

الخطوة 4
انقر على نقل.

الخطوة 5
اختر المشروع المحدد.

الخطوة 6
اختر المهمة المناسبة،

الخطوة 7
ثم انقر على التالي،

الخطوة 8
اختر الحالة المستهدفة المطلوبة.

الخطوة 9
ثم انقر على التالي،

الخطوة 10
انقر على مربع الاختيار.

الخطوة 11
ثم تابع بالنقر على التالي.

الخطوة 12
ثم انقر على تأكيد.

نصائح احترافية حول كيفية تغيير نوع المشكلة في Jira
تأكد من أن نوع المشكلة المستهدف متاح في مخطط أنواع المشكلات الخاص بالمشروع قبل محاولة تغييره.
استخدم خيار النقل في Jira لتغيير نوع المشكلة مع الحفاظ على جميع التفاصيل الرئيسية مثل المرفقات والتعليقات.
إذا كان نوع المشكلة يتطلب حقولًا مختلفة، فقم بمواءمتها بشكل صحيح أثناء الانتقال لتجنب فقدان البيانات.
المزالق الشائعة وكيفية تجنبها
قد يؤدي تغيير نوع المشكلة دون التحقق من الحقول المطلوبة إلى فقدان معلومات؛ راجع دائمًا تعيينات الحقول قبل التأكيد.
استخدام سير عمل لا يدعم نوع المشكلة الجديد يمكن أن يسبب أخطاء؛ تأكد من التوافق قبل إجراء التغييرات.
عدم توفر أذونات المشروع اللازمة قد يمنع التغييرات؛ تأكد من أن لديك أذونات نقل المشكلات في Jira.
الأسئلة الشائعة الشائعة حول كيفية تغيير نوع المشكلة في Jira
لماذا لا أستطيع تغيير نوع المشكلة في Jira؟
إذا لم تتمكن من تغيير نوع المشكلة، فتحقق من أذونات المشروع، وتأكد من أن نوع المشكلة جزء من مخطط المشروع، وتحقق من أن سير العمل يدعم النوع الجديد.هل سيؤدي تغيير نوع المشكلة إلى حذف أي بيانات؟
لا، ولكن إذا كان نوع المشكلة الجديد يحتوي على حقول مطلوبة مختلفة، فقد تحتاج إلى إعادة إدخال بعض المعلومات أو تعديلها يدويًا.هل يمكنني تغيير نوع المشكلة لعدة مشكلات دفعة واحدة؟
نعم، يمكنك استخدام ميزة التغيير الجماعي في Jira لتحديث نوع المشكلة لعدة مشكلات في الوقت نفسه.هل يؤثر تغيير نوع المشكلة على التقارير أو لوحات المعلومات؟
قد يؤثر ذلك، اعتمادًا على كيفية قيام التقارير ولوحات المعلومات بتصفية المشكلات. حدّث عوامل التصفية لديك إذا لزم الأمر بعد إجراء التغييرات.كيف أسجل الشاشة على Mac؟
لتسجيل الشاشة على جهاز Mac، يمكنك استخدام Trupeer AI. يتيح لك التقاط الشاشة بالكامل ويوفر إمكانات ذكاء اصطناعي مثل إضافة شخصيات رمزية بالذكاء الاصطناعي، وإضافة تعليق صوتي، وإضافة تكبير وتصغير في الفيديو. باستخدام ميزة ترجمة الفيديو بالذكاء الاصطناعي من trupeer، يمكنك ترجمة الفيديو إلى أكثر من 30 لغة.كيف أضيف صورة رمزية بالذكاء الاصطناعي إلى تسجيل الشاشة؟
لإضافة صورة رمزية بالذكاء الاصطناعي إلى تسجيل شاشة، ستحتاج إلى استخدام أداة تسجيل شاشة بالذكاء الاصطناعي. Trupeer AI هي أداة تسجيل شاشة بالذكاء الاصطناعي، تساعدك على إنشاء مقاطع فيديو بعدة شخصيات رمزية، كما تساعدك في إنشاء شخصيتك الرمزية الخاصة للفيديو.كيف أسجل الشاشة على Windows؟
لتسجيل الشاشة على Windows، يمكنك استخدام شريط الألعاب المدمج (Windows + G) أو أداة ذكاء اصطناعي متقدمة مثل Trupeer AI للحصول على ميزات أكثر تقدمًا مثل الشخصيات الرمزية بالذكاء الاصطناعي، والتعليق الصوتي، والترجمة، إلخ.كيف أضيف تعليقًا صوتيًا إلى الفيديو؟
لإضافة تعليق صوتي إلى مقاطع الفيديو، نزّل إضافة trupeer ai لمتصفح Chrome. بعد التسجيل، ارفع الفيديو الخاص بك مع الصوت، واختر التعليق الصوتي المطلوب من trupeer، ثم صدّر الفيديو المعدّل.كيف أقرّب الصورة في تسجيل الشاشة؟
لتكبير الصورة أثناء تسجيل الشاشة، استخدم تأثيرات التكبير في Trupeer AI التي تتيح لك التكبير والتصغير في لحظات محددة، مما يعزز التأثير البصري لمحتوى الفيديو الخاص بك.
يسأل الآخرون أيضًا
دروس ذات صلة

