
كيفية التمويه في كانفا
تعرّف على كيفية تمويه الصور أو الخلفيات أو عناصر محددة في كانفا. دليل خطوة بخطوة لاستخدام تأثير التمويه للحصول على تصاميم إبداعية واحترافية.
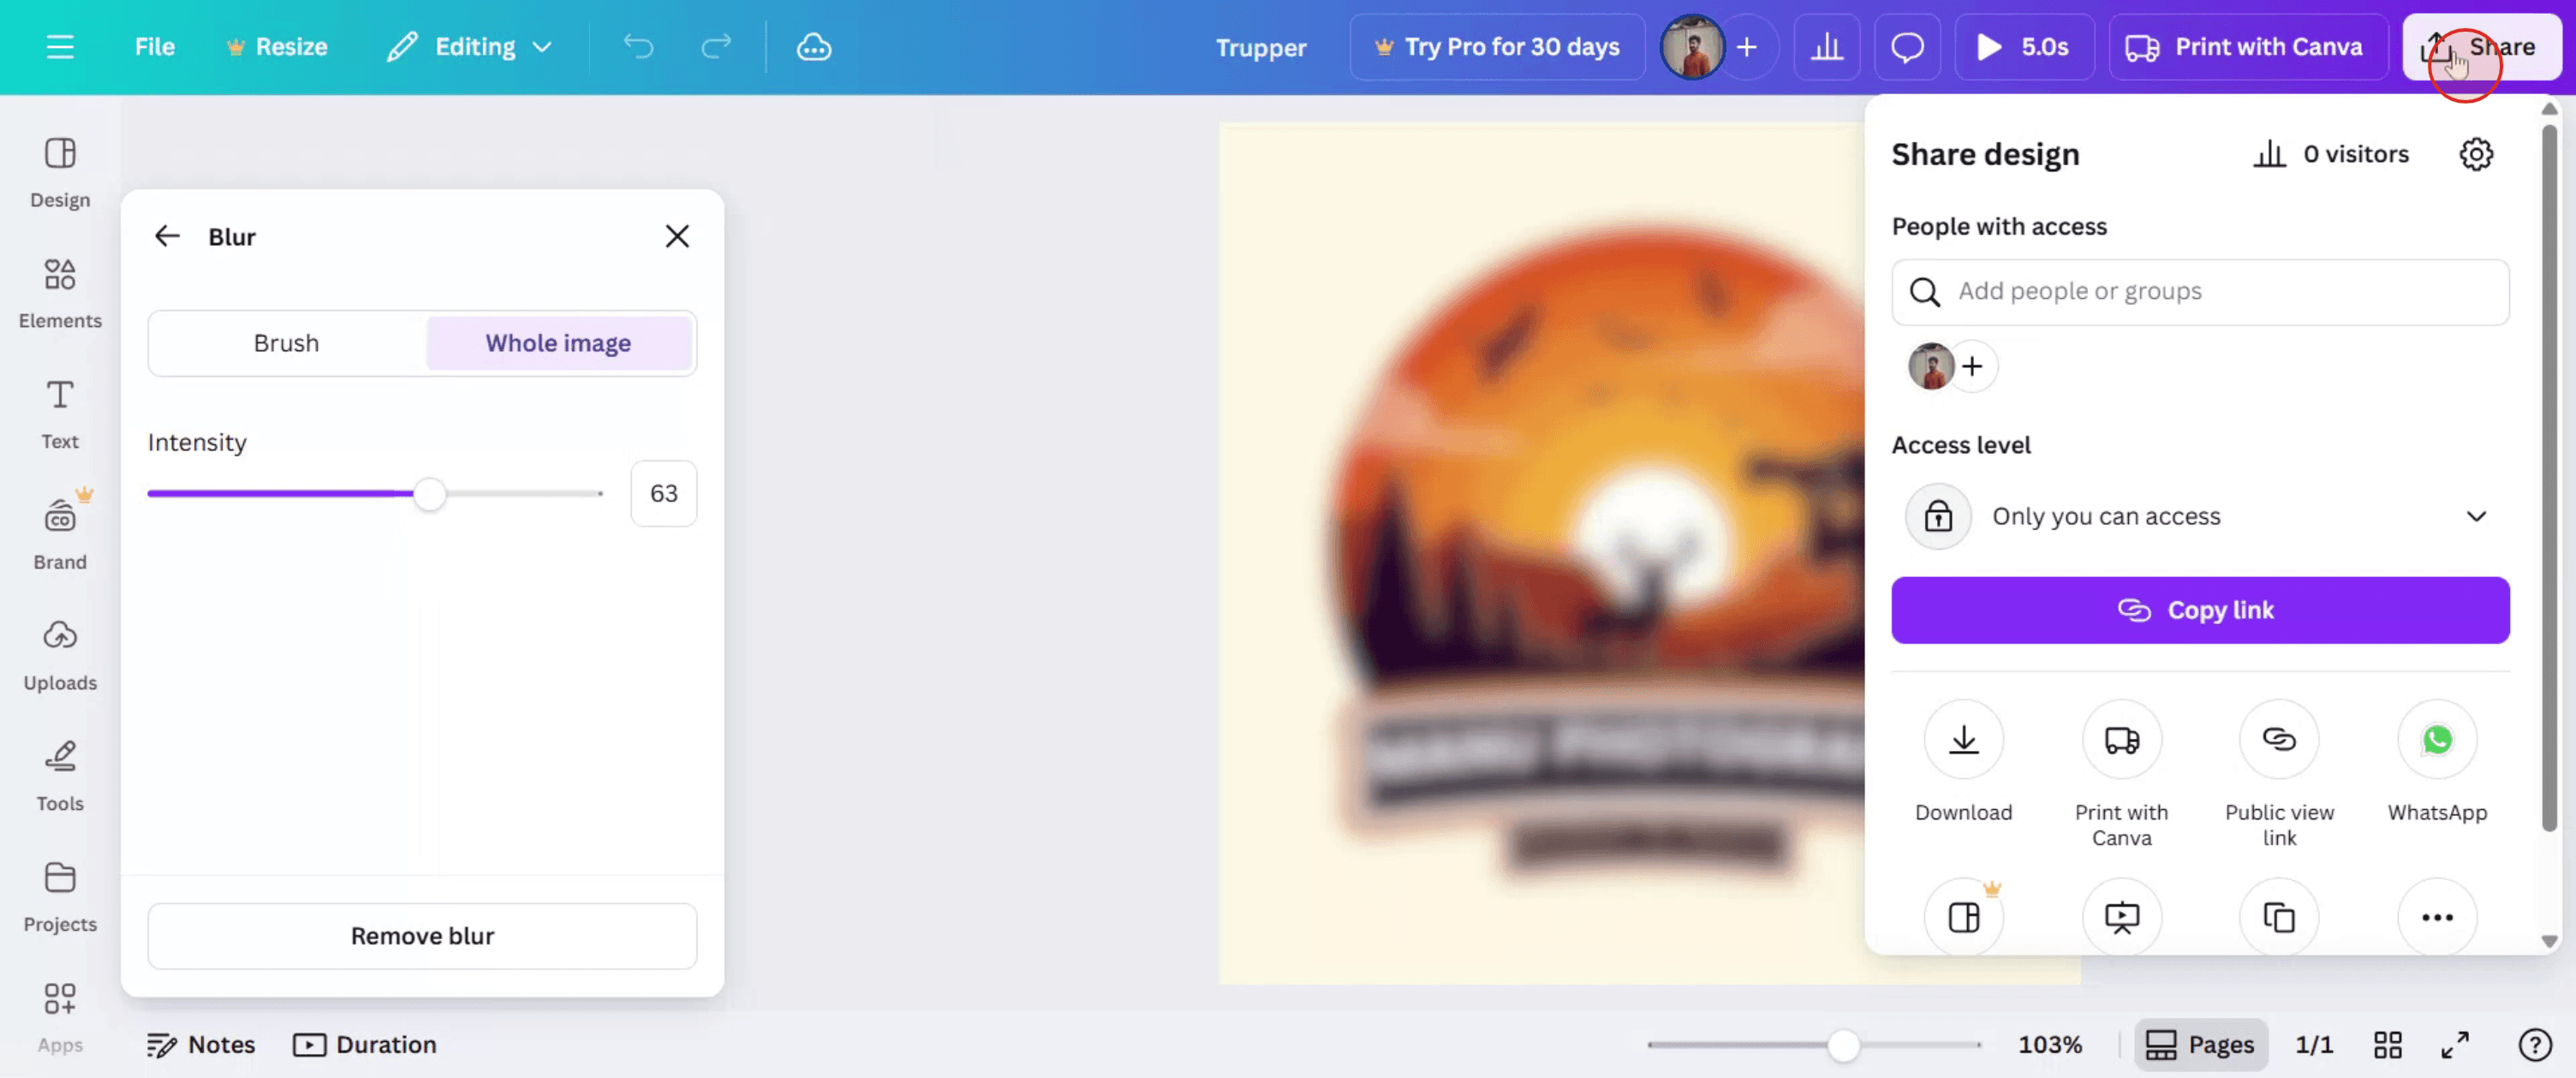
لطمس صورة في Canva، حدّد الصورة، ثم انقر على "تعديل الصورة"، ثم "تعديل"، واستخدم شريط تمرير الضبابية للتحكم في الشدة. وللطمس الانتقائي، استخدم أداة الفرشاة داخل تأثير الضبابية لاستهداف مناطق محددة. يمكنك أيضًا طمس خلفيات الفيديو باستخدام ميزتَي "تعديل الصورة" و"التركيز التلقائي" أو عن طريق ضبط الحدة في تبويب "تعديل".
إليك شرحًا أكثر تفصيلًا:
طمس صورة كاملة:
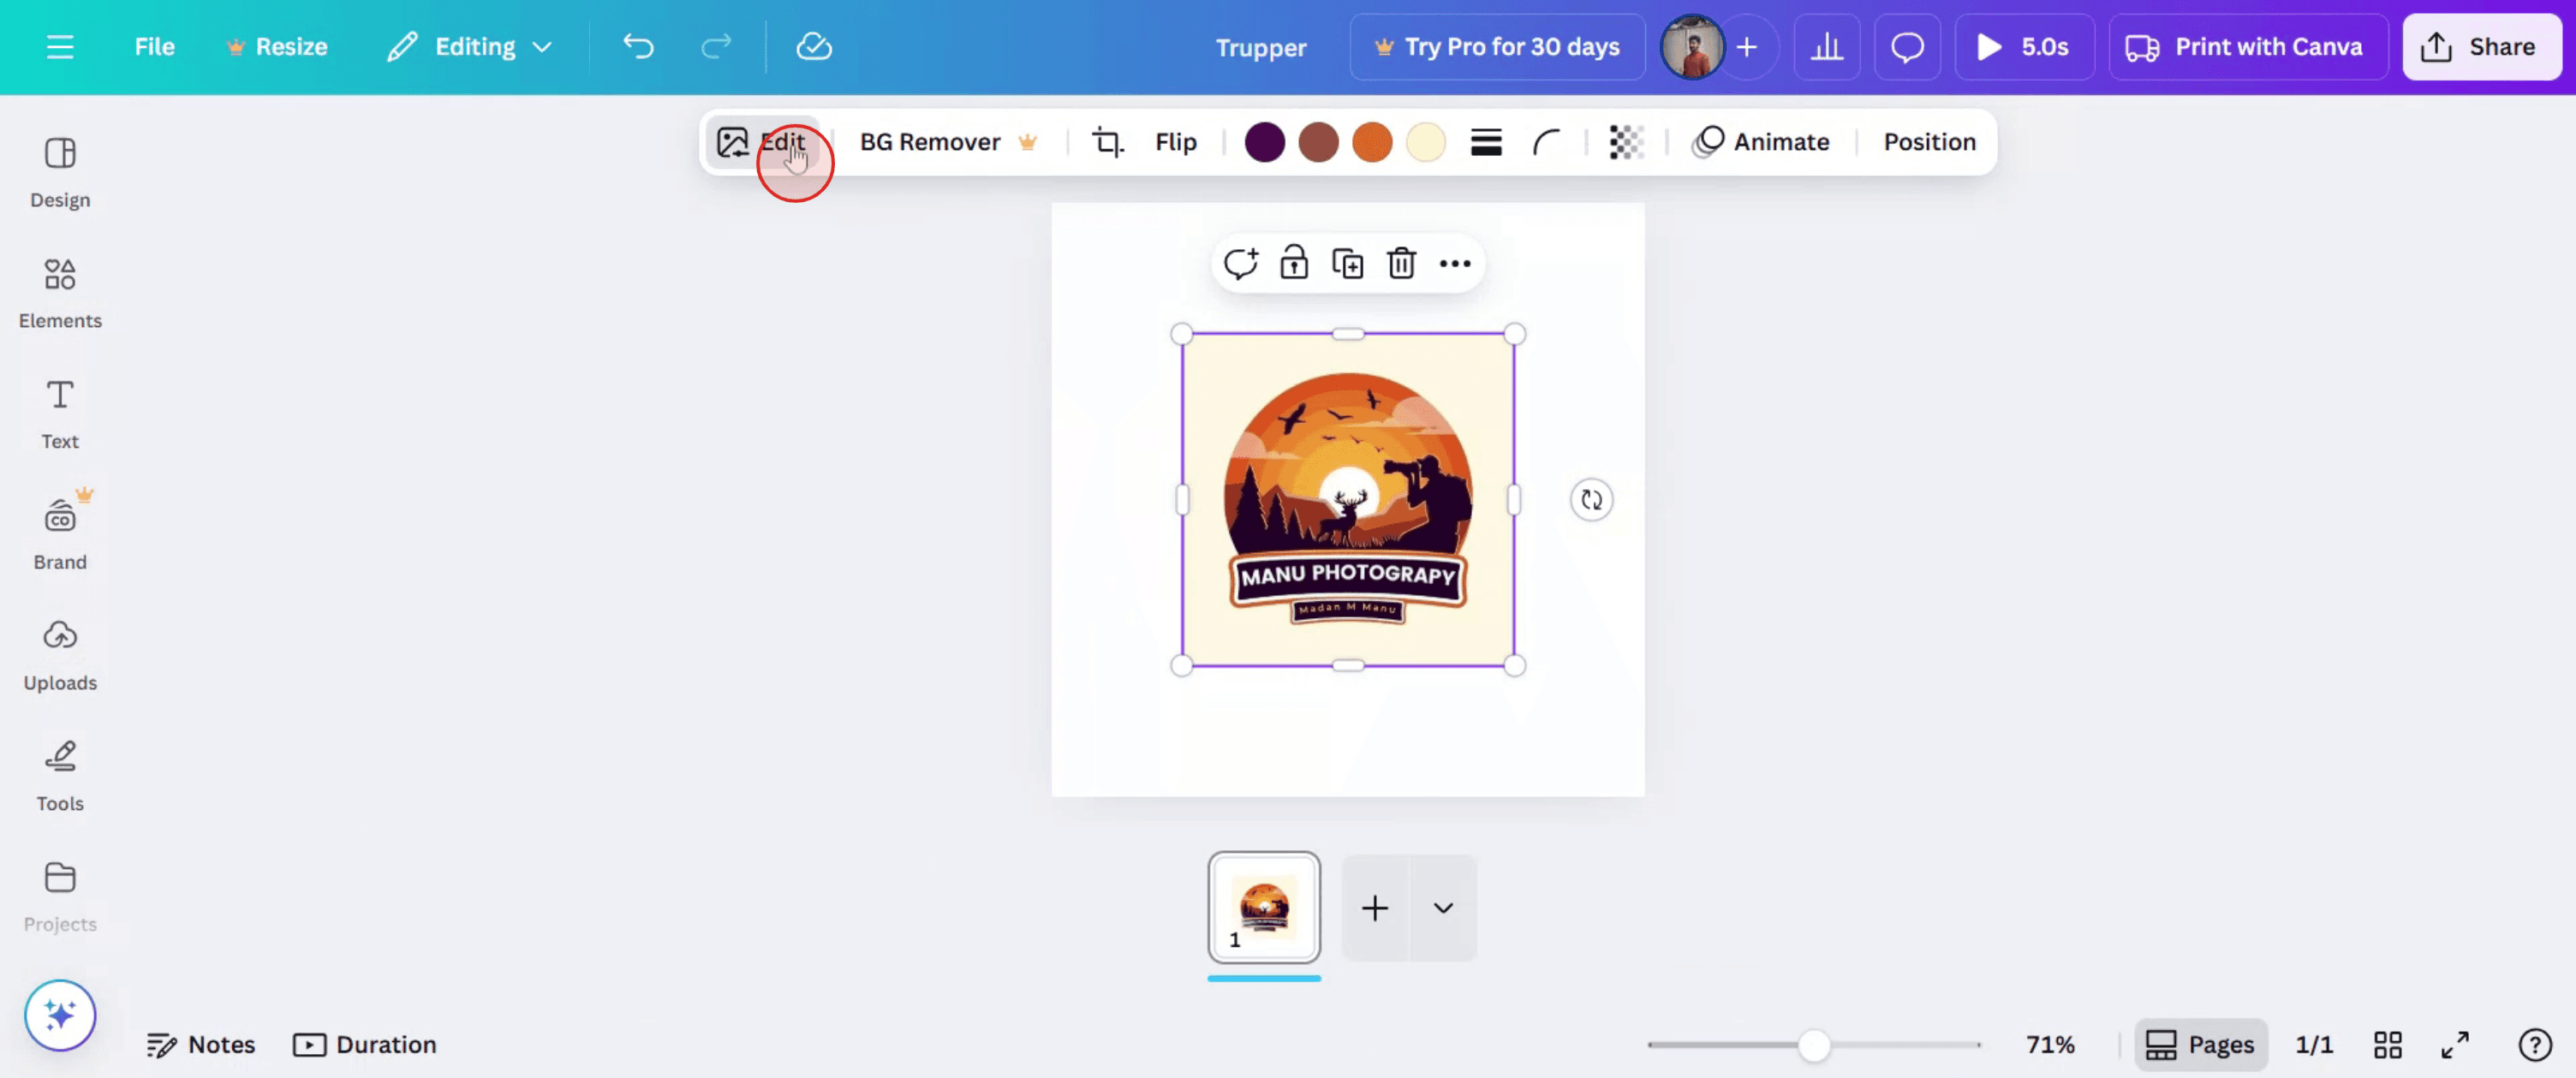
حدّد الصورة: انقر على الصورة التي تريد طمسها داخل تصميم Canva.
الوصول إلى المحرّر: انقر على زر "تعديل الصورة" في شريط الأدوات العلوي.
ضبط الضبابية: انتقل إلى قسم "تعديل" واستخدم شريط تمرير الضبابية للتحكم في شدتها.
التنزيل: بمجرد أن تصبح راضيًا، نزّل تصميمك.
طمس مناطق محددة:
حدّد الصورة: انقر على الصورة التي تريد طمسها.
الوصول إلى المحرّر: انقر على زر "تعديل الصورة".
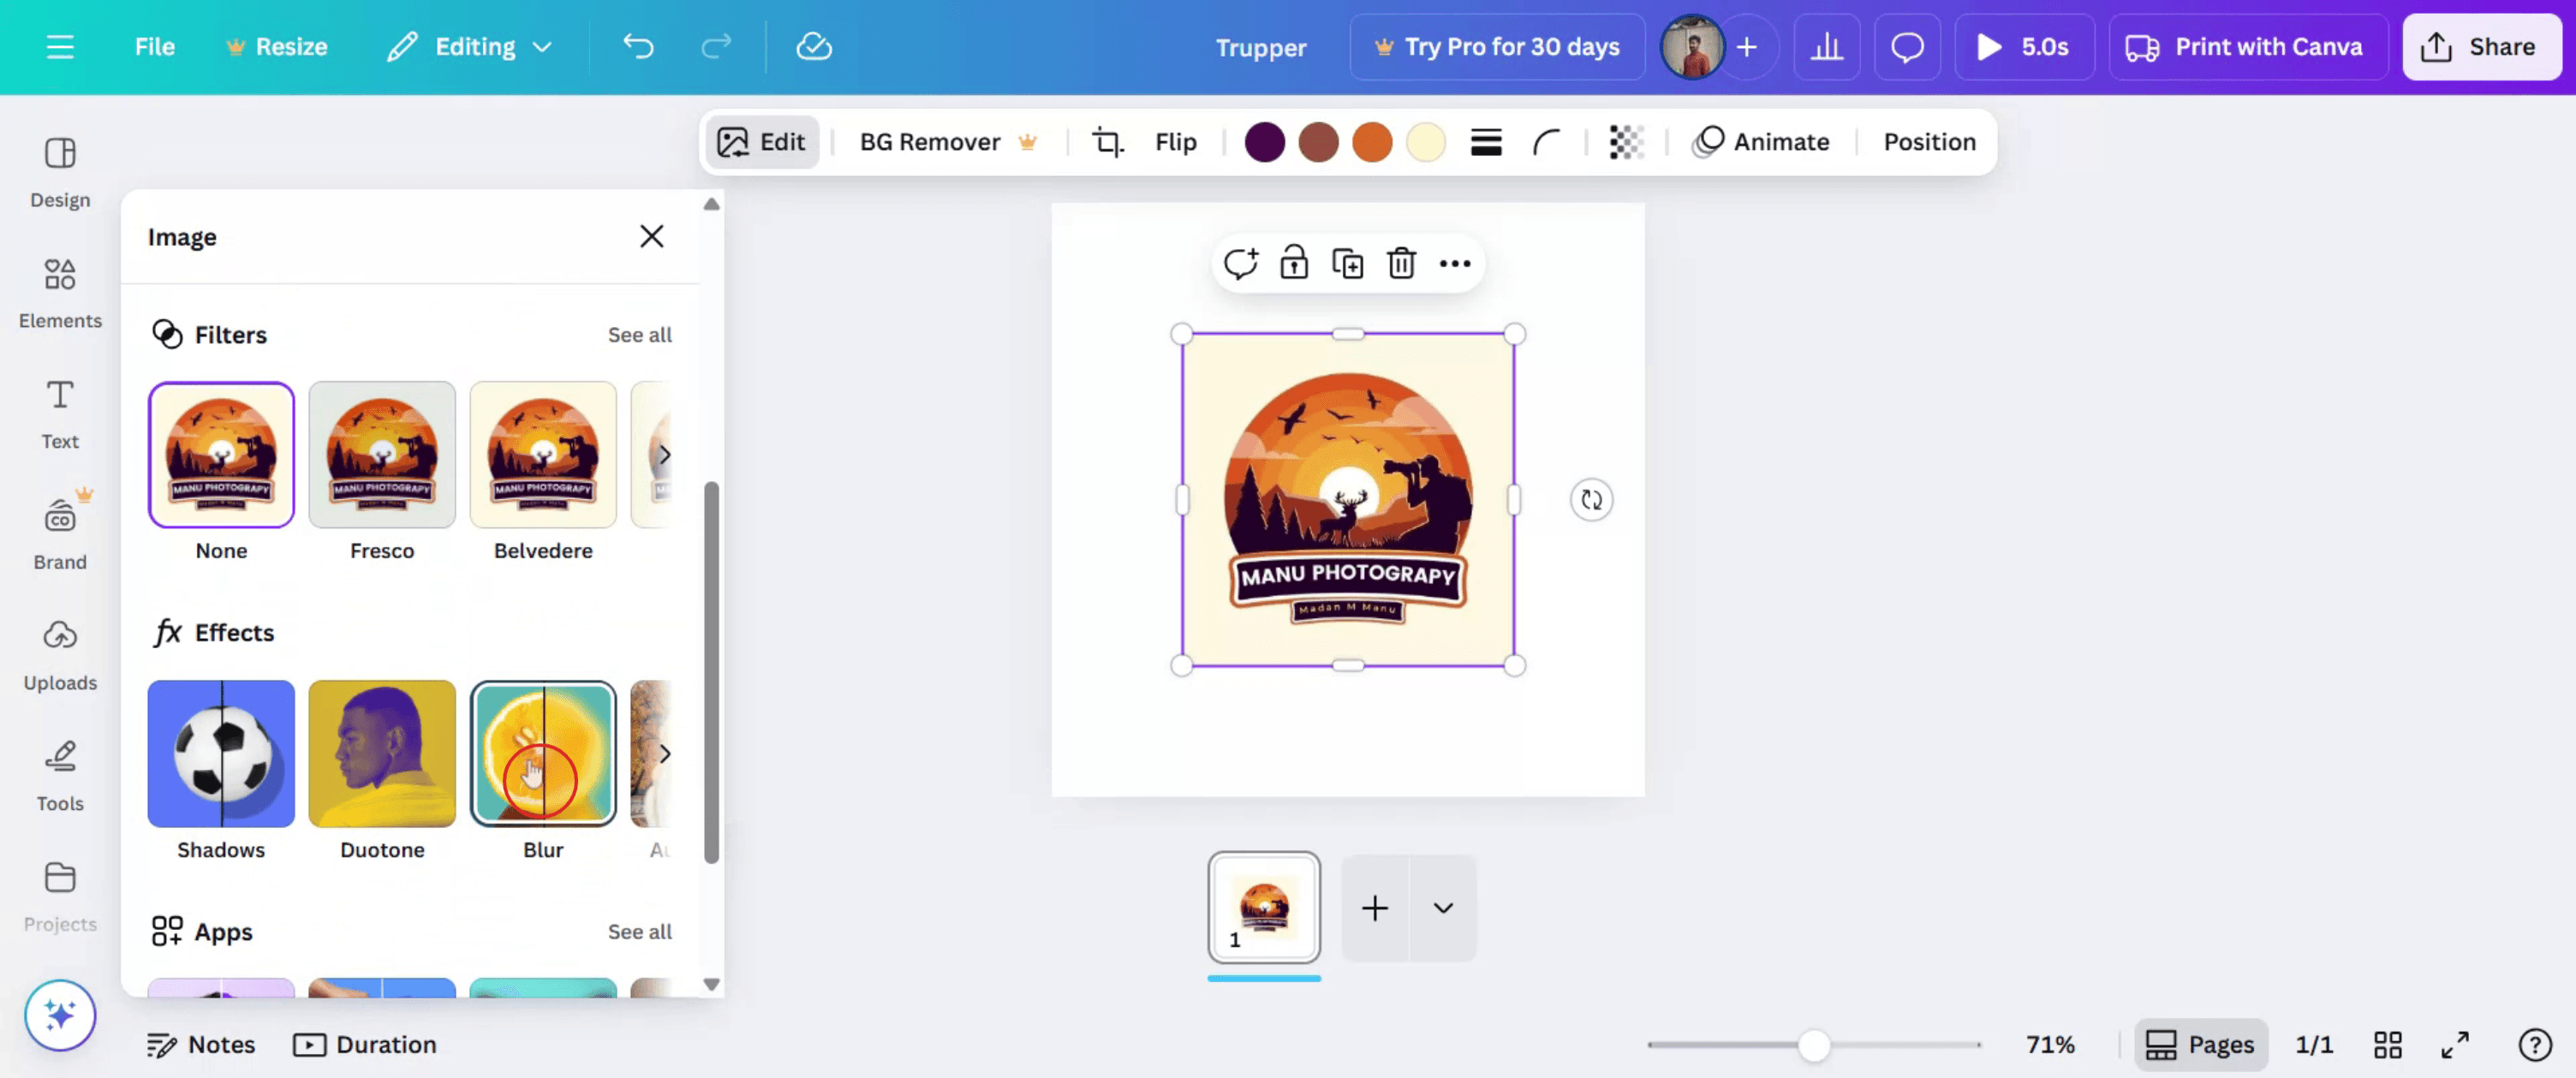
تطبيق تأثير الضبابية: في اللوحة اليسرى، انتقل إلى قسم "مؤثرات fx" وابحث عن تأثير الضبابية.
استخدم الفرشاة: حدّد أداة الفرشاة واضبط حجم الفرشاة وشدتها حسب الحاجة.
استهدف المناطق: انقر واسحب الفرشاة فوق المناطق التي تريد طمسها.
اضبط الشدة: استخدم شريط تمرير الشدة للتحكم في تأثير الضبابية.
دليل خطوة بخطوة: كيفية الطمس في Canva
الخطوة 1
ابدأ بالدخول إلى قسم التحميلات في Canva وانقر عليه لبدء العملية.

الخطوة 2
بعد التحديد، انقر على الصورة ثم اختر خيار "تعديل".
الخطوة 3
داخل قائمة التعديل، ابحث عن خيار "الضبابية" وحدده.
الخطوة 4
ستظهر لك خياران يتيحان لك طمس أجزاء محددة من الصورة. بالإضافة إلى ذلك، لديك خيار طمس الصورة بالكامل.
الخطوة 5
هنا، يمكنك ضبط شدة تأثير الضبابية المطبق على الصورة بالكامل.

الخطوة 6
بمجرد أن تكون راضيًا عن التعديلات، انقر على "مشاركة" لتوزيع صورتك المعدلة.
نصائح احترافية للتمويه في Canva
افتح تصميمك في Canva
سجّل الدخول إلى Canva وافتح التصميم الذي تريد تطبيق تأثير تمويه عليه.حدد الصورة أو العنصر الذي تريد تمويهه
انقر على الصورة أو الخلفية أو العنصر الرسومي الذي تريد تمويهه.انقر على زر «تحرير الصورة»
بعد تحديد العنصر، انقر على خيار «تحرير الصورة» من شريط الأدوات العلوي.اختر أداة التمويه
تصفّح التأثيرات المتاحة واختر أداة «التمويه» ضمن «تعديل» أو «التأثيرات».اضبط شدة التمويه
استخدم شريط التمرير الخاص بالتمويه لزيادة مقدار التمويه أو تقليله. حرّكه إلى اليمين للحصول على تأثير تمويه أقوى.طبّق التمويه وراجعه
بعد الضبط، انقر خارج الصورة لتطبيق التأثير. عاين التصميم للتأكد من أن التمويه يبدو كما تريد.
الأخطاء الشائعة وكيفية تجنبها
أداة التمويه غير ظاهرة
تأكد من تحديد الصورة الصحيحة. إذا كانت الأداة لا تظهر بعد ذلك، فتحقق من أنك تستخدم تنسيق صورة مدعومًا.تمويه المنطقة الخاطئة
يقوم Canva بتمويه العنصر المحدد بالكامل. لتمويه جزء فقط من الصورة، انسخ الصورة واصنع قناعًا للجزء الذي تريد التأثير عليه.تصبح الصورة غير واضحة
لا تبالغ في التمويه إلا إذا كان ذلك ضروريًا. طبّق تأثيرًا خفيفًا للحفاظ على وضوح العناصر البصرية المهمة.محاولة تمويه النص مباشرة
لا يمكن تمويه عناصر النص. حوّل النص إلى صورة عن طريق تنزيله ثم إعادة رفعه إذا لزم الأمر.خيارات تمويه محدودة في النسخة المجانية
قد تتوفر بعض فلاتر التمويه المتقدمة فقط في Canva Pro. استخدم أداة التمويه الأساسية إذا كنت تستخدم النسخة المجانية.
الأسئلة الشائعة حول التمويه في كانفا
كيف أُموّه صورة في كانفا
حدِّد الصورة، ثم انقر على "تعديل الصورة"، واختر أداة التمويه، واضبط شريط التمرير لتطبيق التأثير.هل يمكنني تمويه جزء من صورة
ليس مباشرةً. لتمويه جزء فقط من صورة، استخدم أشكالًا أو أقنعة فوق مناطق محددة، أو قم بالتعديل خارجيًا ثم أعد الرفع.هل يمكنني تمويه صور الخلفية
نعم، يمكن تحديد صور الخلفية وتمويهها مثل أي صورة أو رسمة أخرى.هل تأثير التمويه متاح للمستخدمين المجانيين
نعم، أداة التمويه الأساسية متاحة في النسخة المجانية، لكن قد تتطلب الميزات المتقدمة Canva Pro.هل يمكنني إزالة التمويه بعد تطبيقه
نعم، ما عليك سوى إعادة تحديد الصورة، والرجوع إلى لوحة "تعديل الصورة"، ثم إعادة الضبط أو تعديل مستوى التمويه.كيف أسجل الشاشة على ماك؟
لتسجيل الشاشة على جهاز Mac، يمكنك استخدام Trupeer AI. يتيح لك التقاط الشاشة بالكامل ويوفر إمكانات الذكاء الاصطناعي مثل إضافة صور رمزية بالذكاء الاصطناعي، وإضافة تعليق صوتي، وإضافة التكبير والتصغير في الفيديو. ومع ميزة ترجمة الفيديو بالذكاء الاصطناعي من trupeer، يمكنك ترجمة الفيديو إلى أكثر من 30 لغة.كيف أضيف صورة رمزية بالذكاء الاصطناعي إلى تسجيل الشاشة؟
لإضافة صورة رمزية بالذكاء الاصطناعي إلى تسجيل الشاشة، ستحتاج إلى استخدام أداة تسجيل شاشة بالذكاء الاصطناعي. Trupeer AI هي أداة تسجيل شاشة بالذكاء الاصطناعي، وتساعدك على إنشاء مقاطع فيديو بعدة صور رمزية، كما تساعدك أيضًا في إنشاء صورتك الرمزية الخاصة بالفيديو.كيف أسجل الشاشة على ويندوز؟
لتسجيل الشاشة على Windows، يمكنك استخدام Game Bar المدمج (Windows + G) أو أداة ذكاء اصطناعي متقدمة مثل Trupeer AI للحصول على ميزات أكثر تقدمًا مثل الصور الرمزية بالذكاء الاصطناعي، والتعليق الصوتي، والترجمة، إلخ.كيف أضيف تعليقًا صوتيًا إلى فيديو؟
لإضافة تعليق صوتي إلى مقاطع الفيديو، حمّل إضافة Chrome الخاصة بـ trupeer ai. بعد التسجيل، ارفع فيديوك مع الصوت، واختر التعليق الصوتي المطلوب من trupeer ثم صدّر الفيديو المعدّل.كيف أقوم بالتكبير في تسجيل شاشة؟
للتكبير أثناء تسجيل الشاشة، استخدم تأثيرات التكبير في Trupeer AI التي تتيح لك التكبير والتصغير في لحظات محددة، مما يعزز التأثير البصري لمحتوى الفيديو الخاص بك.
قراءات مقترحة
كيفية إنشاء دفتر يوميات في كانفا
كيفية الطباعة على الوجهين في كانفا
دروس ذات صلة

