

كيفية إضافة تقويم لاختيار التاريخ إلى الخلايا في MS Excel
تعرّف على كيفية إضافة تقويم منتقي التاريخ إلى خلايا Excel باستخدام أدوات المطوّر أو الإضافات لاختيار التواريخ بسرعة. اتبع هذا الدليل خطوة بخطوة وأنشئ أدلة مع Trupeer.
لإضافة تقويم منتقي التاريخ إلى الخلايا في MS Excel، يمكنك استخدام عنصر التحكم المدمج "منتقي التاريخ" (المعروف أيضًا باسم "Microsoft Date and Time Picker Control") من علامة التبويب المطوّر. وبدلًا من ذلك، يمكنك استخدام إضافة مثل "Mini Calendar and Date Picker" للحصول على تجربة أبسط وأكثر سهولة للمستخدم.
فيما يلي تفصيل للطرق:
1. باستخدام علامة التبويب المطوّر (عنصر تحكم مدمج):
1. فعّل علامة التبويب المطوّر: انقر بزر الماوس الأيمن على الشريط، ثم اختر "تخصيص الشريط"، وحدد مربع "المطوّر".
2. إدراج عنصر التحكم: انتقل إلى علامة التبويب المطوّر، وانقر "إدراج"، ثم اختر عنصر التحكم "منتقي التاريخ" ضمن "عناصر تحكم ActiveX". إذا لم يكن ظاهرًا، فقد تحتاج إلى النقر على "مزيد من عناصر التحكم" واختيار "Microsoft Date and Time Picker Control 6.0 (SP6)" بعد تسجيله إذا لزم الأمر.
3. وضعه وتكوينه: انقر على الخلية التي تريد إضافة منتقي التاريخ إليها، ثم انقر بزر الماوس الأيمن على عنصر التحكم واختر "تنسيق عنصر التحكم" لتخصيص خصائصه، بما في ذلك الخلية المرتبطة.
4. الاستخدام: انقر على الخلية لتفعيل منتقي التاريخ، ثم اختر تاريخًا، وسيتم إدخاله في الخلية.
2. استخدام الإضافة "Mini Calendar and Date Picker":
الحصول على الإضافة: انتقل إلى علامة التبويب "إدراج"، وانقر "الحصول على الإضافات"، وابحث عن "Mini Calendar and Date Picker".
التثبيت والفتح: أضف الإضافة ثم افتحها من زر "الإضافات" في علامة التبويب الرئيسية.
الاختيار والاستخدام: انقر على الخلية المطلوبة ثم اختر التاريخ من التقويم.
دليل خطوة بخطوة: كيفية إضافة تقويم منتقي التاريخ إلى الخلايا في MS Excel
الخطوة 1
حدّد خلية معينة تريد إدراج منتقي التاريخ فيها.
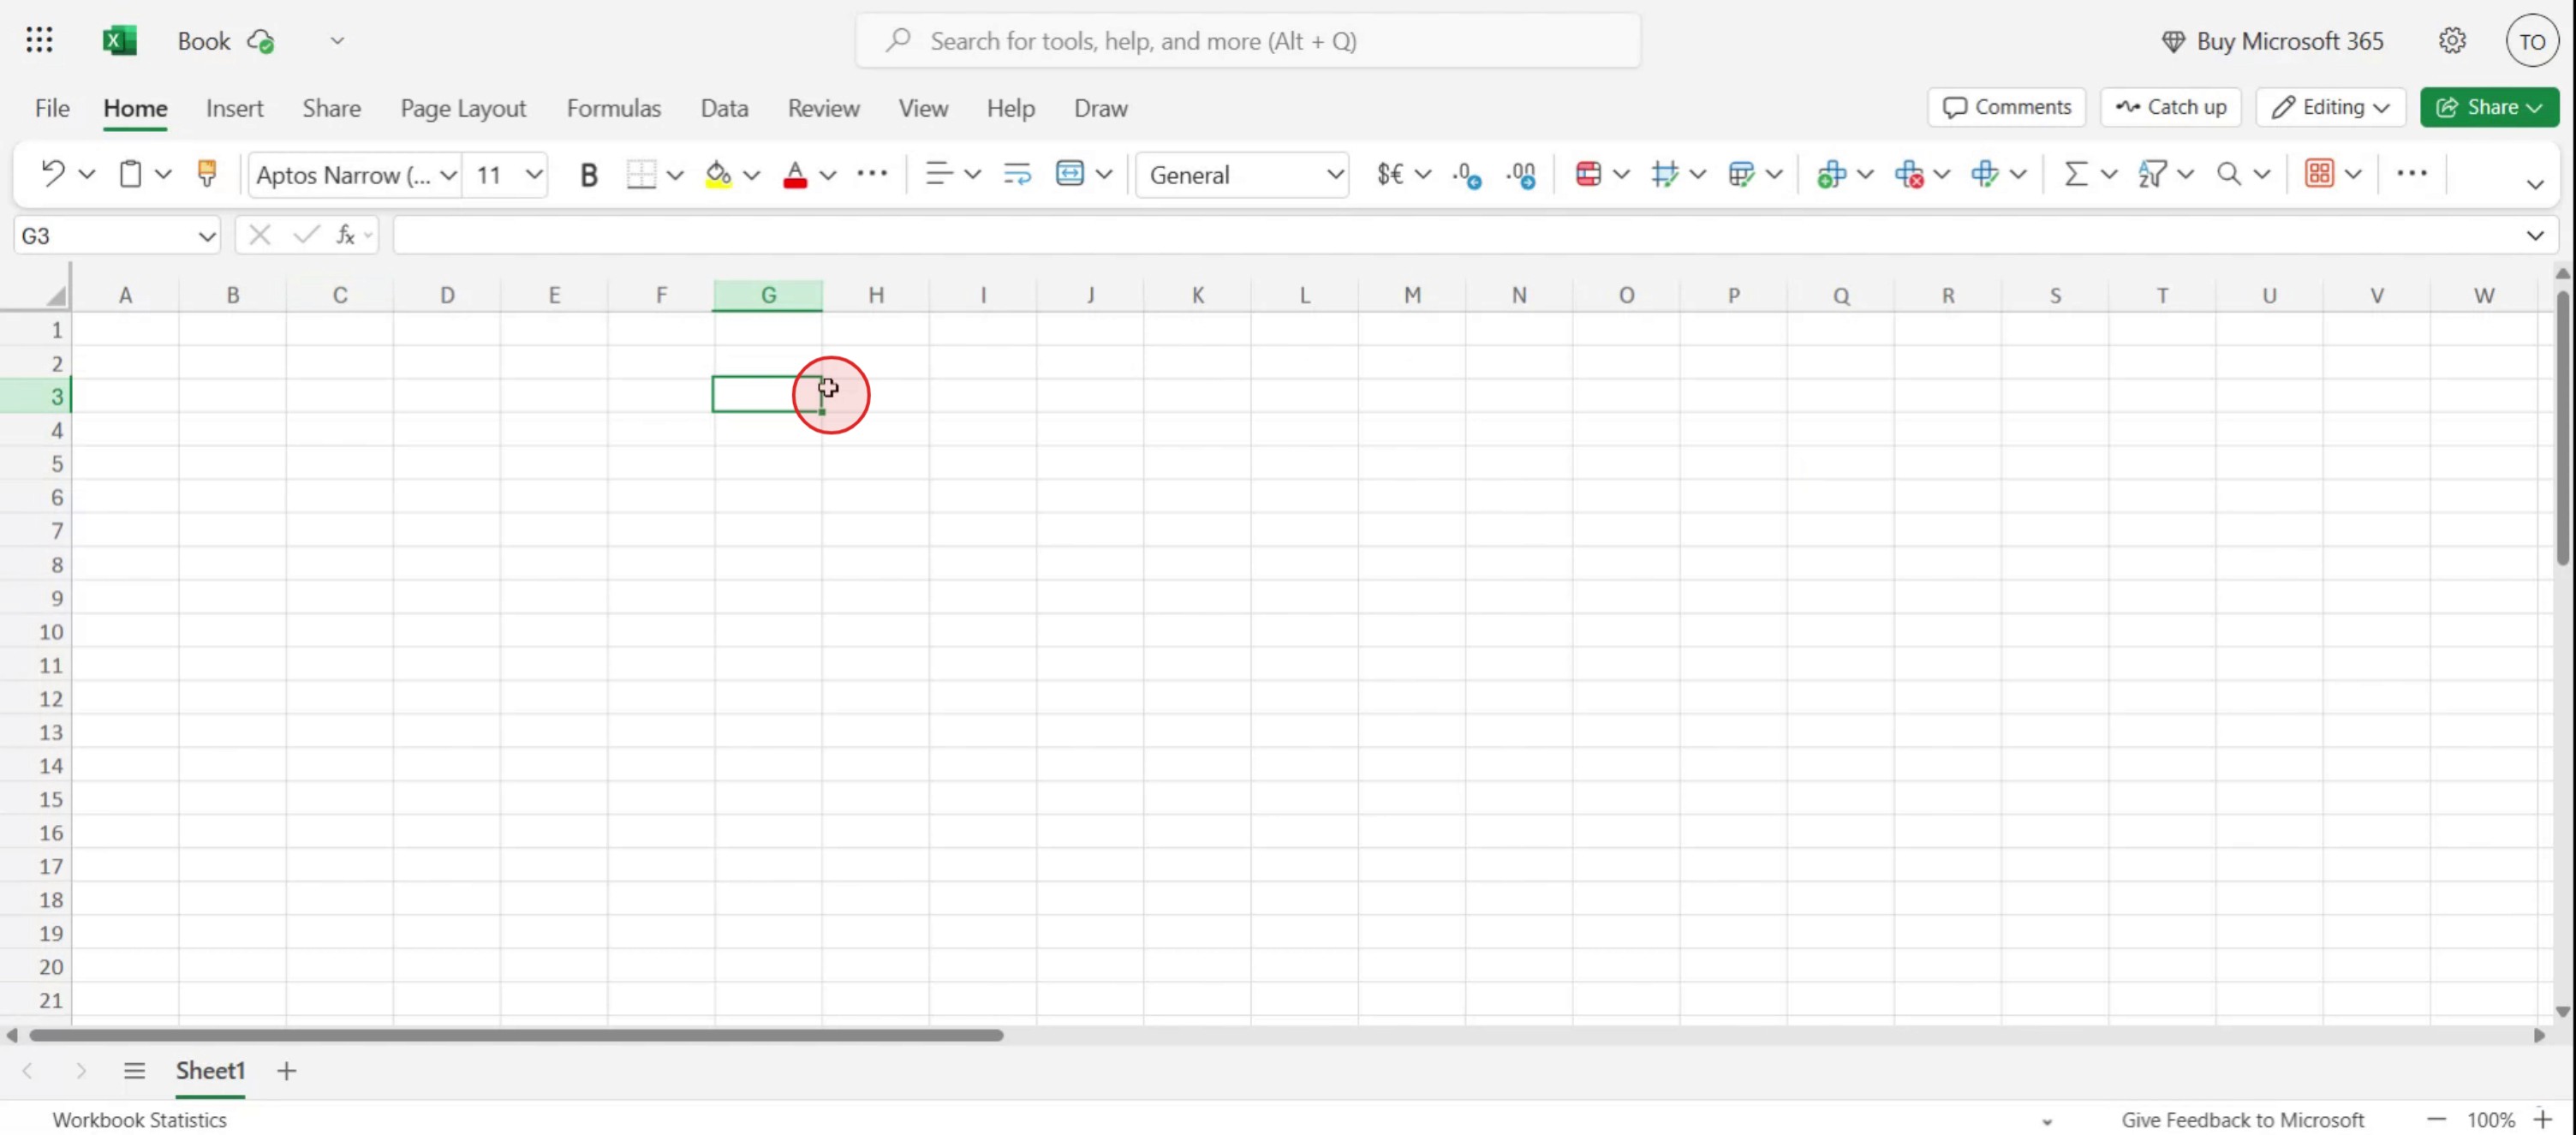
الخطوة 2
من شريط أدوات التنسيق، حدّد خيار تنسيق الأرقام.

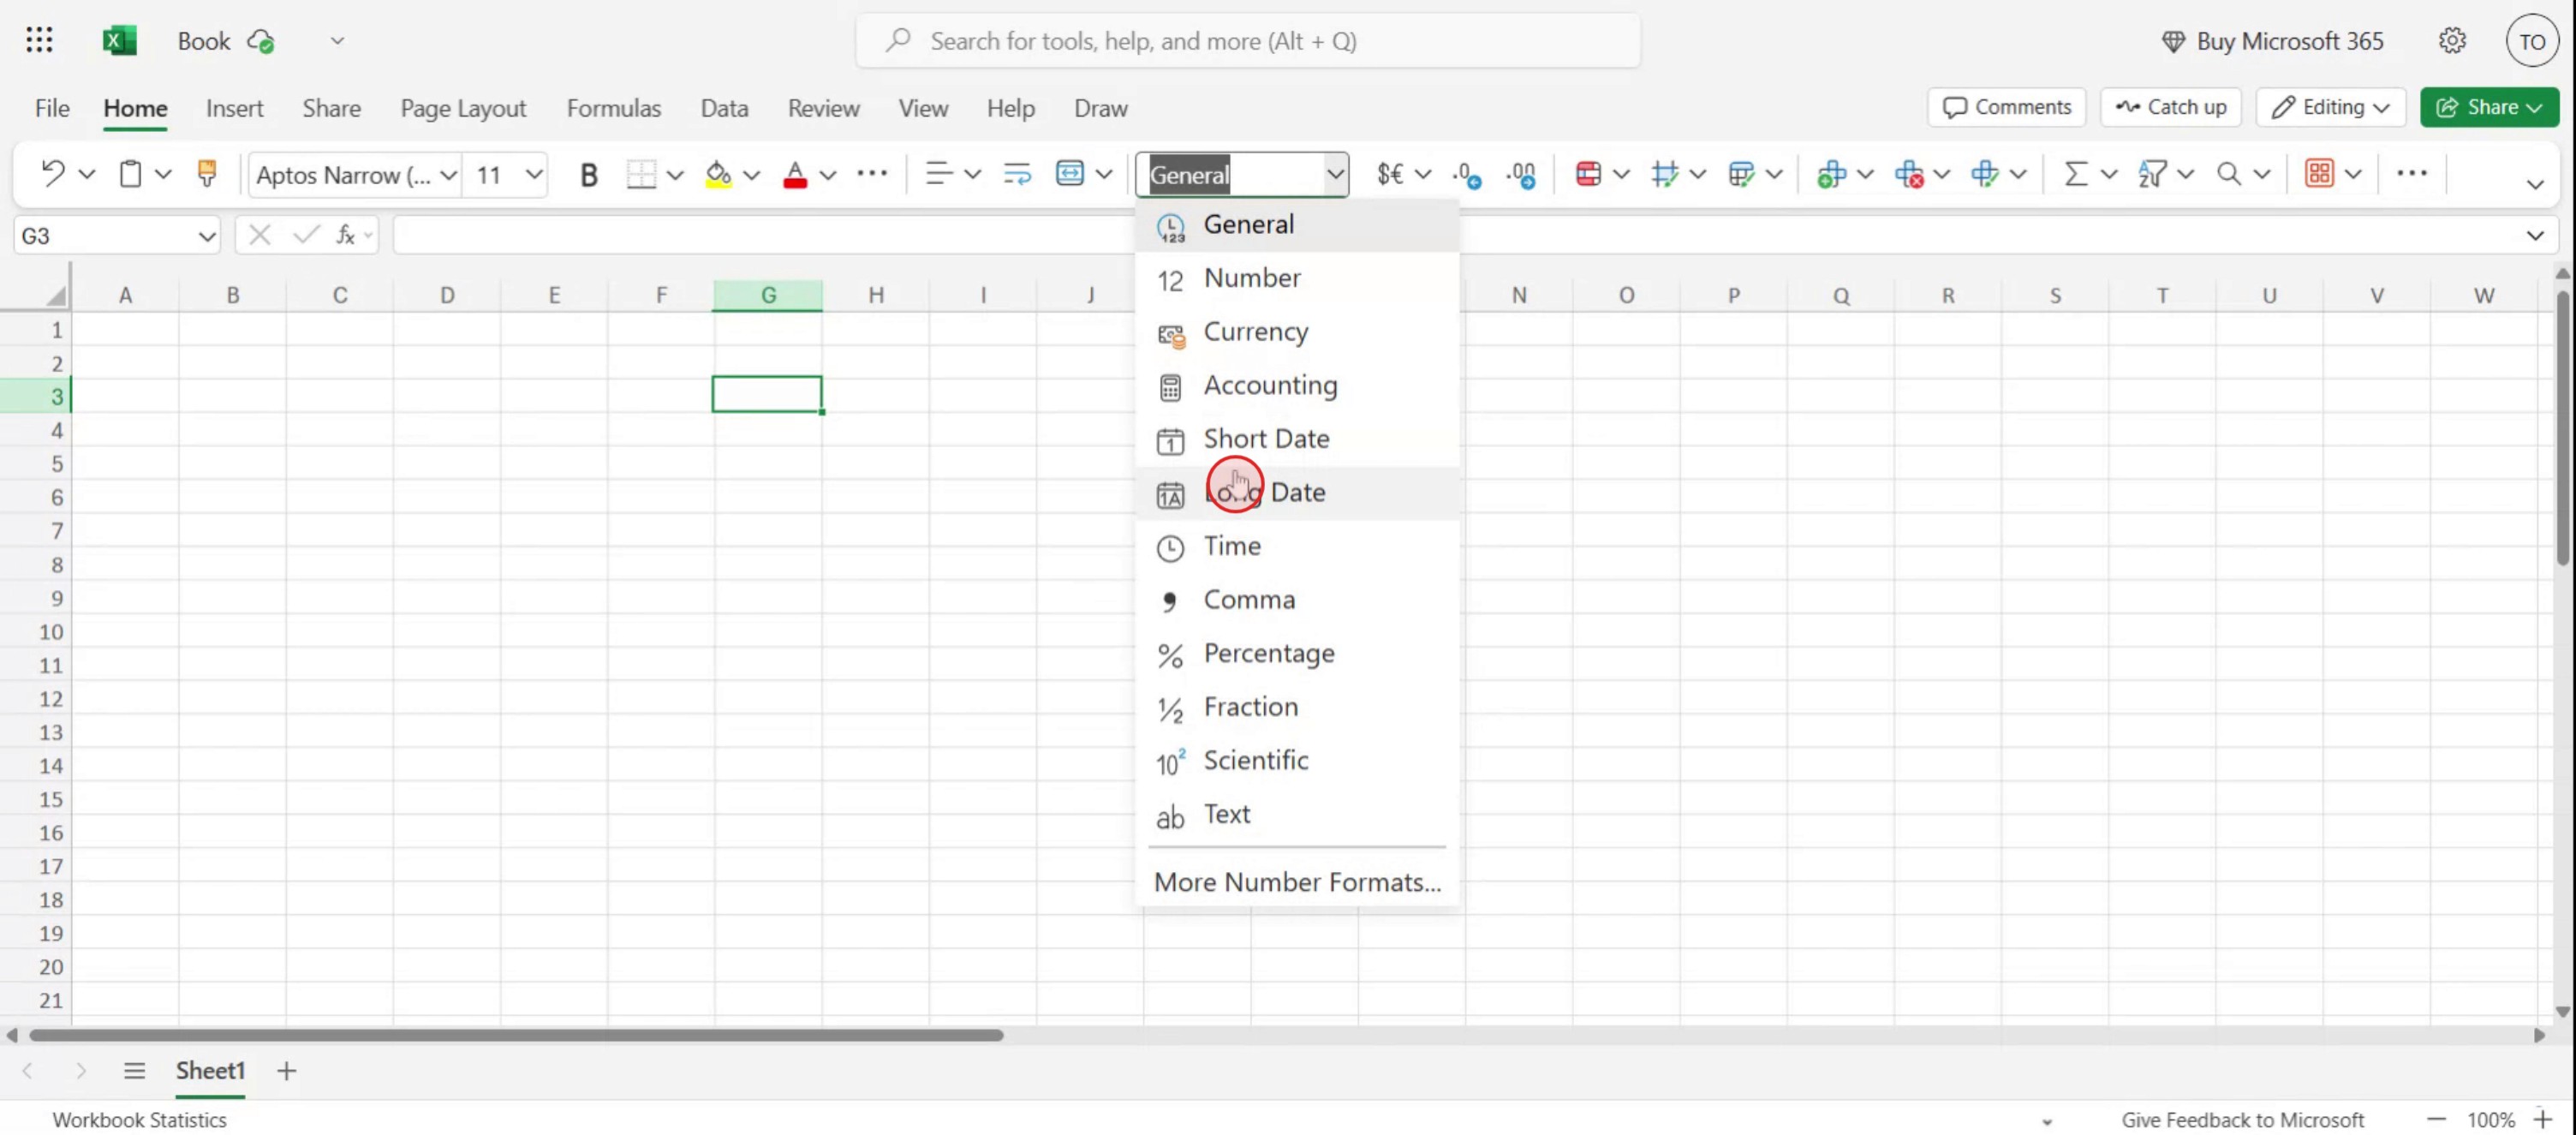
الخطوة 3
من القائمة المنسدلة، اختر إما خيار 'التاريخ الطويل'،
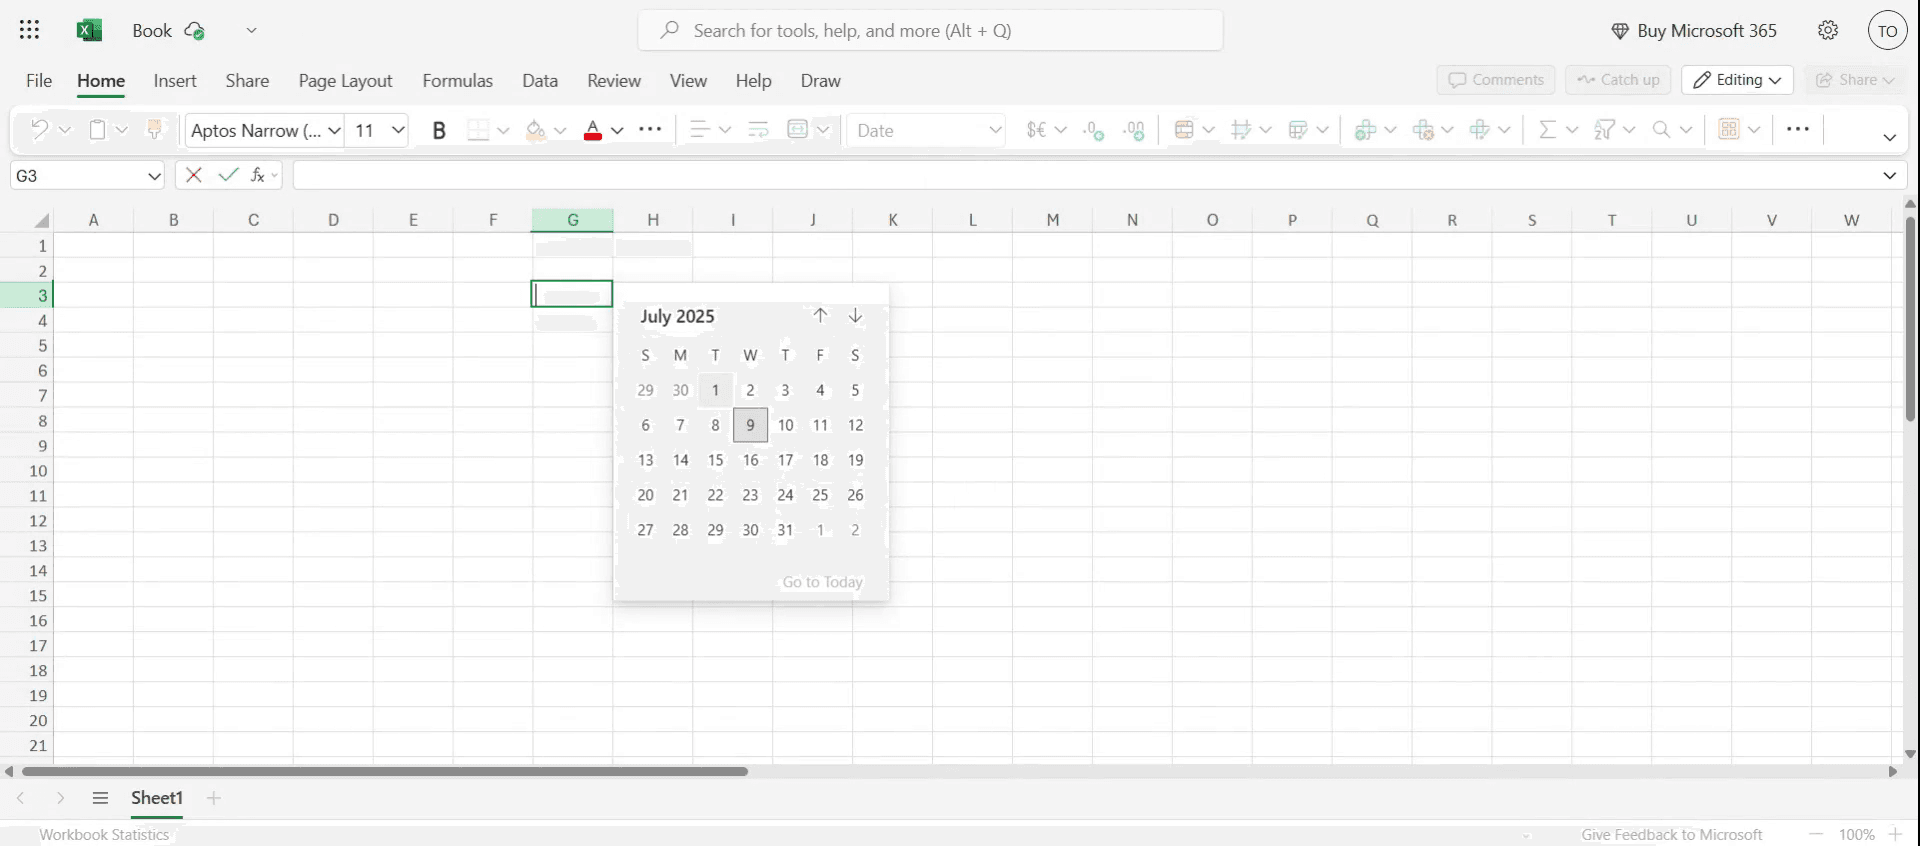
الخطوة 4
عند النقر المزدوج على الخلية، سيظهر التاريخ كما هو محدد.
نصائح احترافية لإضافة تقويم منتقي التاريخ إلى الخلايا في MS Excel
افتح ملف Excel الخاص بك
شغّل Microsoft Excel وافتح المصنف الذي تريد إضافة منتقي التاريخ إليه.فعّل علامة تبويب المطوّر
انتقل إلى الشريط، وانقر على ملف → خيارات → تخصيص الشريط، ثم ضع علامة في مربع المطوّر ليظهر.أدرج عنصر التحكم منتقي التاريخ
في علامة تبويب المطوّر، انقر على إدراج → المزيد من عناصر التحكم (أيقونة المفتاح والمطرقة). مرِّر للأسفل وحدد «Microsoft Date and Time Picker Control» ثم انقر على موافق.ارسم منتقي التاريخ على الورقة
سيتحول المؤشر إلى علامة زائد. انقر واسحب لرسم التقويم على ورقة العمل.اربط منتقي التاريخ بخلية
انقر بزر الماوس الأيمن على منتقي التاريخ، واختر الخصائص، ثم عيّن الخاصية LinkedCell إلى الخلية التي تريد أن يظهر فيها التاريخ.اختبر منتقي التاريخ
انقر على التقويم وحدد تاريخًا. يجب أن تعرض الخلية المرتبطة التاريخ المحدد تلقائيًا.
المشكلات الشائعة وكيفية تجنبها
منتقي التاريخ غير متوفر في قائمة عناصر التحكم
يتوفر عنصر التحكم Date Picker فقط في إصدارات Excel ذات 32 بت. إذا كنت تستخدم إصدار 64 بت، ففكّر في استخدام طرق بديلة مثل نماذج تقويم ActiveX أو حلول VBA.علامة تبويب المطوّر مفقودة
إذا لم تظهر علامة تبويب المطوّر، فتأكد من تفعيلها من خلال Excel Options → Customize Ribbon.الخلية المرتبطة لا تتحدث
تأكد من كتابة مرجع الخلية بشكل صحيح في الخاصية LinkedCell دون أخطاء إملائية.يظهر التقويم كبيرًا جدًا أو صغيرًا جدًا
غيّر حجم منتقي التاريخ بسحب حدوده ليتناسب مع تخطيطك بشكل أفضل.التاريخ غير منسق بشكل صحيح في الخلية
نسّق الخلية المستهدفة كـ تاريخ (انقر بزر الماوس الأيمن على الخلية → تنسيق الخلايا → تاريخ) لعرض متسق.
الأسئلة الشائعة الشائعة حول إضافة منتقي التاريخ في Excel
هل يتوفر منتقي التاريخ في جميع إصدارات Excel؟
لا، فهو متوفر فقط في Excel 32 بت وقد لا يكون موجودًا في الإصدارات الأحدث 64 بت.ماذا لو كنت أستخدم Excel 64 بت؟
يمكنك استخدام VBA لإنشاء منتقي تاريخ مخصص أو استخدام إضافات Excel من جهات خارجية.هل يمكنني تطبيق منتقي تاريخ على عدة خلايا؟
لا، يجب ربط كل منتقي تاريخ بخلية محددة. يمكنك النسخ والإعداد لعدة خلايا بشكل فردي.هل سيعمل منتقي التاريخ بعد مشاركة الملف؟
فقط إذا كان لدى المستلم أيضًا عنصر التحكم في منتقي التاريخ مثبتًا ومفعّلًا في Excel.هل يمكنني استخدام التحقق من صحة البيانات كبديل؟
نعم، استخدام التحقق من صحة البيانات مع قائمة بالتواريخ هو حل بديل أساسي، لكنه لا يوفر تقويمًا قابلًا للنقر.كيف أسجل الشاشة على جهاز Mac؟
لتسجيل الشاشة على جهاز Mac، يمكنك استخدام Trupeer AI. يتيح لك التقاط الشاشة بالكامل ويوفر إمكانات الذكاء الاصطناعي مثل إضافة شخصيات ذكاء اصطناعي، وإضافة تعليق صوتي، والتكبير والتصغير في الفيديو. مع ميزة ترجمة الفيديو بالذكاء الاصطناعي من Trupeer، يمكنك ترجمة الفيديو إلى أكثر من 30 لغة.كيف أضيف شخصية ذكاء اصطناعي إلى تسجيل الشاشة؟
لإضافة شخصية ذكاء اصطناعي إلى تسجيل الشاشة، ستحتاج إلى استخدام أداة تسجيل شاشة بالذكاء الاصطناعي. Trupeer AI هي أداة تسجيل شاشة بالذكاء الاصطناعي، تساعدك على إنشاء مقاطع فيديو بعدة شخصيات، كما تساعدك في إنشاء شخصيتك الخاصة للفيديو.كيف أسجل الشاشة على Windows؟
لتسجيل الشاشة على Windows، يمكنك استخدام شريط الألعاب المدمج (Windows + G) أو أداة ذكاء اصطناعي متقدمة مثل Trupeer AI للحصول على ميزات أكثر تقدمًا مثل شخصيات الذكاء الاصطناعي، والتعليق الصوتي، والترجمة، إلخ.كيف أضيف تعليقًا صوتيًا إلى الفيديو؟
لإضافة تعليق صوتي إلى مقاطع الفيديو، نزّل إضافة Trupeer AI لمتصفح Chrome. بعد التسجيل، ارفع الفيديو الخاص بك مع الصوت، واختر التعليق الصوتي المطلوب من Trupeer، ثم صدّر الفيديو المعدّل.كيف أقوم بالتكبير في تسجيل الشاشة؟
للتكبير أثناء تسجيل الشاشة، استخدم تأثيرات التكبير في Trupeer AI التي تتيح لك التكبير والتصغير في لحظات محددة، مما يعزز التأثير البصري لمحتوى الفيديو الخاص بك.
قراءات مقترحة
كيفية تمكين المسطرة في Microsoft Excel
كيفية إبقاء الصف العلوي مرئيًا في Microsoft Excel
كيفية إدراج ورقة عمل جديدة في Microsoft Excel
دروس ذات صلة

