
Como exportar um ficheiro SVG do Figma
Aprenda a exportar ficheiros SVG do Figma com precisão. Siga este guia simples para descarregar recursos vetoriais para utilização em projetos de web, design ou desenvolvimento.
Passos em detalhe:
1. Selecione os elementos: Escolha a moldura, grupo ou objetos individuais específicos que pretende exportar como SVG.
2. Localize a secção Exportar: Encontre a secção "Exportar" na barra lateral direita da interface do Figma.
3. Escolha o formato: Clique no botão "+" junto de "Exportar" para adicionar uma definição de exportação. Em seguida, selecione "SVG" no menu pendente de formatos.
4. Exporte o ficheiro: Clique no botão "Exportar" e escolha onde guardar o ficheiro SVG no seu computador.
Guia passo a passo: Como Exportar um Ficheiro SVG a Partir do Figma
Passo 1
Selecione a camada específica que pretende converter num ficheiro SVG.
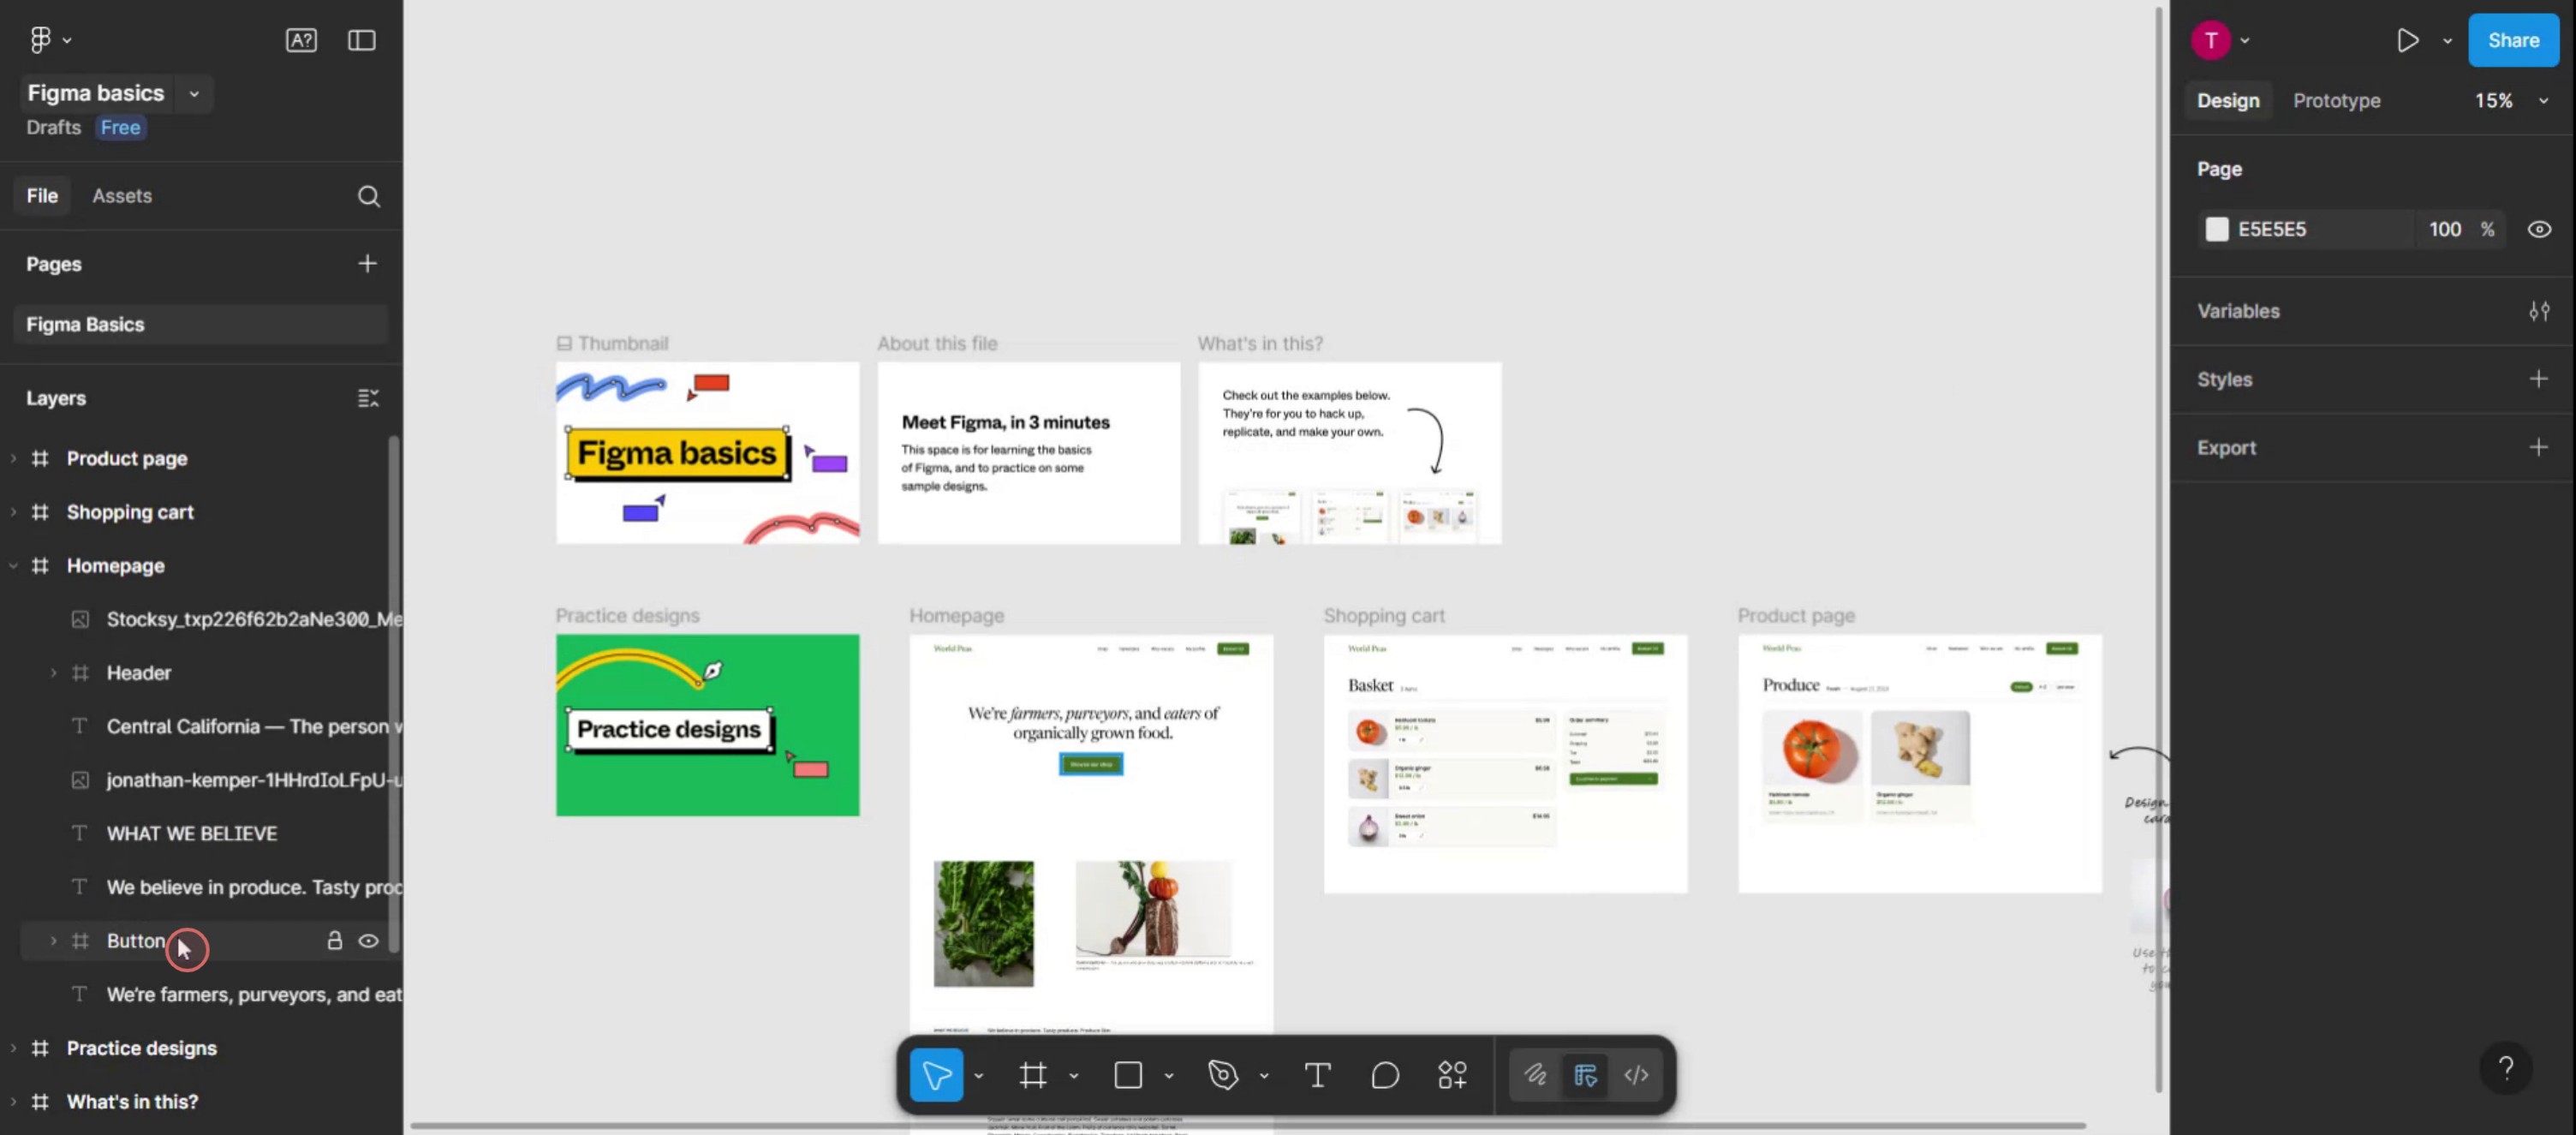
Passo 2
Clique no ícone de mais para prosseguir.

Passo 3
Clique neste menu pendente,
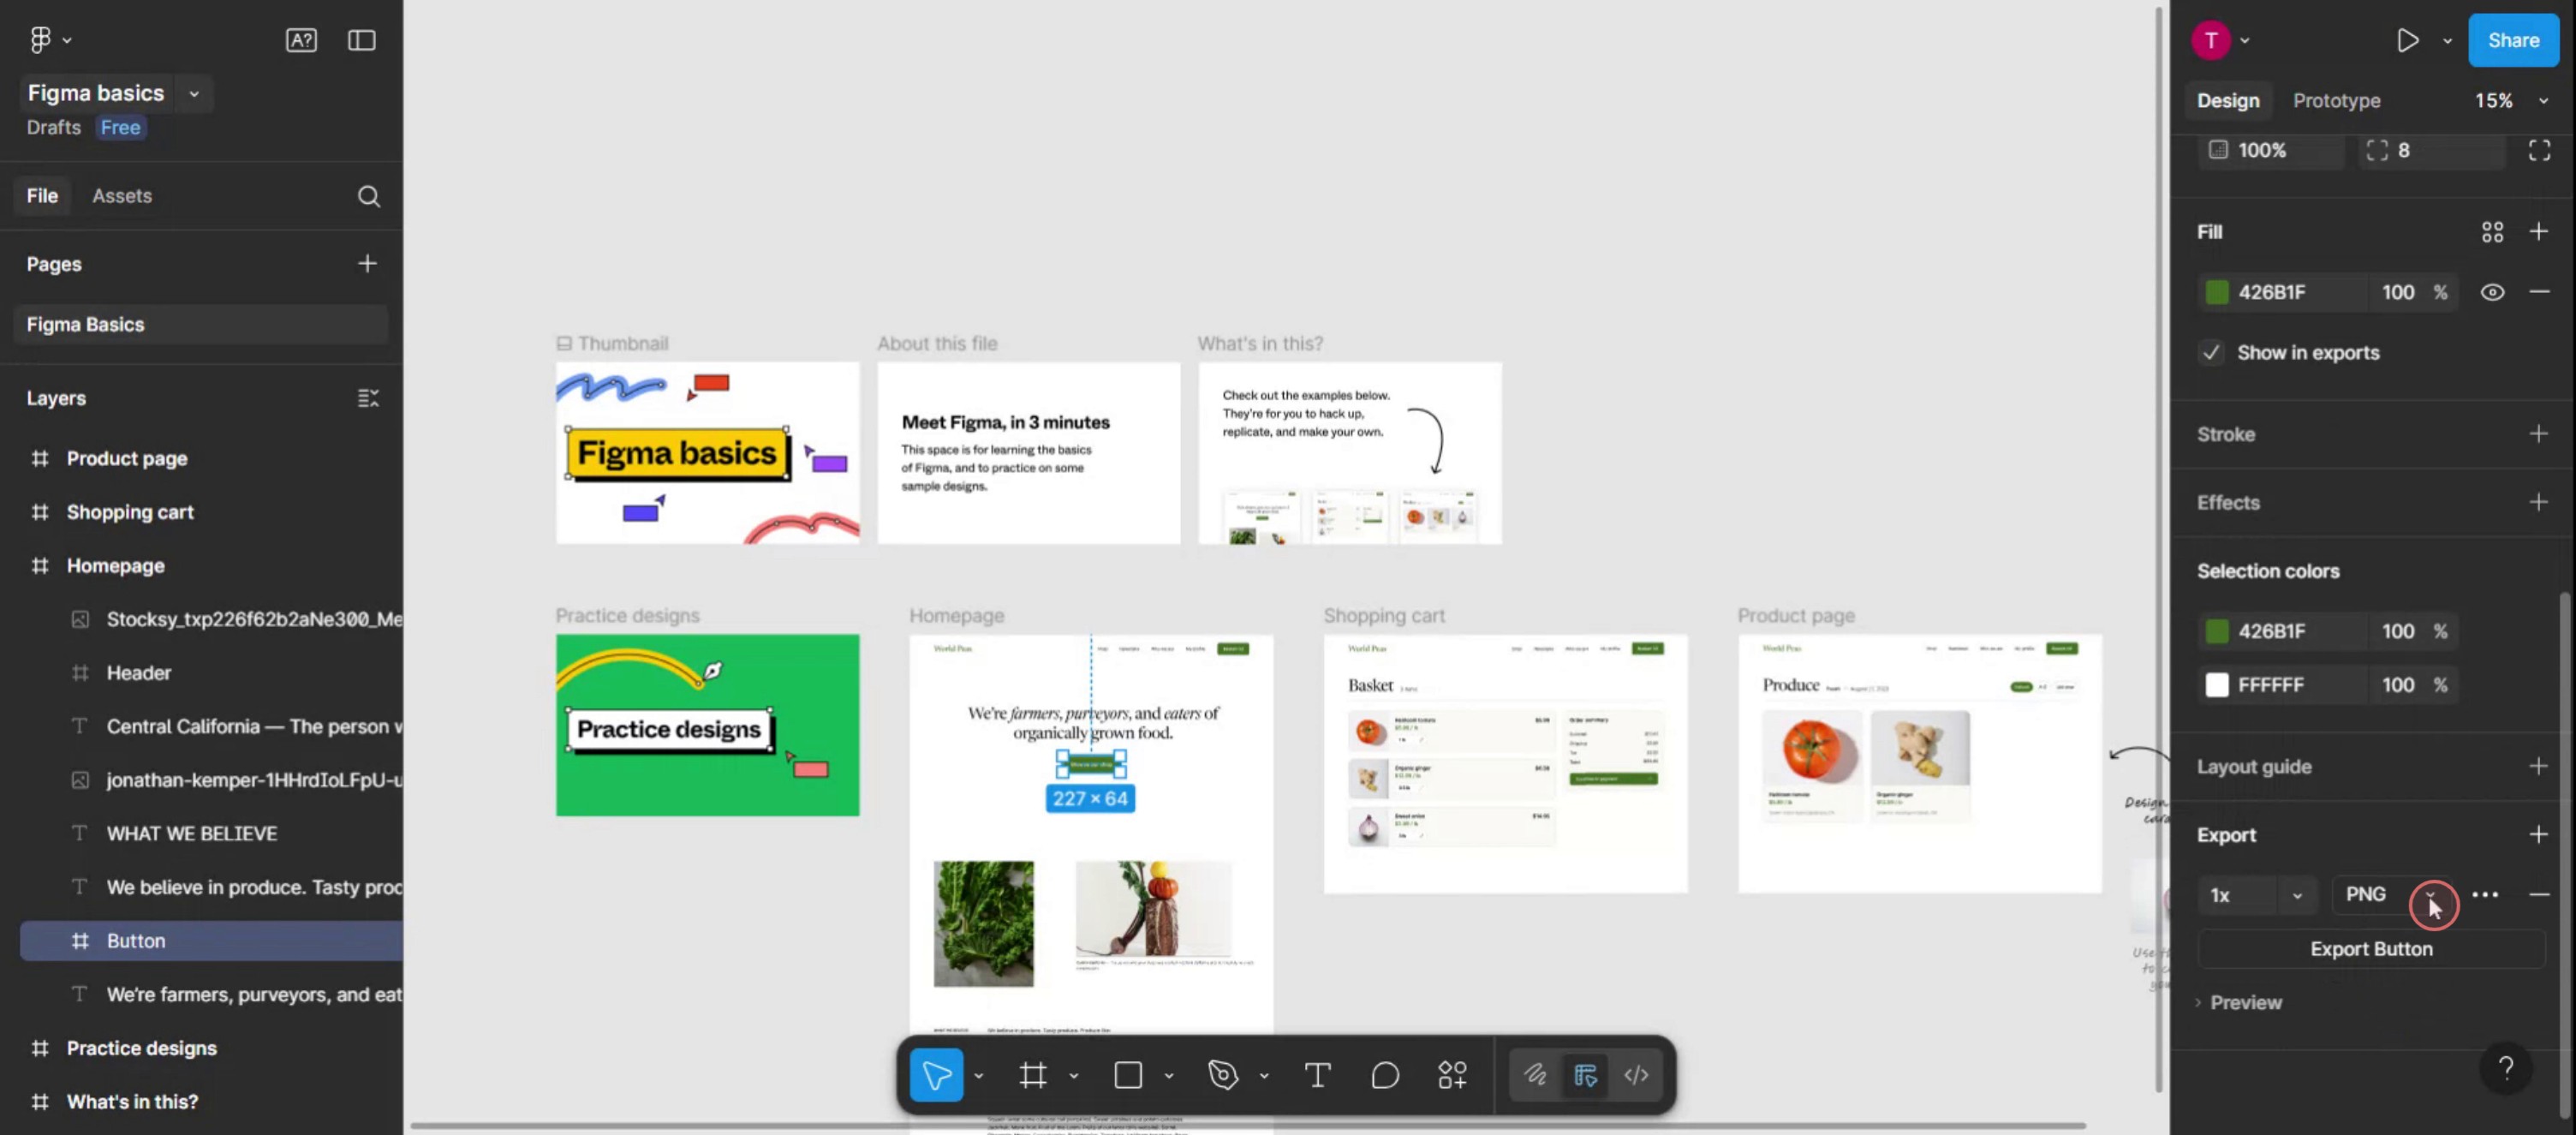
Passo 4
Selecione o formato SVG para o seu ficheiro.

Dicas Profissionais para Exportar um Ficheiro SVG do Figma
Selecione o objeto ou quadro
Clique no objeto, ícone ou quadro específico que pretende exportar como SVG. Certifique-se de que apenas o elemento pretendido está selecionado.Vá para a secção de exportação na barra lateral direita
Na barra lateral direita, desça até encontrar a secção “Export”. Pode ser necessário expandi-la se estiver recolhida.Clique no ícone “+” para adicionar uma definição de exportação
Clique no “+” junto ao rótulo de exportação para ativar as opções de exportação do objeto ou quadro selecionado.Escolha “SVG” no menu suspenso de formato
No menu suspenso de formato de exportação, selecione “SVG” na lista de formatos disponíveis (PNG, JPG, PDF, SVG, etc.).Clique no botão “Exportar”
Depois de selecionar SVG, clique no botão “Exportar [Layer Name]”. O Figma irá gerar e transferir o ficheiro SVG para o seu computador.
Armadilhas Comuns e Como Evitá-las
SVG exportado não está a funcionar corretamente
Se o SVG tiver efeitos como desfoques ou tipos de letra não suportados, poderá não ser renderizado corretamente. Simplifique o design antes de exportar.Ficheiro a exportar como PNG ou outro formato
Verifique sempre se “SVG” está selecionado no menu suspenso de formato. Por predefinição, pode mostrar PNG.Elementos indesejados incluídos na exportação
Certifique-se de que seleciona apenas o que pretende exportar. Use grupos ou quadros para isolar o elemento a exportar.Perda de qualidade no SVG exportado
Como o SVG é baseado em vetores, os problemas de qualidade são raros, mas utilize vetores achatados e evite imagens raster complexas no interior do ficheiro.Tamanho do ficheiro SVG demasiado grande
Limpe as camadas e os traçados não utilizados. Converta o texto em contornos, se necessário, para reduzir o tamanho do ficheiro.
Perguntas frequentes sobre exportação de SVG do Figma
Como exporto um ficheiro SVG no Figma?
Selecione o objeto ou frame, vá para a barra lateral direita, adicione uma definição de exportação, escolha SVG como formato e, por fim, clique em Exportar.Posso exportar vários SVGs de uma vez?
Sim, selecione vários frames ou componentes e aplique a definição de exportação a cada um antes de exportar tudo de uma vez.O meu texto continuará editável no SVG?
Por predefinição, sim. Se quiser garantir compatibilidade, converta o texto em contornos antes de exportar.Qual é a vantagem de usar SVG em vez de PNG?
Os ficheiros SVG são escaláveis, leves e mantêm a qualidade em qualquer resolução. São ideais para ícones e recursos de interface.Posso usar o SVG exportado num site?
Sim, os SVGs exportados do Figma estão prontos para a web e podem ser incorporados diretamente em HTML ou usados como recursos de imagem.Como gravar o ecrã no Mac?
Para gravar o ecrã num Mac, pode usar o Trupeer AI. Permite capturar o ecrã inteiro e oferece capacidades de IA, como adicionar avatares de IA, adicionar locução e aplicar zoom in e out no vídeo. Com a funcionalidade de tradução de vídeo com IA do trupeer, pode traduzir o vídeo para mais de 30 idiomas.Como adicionar um avatar de IA a uma gravação de ecrã?
Para adicionar um avatar de IA a uma gravação de ecrã, terá de usar uma ferramenta de gravação de ecrã com IA. O Trupeer AI é uma ferramenta de gravação de ecrã com IA, que ajuda a criar vídeos com vários avatares e também ajuda a criar o seu próprio avatar para o vídeo.Como gravar o ecrã no Windows?
Para gravar o ecrã no Windows, pode usar a Game Bar integrada (Windows + G) ou uma ferramenta de IA avançada como o Trupeer AI para funcionalidades mais avançadas, como avatares de IA, locução, tradução, etc.Como adicionar locução a um vídeo?
Para adicionar locução a vídeos, descarregue a extensão do Chrome do Trupeer AI. Depois de se registar, carregue o seu vídeo com voz, escolha a locução pretendida no Trupeer e exporte o vídeo editado.Como faço zoom numa gravação de ecrã?
Para aplicar zoom durante uma gravação de ecrã, use os efeitos de zoom no Trupeer AI, que permitem ampliar e reduzir em momentos específicos, melhorando o impacto visual do conteúdo do seu vídeo.
As pessoas também perguntam
Gerador de documentação técnica
Software de base de conhecimento
Como ocultar nomes de frames no Figma
Como guardar um ficheiro do Figma
Como criar uma grelha no Figma
Tutoriais relacionados

