

Hoe gebruik je de Canva AI-videogenerator
Leer hoe je Canva's AI-videogenerator kunt gebruiken om automatisch boeiende video's te maken. Genereer scripts, visuele elementen en animaties met slechts een paar klikken.
Stapsgewijze handleiding: hoe je de Canva AI-videogenerator gebruikt
Stap 1
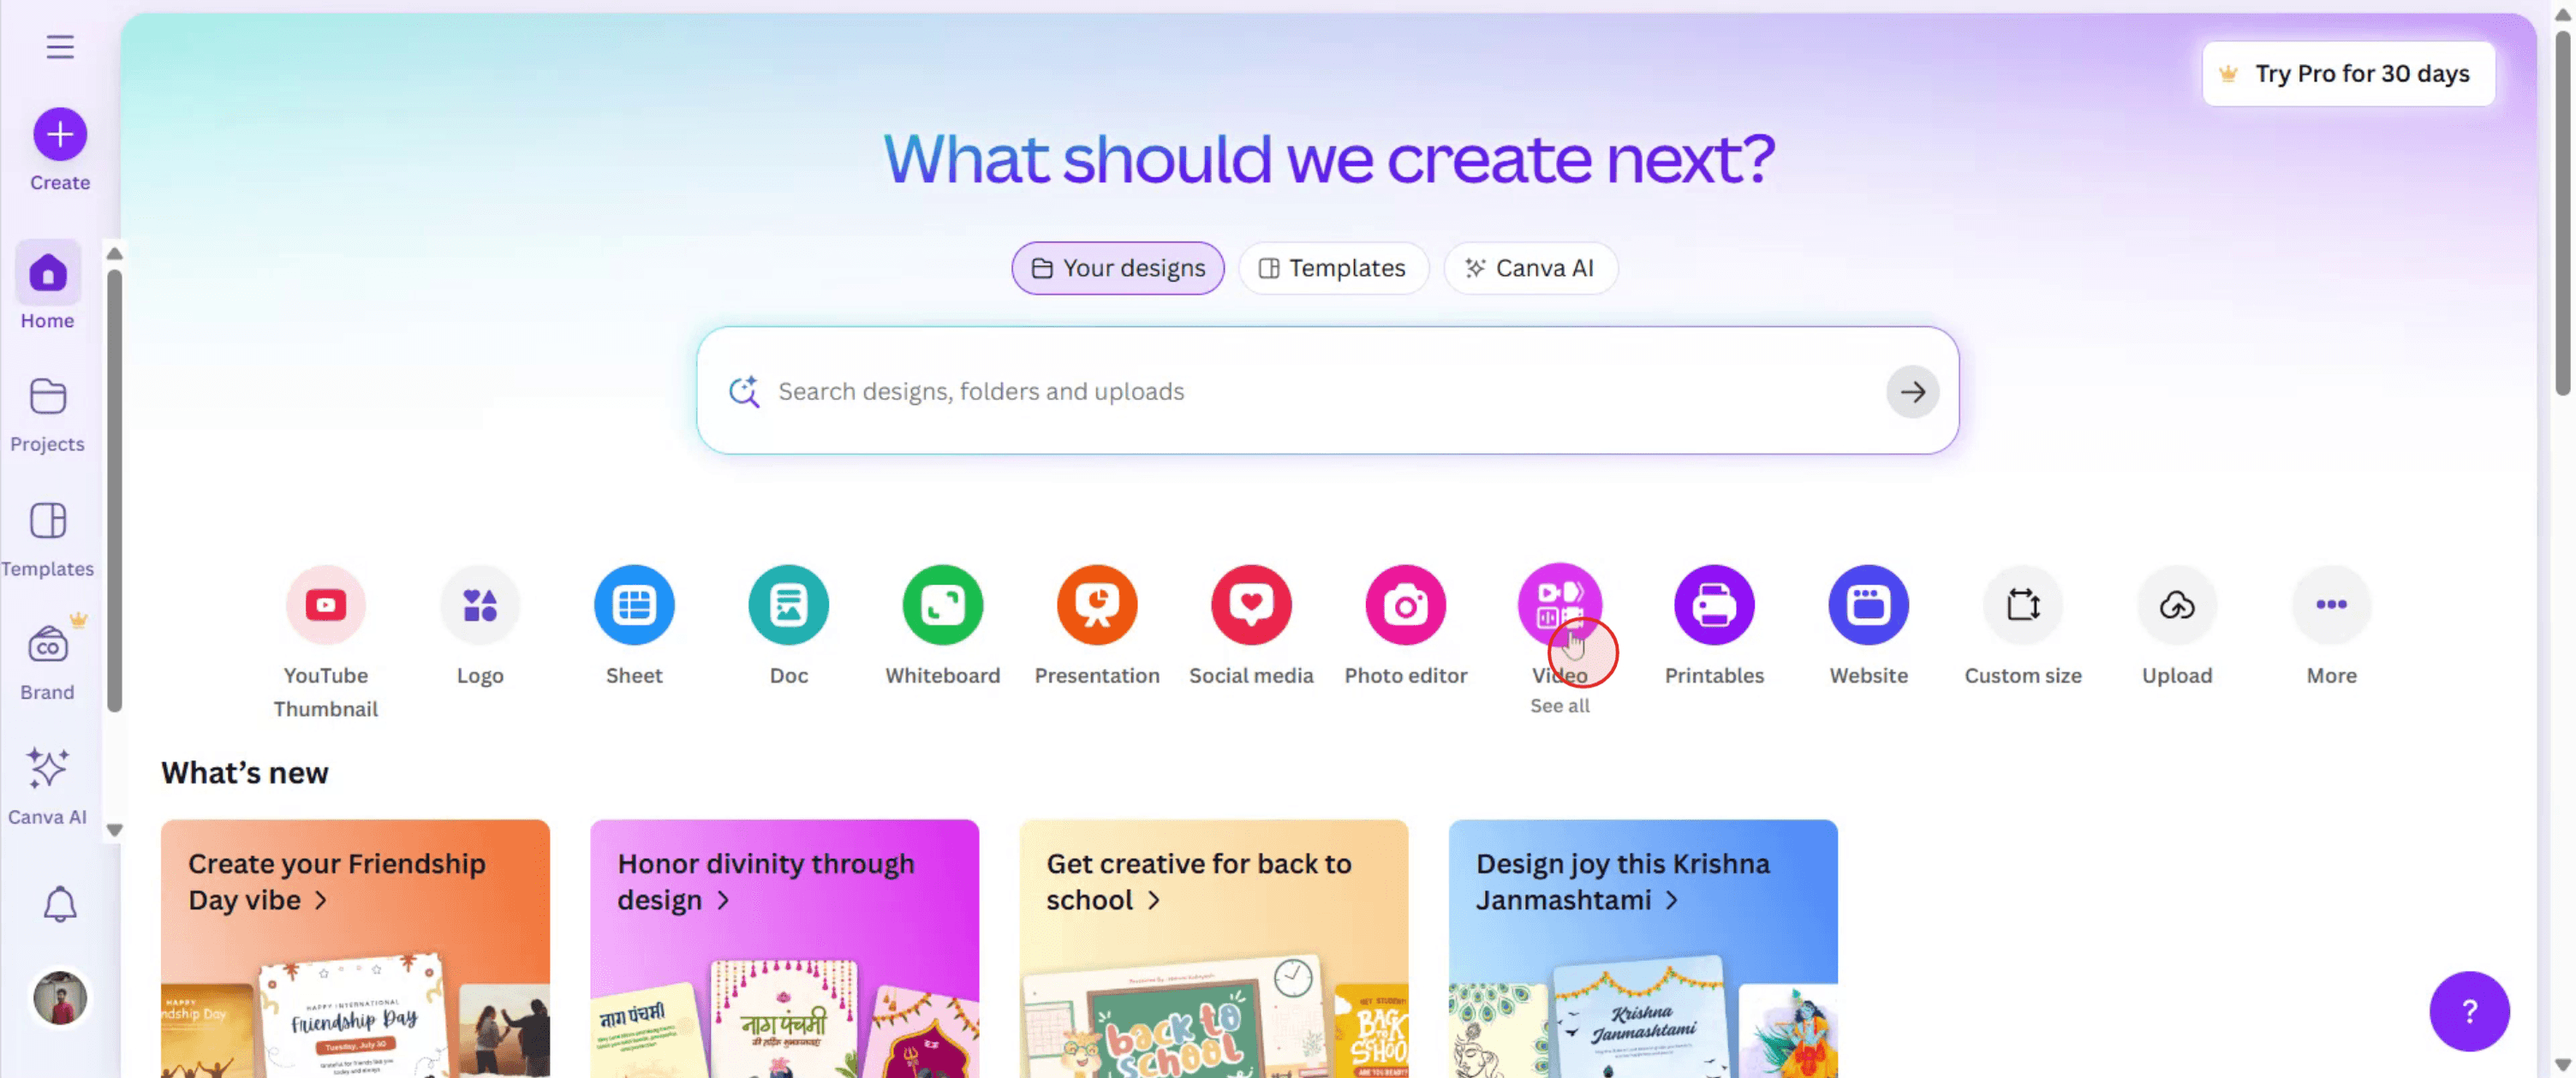
Om te beginnen met het gebruiken van de Canva AI-videogenerator, ga je in Canva naar de optie 'Video' en klik je erop.
Stap 2
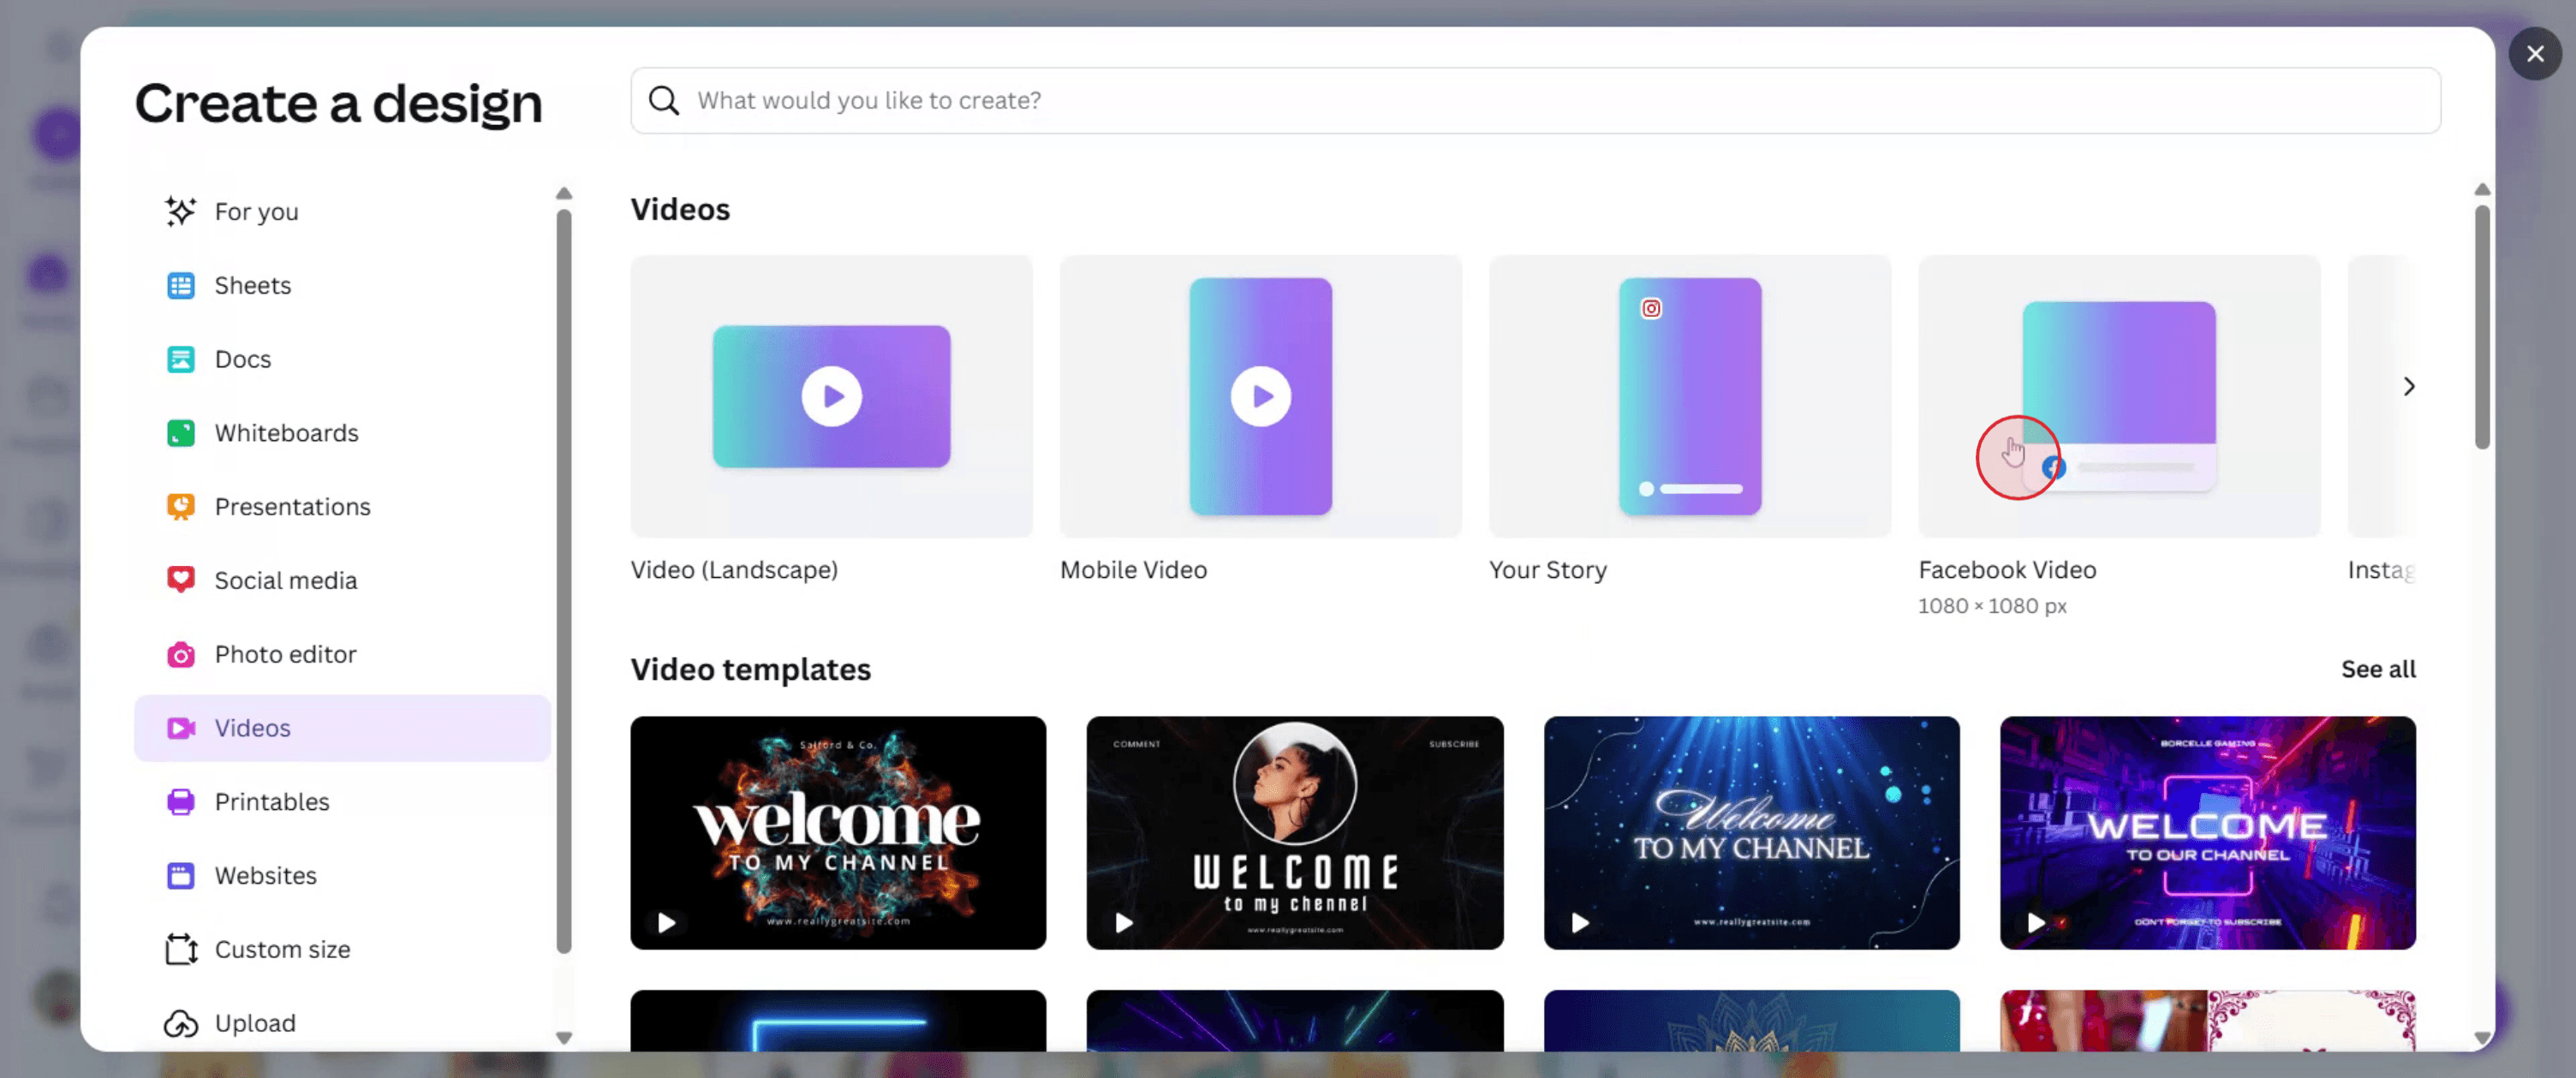
Selecteer vervolgens de sjabloon die het beste past bij de behoeften van je project.
Stap 3
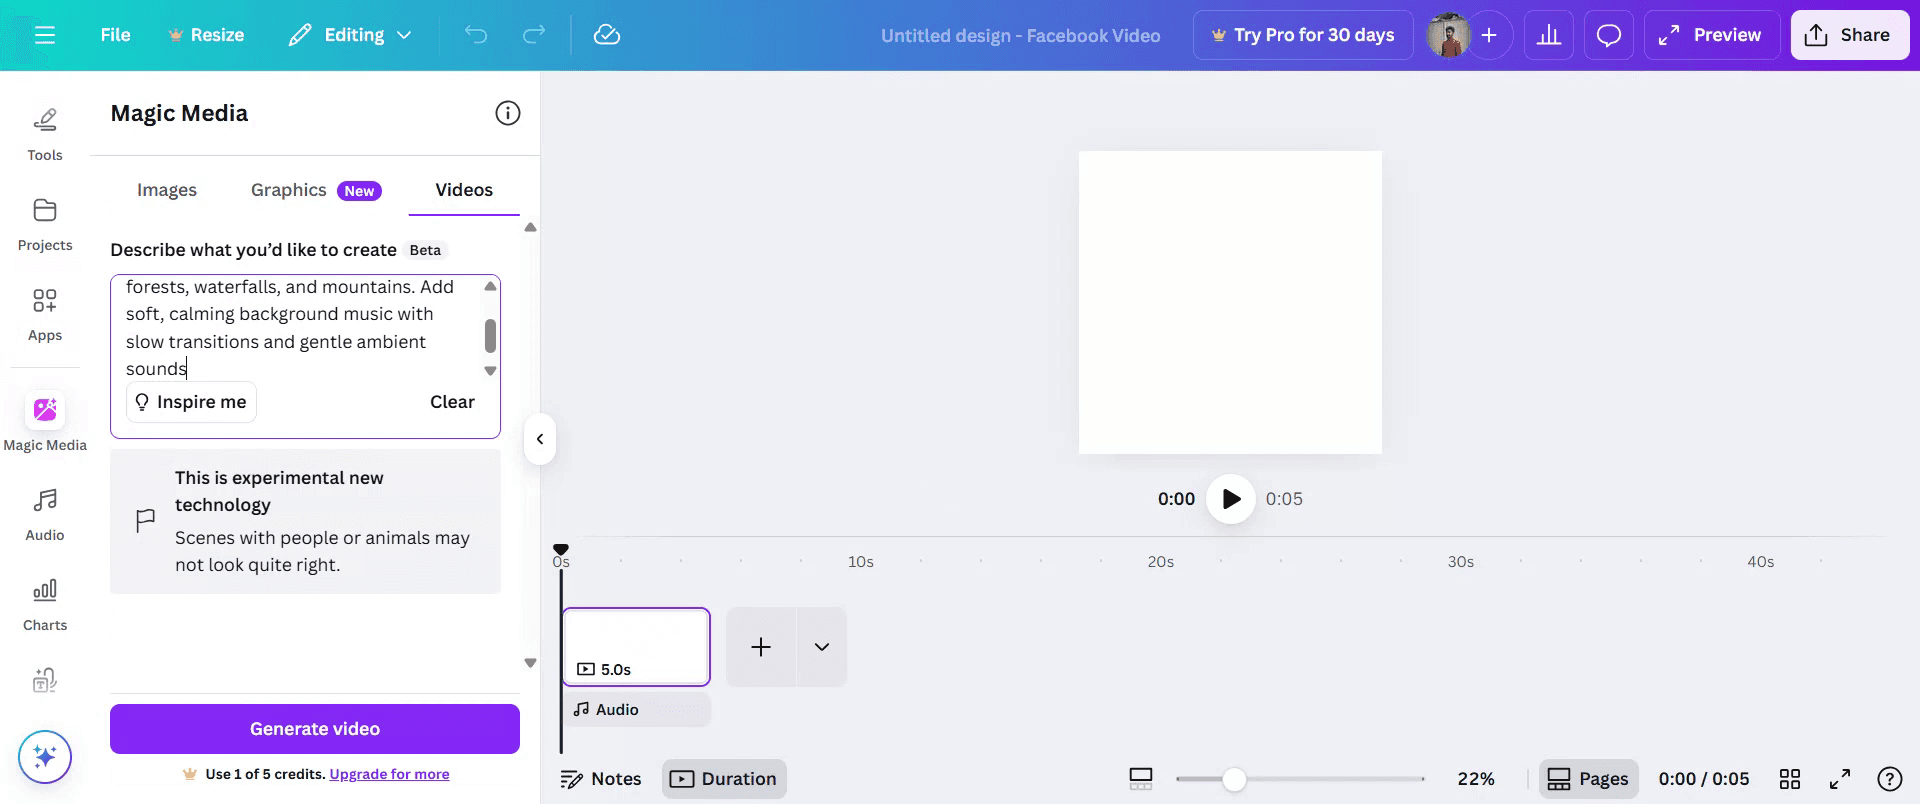
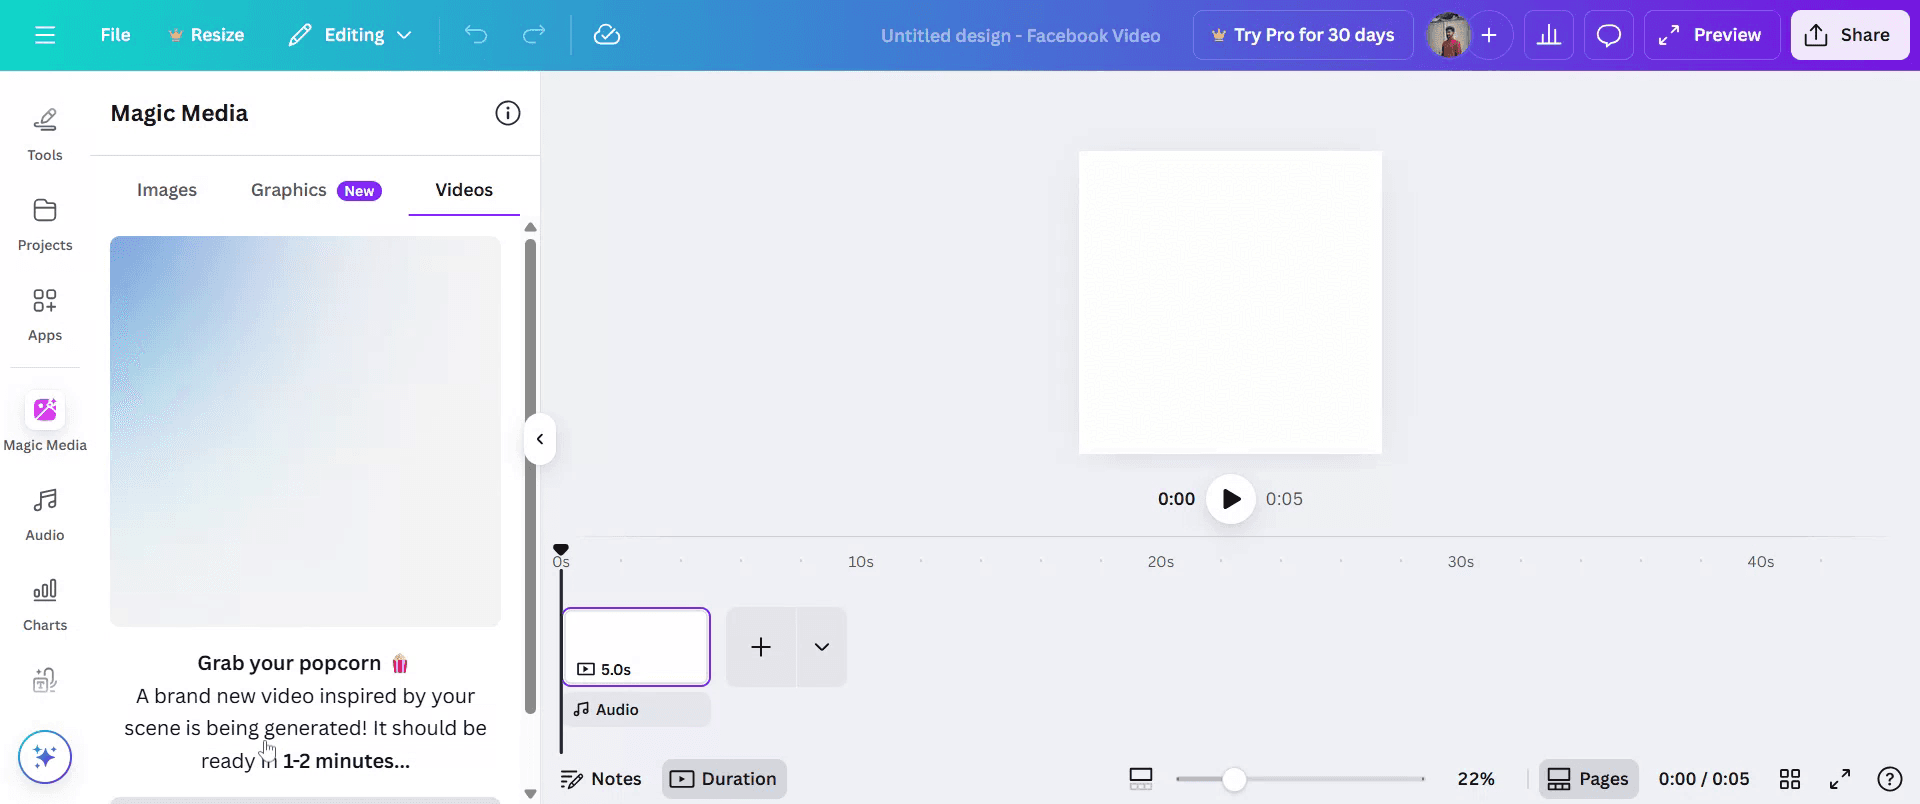
Zoek en klik op de hoofdoptie genaamd "Magic Media."

Stap 4
Ga in deze sectie naar 'Video's' en beschrijf je video met woorden.
Stap 5
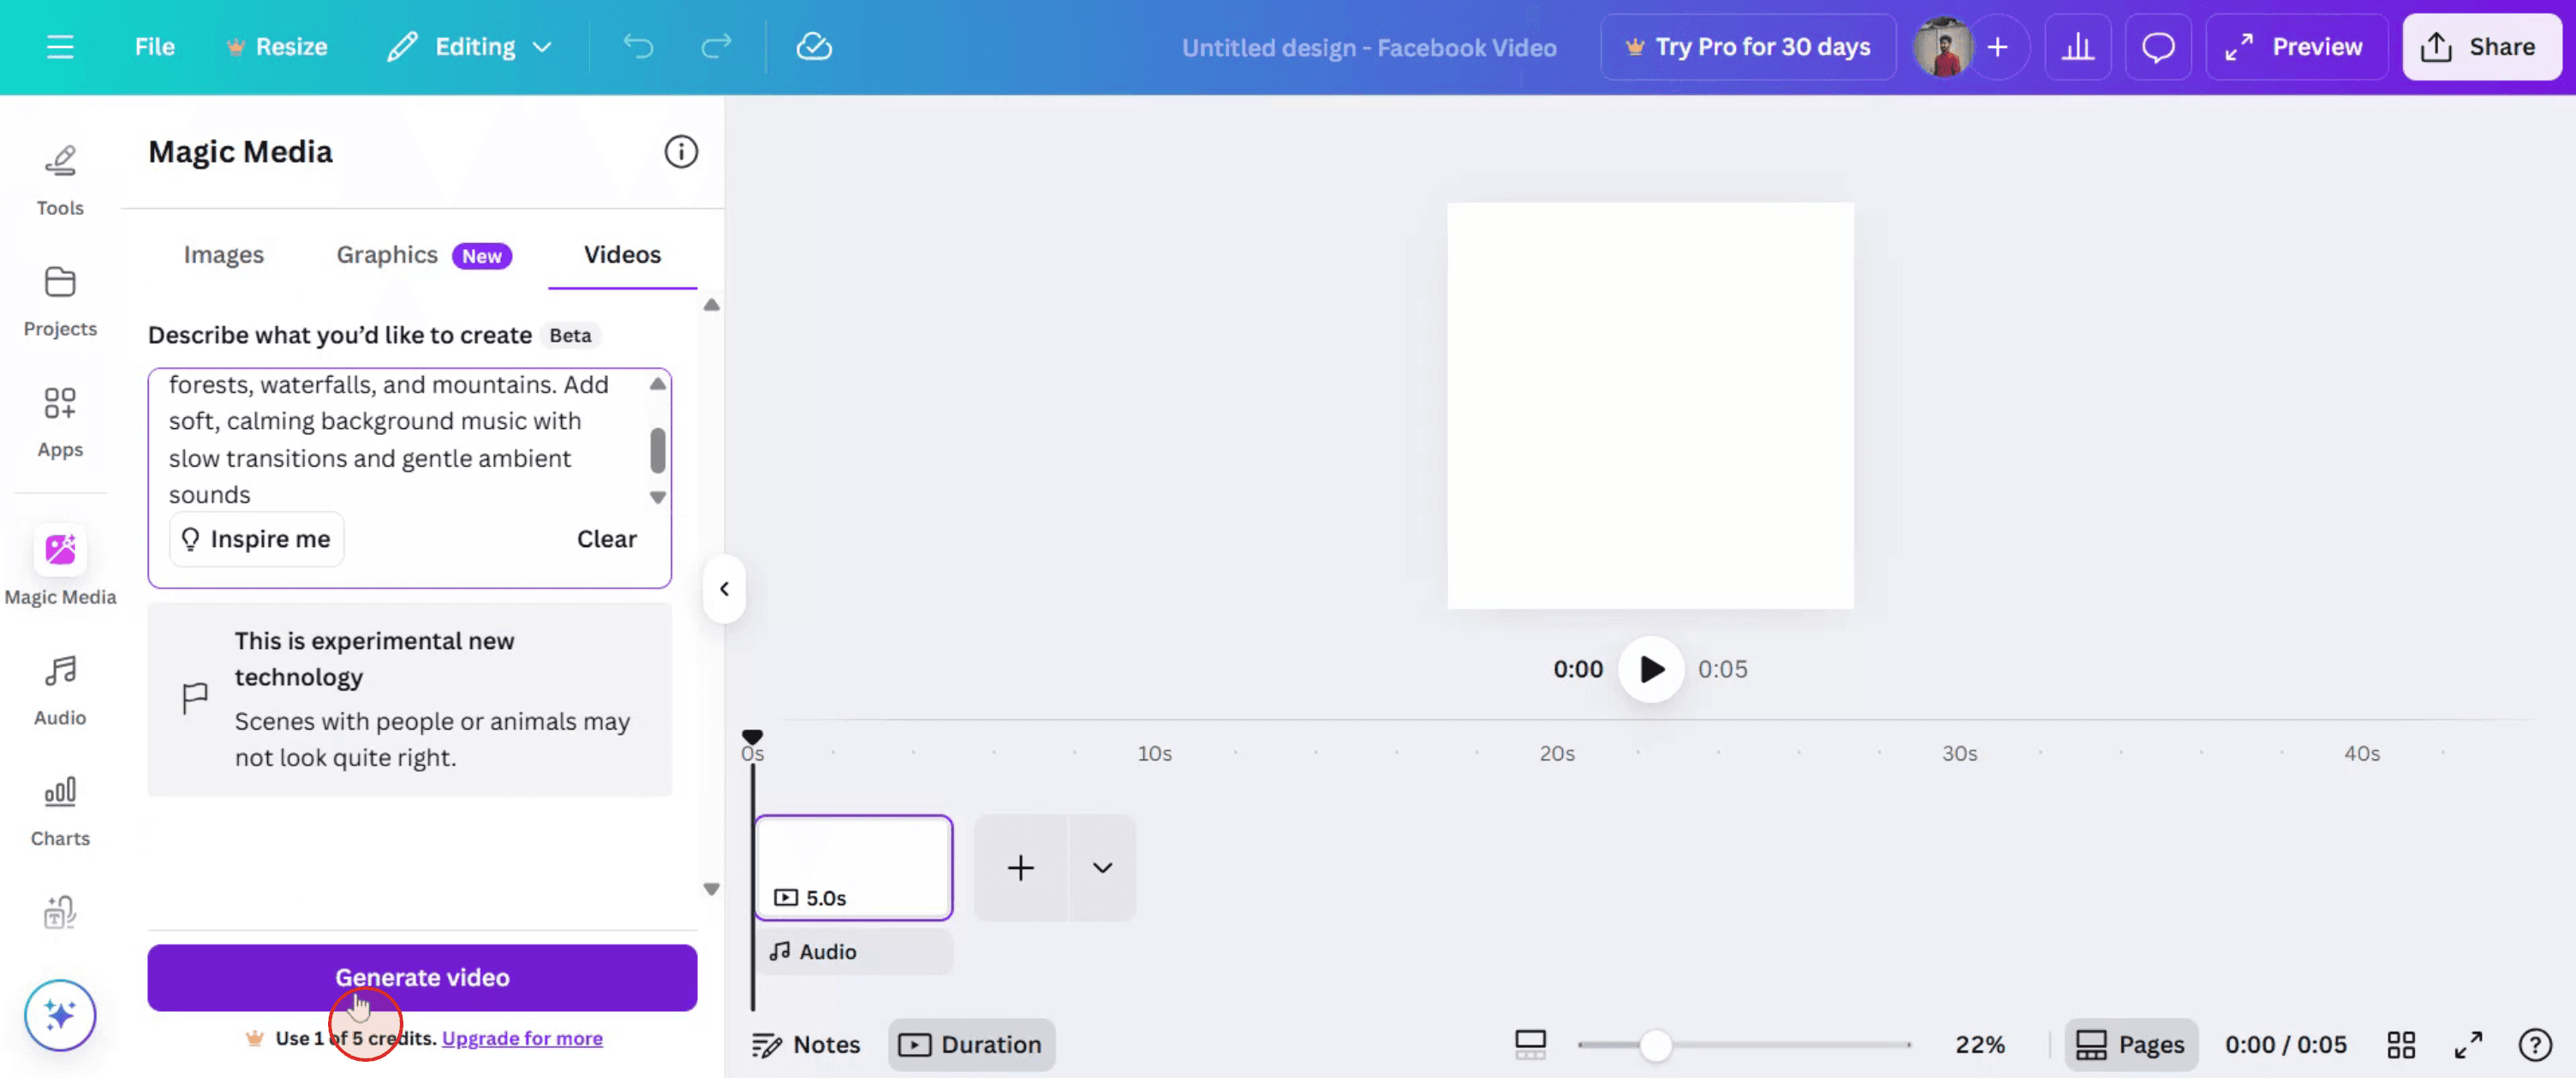
En klik vervolgens op "Video genereren."
Stap 6
Wacht alstublieft terwijl de video wordt verwerkt.
Stap 7
Zodra je video klaar is, selecteer je deze en sleep je hem naar je project.

Stap 8
Klik op "Delen" om je video met anderen te verspreiden.

Professionele tips voor het gebruik van de Canva AI-videogenerator
Log in op je Canva-account
Bezoek canva.com en meld je aan met je gegevens of maak een gratis account aan als je er nog geen hebt.Open het tabblad Video
Klik op “Video” in de linkerzijbalk op de Canva-startpagina of zoek naar “Video” in de zoekbalk om een nieuw videoproject te starten.Open de AI-videogenerator
Klik op de tool “Magic Design” of “Magic Media”, afhankelijk van je versie. Je vindt deze mogelijk onder het tabblad “Apps” in het linkerpaneel.Voer je videoprompt in
Gebruik het promptvak om te typen wat voor video je wilt genereren. Voer bijvoorbeeld “Maak een video over tips voor gezond eten” in en klik op genereren.Bekijk de gegenereerde sjablonen
Canva genereert een video-indeling met stockbeelden, tekst en muziek. Je kunt meerdere versies bekijken en degene kiezen die je mooi vindt.Pas de inhoud aan
Vervang de plaatshoudertekst, afbeeldingen of videoclips door je eigen materiaal of kies uit de bibliotheek van Canva. Je kunt ook lettertypen, kleuren en overgangen bewerken.Voeg voice-over of muziek toe
Gebruik Canva's audiobibliotheek of upload je eigen voice-over. Sleep muziektracks of vertellingen naar de tijdlijn.Exporteer of deel je video
Wanneer je klaar bent met bewerken, klik je op de knop “Delen” of “Downloaden”. Kies het videoformaat (meestal MP4) en exporteer je definitieve project.
Veelgemaakte fouten en hoe je ze voorkomt
De AI-videogeneratoroptie niet zien
De AI-videofunctie kan, afhankelijk van de versie, anders worden genoemd. Zoek naar Magic Media, Magic Design of kijk onder de sectie “Apps”.Te veel stockinhoud gebruiken
Canva's AI kan je video vullen met generieke stockbeelden. Pas de visuals aan zodat ze beter passen bij je merk of onderwerp.Tekstoverlays negeren
Zorg ervoor dat de tekst leesbaar is en goed over de video's is geplaatst. Pas indien nodig de timing en animaties aan voor meer duidelijkheid.Vergeet geen overgangen toe te voegen
Overgangen zorgen voor een vloeiende videostroom. Gebruik de ingebouwde overgangen van Canva tussen scènes om het geheel professioneler te maken.De audiotiming niet aanpassen
Als je een voice-over of muziek toevoegt, zorg er dan voor dat de timing aansluit op de visuele elementen. Gebruik de tijdlijneditor voor betere controle.
Veelgestelde vragen over Canva AI-videogenerator
Is de AI-videogenerator beschikbaar op gratis Canva-accounts?
Ja, maar met beperkte functionaliteit. Pro-gebruikers hebben toegang tot meer functies en content.Kan ik mijn eigen videoclips gebruiken met de AI-generator?
Ja, je kunt je eigen clips uploaden en de stockbeelden vervangen die door Canva zijn gegenereerd.Kan ik verticale video's maken voor sociale media?
Ja, kies de juiste templatesize zoals 9:16 voor Instagram Reels of TikTok voordat je de video genereert.Voegt Canva watermerken toe aan AI-gegenereerde video's?
Er wordt geen watermerk toegevoegd als je gratis assets gebruikt of een Pro-account hebt. Premium assets tonen een watermerk, tenzij ervoor betaald is.Kan ik ondertiteling of captions toevoegen in Canva-video's?
Ja, je kunt handmatig tekstvakken toevoegen of de AI-tekst-naar-spraak- en ondertiteltools gebruiken als die beschikbaar zijn in je abonnement.Hoe neem je het scherm op op een Mac?
Om het scherm op een Mac op te nemen, kun je Trupeer AI gebruiken. Hiermee kun je het volledige scherm vastleggen en krijg je AI-mogelijkheden zoals AI-avatars toevoegen, voice-over toevoegen en in- en uitzoomen in de video. Met de AI-videotranslatiefunctie van Trupeer kun je de video vertalen naar meer dan 30 talen.Hoe voeg je een AI-avatar toe aan een schermopname?
Om een AI-avatar toe te voegen aan een schermopname, moet je een AI-tool voor schermopnames gebruiken. Trupeer AI is een AI-tool voor schermopnames waarmee je video's met meerdere avatars kunt maken; het helpt je ook bij het maken van je eigen avatar voor de video.Hoe neem je het scherm op in Windows?
Om het scherm op Windows op te nemen, kun je de ingebouwde Game Bar (Windows + G) gebruiken of een geavanceerde AI-tool zoals Trupeer AI voor meer geavanceerde functies zoals AI-avatars, voice-over, vertaling enz.Hoe voeg je voice-over toe aan video?
Om voice-over toe te voegen aan video's, download je de Trupeer AI Chrome-extensie. Nadat je je hebt aangemeld, upload je je video met stem, kies je de gewenste voice-over van Trupeer en exporteer je je bewerkte video.Hoe zoom ik in op een schermopname?
Om tijdens een schermopname in te zoomen, gebruik je de zoomeffecten in Trupeer AI, waarmee je op specifieke momenten kunt in- en uitzoomen en zo de visuele impact van je videocontent kunt versterken.
Aanbevolen lectuur
Generator voor technische documentatie
Hoe je een afbeelding omzet in een kleurplaat in Canva
Hoe je dubbelzijdig afdrukt in Canva
Gerelateerde tutorials

