
Hoe haal je een foto uit een video in Canva
Leer hoe je in Canva een foto uit een video haalt door een frame vast te leggen en als afbeelding te exporteren. Volg deze eenvoudige handleiding en maak duidelijke visuele gidsen met Trupeer.
Deze handleiding biedt een uitgebreide stapsgewijze uitleg over hoe je een stilstaand beeld uit een video kunt vastleggen in Canva.
Volg de onderstaande stappen om efficiënt de gewenste foto uit je videoproject te halen.
Om een foto uit een video in Canva vast te leggen, upload je de video, positioneer je deze zodat het gewenste frame wordt weergegeven, en download je het ontwerp vervolgens als een afbeeldingsbestand (PNG of JPEG). Hoewel Canva geen speciale functie voor het vastleggen van een frame heeft, kun je met deze workaround toch effectief een stilstaand beeld extraheren.
Stapsgewijze handleiding:
1. Upload je video:
Open je Canva-project en upload de video die je wilt gebruiken. Sleep deze naar je canvas.
2. Stel het frame in:
Verplaats de afspeelkop (de schuifregelaar) in de videotijdlijn naar het frame dat je wilt vastleggen. Wijzig de grootte en positioneer de video op de canvas indien nodig.
3. Download het frame als een afbeelding:
Klik op "Delen" in de rechterbovenhoek.
Selecteer "Downloaden".
Kies PNG of JPEG als bestandstype.
Onder “Pagina's selecteren” kies je alleen de huidige pagina.
Stapsgewijze handleiding: hoe je een foto uit een video in Canva haalt
Stap 1
Om te beginnen met het vastleggen van een foto uit een video in Canva, open je een bestaand ontwerp dat de video bevat. Gebruik de duurtimer onder de video om af te spelen en precies te stoppen op het moment dat je wilt vastleggen.

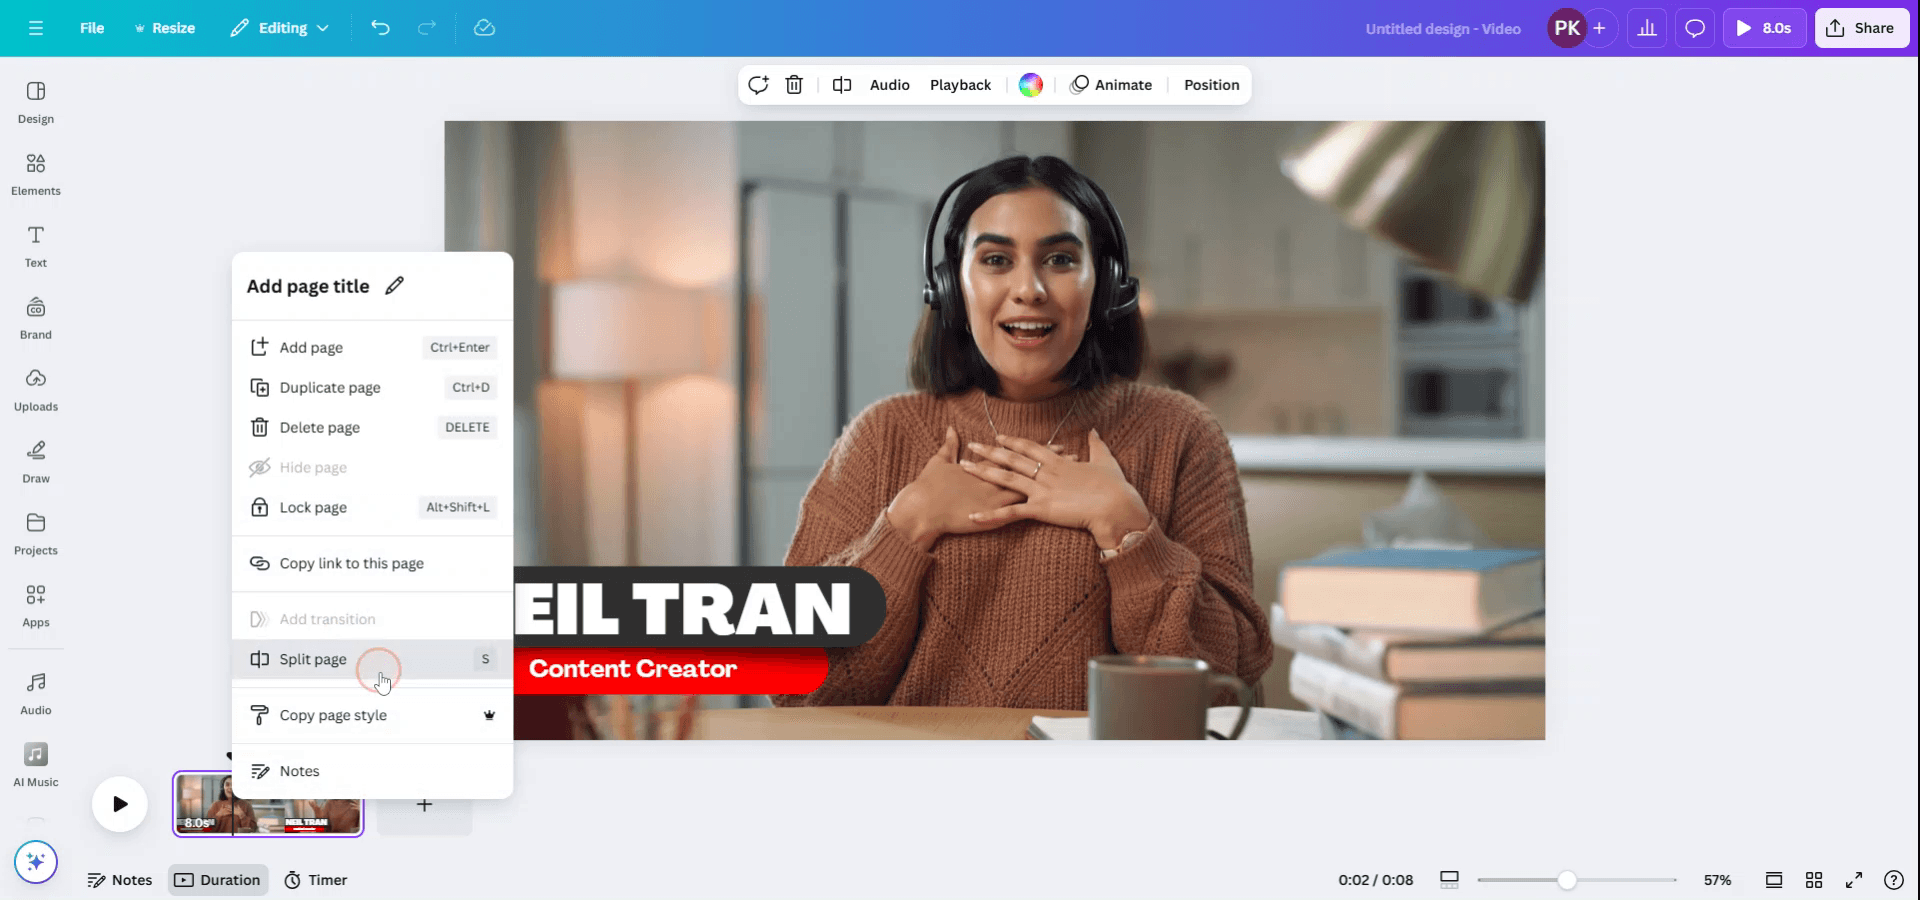
Stap 2
Nadat je exact het frame hebt gevonden dat je wilt vastleggen, klik je op "S" om de video te splitsen. Je kunt ook met de rechtermuisknop op de video klikken en "Pagina splitsen" kiezen om het frame te isoleren.
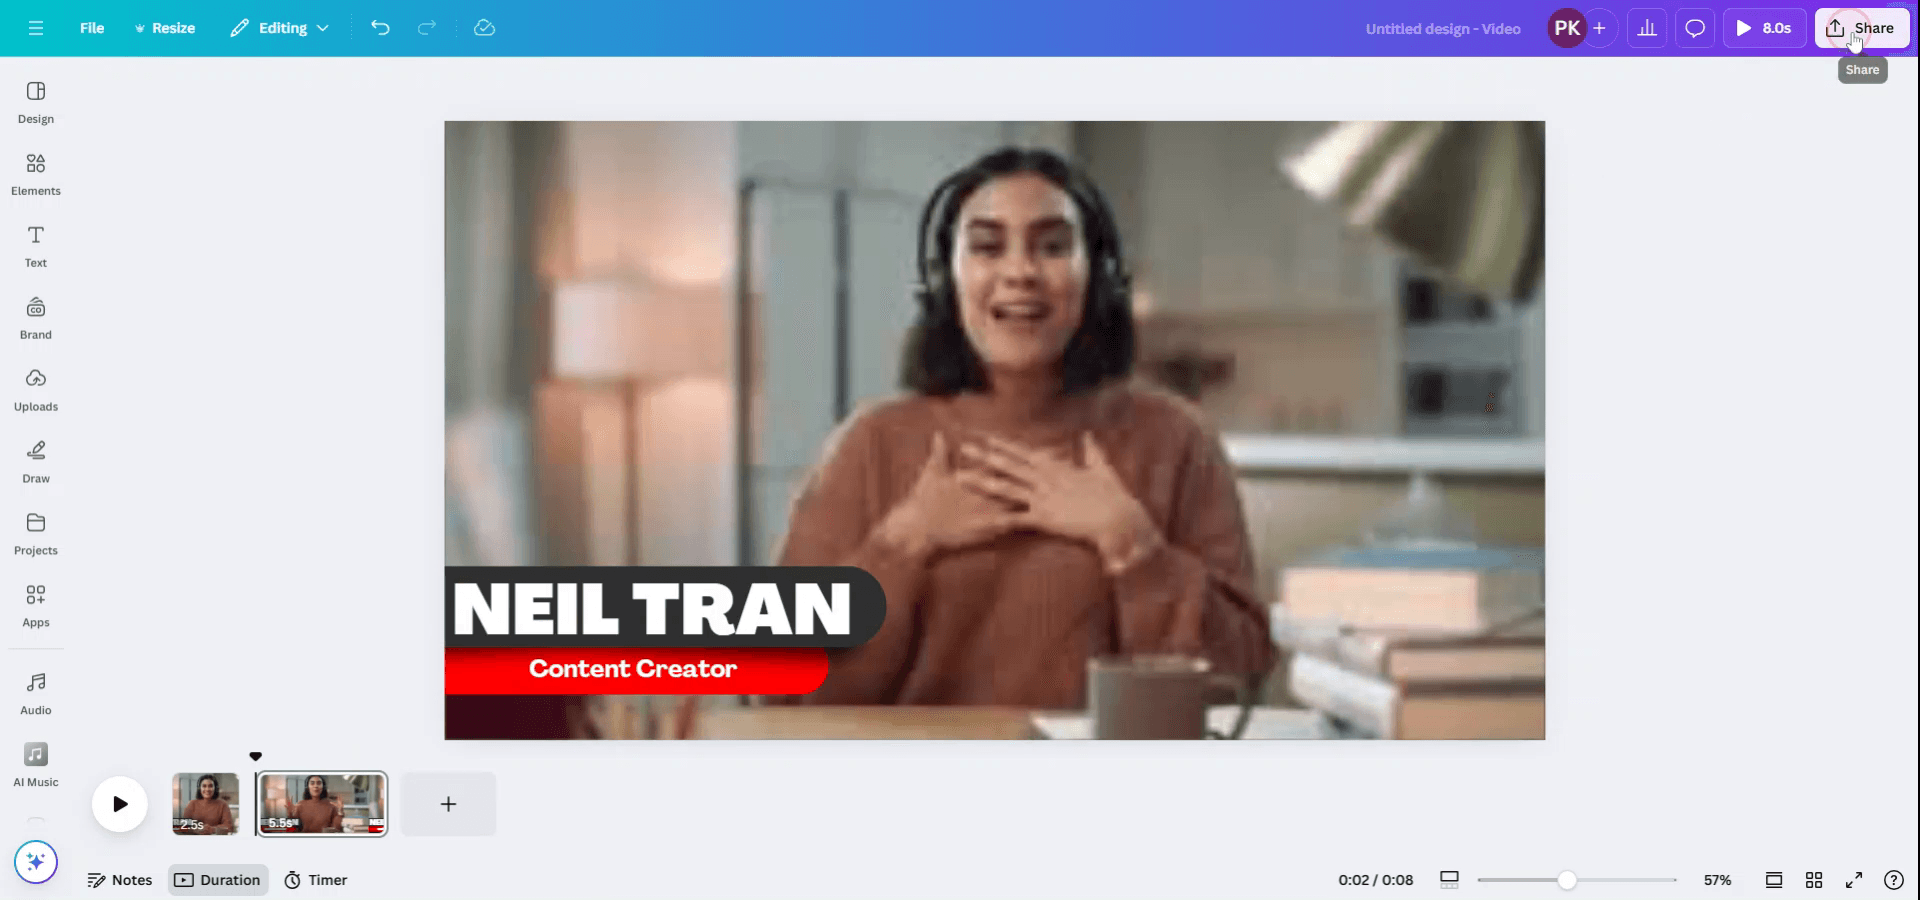
Stap 3
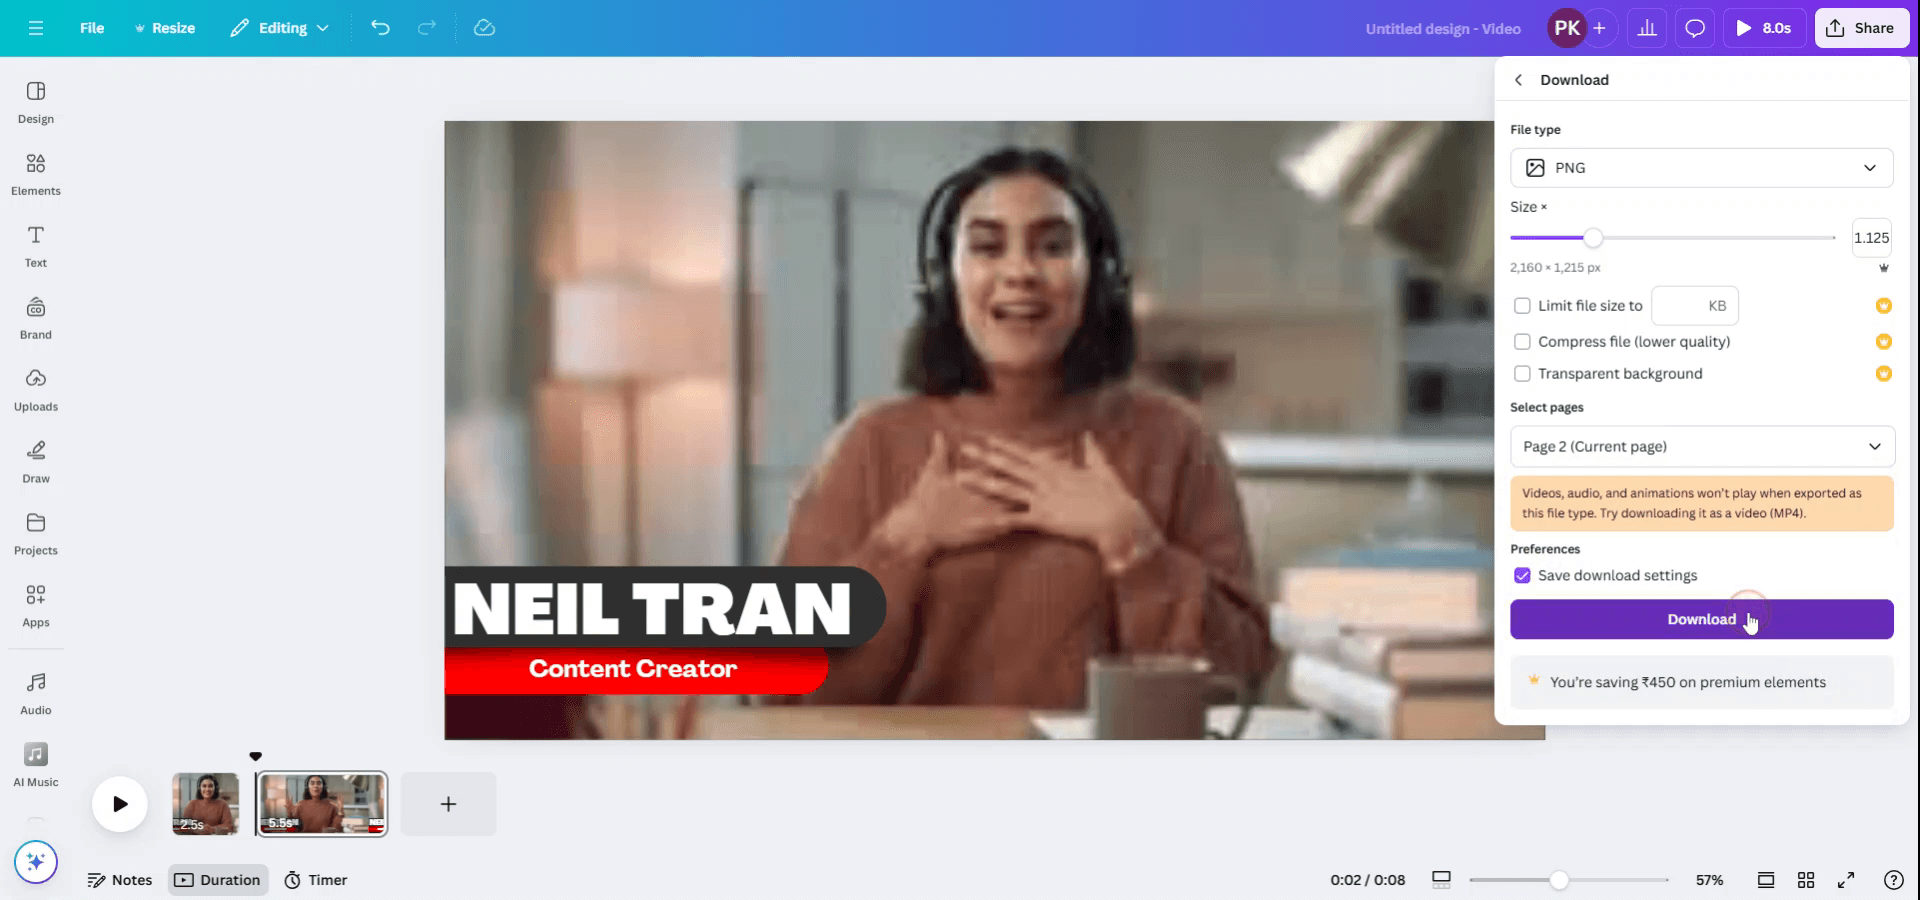
Het gekozen frame verschijnt nu op een nieuwe pagina, zoals Pagina 2. Om dit frame als foto te downloaden, klik je op de knop "Delen" en selecteer je "Downloaden" in het vervolgkeuzemenu.
Stap 4
Stel het bestandstype in op PNG en pas de grootte indien nodig aan.
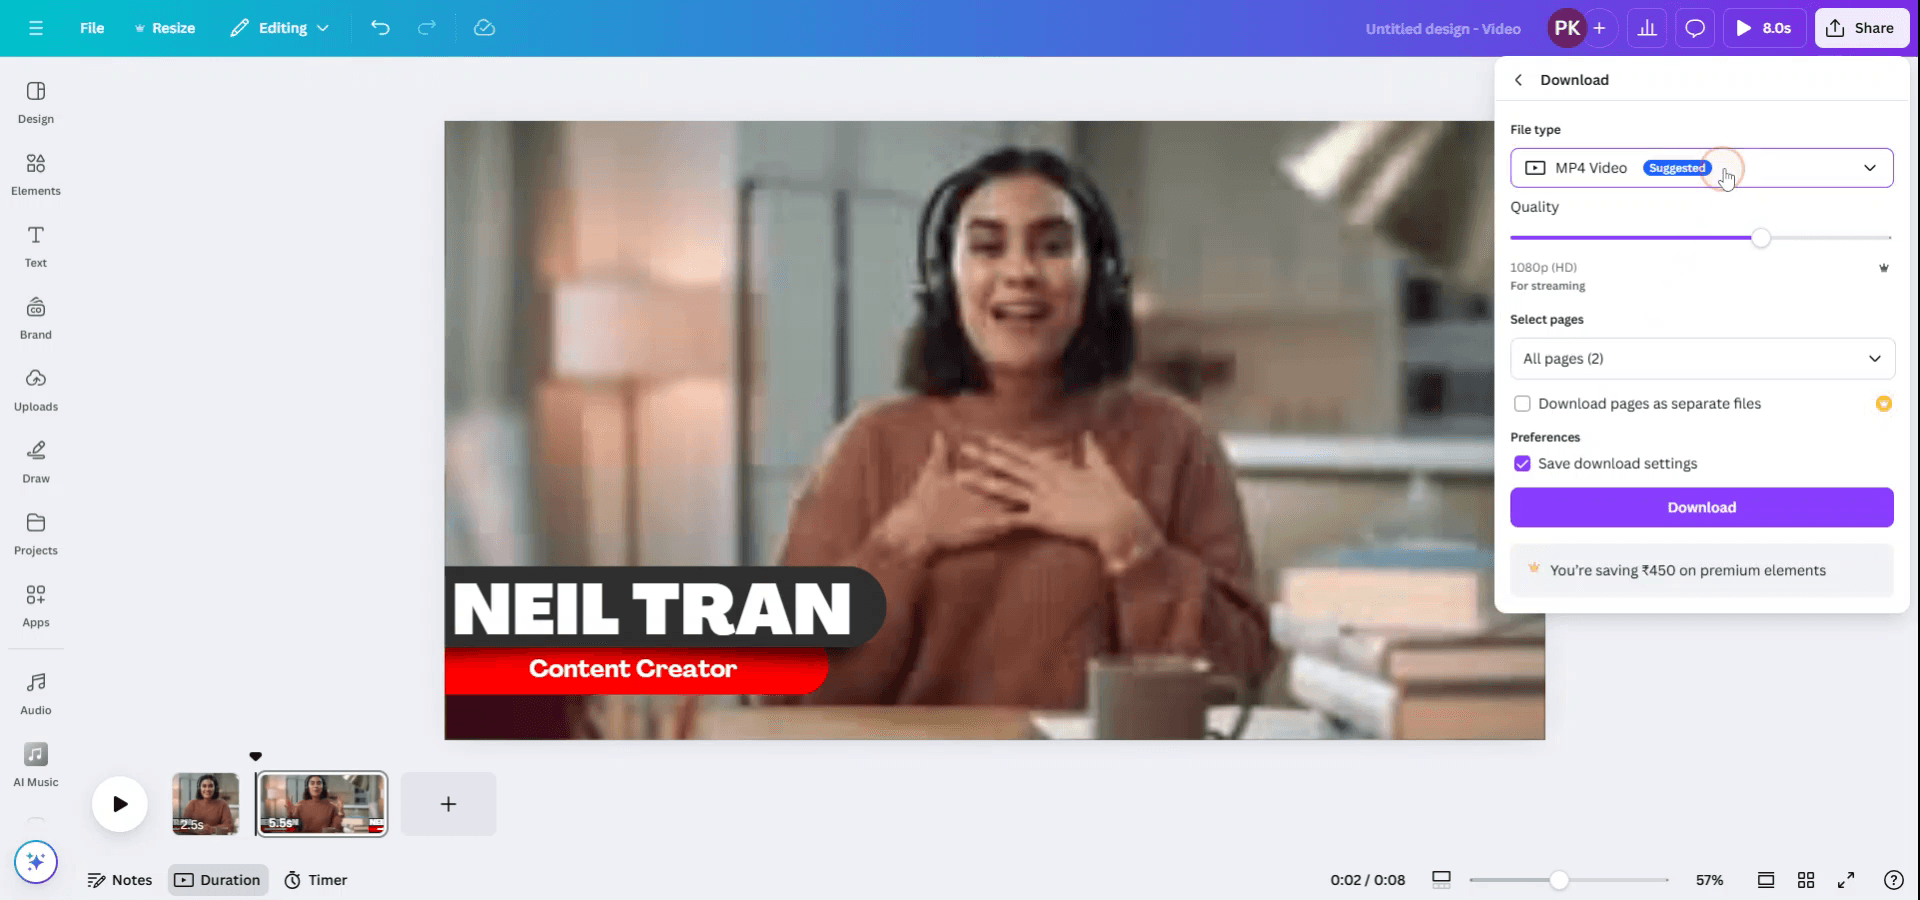
Stap 5
Zorg ervoor dat je de juiste pagina (Pagina 2) hebt geselecteerd waarop de gewenste foto staat voordat je verdergaat.

Stap 6
Zodra alle instellingen zijn bevestigd, klik je op "Gereed" en vervolgens op "Downloaden" om de foto op je apparaat op te slaan.
Pro tips voor het halen van een foto uit een video in Canva
Pauzeer op het gewenste frame: Speel de video af en pauzeer precies op het frame dat je als afbeelding wilt vastleggen.
Maak een screenshot: Gebruik de screenshotfunctie van je computer of apparaat (bijv. Knipprogramma op Windows, Command+Shift+4 op Mac) om het frame vast te leggen.
Upload de screenshot naar Canva: Nadat je de screenshot hebt vastgelegd, upload je deze naar Canva door te slepen en neer te zetten of via het tabblad "Uploads".
Gebruik de video-bewerkingstool: Canva laat je video's inkorten en splitsen. Gebruik deze functie om je te richten op het deel van de video waaruit je een foto wilt halen voordat je de screenshot maakt.
Gebruik Canva’s afbeeldingseditor voor verbeteringen: Zodra de afbeelding is geüpload, gebruik je Canva’s afbeeldingseditor om helderheid en contrast aan te passen en filters toe te passen voor een professionele uitstraling.
Veelvoorkomende valkuilen en hoe je ze vermijdt bij het halen van een foto uit een video in Canva
Screenshot van lage kwaliteit: Als je een screenshot van een video met lage resolutie maakt, kan de beeldkwaliteit slecht zijn.
Oplossing: Zorg ervoor dat de video een hoge resolutie heeft voordat je een screenshot maakt, zodat de beeldhelderheid behouden blijft.Ongewenste elementen in het frame: Soms verschijnen andere delen van de video in het frame dat je wilt vastleggen.
Oplossing: Kort de video in Canva in voordat je pauzeert om het gewenste frame te isoleren, of gebruik bijsnijdtools nadat je de afbeelding hebt vastgelegd.De afbeeldingsgrootte niet aanpassen: Na het uploaden van de screenshot vergeet je misschien om het formaat aan te passen aan je ontwerp.
Oplossing: Gebruik de formaatopties van Canva om de afbeelding perfect aan te laten sluiten op je lay-out.Verlies van beeldverhouding: Het formaat van de afbeelding wijzigen kan de oorspronkelijke beeldverhouding vervormen.
Oplossing: Houd de toets "Shift" ingedrukt tijdens het wijzigen van het formaat om de juiste verhoudingen van de afbeelding te behouden.Beperkingen in bestandsindeling: Screenshots zijn niet altijd in de beste indeling voor Canva.
Oplossing: Sla screenshots op in gangbare afbeeldingsindelingen (PNG of JPG) voordat je ze naar Canva uploadt.
Veelgestelde vragen over het uit een video halen van een foto in Canva
Kan ik rechtstreeks een foto uit een video extraheren in Canva?
Nee, Canva heeft geen ingebouwde functie om foto's uit video's te halen. Je moet eerst het beeldkader vastleggen via een screenshot.Welke videoformaten kan ik uploaden naar Canva?
Canva ondersteunt video-uploads in MP4, MOV en andere gangbare videoformaten.Kan ik de foto bewerken nadat ik deze uit een video heb vastgelegd?
Ja, nadat je deze in Canva hebt geüpload, kun je de bewerkingstools van het platform gebruiken om de afbeelding te verbeteren of aan te passen.Is er een betere manier om foto's van hoge kwaliteit uit een video te halen?
Als je een afbeelding van hogere kwaliteit nodig hebt, overweeg dan om vóór het uploaden naar Canva speciale software voor video-naar-afbeelding te gebruiken.Kan ik een frame uit een video voor commerciële doeleinden gebruiken?
Zorg ervoor dat je over de juiste rechten beschikt om de videoinhoud te gebruiken. Canva biedt stockvideo's en foto's met gebruiksrechten voor commercieel gebruik, maar voor persoonlijke video's kan toestemming of een licentie nodig zijn.Hoe schermopnames maken op mac?
Om een schermopname op een Mac te maken, kun je Trupeer AI gebruiken. Het stelt je in staat het volledige scherm vast te leggen en biedt AI-mogelijkheden zoals het toevoegen van AI-avatars, voice-over toevoegen, in- en uitzoomen in de video. Met de AI-videotranslatiefunctie van trupeer kun je de video vertalen naar meer dan 30 talen.Hoe voeg ik een AI-avatar toe aan een schermopname?
Om een AI-avatar toe te voegen aan een schermopname, moet je een AI-schermopnametool gebruiken. Trupeer AI is een AI-schermopnametool, waarmee je video's met meerdere avatars kunt maken en die je ook helpt bij het maken van je eigen avatar voor de video.Hoe schermopnames maken op windows?
Om een schermopname op Windows te maken, kun je de ingebouwde Game Bar (Windows + G) gebruiken of een geavanceerde AI-tool zoals Trupeer AI voor meer geavanceerde functies zoals AI-avatars, voice-over, vertaling, enz.Hoe voeg ik voice-over toe aan video?
Om voice-over aan video's toe te voegen, download de Chrome-extensie van trupeer ai. Nadat je je hebt aangemeld, upload je video met stem, kies de gewenste voice-over van trupeer en exporteer je bewerkte video.Hoe zoom ik in op een schermopname?
Om in te zoomen tijdens een schermopname, gebruik je de zoom-effecten in Trupeer AI waarmee je op specifieke momenten kunt in- en uitzoomen, wat de visuele impact van je videocontent vergroot.
Mensen vragen ook
Technische documentatiegenerator
Hoe je een afbeelding omzet in een kleurplaat in Canva
Hoe je dubbelzijdig afdrukt in Canva
Gerelateerde tutorials

