

Hoe archiveer je een GitHub-repository
Leer hoe u uw GitHub-repository eenvoudig kunt archiveren om deze alleen-lezen te maken. Volg deze stapsgewijze handleiding om oude projecten te beschermen en uw versiebeheer overzichtelijk te houden.
Stapsgewijze handleiding: hoe archiveer je een GitHub-repository
Stap 1
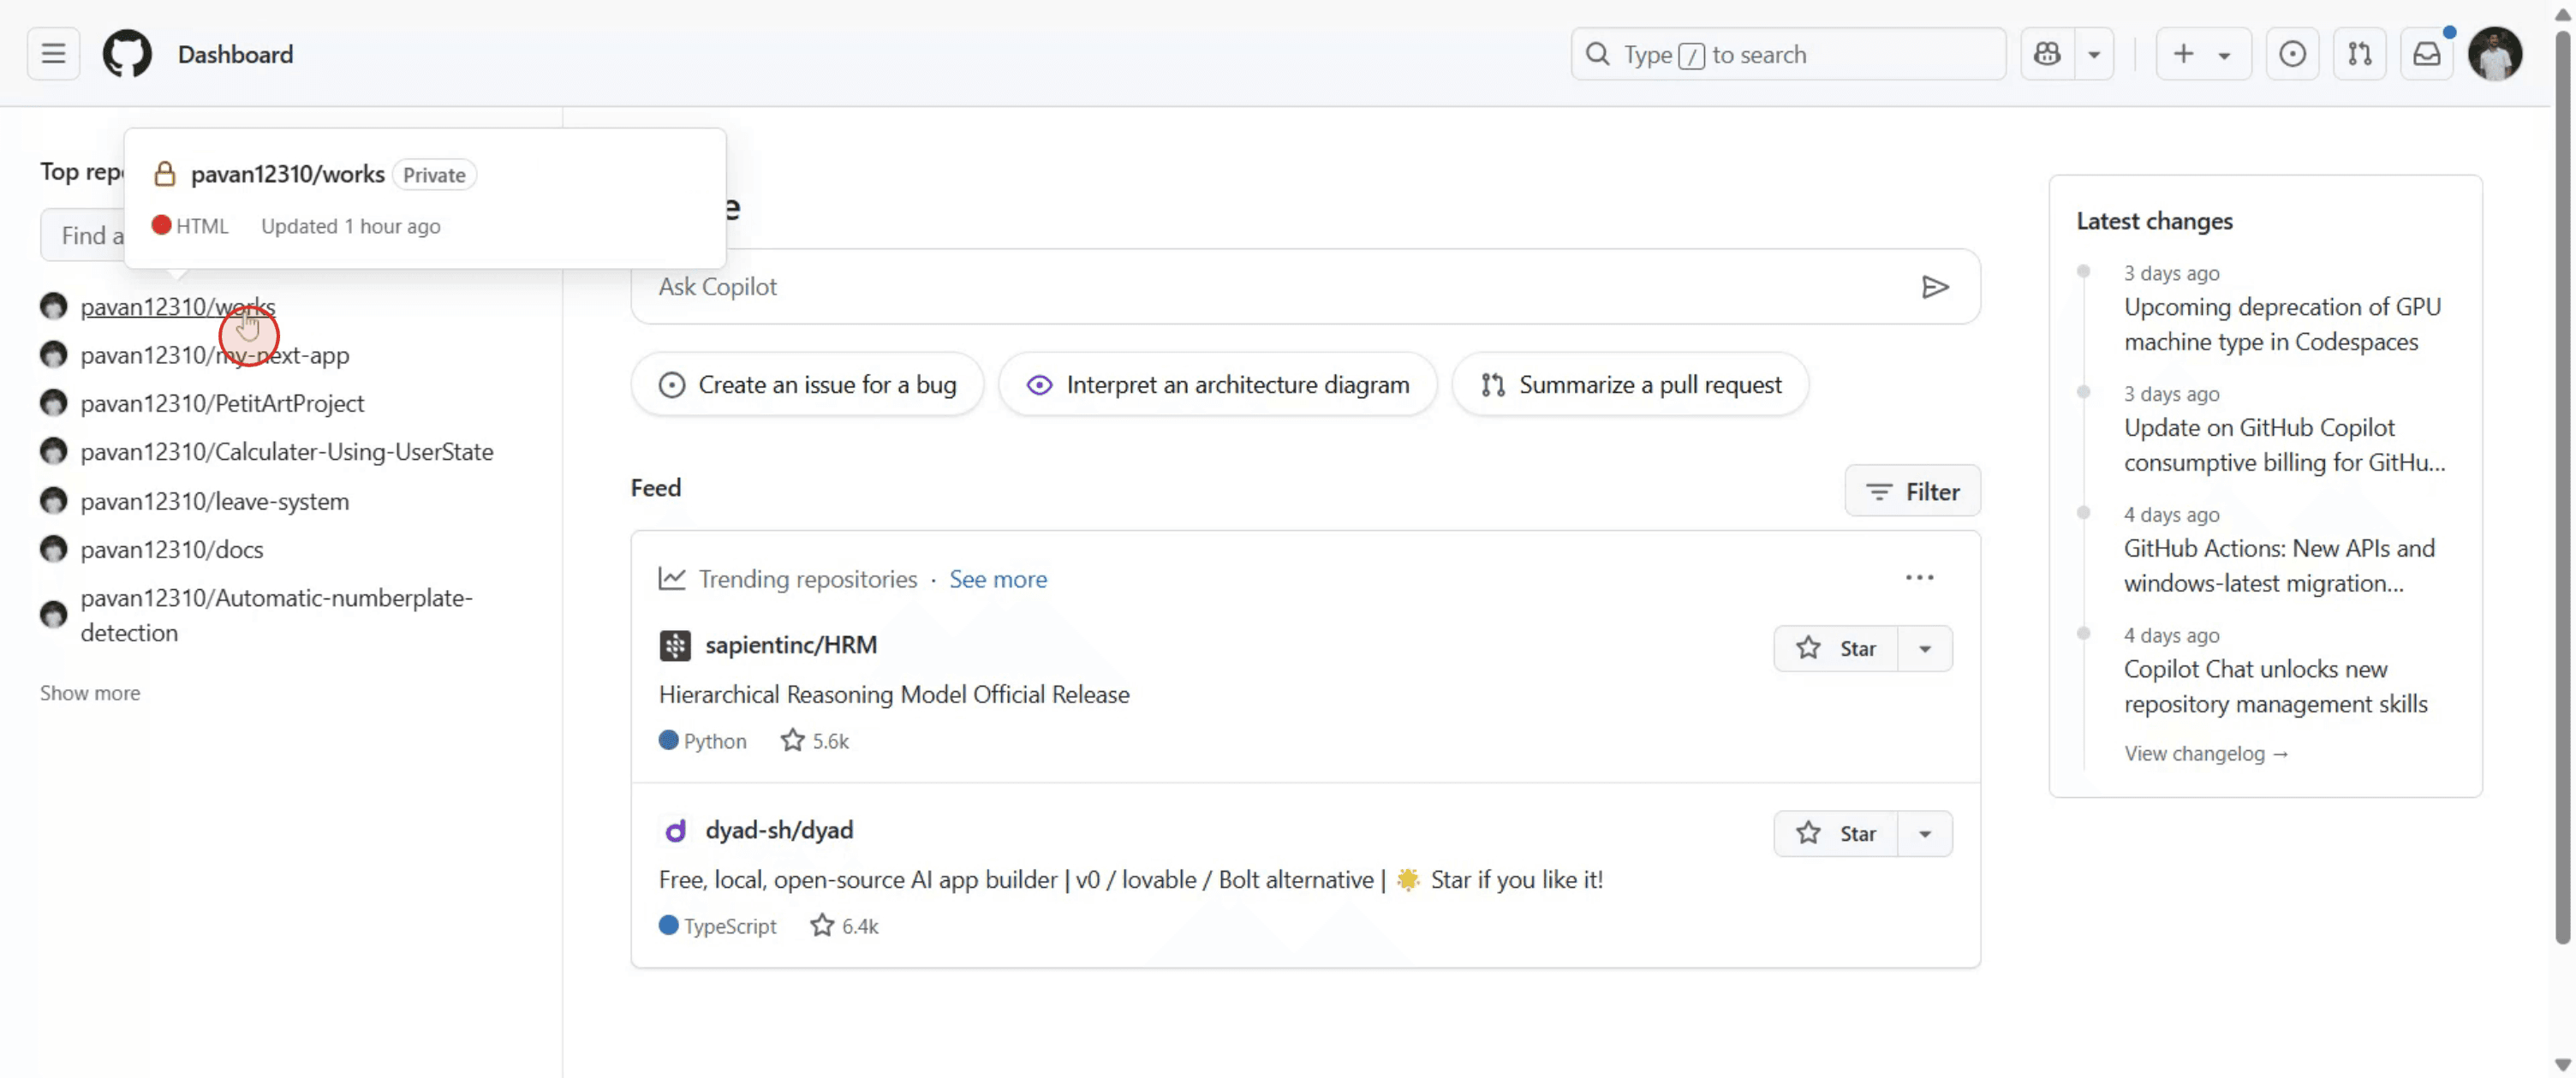
Navigeer naar de gewenste repository.
Stap 2
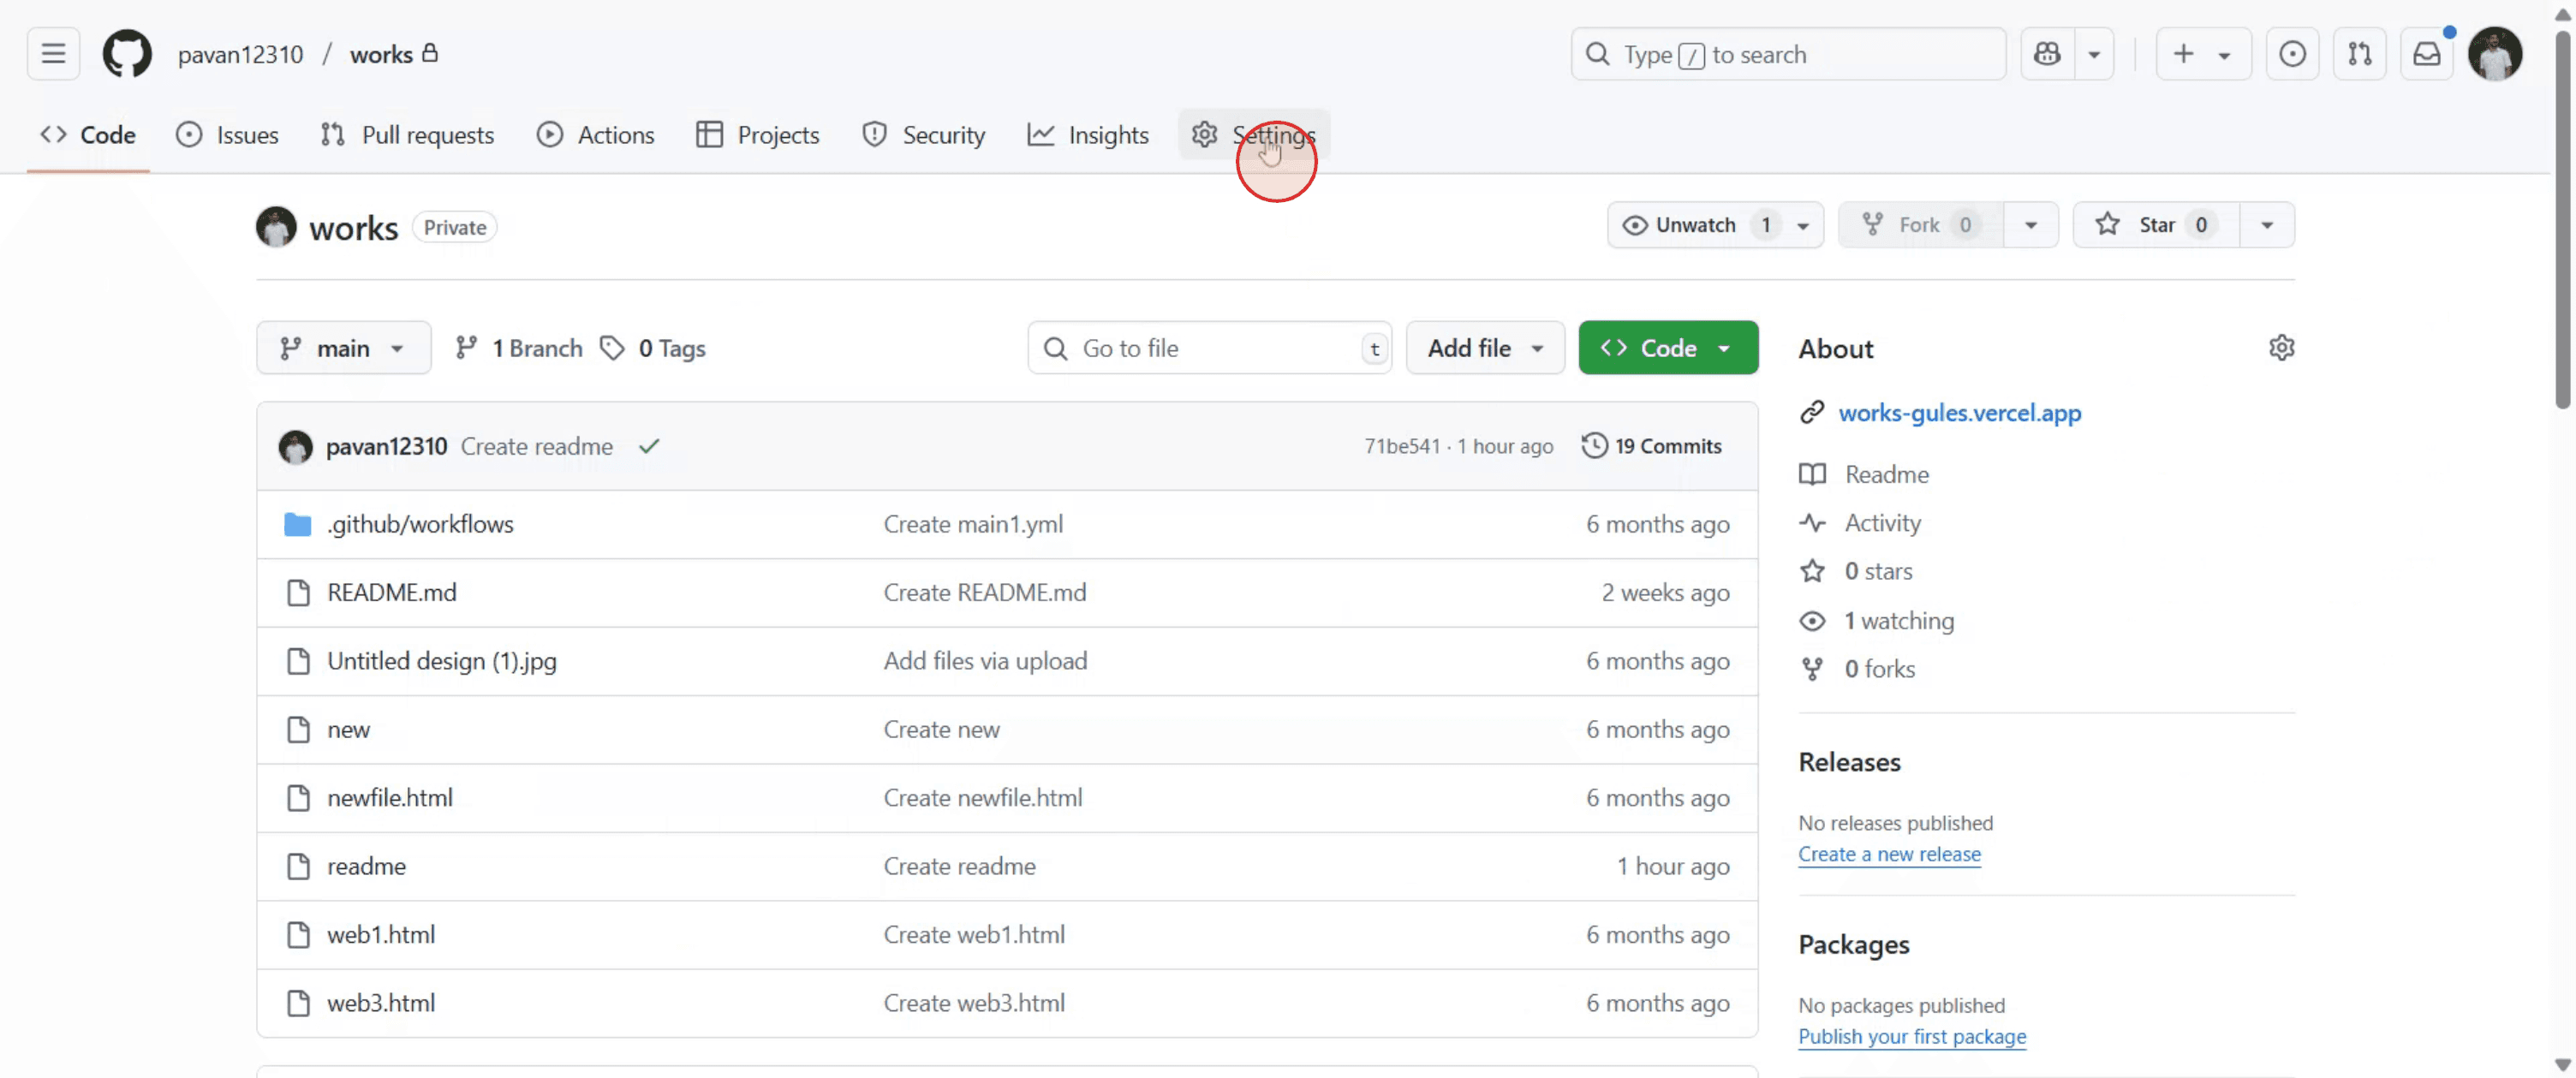
Klik op het tabblad 'Instellingen'. Je vindt het aan de rechterkant van de pagina, onder de naam van de repository.
Stap 3
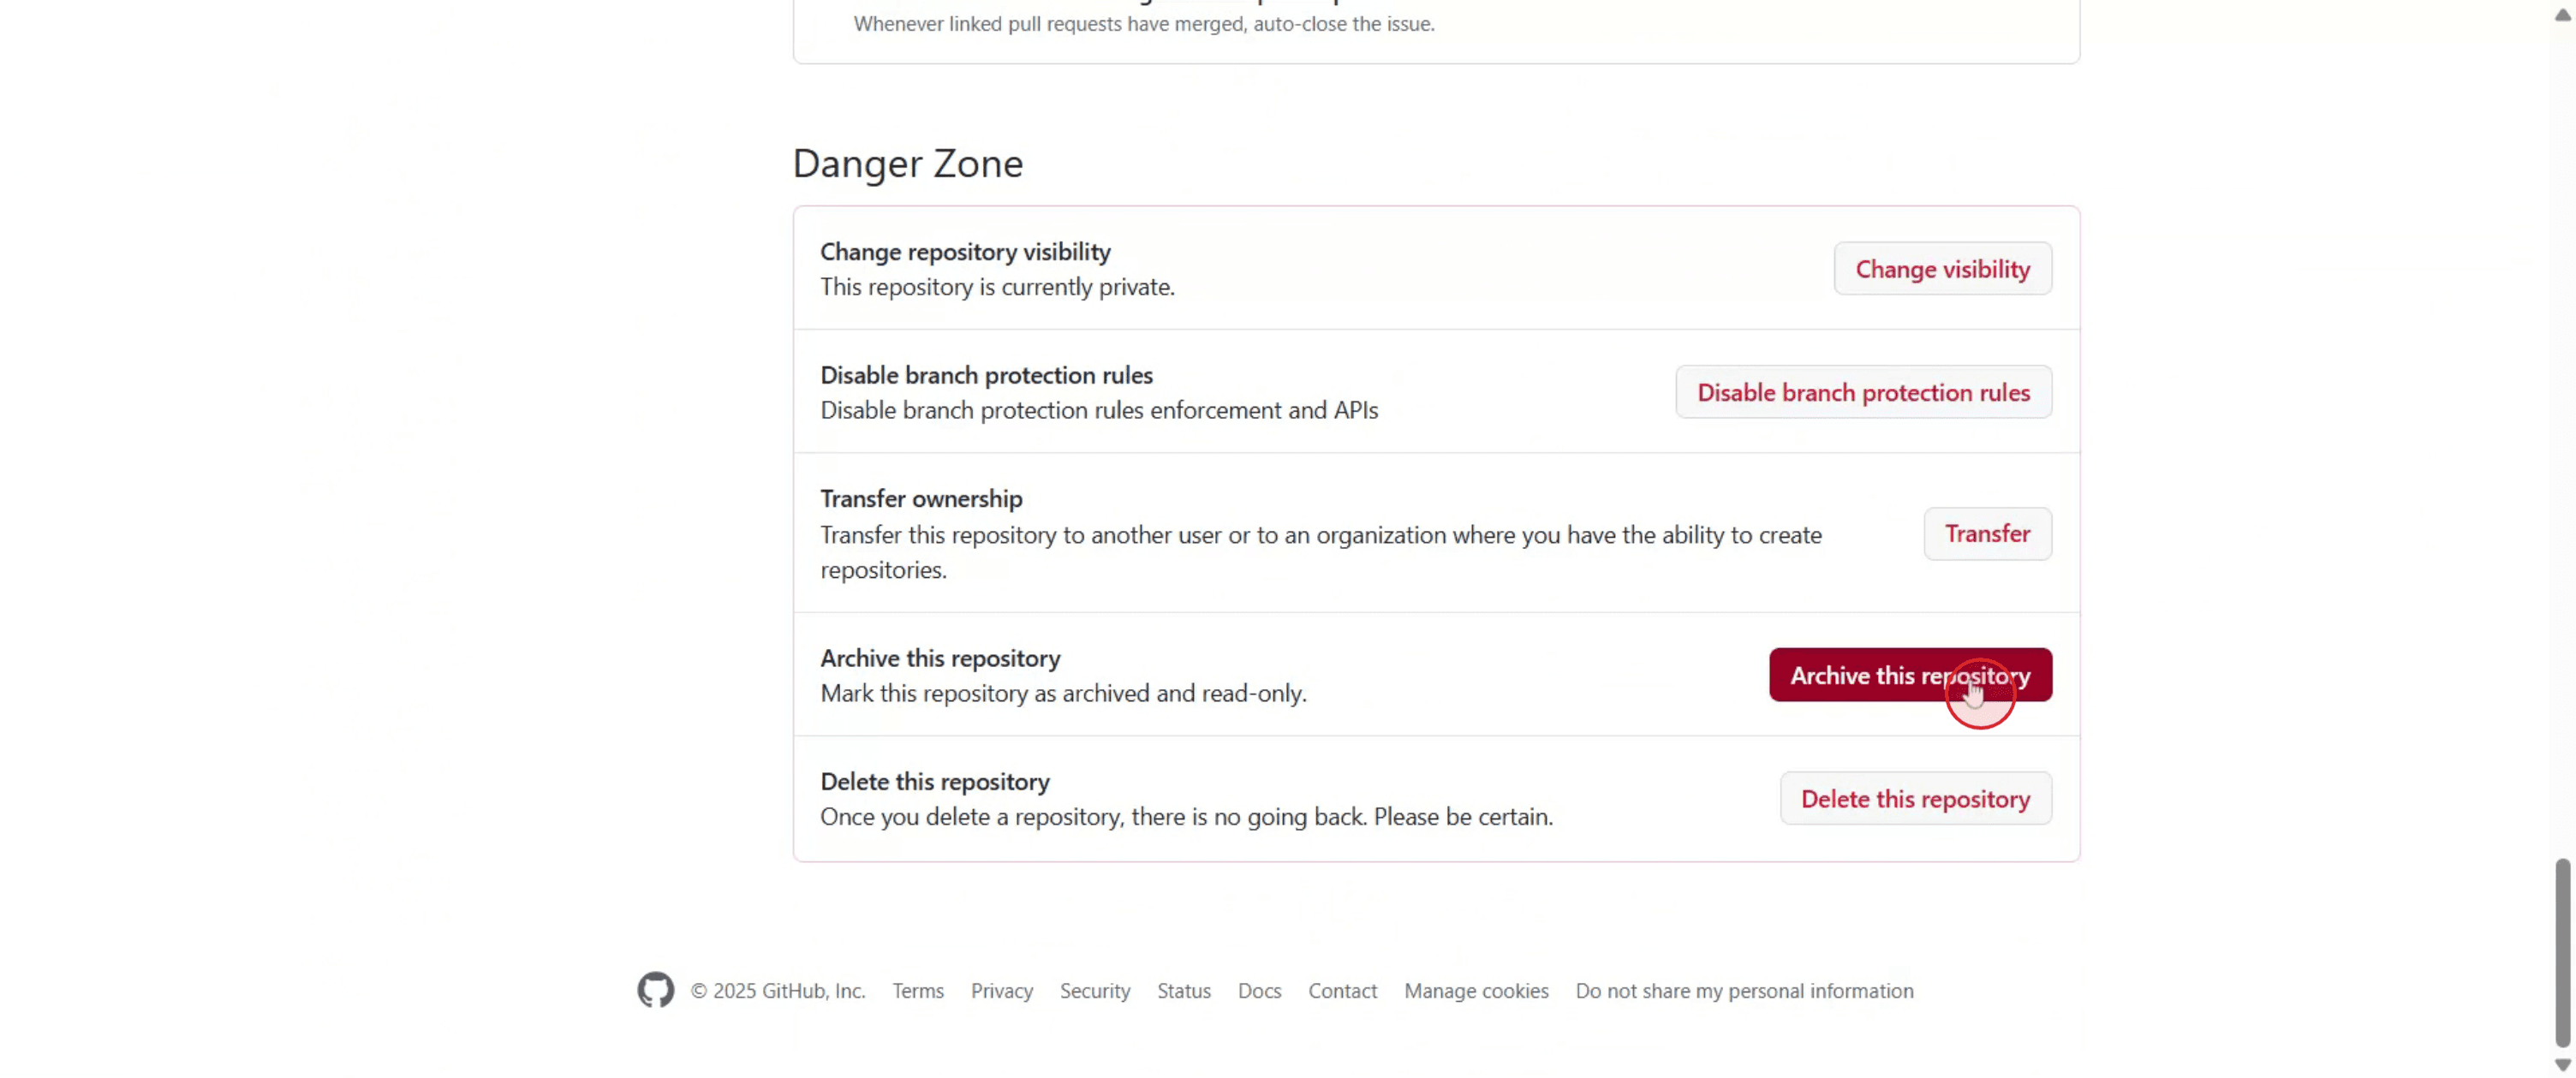
Zoek in de sectie 'Instellingen' de optie 'Archiveer deze repository' en selecteer deze.
Stap 4
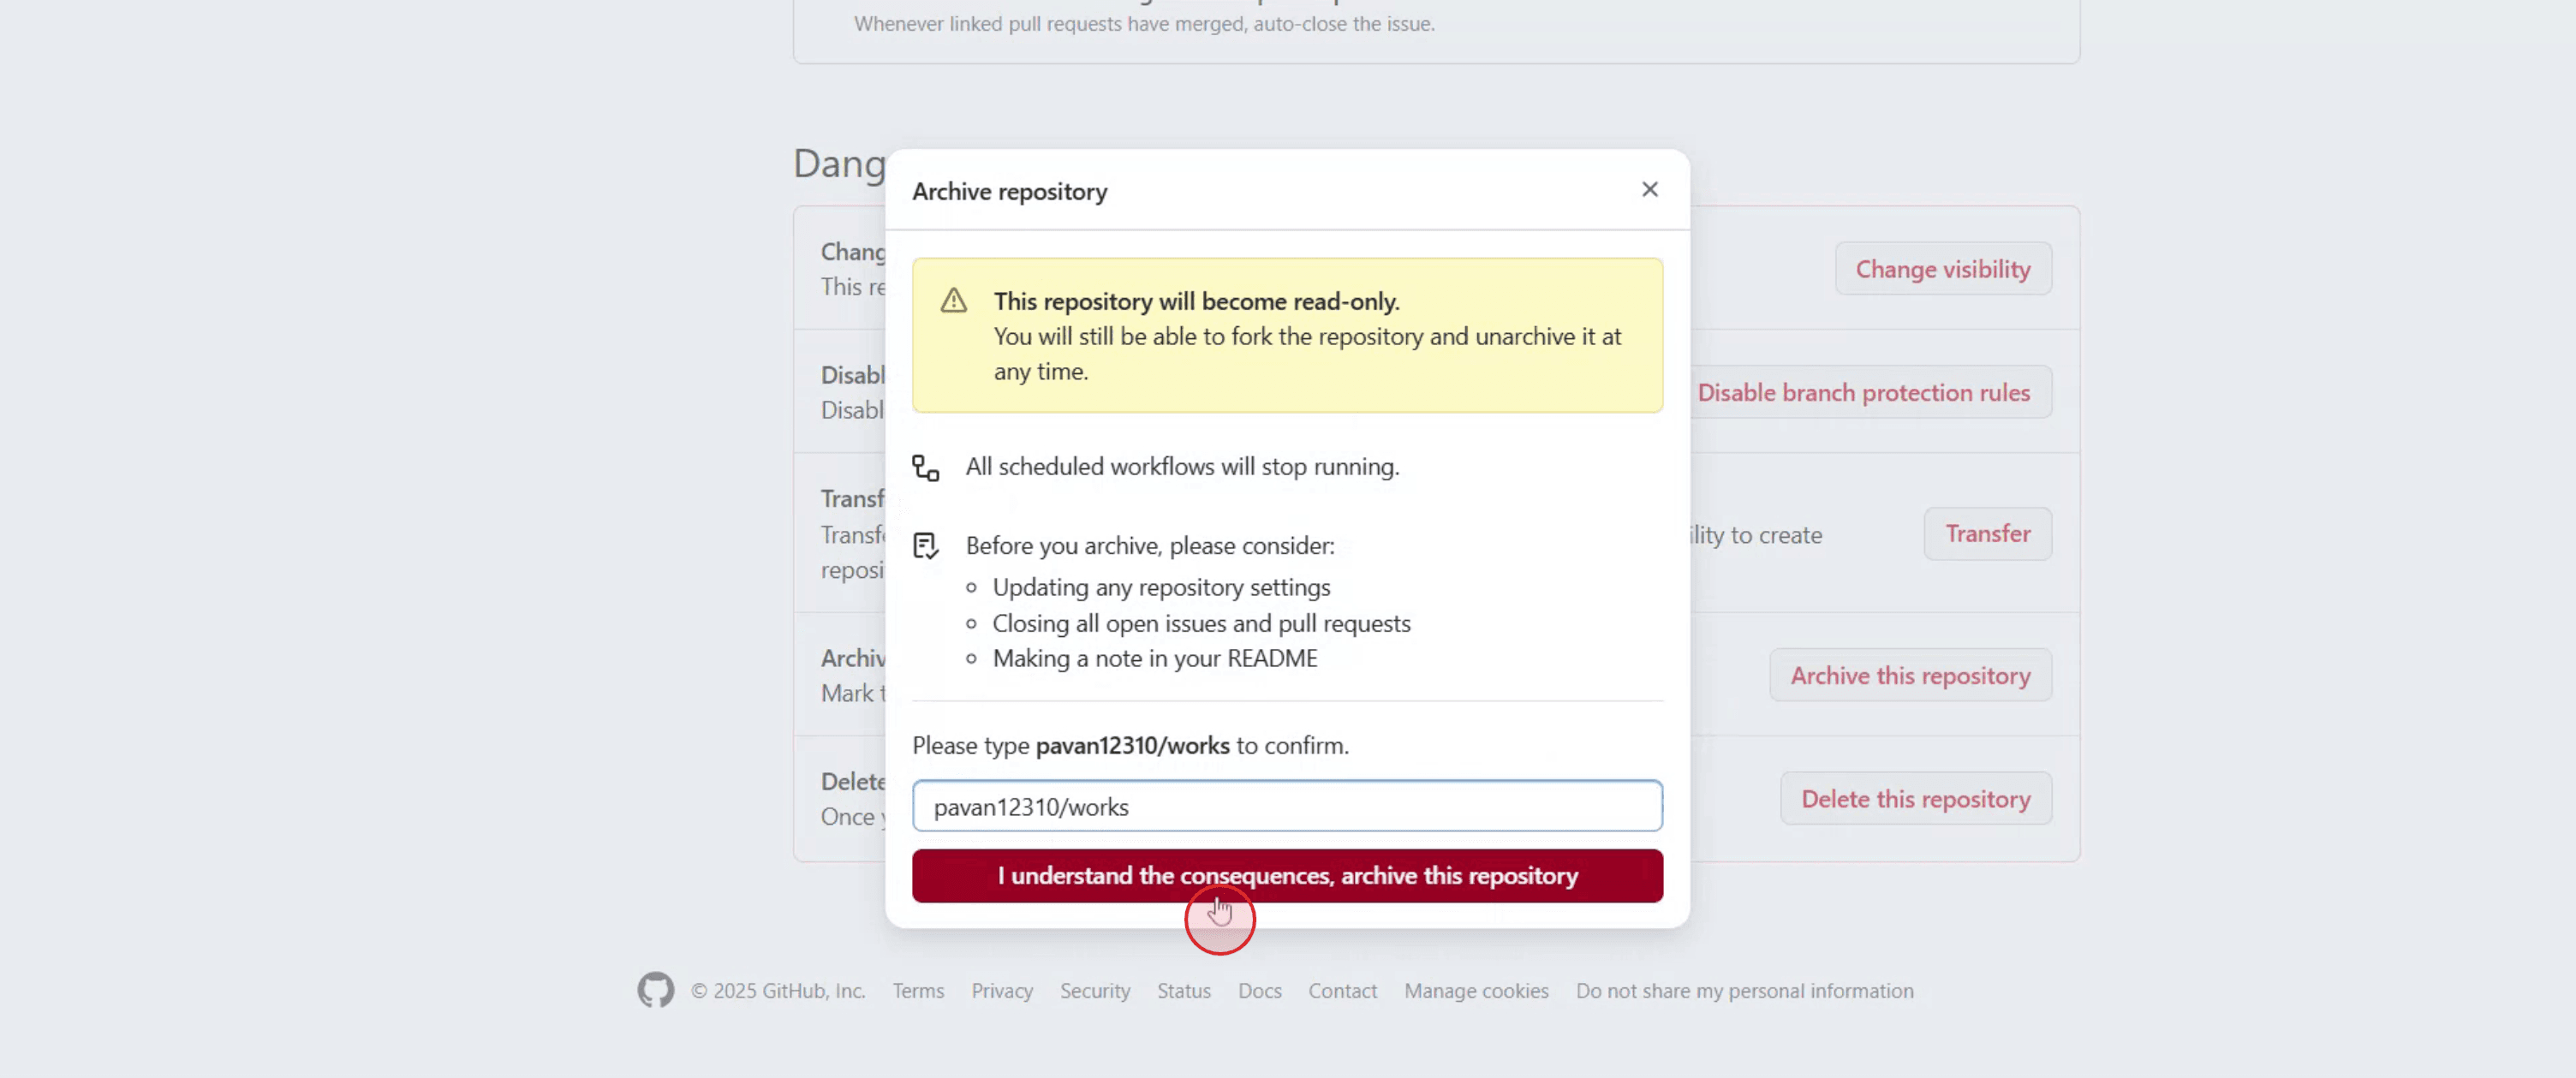
Typ de naam van de repository ter bevestiging wanneer daarom wordt gevraagd en klik op 'Ik begrijp het, archiveer deze repository'.
Stap 5
Zodra de repository is gearchiveerd, wordt deze alleen-lezen. Je kunt dan geen wijzigingen pushen, issues aanmaken, pull requests openen of de repository bijwerken totdat deze weer uit het archief is gehaald.
Pro-tips voor het archiveren van een GitHub-repository
Log in bij GitHub
Ga naar github.com en log in op je account met je inloggegevens.Navigeer naar de repository
Open de repository die je wilt archiveren vanuit je GitHub-dashboard of profiel.Klik op het tabblad “Settings”
Klik in het bovenste menu van je repository op “Settings”. Deze optie is alleen zichtbaar als je beheerdersrechten hebt.Scroll omlaag naar de “Danger Zone”
Ga op de instellingenpagina helemaal naar beneden totdat je de sectie “Danger Zone” ziet.Klik op “Archive this repository”
Klik in de Danger Zone op de knop “Archive this repository” om het archiveringsproces te starten.Bevestig de actie
GitHub zal je vragen om de actie te bevestigen. Lees de waarschuwing en klik daarna op de bevestigingsknop om de repository te archiveren.De repository wordt alleen-lezen
Na het archiveren wordt de repository alleen-lezen. Issues, pull requests of pushes zijn dan niet meer toegestaan.
Veelvoorkomende valkuilen en hoe je ze vermijdt
Archiveren zonder het team op de hoogte te stellen
Informeer je samenwerkingspartners voordat je archiveert, want nadat de repository is gearchiveerd, zijn er geen wijzigingen meer toegestaan.Onverwacht schrijfrecht verliezen
Zodra de repository is gearchiveerd, kan niemand (ook jij niet) nog wijzigingen pushen, tenzij je hem weer dearchiveert. Zorg ervoor dat alle wijzigingen definitief zijn.Per ongeluk actieve repositories archiveren
Controleer de activiteitsstatus van de repository nogmaals. Archiveer geen repo waar nog actief aan wordt gewerkt.Verwarring met verwijderen
Archiveren verwijdert de repo niet. Het vergrendelt deze alleen om de inhoud in een alleen-lezenstatus te behouden.Niet weten hoe je een repository uit het archief haalt
Je kunt de repo uit het archief halen door terug te gaan naar dezelfde Settings-pagina en op “Unarchive this repository” te klikken.
Veelgestelde vragen over het archiveren van een GitHub-repository
Wat doet het archiveren van een repository?
Archiveren maakt de repository alleen-lezen. Je kunt deze nog steeds bekijken, maar geen wijzigingen pushen, issues of pull requests openen.Kan ik een repository later weer uit het archief halen?
Ja, je kunt deze op elk moment weer uit het archief halen door naar Instellingen te gaan en op “Haal deze repository uit het archief.” te klikken.Wordt de gearchiveerde repository verwijderd?
Nee, de repository blijft op GitHub en is openbaar zichtbaar, tenzij je deze privé maakt.Kunnen gebruikers een gearchiveerde repository forken?
Ja, andere gebruikers kunnen de gearchiveerde repository nog steeds forken en klonen.Wie kan een GitHub-repository archiveren?
Alleen gebruikers met beheerdersrechten voor de repository kunnen deze archiveren of weer uit het archief halen.Hoe neem je het scherm op op Mac?
Om schermopname maken op een Mac, kun je Trupeer AI gebruiken. Het stelt je in staat het volledige scherm vast te leggen en biedt AI-mogelijkheden zoals het toevoegen van AI-avatars, voice-over toevoegen en in- en uitzoomen in de video. Met Trupeer’s AI-videotranslatiefunctie kun je de video vertalen naar meer dan 30 talen.Hoe voeg je een AI-avatar toe aan een schermopname?
Om een AI-avatar aan een schermopname toe te voegen, moet je een AI-tool voor schermopnames gebruiken. Trupeer AI is een AI-tool voor schermopnames, waarmee je video's met meerdere avatars kunt maken en die je ook helpt bij het maken van je eigen avatar voor de video.Hoe neem je het scherm op op Windows?
Om het scherm op te nemen in Windows kun je de ingebouwde Game Bar (Windows + G) gebruiken of een geavanceerde AI-tool zoals Trupeer AI voor meer geavanceerde functies zoals AI-avatars, voice-over, vertaling enz.Hoe voeg je voice-over toe aan video?
Om voice-over aan video's toe te voegen, download je de Chrome-extensie van Trupeer AI. Zodra je je hebt aangemeld, upload je je video met stem, kies je de gewenste voice-over van Trupeer en exporteer je je bewerkte video.Hoe zoom ik in op een schermopname?
Om tijdens een schermopname in te zoomen, gebruik je de zoomeffecten in Trupeer AI, waarmee je op specifieke momenten kunt in- en uitzoomen en de visuele impact van je videocontent vergroot.
Mensen vragen ook
Generator voor technische documentatie
Hoe deel je een GitHub-repository via een link
Gerelateerde tutorials

