
GitHub README에 이미지 추가하는 방법
Markdown 문법 또는 이미지 링크를 사용해 GitHub README 파일에 이미지를 추가하는 방법을 알아보세요. 리포지토리에 시각 자료를 선보이기 위한 단계별 가이드입니다.
Step-by-Step-Guide: How to Add Images to Github ReadMe
Step 1
Begin by navigating to the "Repositories" section on GitHub and click on it.
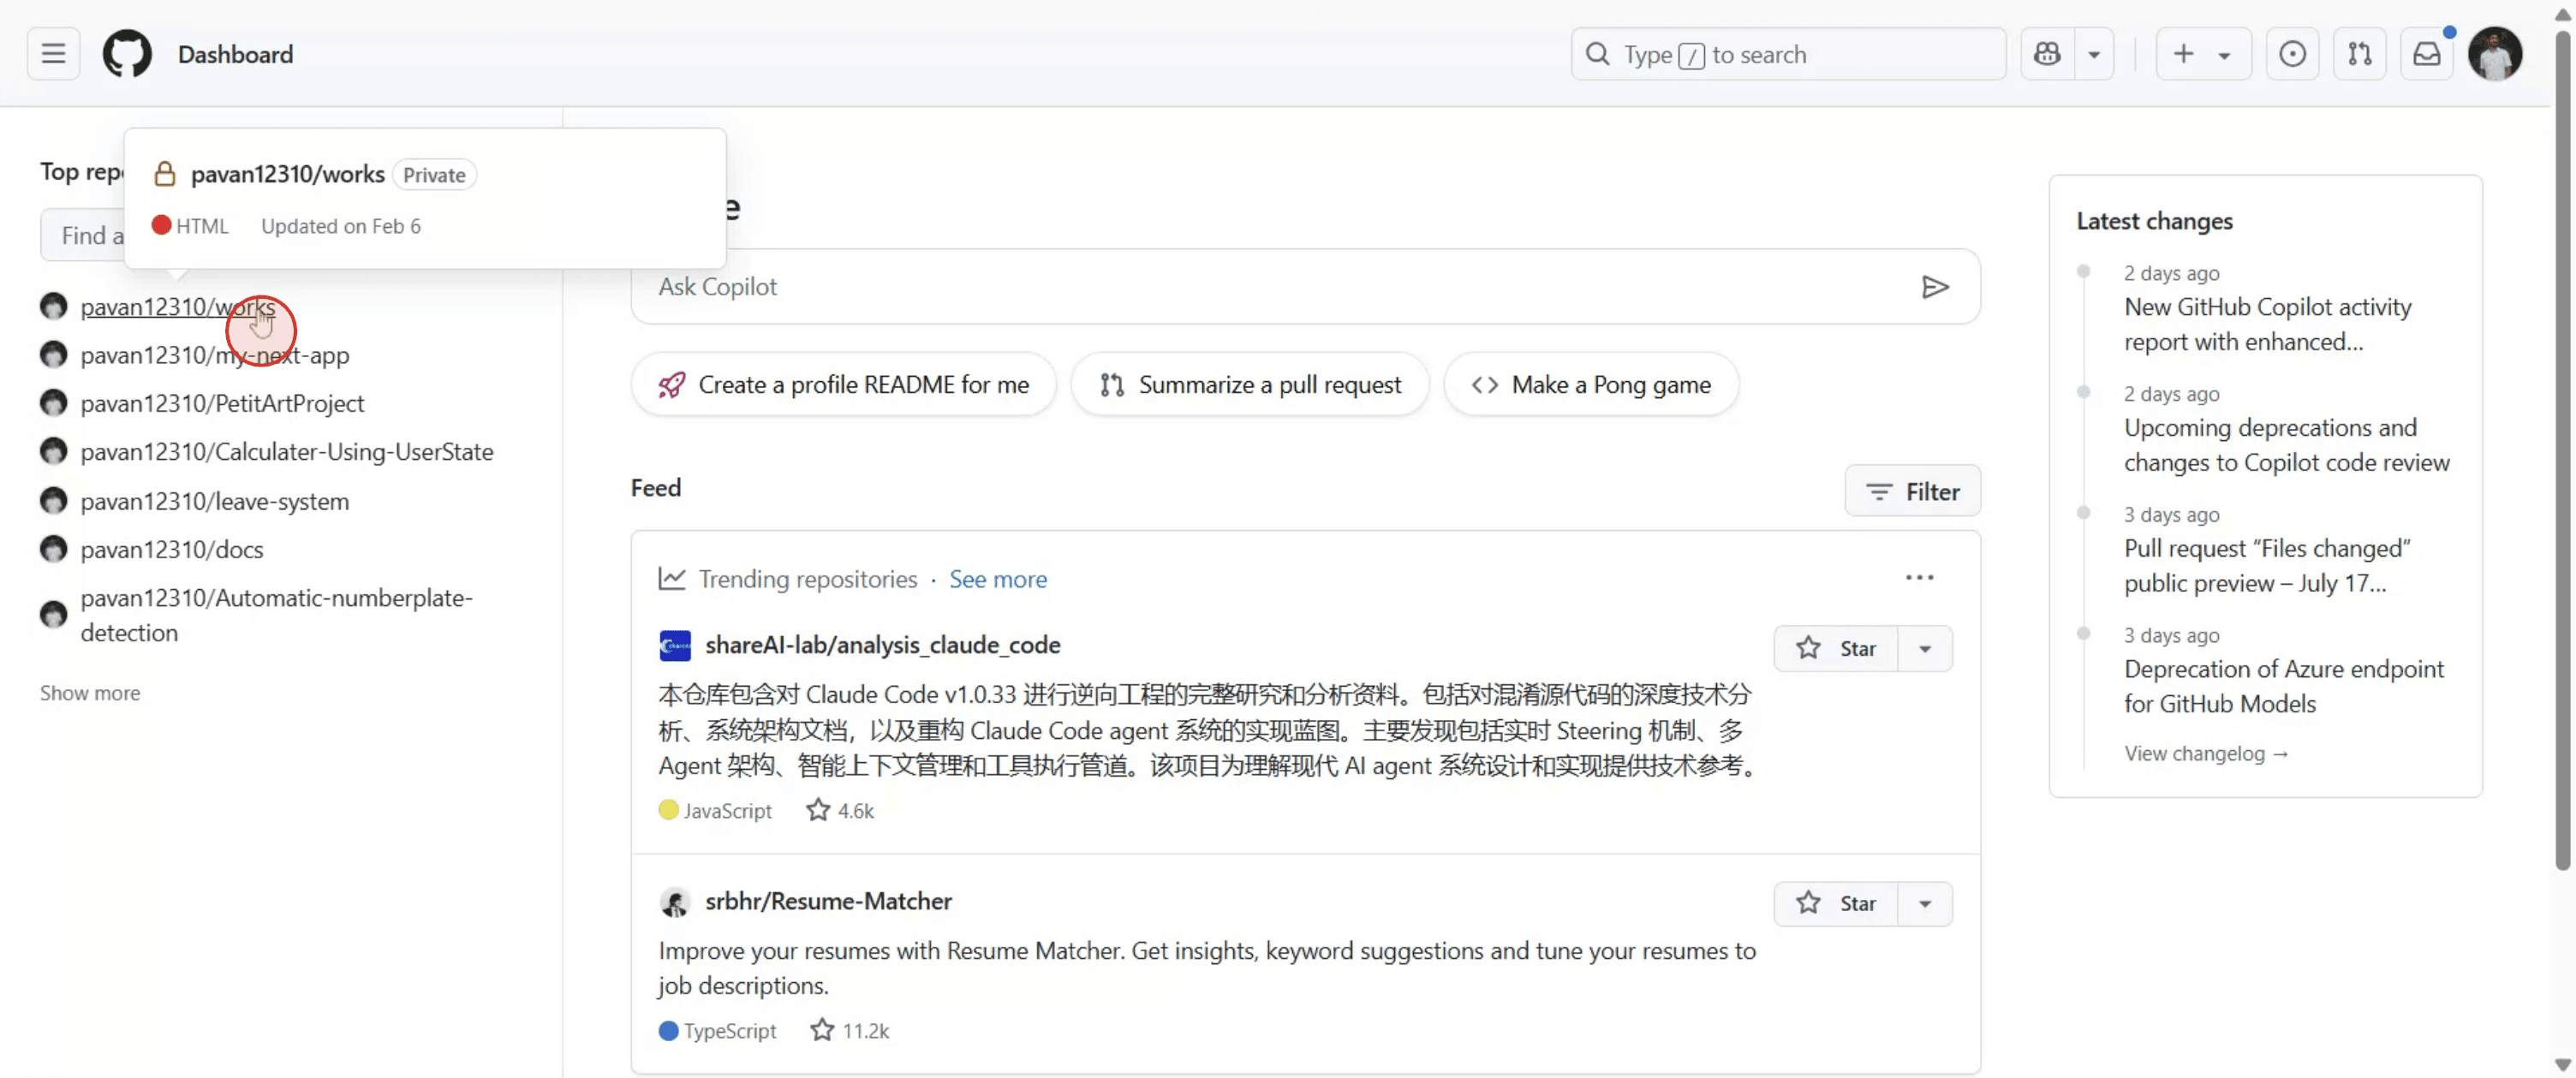
Step 2
And then click on "Add README" to proceed.
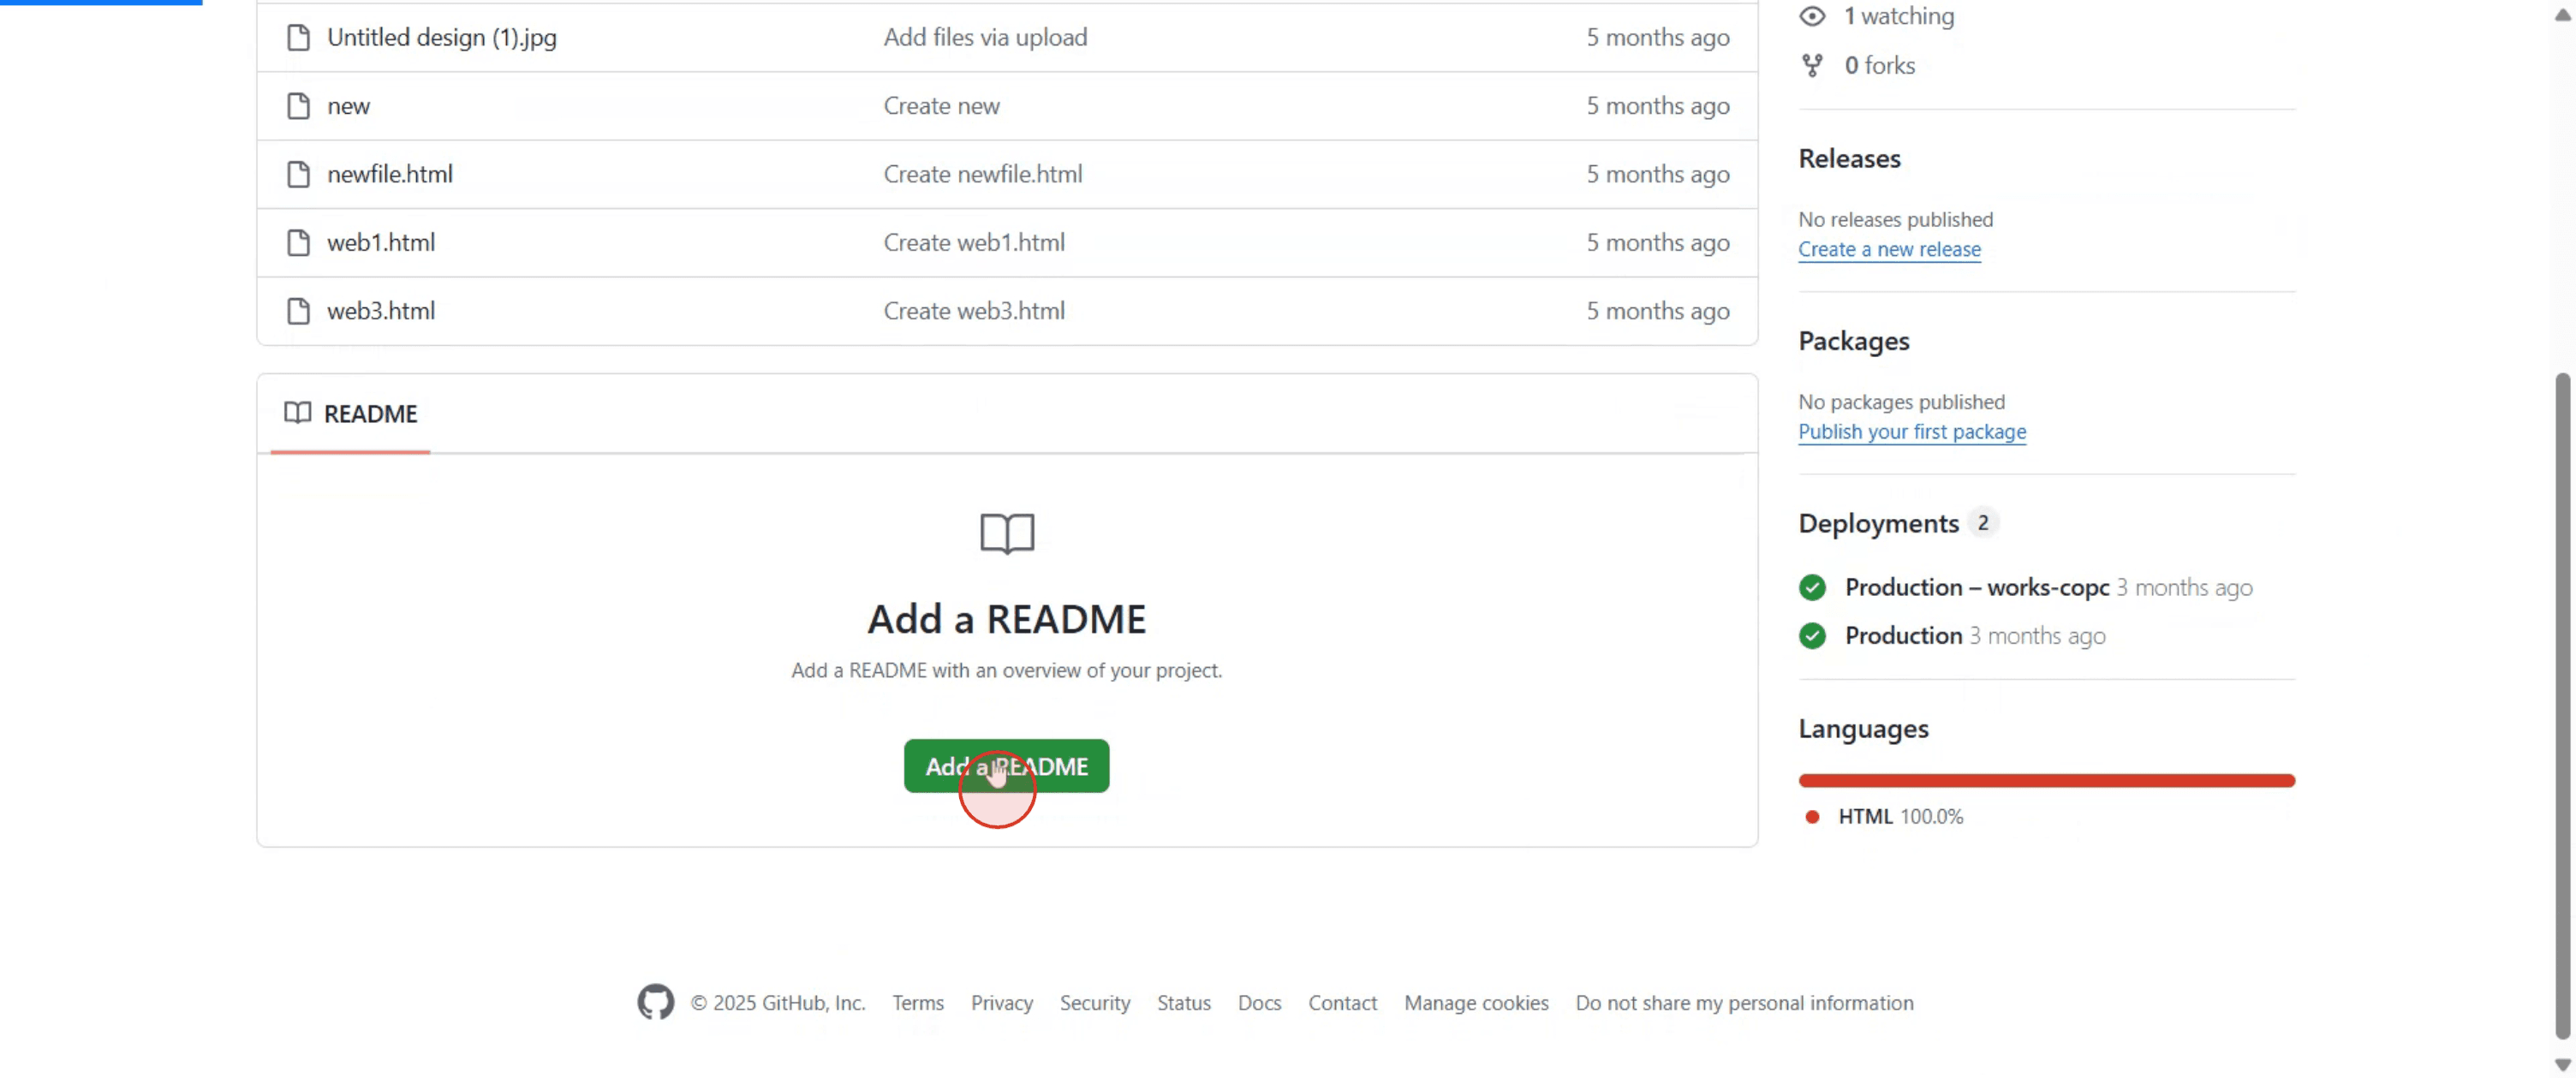
Step 3
Proceed by selecting "Attach Files" and click on it to continue.
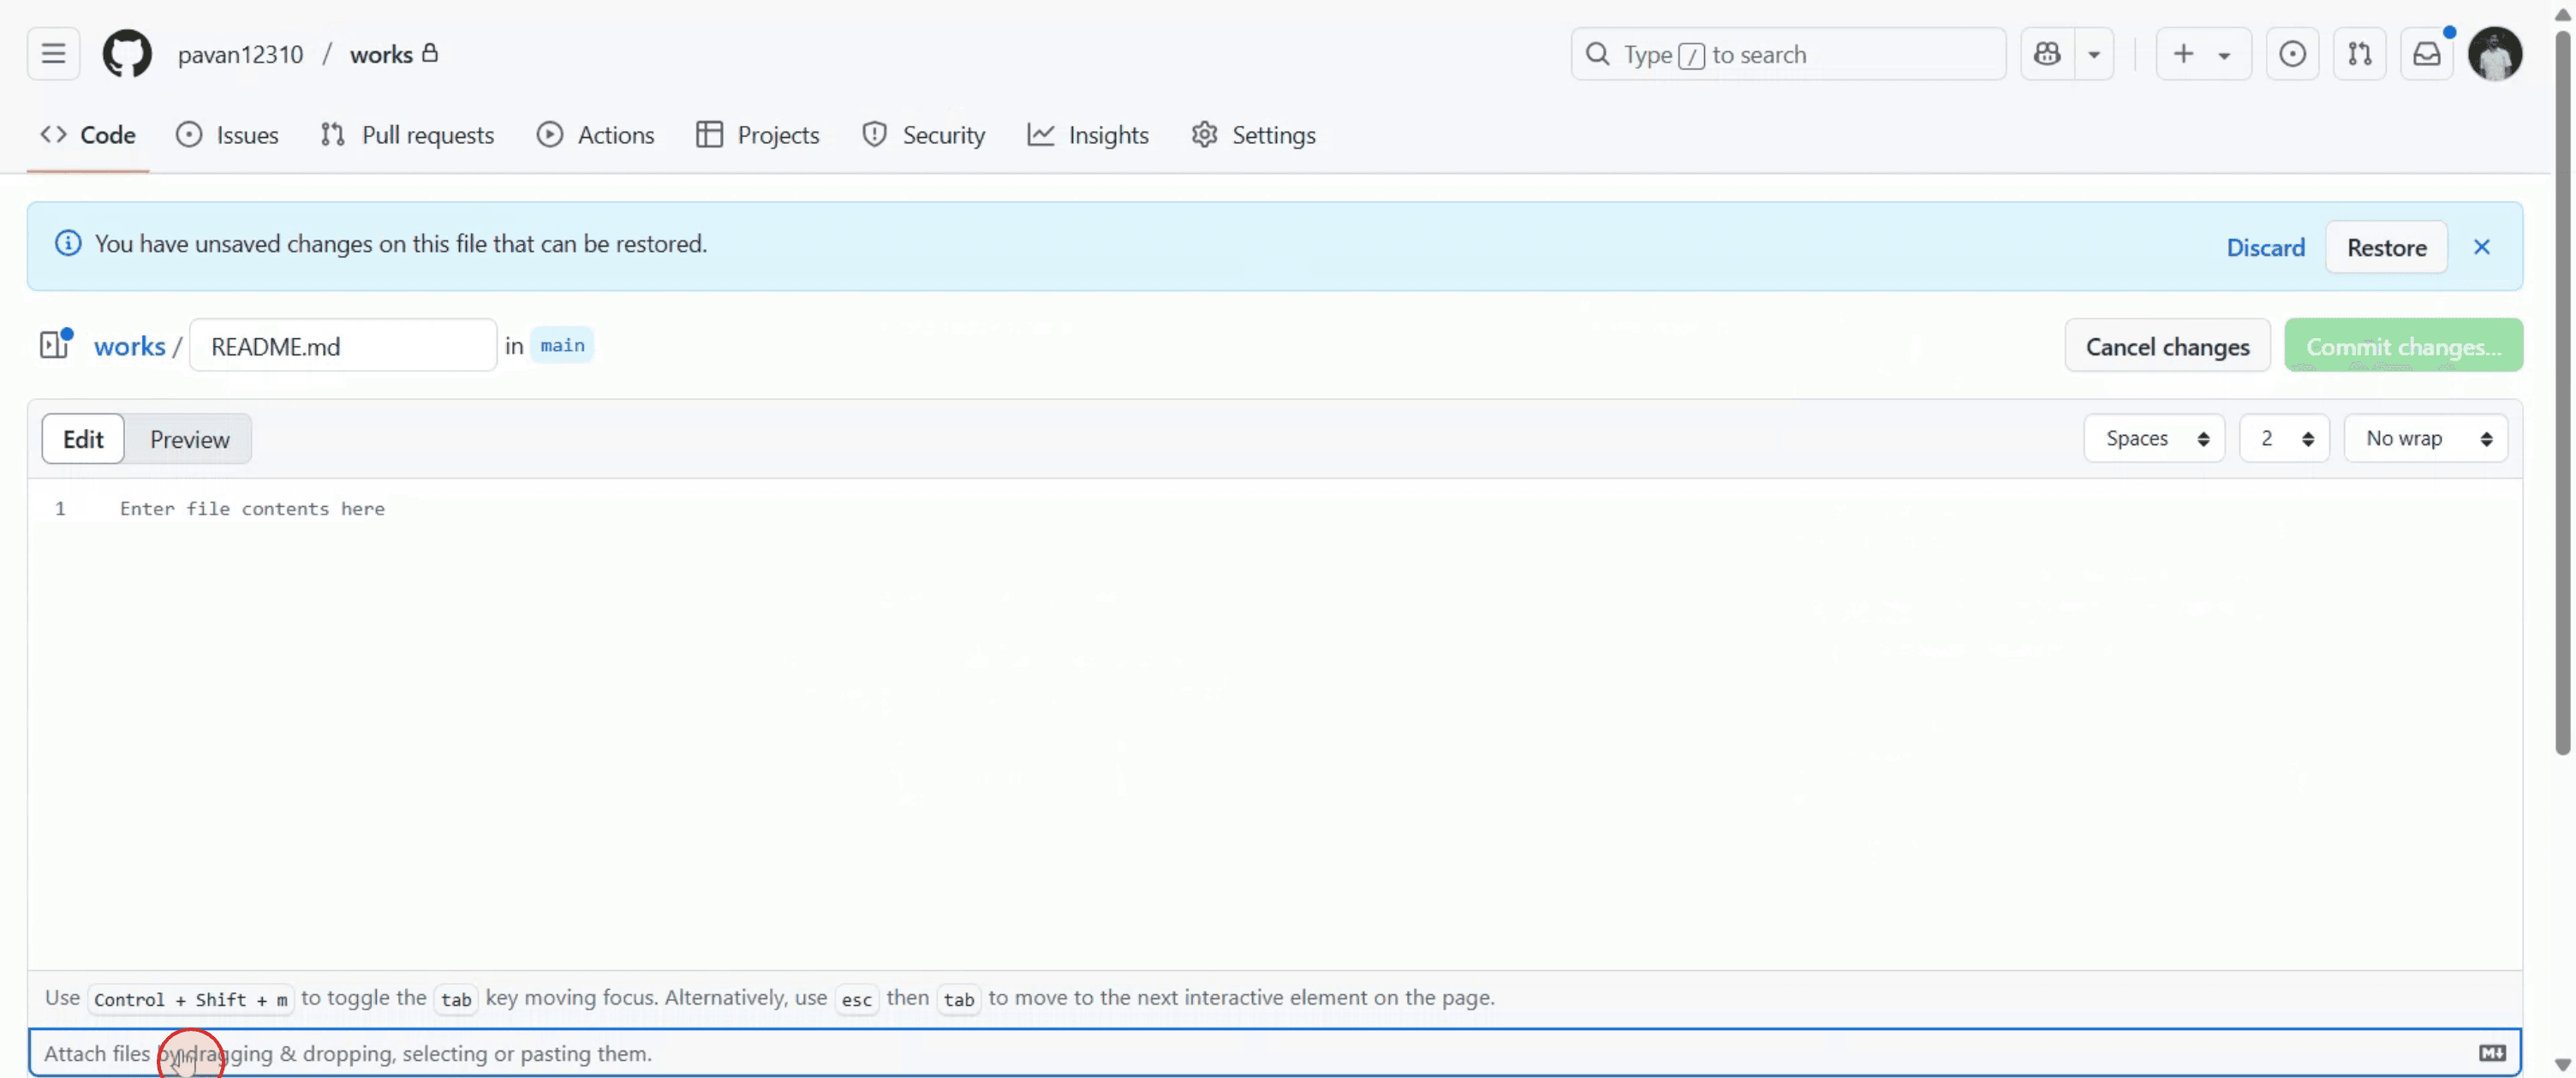
Step 4
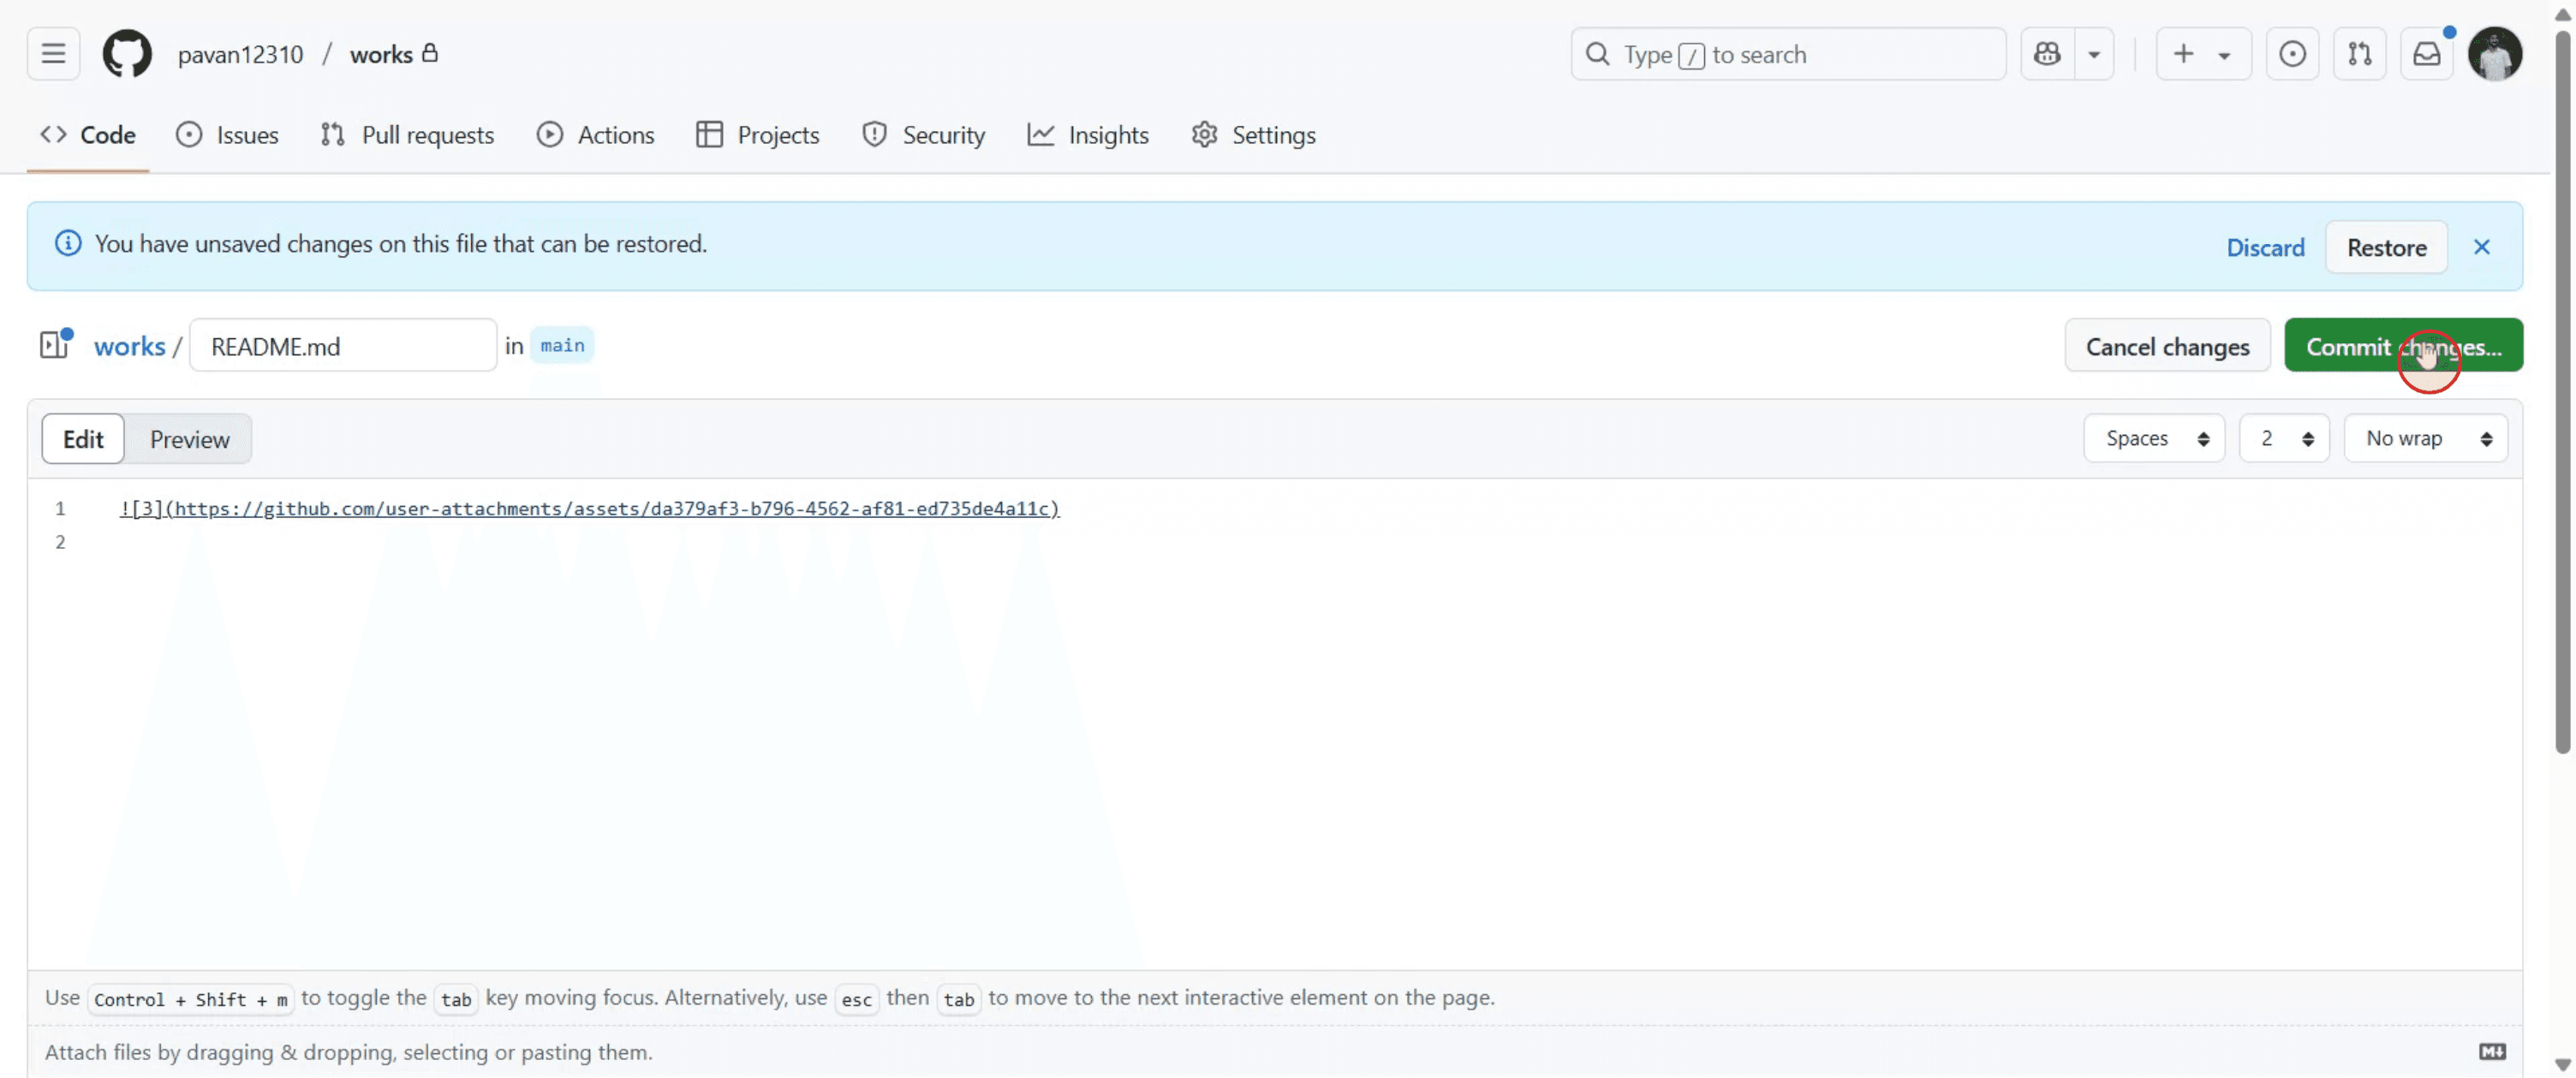
Once uploaded, click on "Commit Changes".
Step 5
Finish by selecting "Commit Changes" again.

Pro Tips for Adding Images to GitHub ReadMe
Upload the image to your repository
Go to your GitHub repository, click on the Add file button, then choose Upload files. Drag and drop your image or select it from your computer.Copy the image URL
Once uploaded, click on the image file. It will open in a new page. Right-click on the image and select Copy image address.Open or create the README.md file
Go back to your repository. If there’s no README.md file, click Add file and select Create new file. Name it README.md.Insert the image using Markdown syntax
Use this format to insert the image into the README file:
Replace image-url with the copied link and Alt text with a short description of the image.Preview and commit changes
Use the Preview tab in the editor to check how the image looks. If everything looks good, scroll down and click Commit changes to save.
Common Pitfalls and How to Avoid Them
Image not loading
Ensure that the image is stored in a public repository or hosted on a platform that supports direct image linking.Incorrect Markdown format
The correct format is Double-check for missing brackets or parentheses.Local file path used
Do not use file paths from your local computer. Only use URLs or repository paths.Broken or outdated link
If you move or delete the image from the repo, the link will break. Always use the final file path.Large image size
Resize or compress large images before uploading to keep your ReadMe clean and fast-loading.
Common FAQs About Adding Images to GitHub ReadMe
How do I add a local image to a GitHub ReadMe?
Upload the image to your repository first, then use the Markdown image syntax to reference it.Can I use an external image URL?
Yes, any publicly available image URL can be used in the Markdown syntax.What is the correct Markdown syntax for adding an image?
The format isCan I center the image in a ReadMe file?
Markdown does not support centering directly, but you can use HTML like <p align="center"> for layout control.Is it possible to resize an image in GitHub ReadMe?
Not with Markdown alone. To control size, use basic HTML like <img src="image-url" width="300"/> inside the README file.How to screen record on mac?
To screen record on a Mac, you can use Trupeer AI. It allows you to capture the entire screen and provides AI capabilities such as adding AI avatars, add voiceover, add zoom in and out in the video. With trupeer’s AI video translation feature, you can translate the video into 30+ languages.How to add an AI avatar to screen recording?
To add an AI avatar to a screen recording, you'll need to use an AI screen recording tool. Trupeer AI is an AI screen recording tool, which helps you create videos with multiple avatars, also helps you in creating your own avatar for the video.How to screen record on windows?
To screen record on Windows, you can use the built-in Game Bar (Windows + G) or advanced AI tool like Trupeer AI for more advanced features such as AI avatars, voiceover, translation etc.How to add voiceover to video?
To add voiceover to videos, download trupeer ai chrome extension. Once signed up, upload your video with voice, choose the desired voiceover from trupeer and export your edited video.How do I Zoom in on a screen recording?
To zoom in during a screen recording, use the zoom effects in Trupeer AI which allows you to zoom in and out at specific moments, enhancing the visual impact of your video content.
관련 튜토리얼