

GitHub にフォルダをアップロードする方法
WebインターフェースまたはGitコマンドを使ってGitHubにフォルダをアップロードし、プロジェクトファイルを追加してリポジトリを簡単に管理する方法を学びましょう。Trupeerを使ったこの簡単なチュートリアルに従ってください。
このガイドでは、GitHub リポジトリに新しいフォルダを追加するための簡潔な手順を説明します。
以下の手順に従って、既存のリポジトリ構造に新しいディレクトリをスムーズに組み込みましょう。
ステップごとのガイド: GitHub にフォルダをアップロードする方法
ステップ 1
フォルダを追加したい GitHub リポジトリに移動し、それをクリックします。

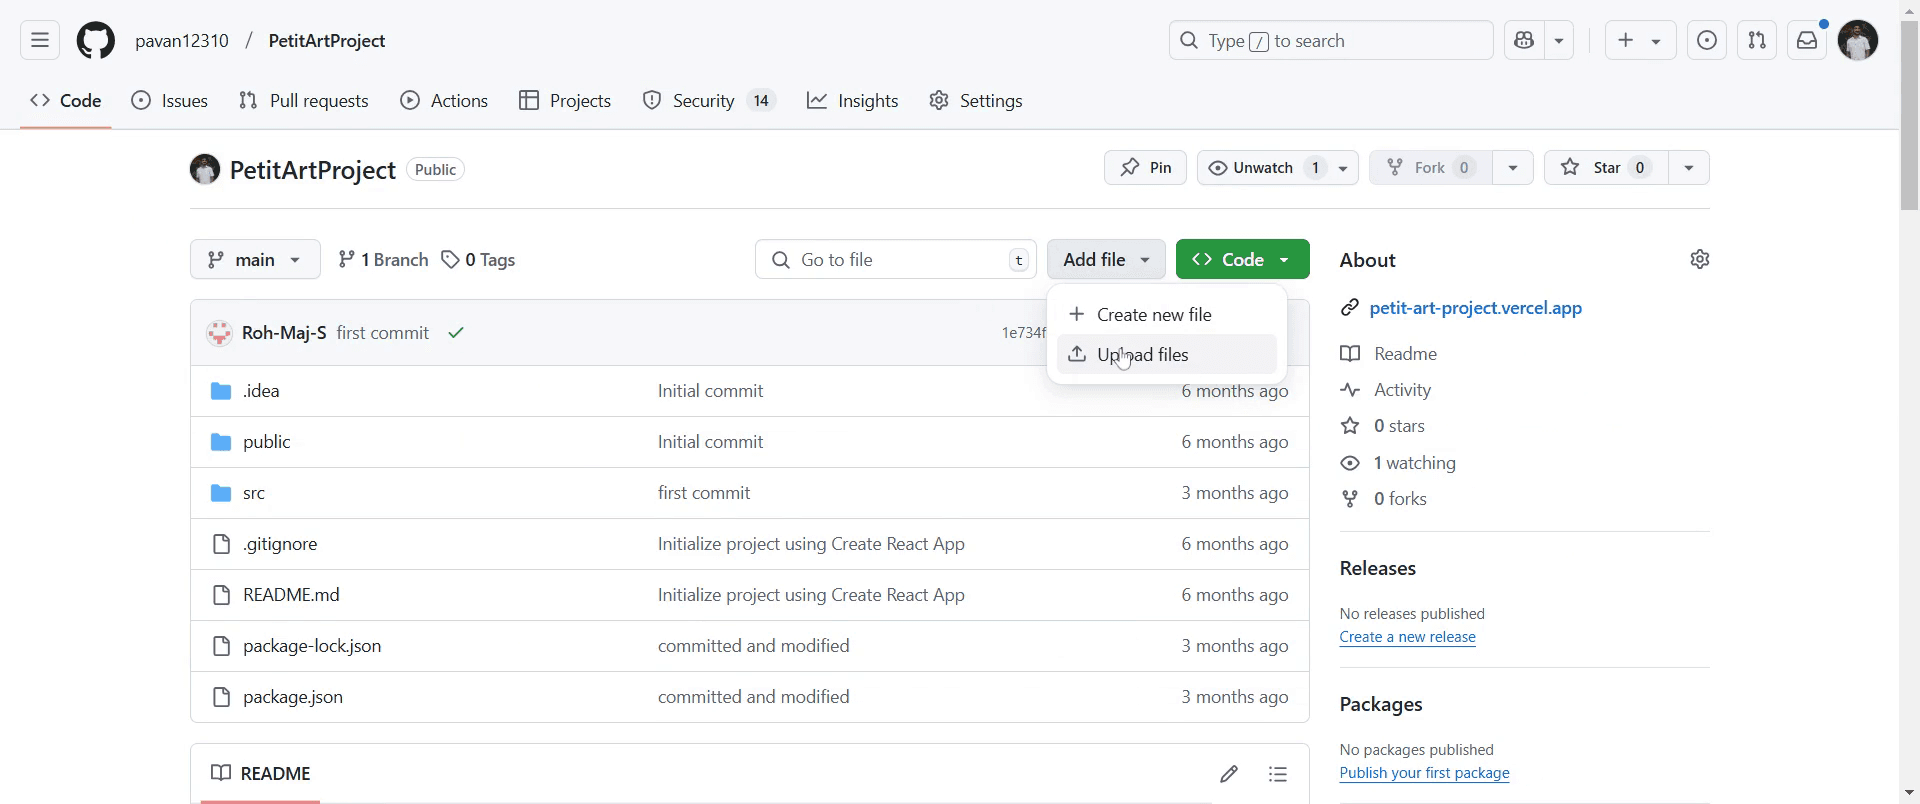
ステップ 2
次に、リポジトリ画面で「Add file」オプションを見つけてクリックします。

ステップ 3
フォルダの追加を続行するには、「Upload files」を選択します。
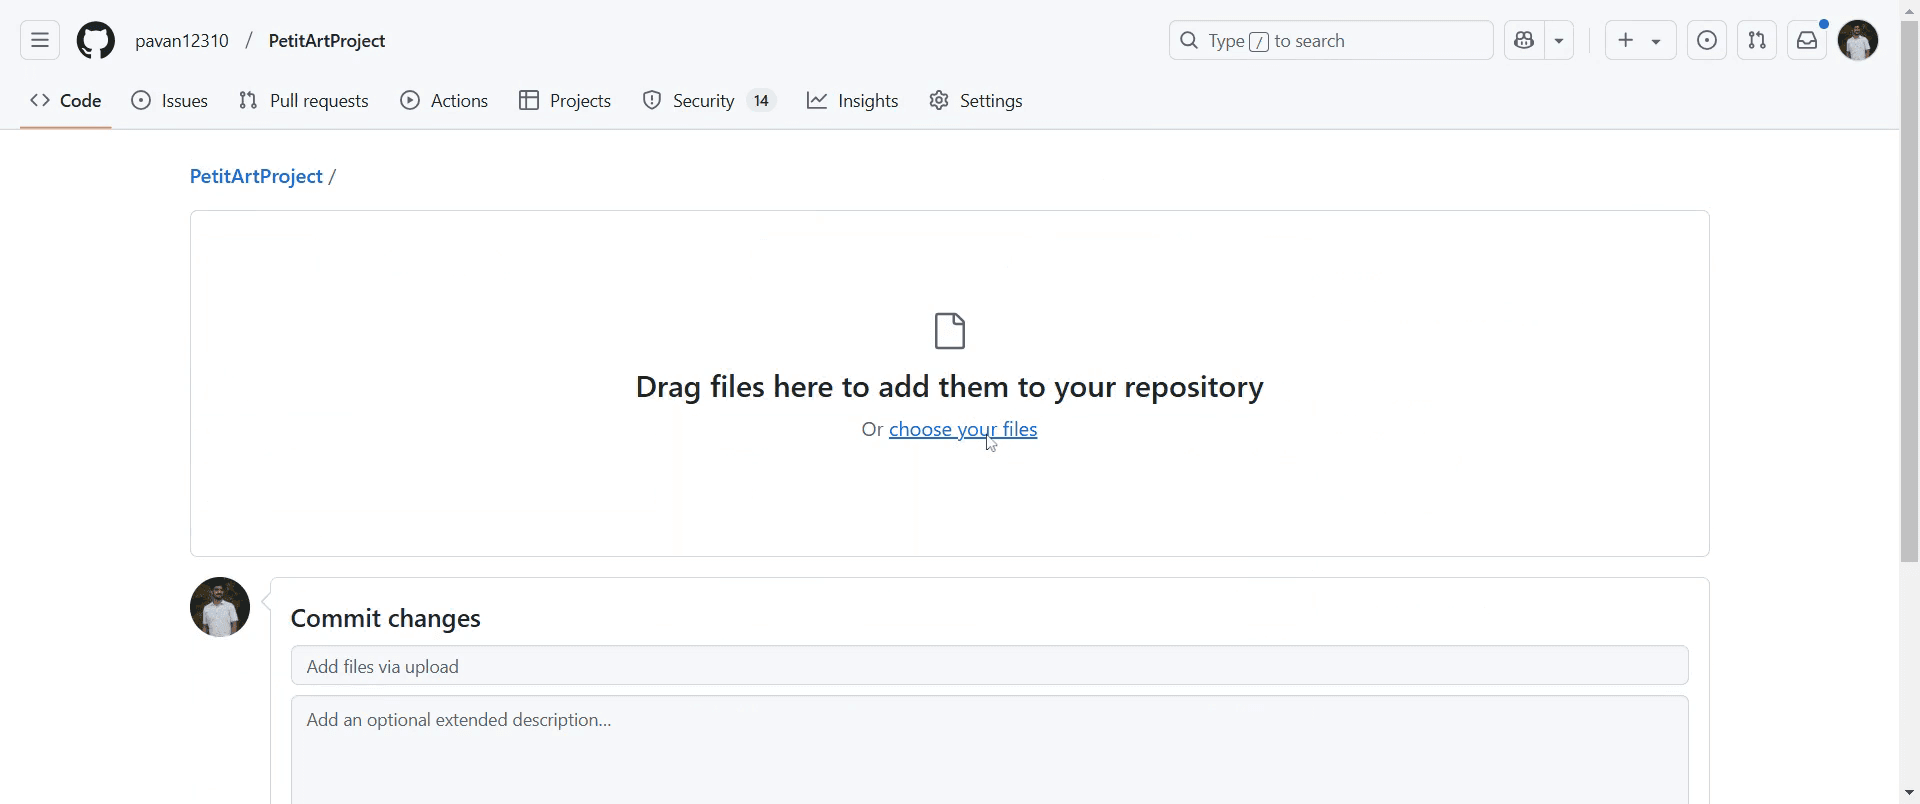
ステップ 4
ここで、適切なオプションをクリックして、新しいフォルダに含めたいファイルを選択します。
ステップ 5
必要に応じて、コミットメッセージを追加し、変更内容の説明を記載して、より詳しい情報を提供できます。

ステップ 6
最後に、「Commit changes」をクリックして操作を確認します。

ステップ 7
完了すると、フォルダは正常にリポジトリへ追加されます。

GitHub にフォルダをアップロードするためのプロのヒント
git add .、git commit -m "Add folder"、git push origin mainを使って、フォルダに移動して Git のコマンドラインを実行し、すべてのファイルをアップロードします。GitHub の Web インターフェースを使う場合は、GitHub はフォルダを直接アップロードできないため、アップロード前にフォルダを ZIP ファイルに圧縮します。
明確さと操作のしやすさを確保するため、アップロード前にリポジトリ構成を適切に整理しておきましょう。
GitHub にフォルダをアップロードする際によくある落とし穴とその回避方法
GitHub の Web インターフェースからフォルダを直接アップロードしようとすること — GitHub は個々のファイルのアップロードのみをサポートしています。
push する前に Git を初期化し忘れること — 新しいローカルリポジトリで変更をコミットする前に、必ず
git initを実行してください。.gitignoreファイルを確認しないこと — 必要なファイルが意図せず無視されていないことを確認してください。
GitHub にフォルダーをアップロードする際のよくある質問
GitHub の Web インターフェースからフォルダーをアップロードできますか?
いいえ、GitHub はフォルダーの直接アップロードに対応していませんが、個別のファイルや ZIP アーカイブはアップロードできます。GitHub に空のフォルダーを追加するには?
コミットしてプッシュする前に、フォルダー内に.gitkeepファイルを作成します。フォルダーのアップロードが GitHub に反映されない場合はどうすればよいですか?
未コミットの変更を確認するためにgit statusを実行し、その後もう一度コミットしてプッシュしてください。特定のブランチにフォルダーをアップロードできますか?
はい、フォルダーを追加してプッシュする前に、git checkout <branch-name>を使って目的のブランチに切り替えてください。Mac で画面収録するには?
Mac で画面収録するには、Trupeer AI を使用できます。画面全体をキャプチャでき、AI アバターの追加、ボイスオーバーの追加、動画内でのズームイン・ズームアウトなどの AI 機能を提供します。Trupeer の AI 動画翻訳機能を使えば、動画を 30 以上の言語に翻訳できます。画面収録に AI アバターを追加するには?
画面収録に AI アバターを追加するには、AI 画面収録ツール。 を使用する必要があります。Trupeer AI は AI 画面収録ツールで、複数のアバターを使った動画の作成を支援し、動画用の独自アバターの作成もサポートします。Windows で画面収録するには?
Windows で画面収録するには、内蔵の Game Bar(Windows + G)または Trupeer AI のような高度な AI ツールを使用して、AI アバター、ボイスオーバー、翻訳などのより高度な機能を利用できます。動画にボイスオーバーを追加するには?
動画にボイスオーバーを追加するには、trupeer ai の Chrome 拡張機能をダウンロードしてください。サインアップ後、音声付きの動画をアップロードし、trupeer から希望のボイスオーバーを選択して、編集済みの動画を書き出します。画面収録でズームインするには?
画面収録中にズームインするには、Trupeer AI のズーム効果を使用します。これにより、特定のタイミングでズームイン・ズームアウトでき、動画コンテンツの視覚的なインパクトを高められます。
おすすめ記事
関連チュートリアル

