
Google スプレッドシートでセルをロックする方法 – データを簡単に保護する
Google スプレッドシートで特定のセルをロックして、意図しない編集を防ぐ方法を学びましょう。シート保護と権限設定を使ったこのステップごとのガイドに従ってください。
このドキュメントでは、保護範囲機能を使用して Google スプレッドシート内の特定のセルを保護する手順を説明します。
これらの手順に従うことで、スプレッドシート内の重要なデータに対する不正な編集を防ぐことができます。
Google Sheets で特定のセルの編集を他のユーザーに止めたい場合は、「シートと範囲を保護」機能を使用してロックできます。これにより、変更できるユーザーを制御したり、編集前に警告を表示したりできます。
セルをロックするには、次の手順に従ってください:
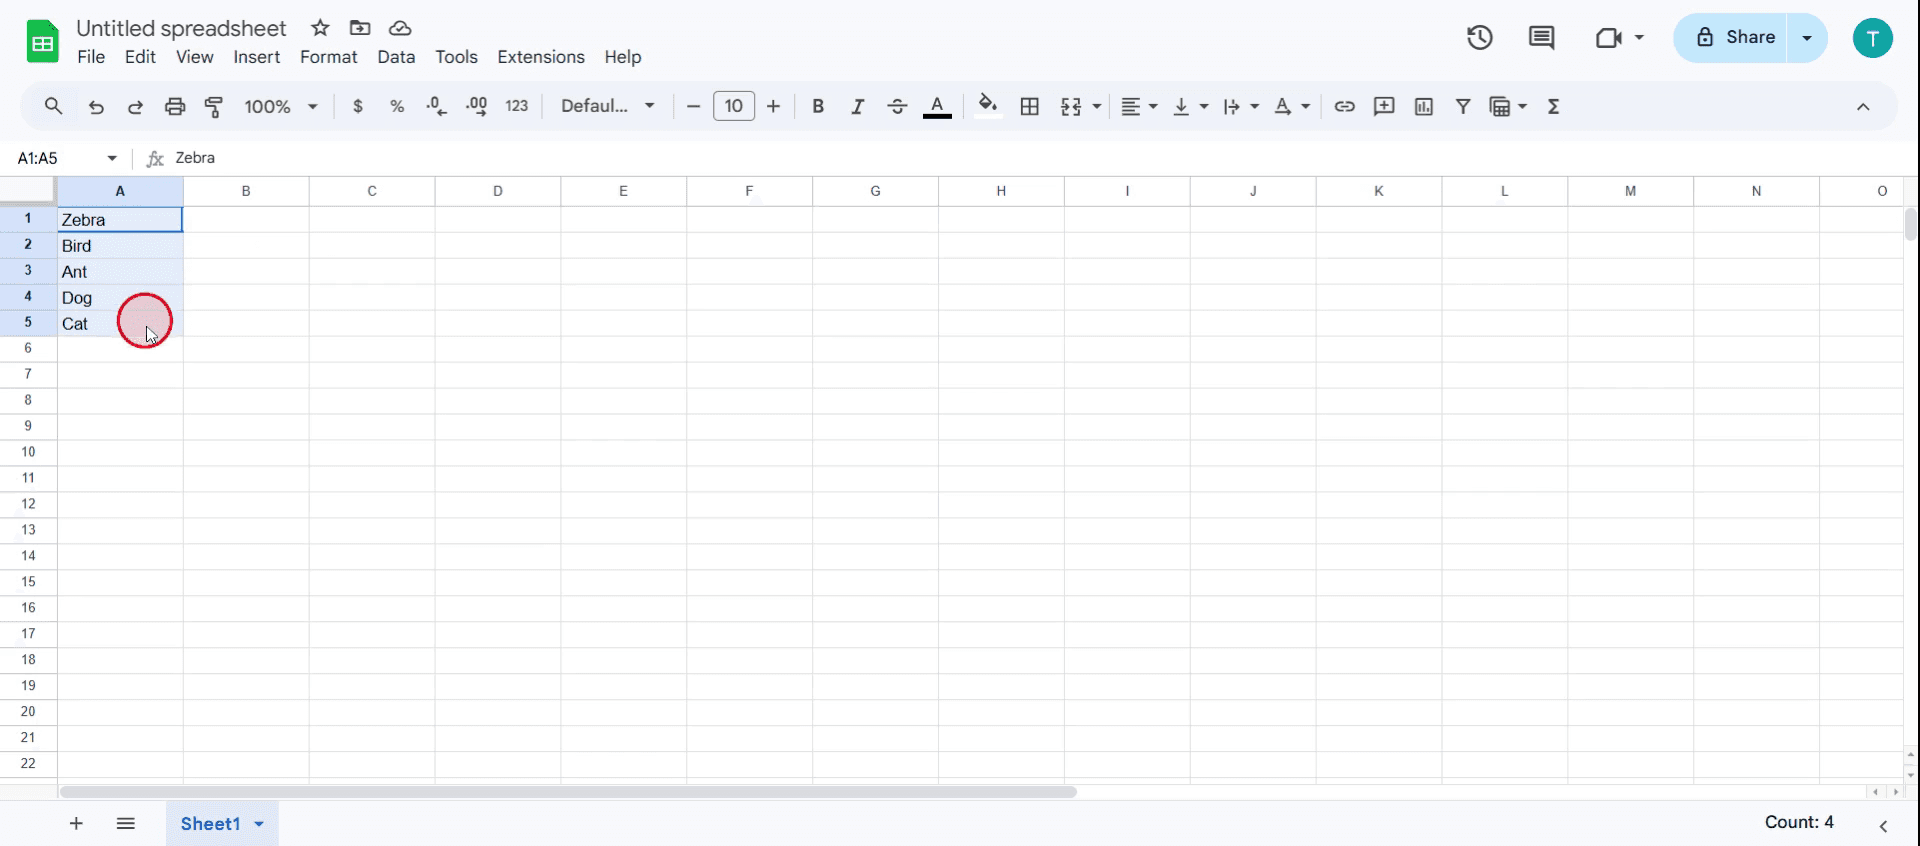
1. 保護したいセルを選択します:
クリックしてドラッグし、ロックしたいセルまたは範囲を選択します。
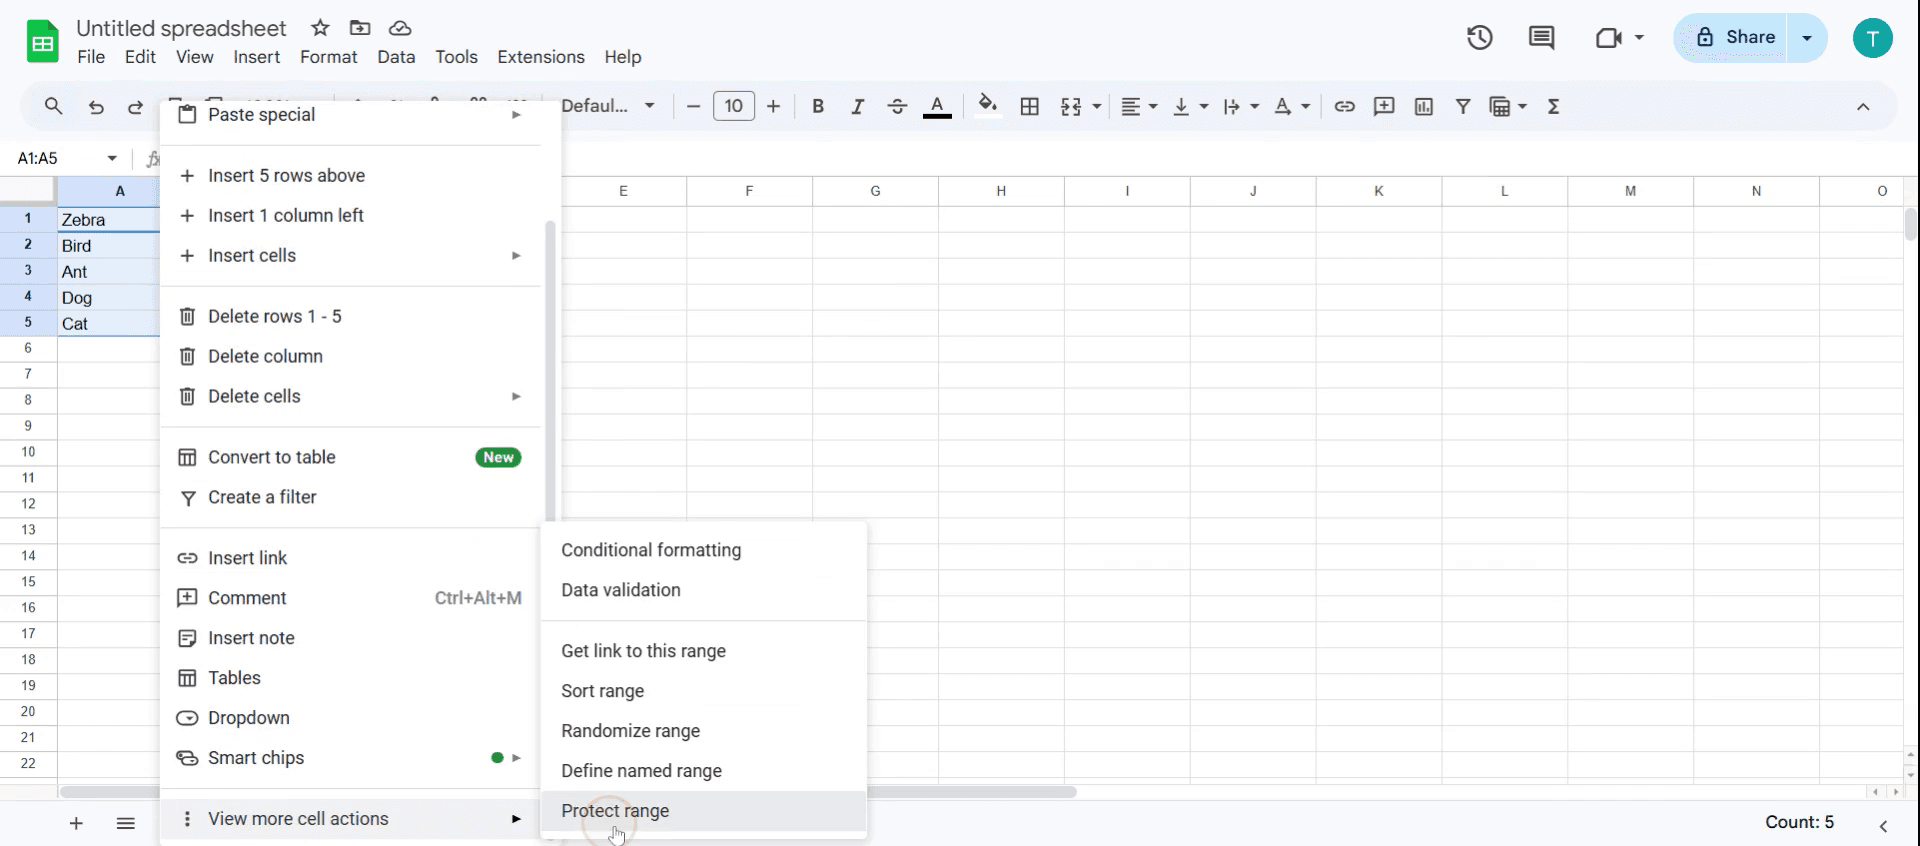
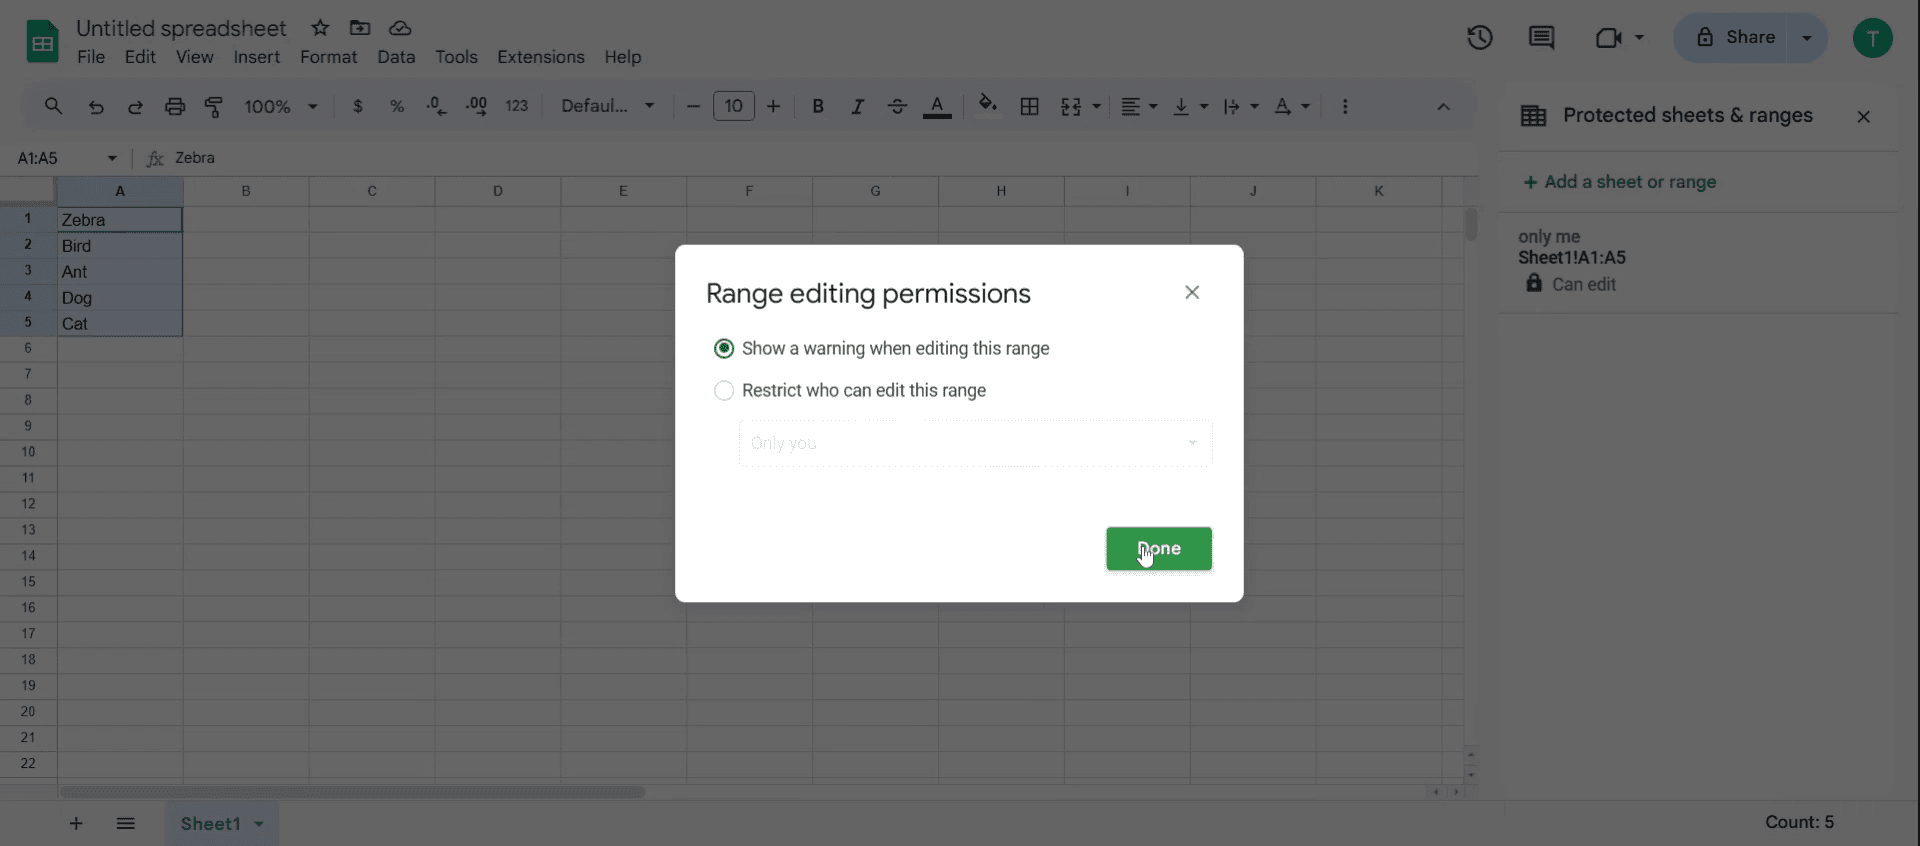
2. 「保護されたシートと範囲」パネルを開きます:
方法 1: 上部メニューの データ をクリックし、シートと範囲を保護 を選択します。
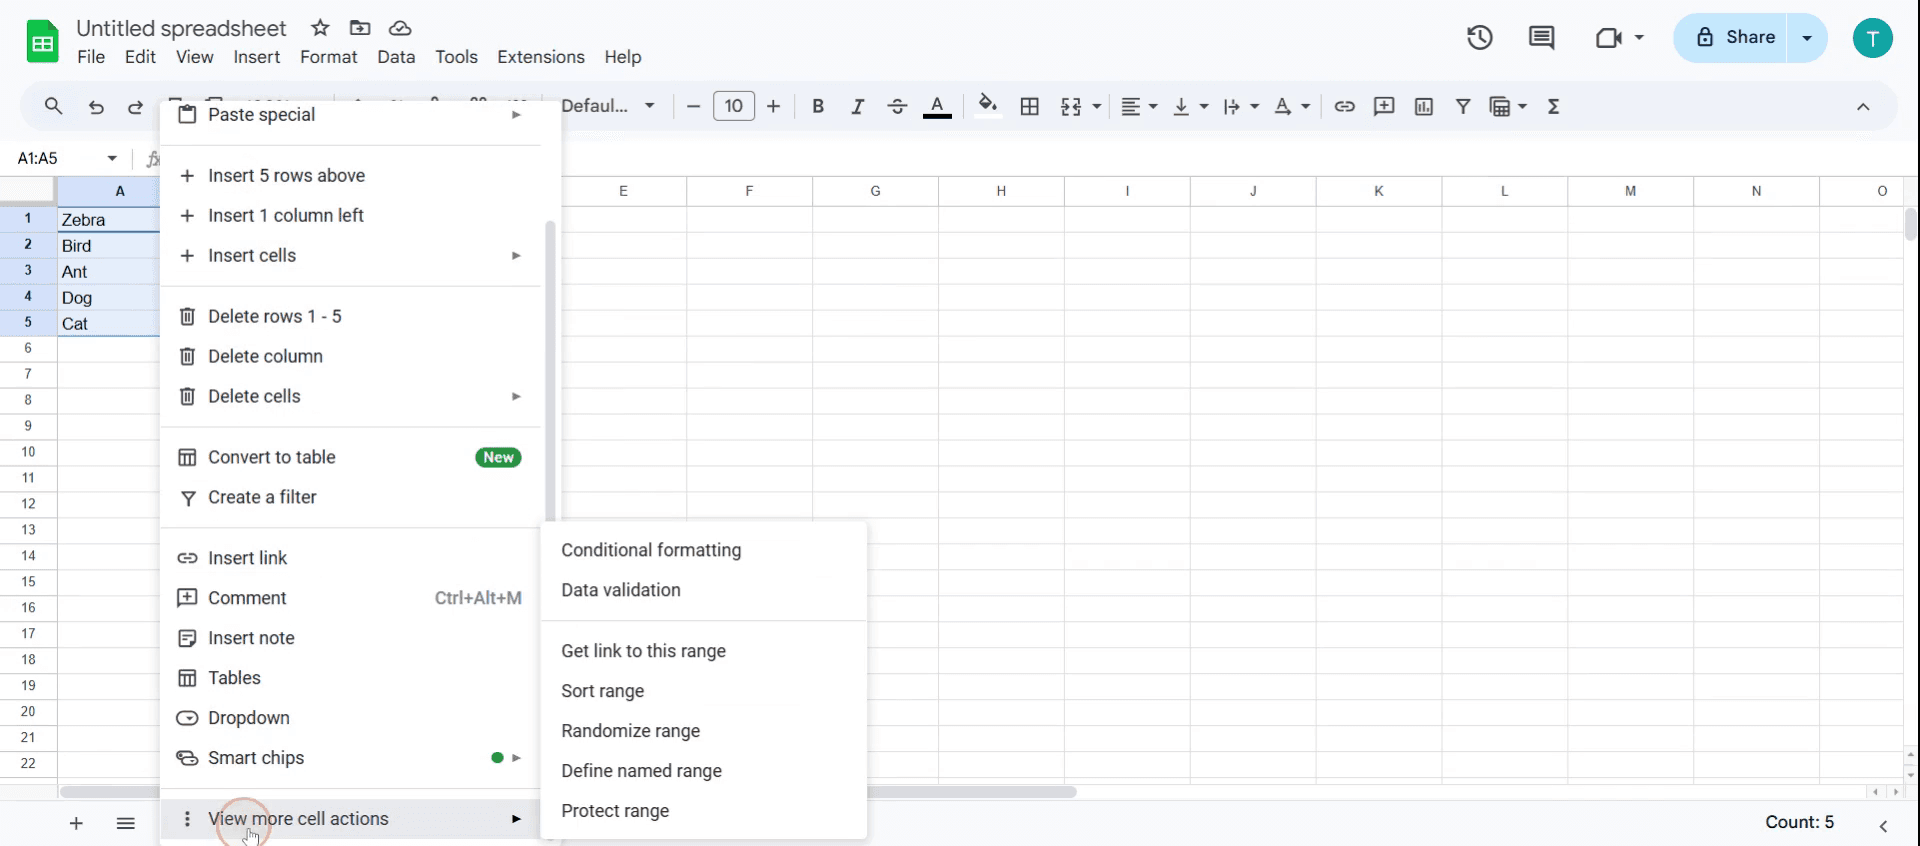
方法 2: 選択したセルを右クリックし、その他のセルの操作を表示 を選び、範囲を保護 をクリックします。
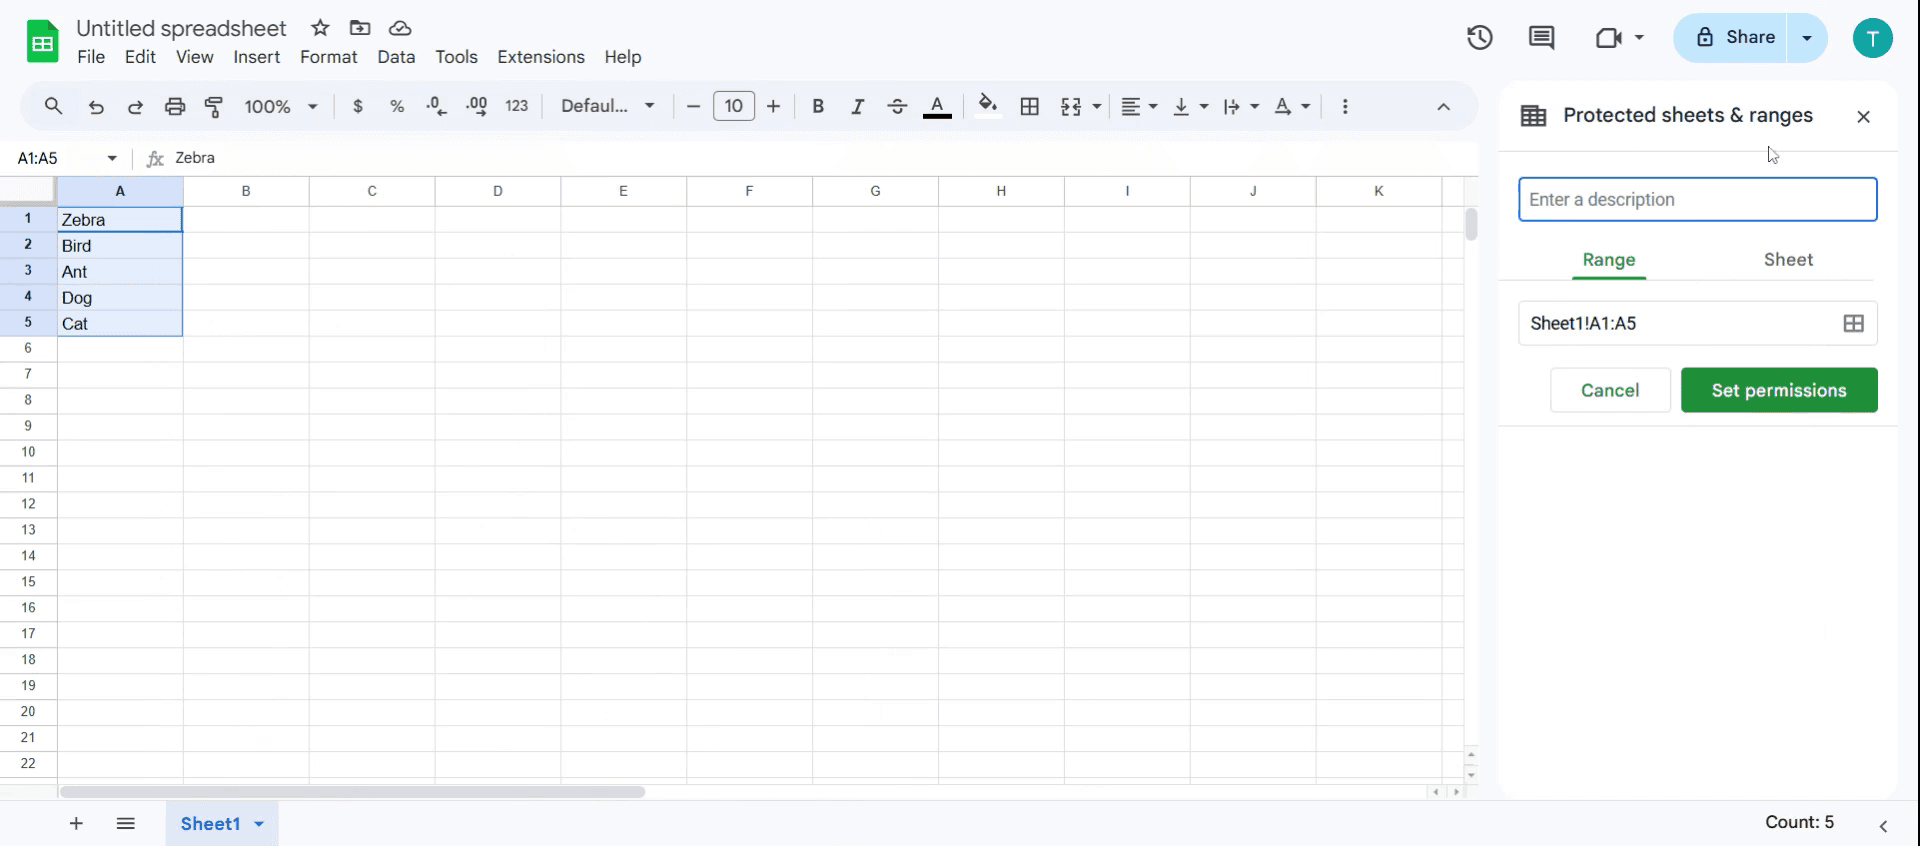
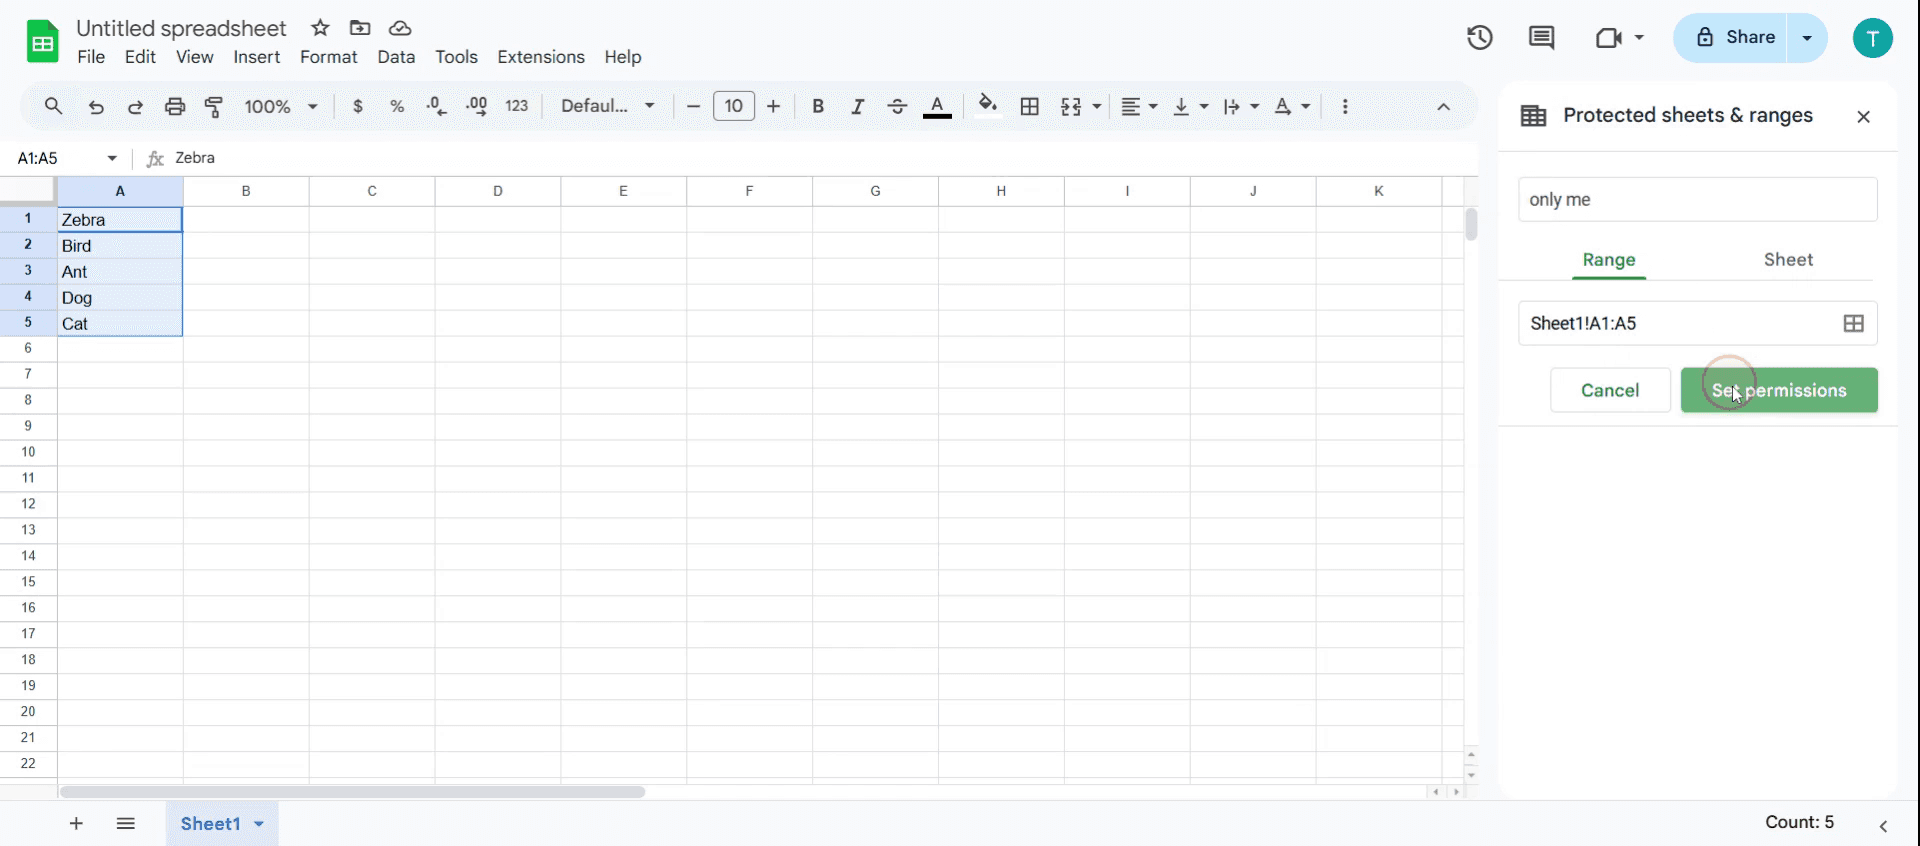
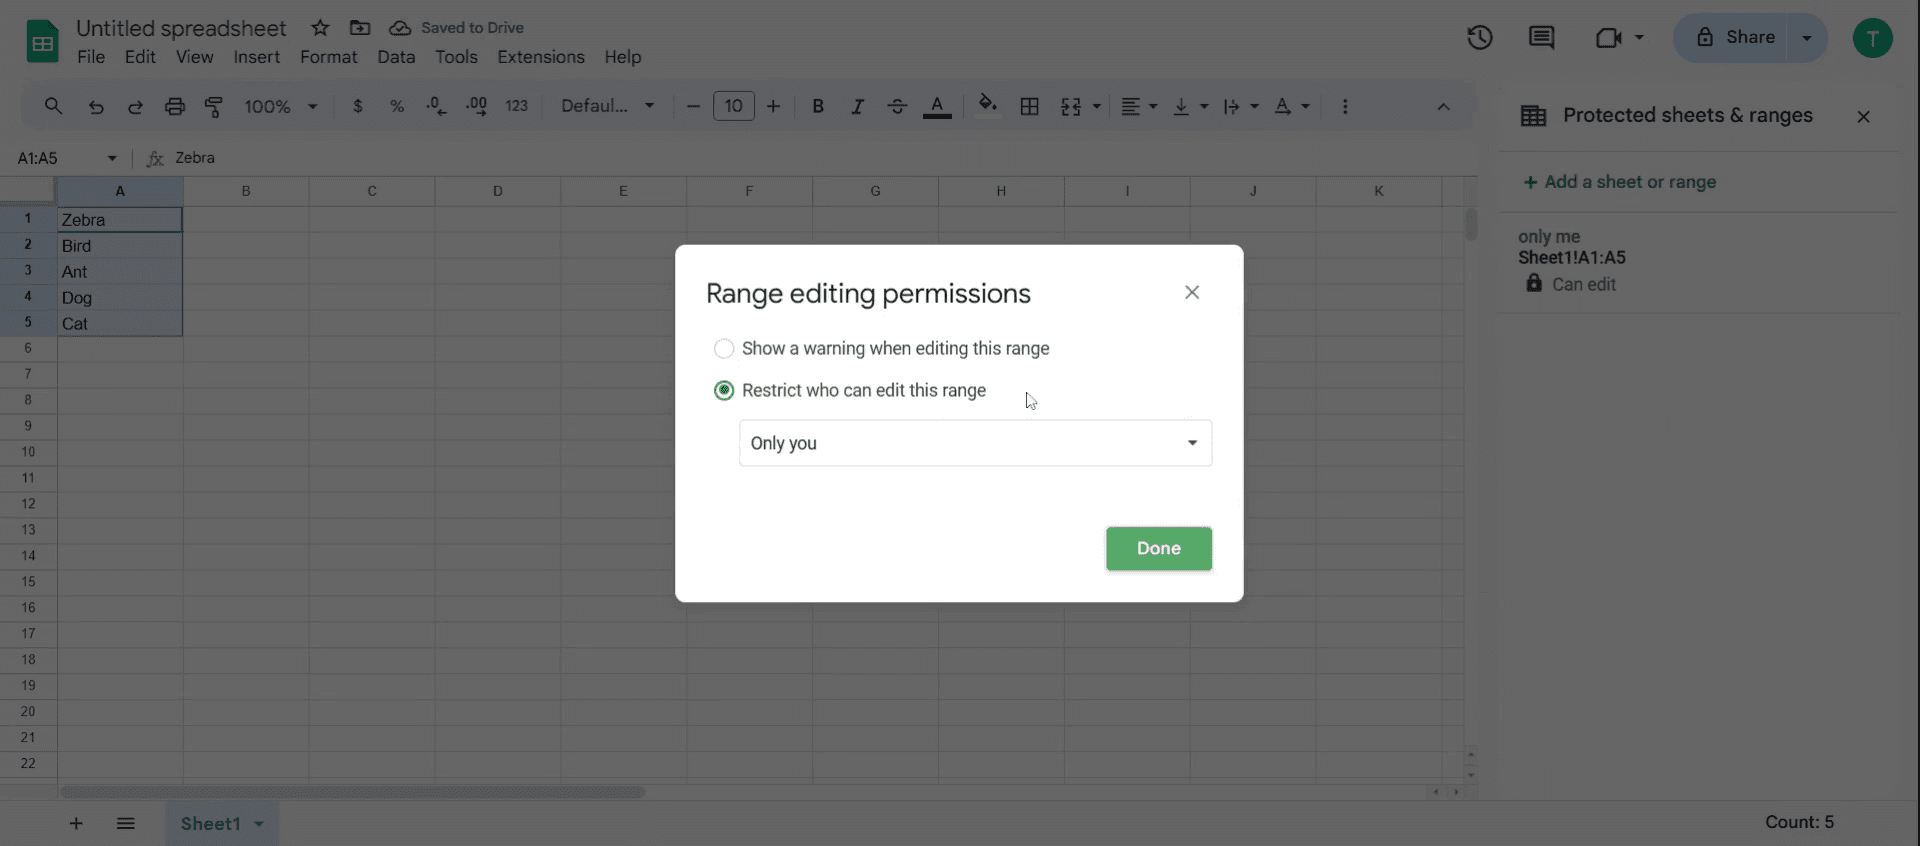
3. 権限を設定します:
編集前に警告を表示: これにより、セルを変更しようとするユーザーにやさしく注意を促せます。
編集を制限: あなたまたは選択した共同編集者のみが変更できるようにアクセスを制限します。
説明を追加(任意): 短いメモを追加すると、ロックされた範囲の用途を説明するのに役立ちます。特に、複数の保護セクションがある場合に便利です。
4. 保護を適用します:
完了 をクリックすると、設定が有効になります。
これで、誰かがロックされたセルを編集しようとすると、設定に応じて警告が表示されるか、完全にブロックされます。
ステップバイステップガイド: Google Sheets でセルをロックする方法
ステップ 1
ロックしたい特定のセル またはセル範囲を選択します
ステップ 2
選択したセルを右クリックすると、ポップアップメニューが表示されます。
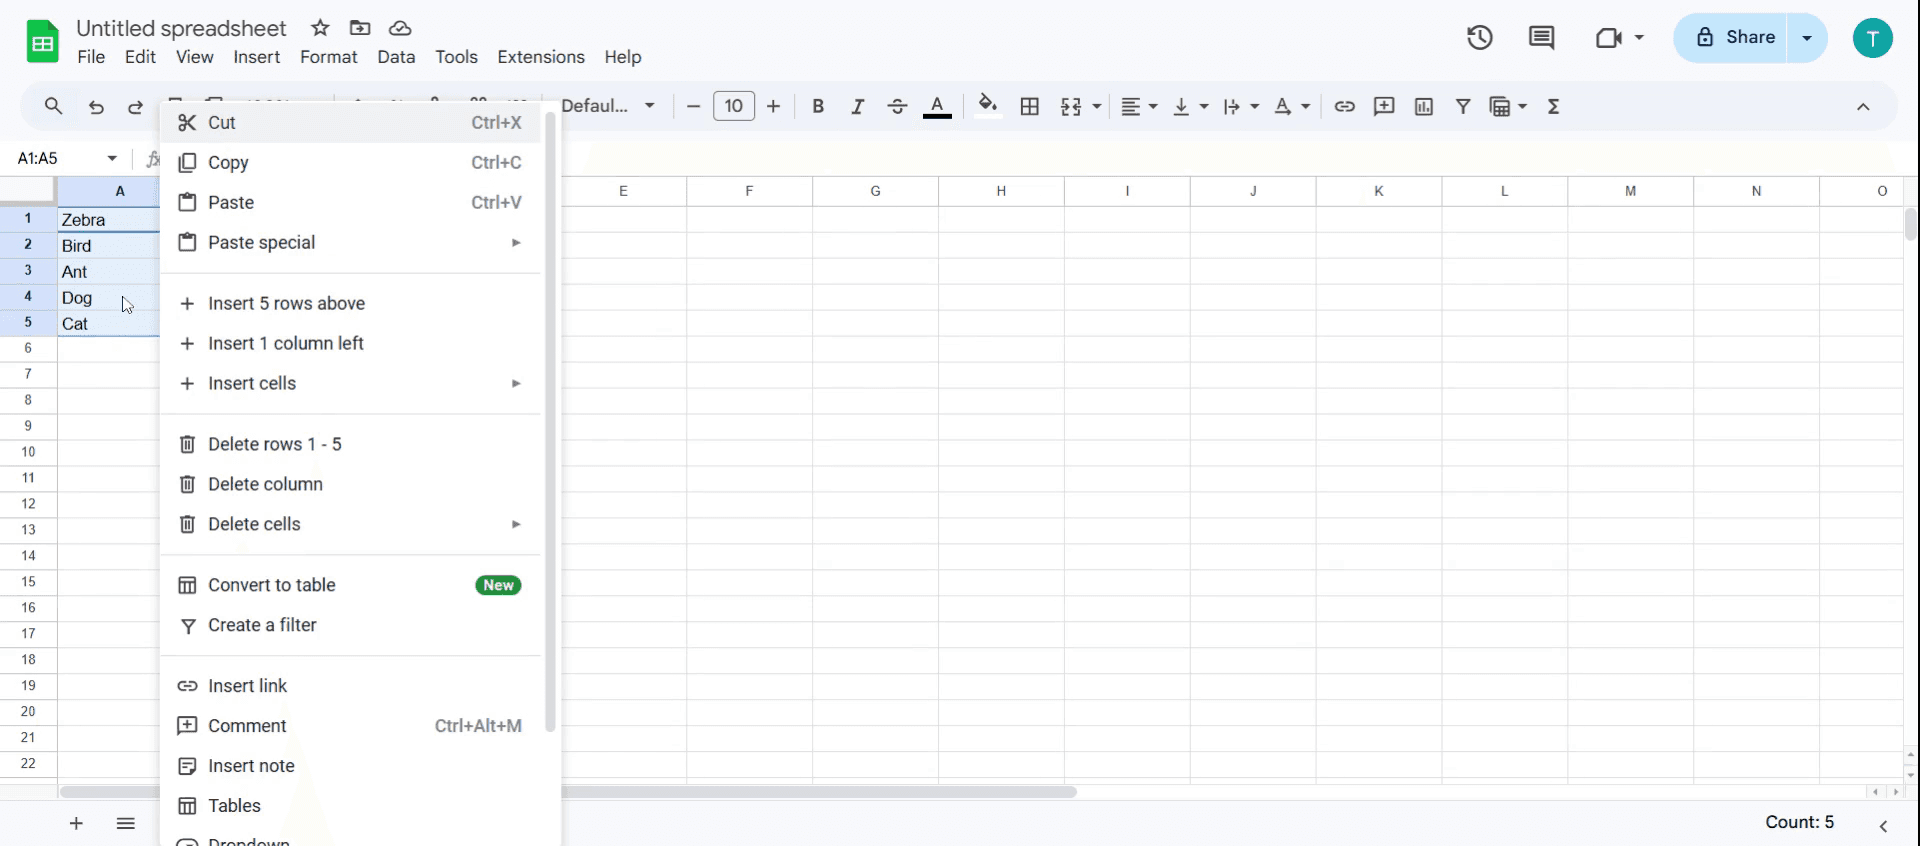
ステップ 3
ポップアップメニューを下にスクロールして、その他のセルの操作を表示 オプションを見つけます。それをクリックします
ステップ 4
オプションから 範囲を保護 を選択します。
ステップ 5
すると 保護されたシートと範囲 ダイアログ बॉックスが開きます。
ステップ 6
説明欄に、保護のための 説明 を入力します。

ステップ 7
権限を設定 をクリックして、誰が範囲を編集できるかを設定します
ステップ 8
この範囲を編集できるユーザーを制限 するか、この範囲を編集するときに警告を表示 するかのオプションが表示されます。要件に応じてオプションを選択してください。
ステップ 9
そして 完了。 をクリックします。
Google スプレッドシートでセルをロックするためのプロのコツ
特定のセルには範囲の保護を使う – シート全体をロックする代わりに、データ > シートと範囲を保護 に移動して、選択したセルだけをロックします。
異なる権限レベルを設定する – ロックされたセルを編集できるユーザーを管理するために、特定のユーザーに表示のみ、コメント可、または編集権限を割り当てます。
データの入力規則とロックを組み合わせる – ロックされたセルとあわせて入力規則を使用し、アクセスを完全に制限せずに誤ったデータ入力を防ぎます。
よくある落とし穴とその回避方法
権限の適用を忘れる – セルをロックするだけでは不十分です。不正な編集を防ぐために、適切な共有設定を行ってください。
シート全体を不要にロックする – シート全体を制限する代わりに、範囲の保護を使って他のユーザーに柔軟性を持たせます。
共同編集者への通知をしない – ロックされたセルを編集できないとユーザーが混乱することがあるため、事前に制限内容を伝えておきましょう。
Google スプレッドシートでセルをロックする際によくある質問
一部のユーザーにはロックされたセルを編集させ、他のユーザーは制限するにはどうすればよいですか? 範囲またはシートをロックした後、[権限を設定] をクリックします。[カスタム] を選択し、その範囲を編集できる特定のユーザーを追加します。[完了] をクリックして変更を適用します。
Google スプレッドシートでロックされたセルのロックを解除するにはどうすればよいですか? [データ] > [シートと範囲を保護] をクリックします。ロックされた範囲またはシートを選択します。ゴミ箱アイコンをクリックして保護を削除します。これで、編集権限を持つ人なら誰でもセルを編集できるようになります。
誰かがロックされたセルを編集しようとするとどうなりますか? 権限のないユーザーがロックされたセルを編集しようとすると、権限がないことを知らせる警告メッセージが表示されます。アクセスが必要な場合は、所有者に編集アクセスをリクエストできます。
Mac で画面録画するには?
Mac で画面録画するには、Trupeer AI を使用できます。画面全体をキャプチャでき、AI アバターの追加、ナレーションの追加、動画内のズームイン・ズームアウトなどの AI 機能を利用できます。trupeer の AI 動画翻訳機能を使えば、動画を 30 以上の言語に翻訳できます。画面録画に AI アバターを追加するには?
画面録画に AI アバターを追加するには、AI 画面録画ツールを使用する必要があります。Trupeer AI は AI 画面録画ツールで、複数のアバターを使った動画作成を支援し、動画用の独自のアバター作成もサポートします。Windows で画面録画するには?
Windows で画面録画するには、組み込みの Game Bar(Windows + G)または、AI アバター、ナレーション、翻訳などのより高度な機能を備えた Trupeer AI のような高度な AI ツールを使用できます。動画にナレーションを追加するには?
動画にナレーションを追加するには、trupeer ai の Chrome 拡張機能をダウンロードします。サインアップ後、音声付きの動画をアップロードし、trupeer から希望のナレーションを選択して、編集した動画を書き出します。画面録画をズームインするには?
画面録画中にズームインするには、Trupeer AI のズーム効果を使用します。これにより、特定のタイミングでズームイン・ズームアウトでき、動画コンテンツの視覚的なインパクトを高められます。
おすすめの記事
関連チュートリアル

