

Comment modifier le type de ticket dans Jira – étapes rapides et faciles
Découvrez comment modifier le type de ticket dans Jira en utilisant l’option Déplacer pour passer de tâches à des bugs ou des stories, tout en conservant les champs et les données du workflow intacts. Suivez ce guide rapide avec Trupeer.
Ce document fournit un processus étape par étape pour modifier le type de ticket dans Jira, garantissant un flux de travail fluide pour les utilisateurs. Suivez attentivement ces instructions pour mettre à jour le type de ticket sans aucun souci.
Vous pouvez modifier un type de ticket de deux manières : en utilisant la fonctionnalité « Déplacer » (méthode la plus fiable) ou, dans certaines instances Jira, directement via l’icône du type de ticket (si elle est activée).
Méthode 1 : utilisation de l’option Déplacer
Ouvrez le ticket
Accédez au ticket que vous souhaitez modifier.Cliquez sur Plus (•••) > Déplacer
Cela ouvre l’assistant de déplacement où vous pouvez modifier le type, le projet et d’autres attributs du ticket.Sélectionnez le nouveau type de ticket
Choisissez le type de ticket souhaité (par exemple, de "Bug" à "Tâche").Associer les champs
Jira vous demandera d’associer les champs requis du type actuel au nouveau. Renseignez les informations manquantes.Vérifier et confirmer
Vérifiez les changements et cliquez sur Confirmer pour les appliquer.
Méthode 2 : modifier depuis l’icône du type de ticket (si disponible)
Ouvrez le ticket
Accédez à la vue détaillée du ticket.Cliquez sur l’icône du type de ticket
Située près du résumé ou de la clé du ticket.Sélectionnez un nouveau type de ticket
Choisissez un nouveau type dans la liste déroulante. Jira peut recharger la page ou demander une confirmation.
Guide étape par étape : comment modifier le type de ticket dans Jira
Étape 1
Cliquez sur l’option du tableau.

Étape 2
Puis sélectionnez le ticket Jira spécifique.
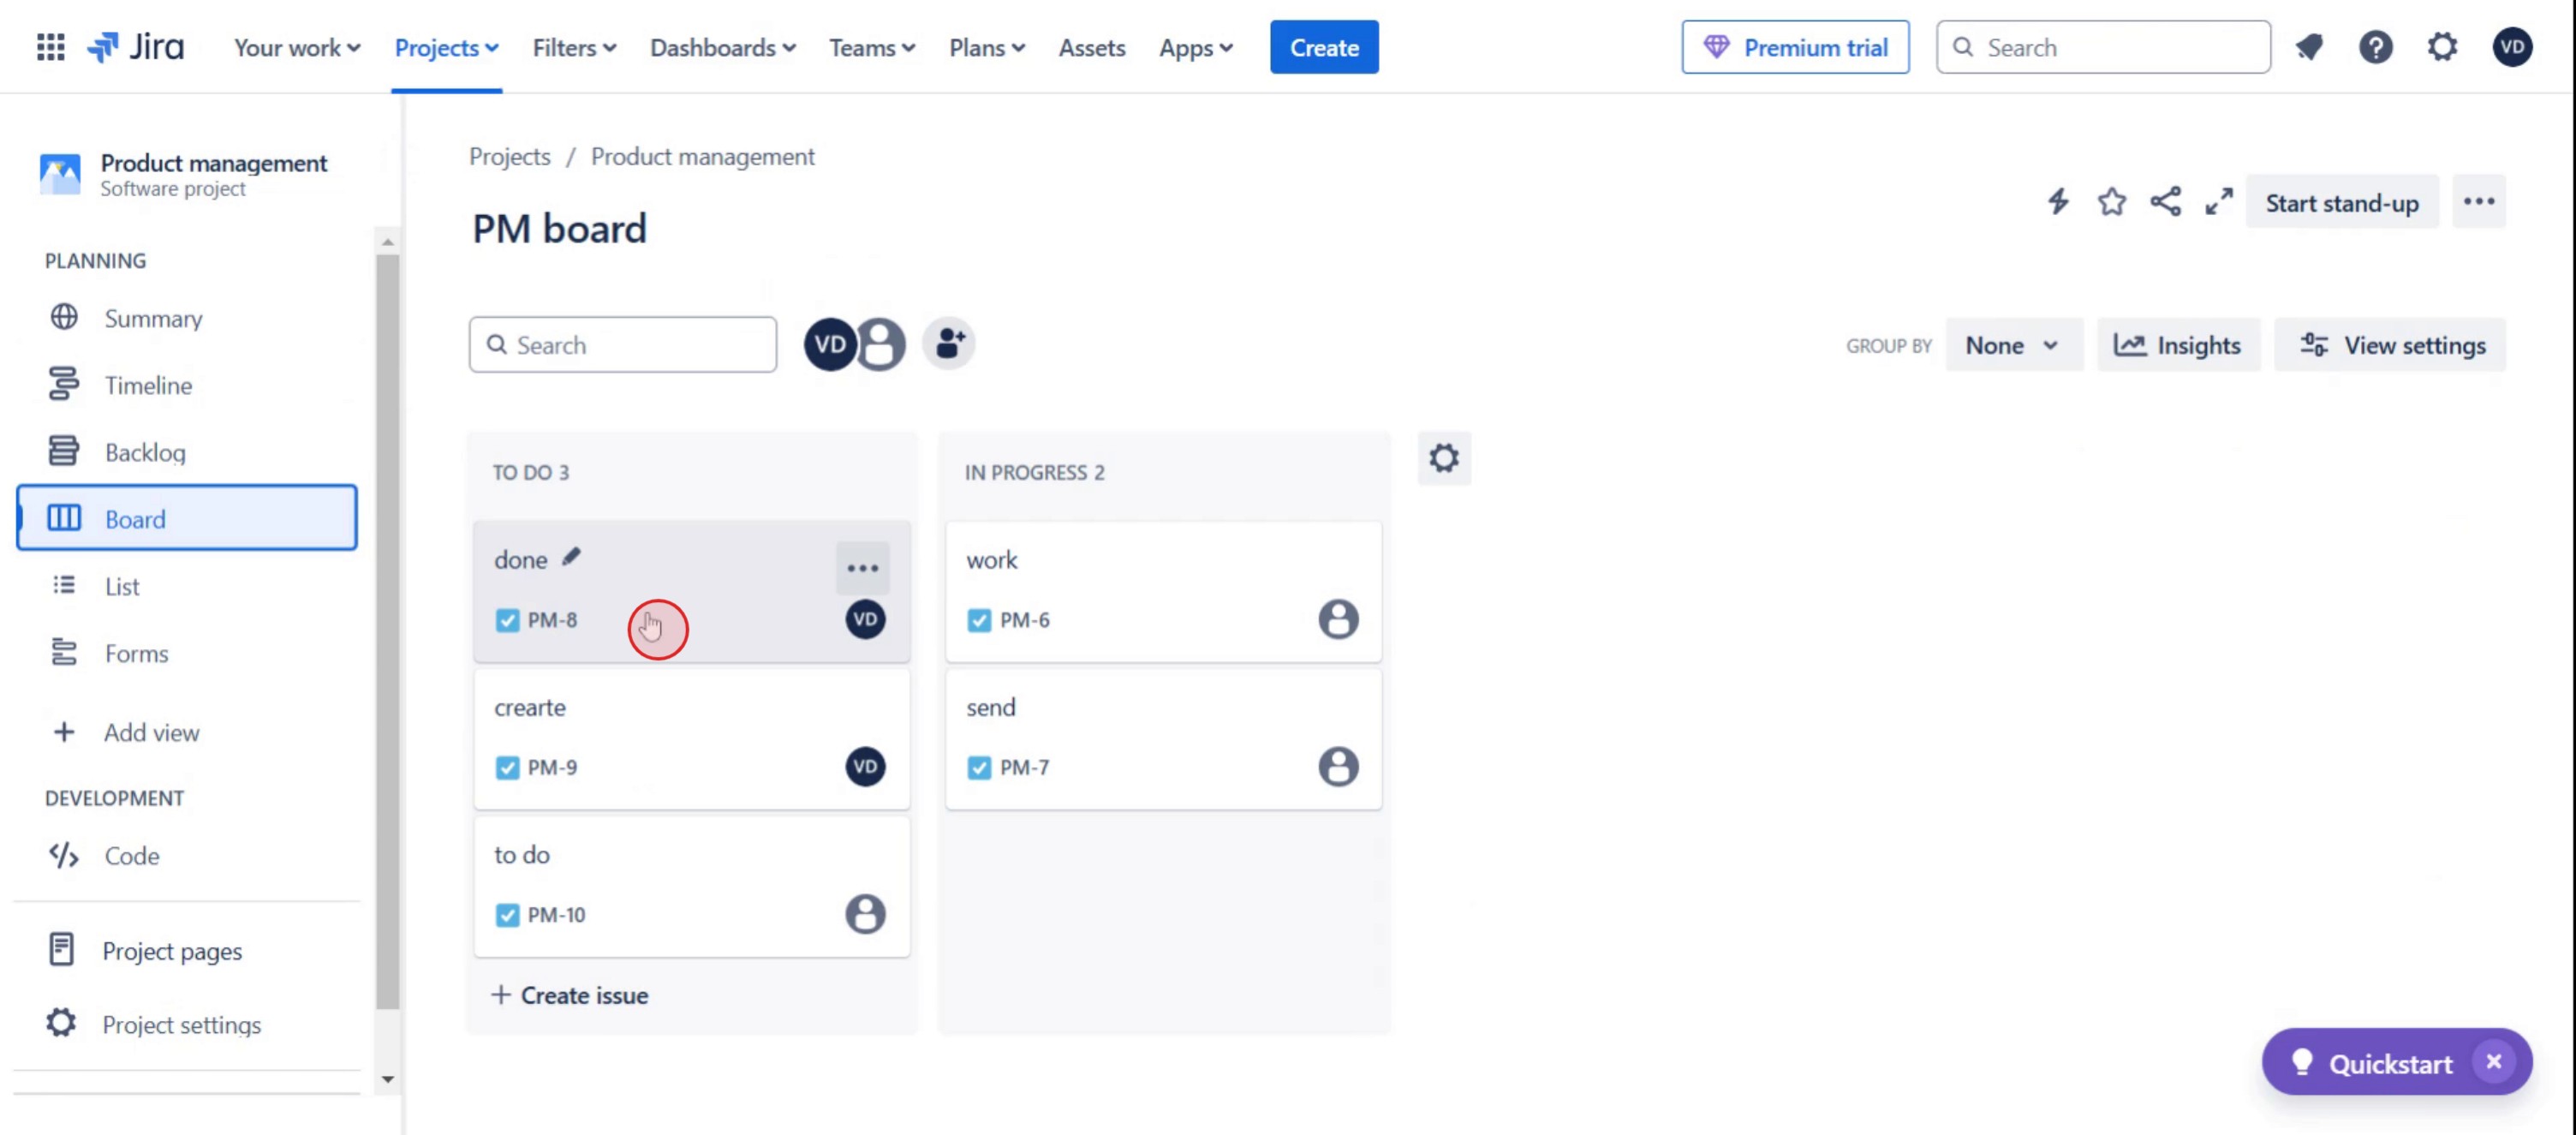
Étape 3
Cliquez sur plus d’options.

Étape 4
Cliquez sur Déplacer.

Étape 5
Sélectionnez le projet spécifique.

Étape 6
Sélectionnez la tâche appropriée,

Étape 7
Puis cliquez sur Suivant,

Étape 8
Sélectionnez le statut cible souhaité.

Étape 9
Puis cliquez sur Suivant,

Étape 10
Cliquez sur la case à cocher.

Étape 11
Puis, continuez en cliquant sur Suivant .

Étape 12
Puis cliquez sur Confirmer.

Astuces professionnelles pour changer le type de ticket dans Jira
Assurez-vous que le type de ticket cible est disponible dans le schéma de types de tickets du projet avant d’essayer de le modifier.
Utilisez l’option Déplacer de Jira pour changer le type de ticket tout en préservant tous les éléments clés comme les pièces jointes et les commentaires.
Si le type de ticket nécessite des champs différents, mappez-les correctement pendant la transition afin d’éviter toute perte de données.
Pièges courants et comment les éviter
Changer le type de ticket sans vérifier les champs obligatoires peut entraîner des informations manquantes ; examinez toujours le mappage des champs avant de confirmer.
Utiliser un workflow qui ne prend pas en charge le nouveau type de ticket peut provoquer des erreurs ; vérifiez la compatibilité avant d’effectuer des modifications.
L’absence des autorisations de projet nécessaires peut empêcher les modifications ; assurez-vous de disposer des autorisations Move Issues dans Jira.
FAQ courantes sur la façon de modifier le type de ticket dans Jira
Pourquoi ne puis-je pas modifier le type de ticket dans Jira ?
Si vous ne pouvez pas modifier le type de ticket, vérifiez les autorisations de votre projet, assurez-vous que le type de ticket fait partie du schéma du projet et confirmez que le flux de travail prend en charge le nouveau type.La modification du type de ticket supprimera-t-elle des données ?
Non, mais si le nouveau type de ticket comporte des champs obligatoires différents, vous devrez peut-être ressaisir ou ajuster manuellement certaines informations.Puis-je modifier le type de ticket pour plusieurs tickets à la fois ?
Oui, vous pouvez utiliser la fonction de modification en masse de Jira pour mettre à jour le type de ticket de plusieurs tickets simultanément.La modification du type de ticket affecte-t-elle les rapports ou les tableaux de bord ?
Cela pourrait, selon la façon dont les rapports et les tableaux de bord filtrent les tickets. Mettez à jour vos filtres si nécessaire après les modifications.Comment enregistrer l’écran sur Mac ?
Pour enregistrer l’écran sur un Mac, vous pouvez utiliser Trupeer AI. Il vous permet de capturer l’écran entier et offre des fonctionnalités d’IA telles que l’ajout d’avatars IA, l’ajout d’une voix off, ainsi que le zoom avant et arrière dans la vidéo. Grâce à la fonction de traduction vidéo par IA de Trupeer, vous pouvez traduire la vidéo dans plus de 30 langues.Comment ajouter un avatar IA à un enregistrement d’écran ?
Pour ajouter un avatar IA à un enregistrement d’écran, vous devrez utiliser un outil d’enregistrement d’écran IA. Trupeer AI est un outil d’enregistrement d’écran IA qui vous aide à créer des vidéos avec plusieurs avatars et vous aide également à créer votre propre avatar pour la vidéo.Comment enregistrer l’écran sur Windows ?
Pour enregistrer l’écran sur Windows, vous pouvez utiliser la barre de jeu intégrée (Windows + G) ou un outil IA avancé comme Trupeer AI pour des fonctionnalités plus avancées telles que des avatars IA, une voix off, la traduction, etc.Comment ajouter une voix off à une vidéo ?
Pour ajouter une voix off aux vidéos, téléchargez l’extension Chrome Trupeer AI. Une fois inscrit, importez votre vidéo avec la voix, choisissez la voix off souhaitée dans Trupeer et exportez votre vidéo modifiée.Comment zoomer dans un enregistrement d’écran ?
Pour effectuer un zoom lors d’un enregistrement d’écran, utilisez les effets de zoom de Trupeer AI, qui vous permettent de zoomer avant et arrière à des moments précis, renforçant ainsi l’impact visuel de votre contenu vidéo.
Les internautes posent aussi
Générateur de documentation technique
Logiciel de base de connaissances
Comment exporter le backlog Jira vers Excel
Comment effectuer une mise à jour en masse dans Jira
Tutoriels associés

