

Hoe u de standaardtak in GitHub wijzigt
Leer eenvoudig hoe je de standaardtak in je GitHub-repository wijzigt. Volg deze stapsgewijze handleiding om een nieuwe hoofdtak in te stellen zonder gegevens te verliezen.
Stap-voor-stap handleiding: hoe u de standaardtak in GitHub wijzigt
Stap 1
Navigeer naar uw repository en klik bovenaan in de repository op het tabblad 'Instellingen'.

Stap 2
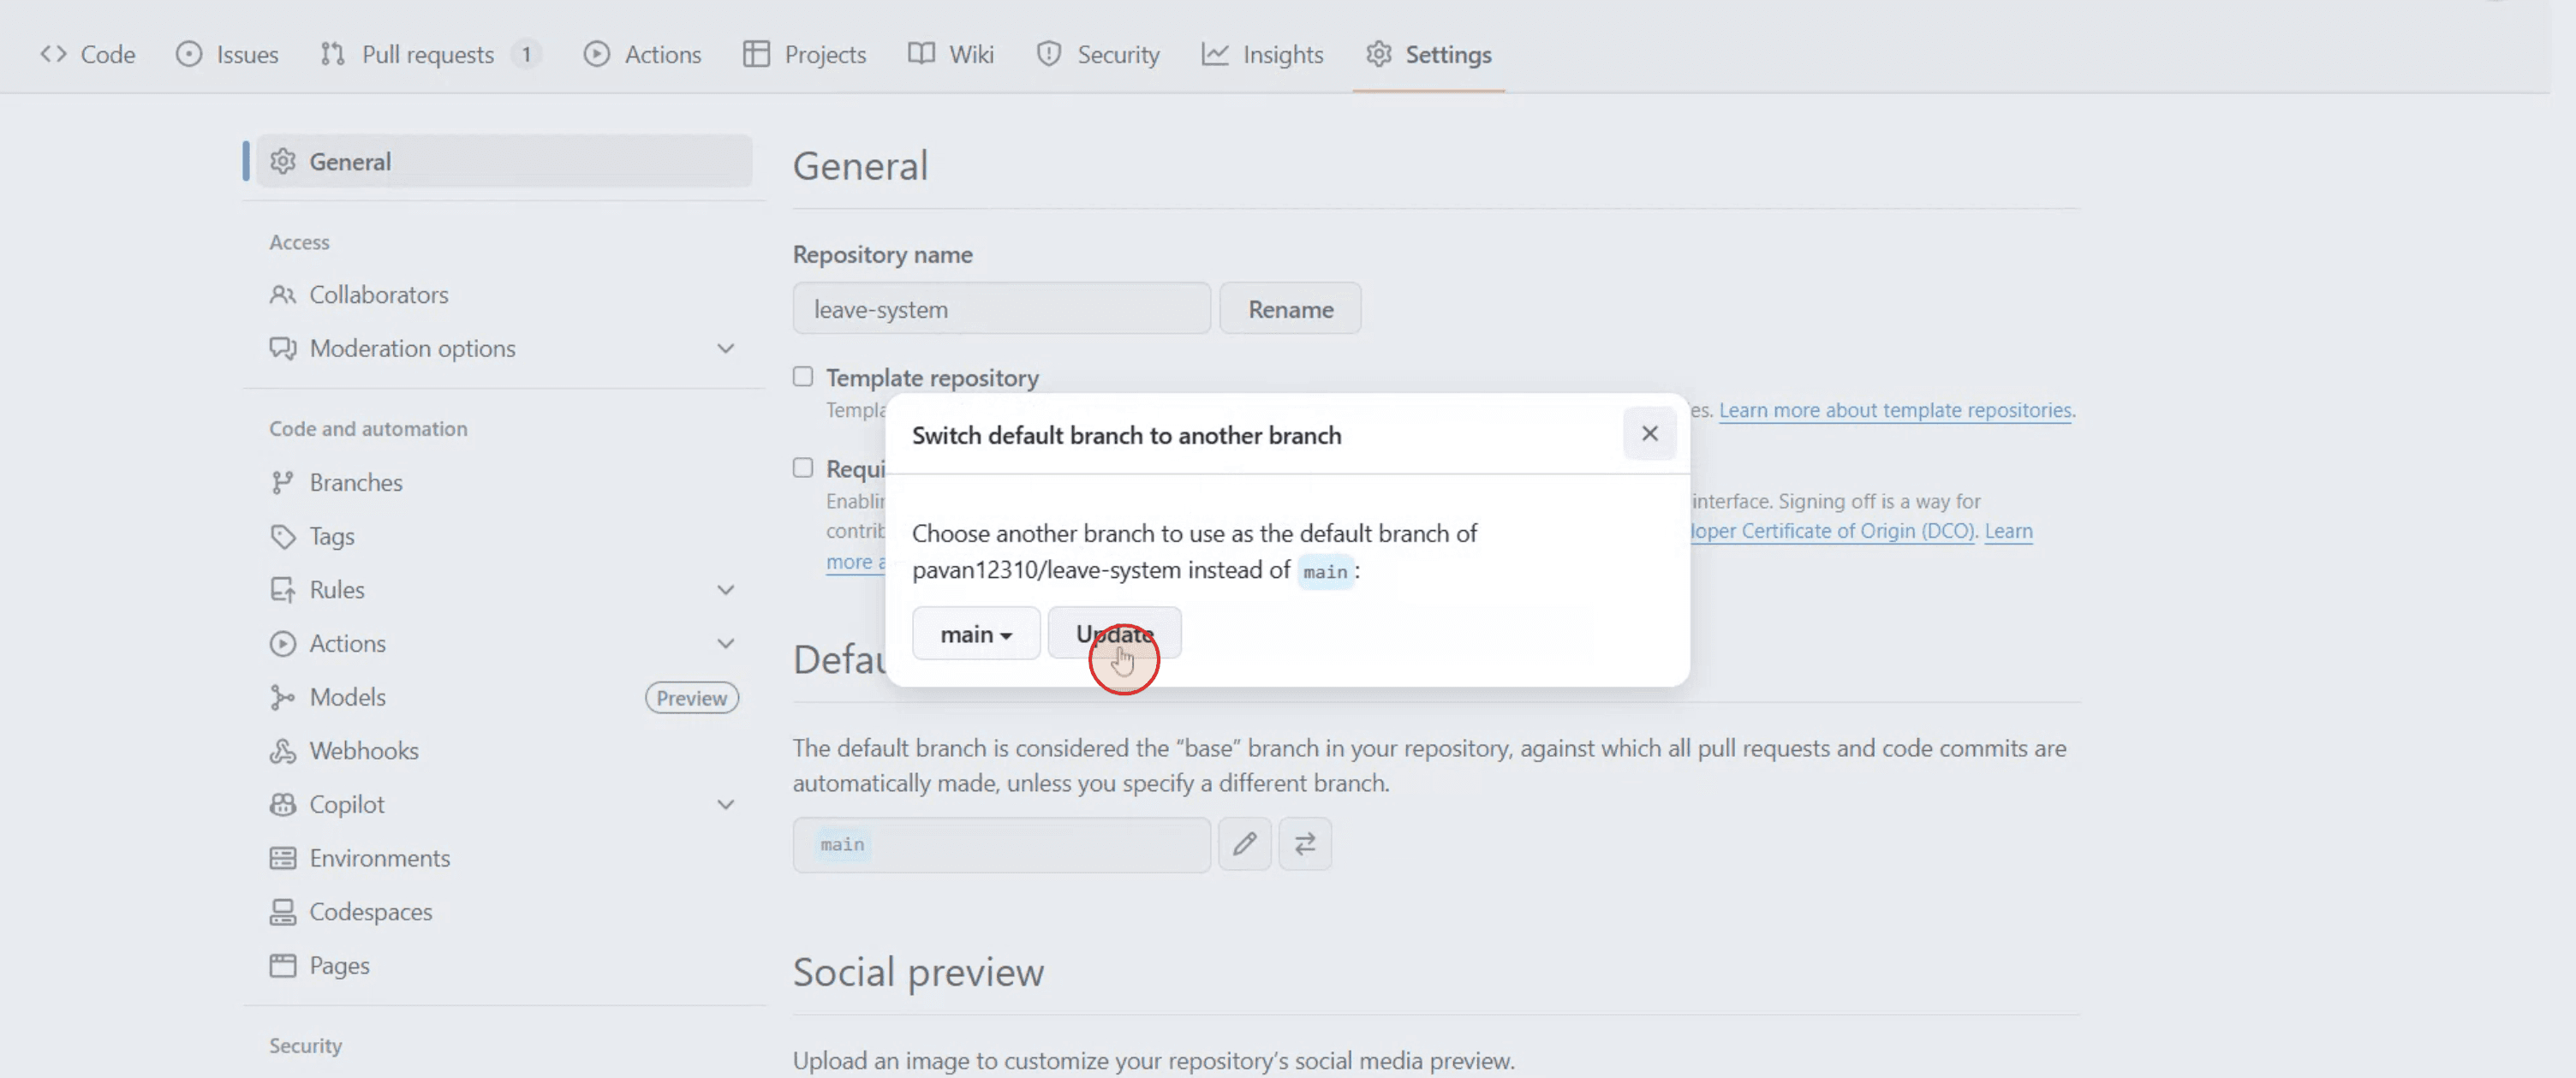
Onder het gedeelte 'Standaardtak' klikt u op de knop waarmee u naar een andere tak kunt overschakelen.

Stap 3
Klik op 'Bijwerken' om de wijziging te bevestigen.
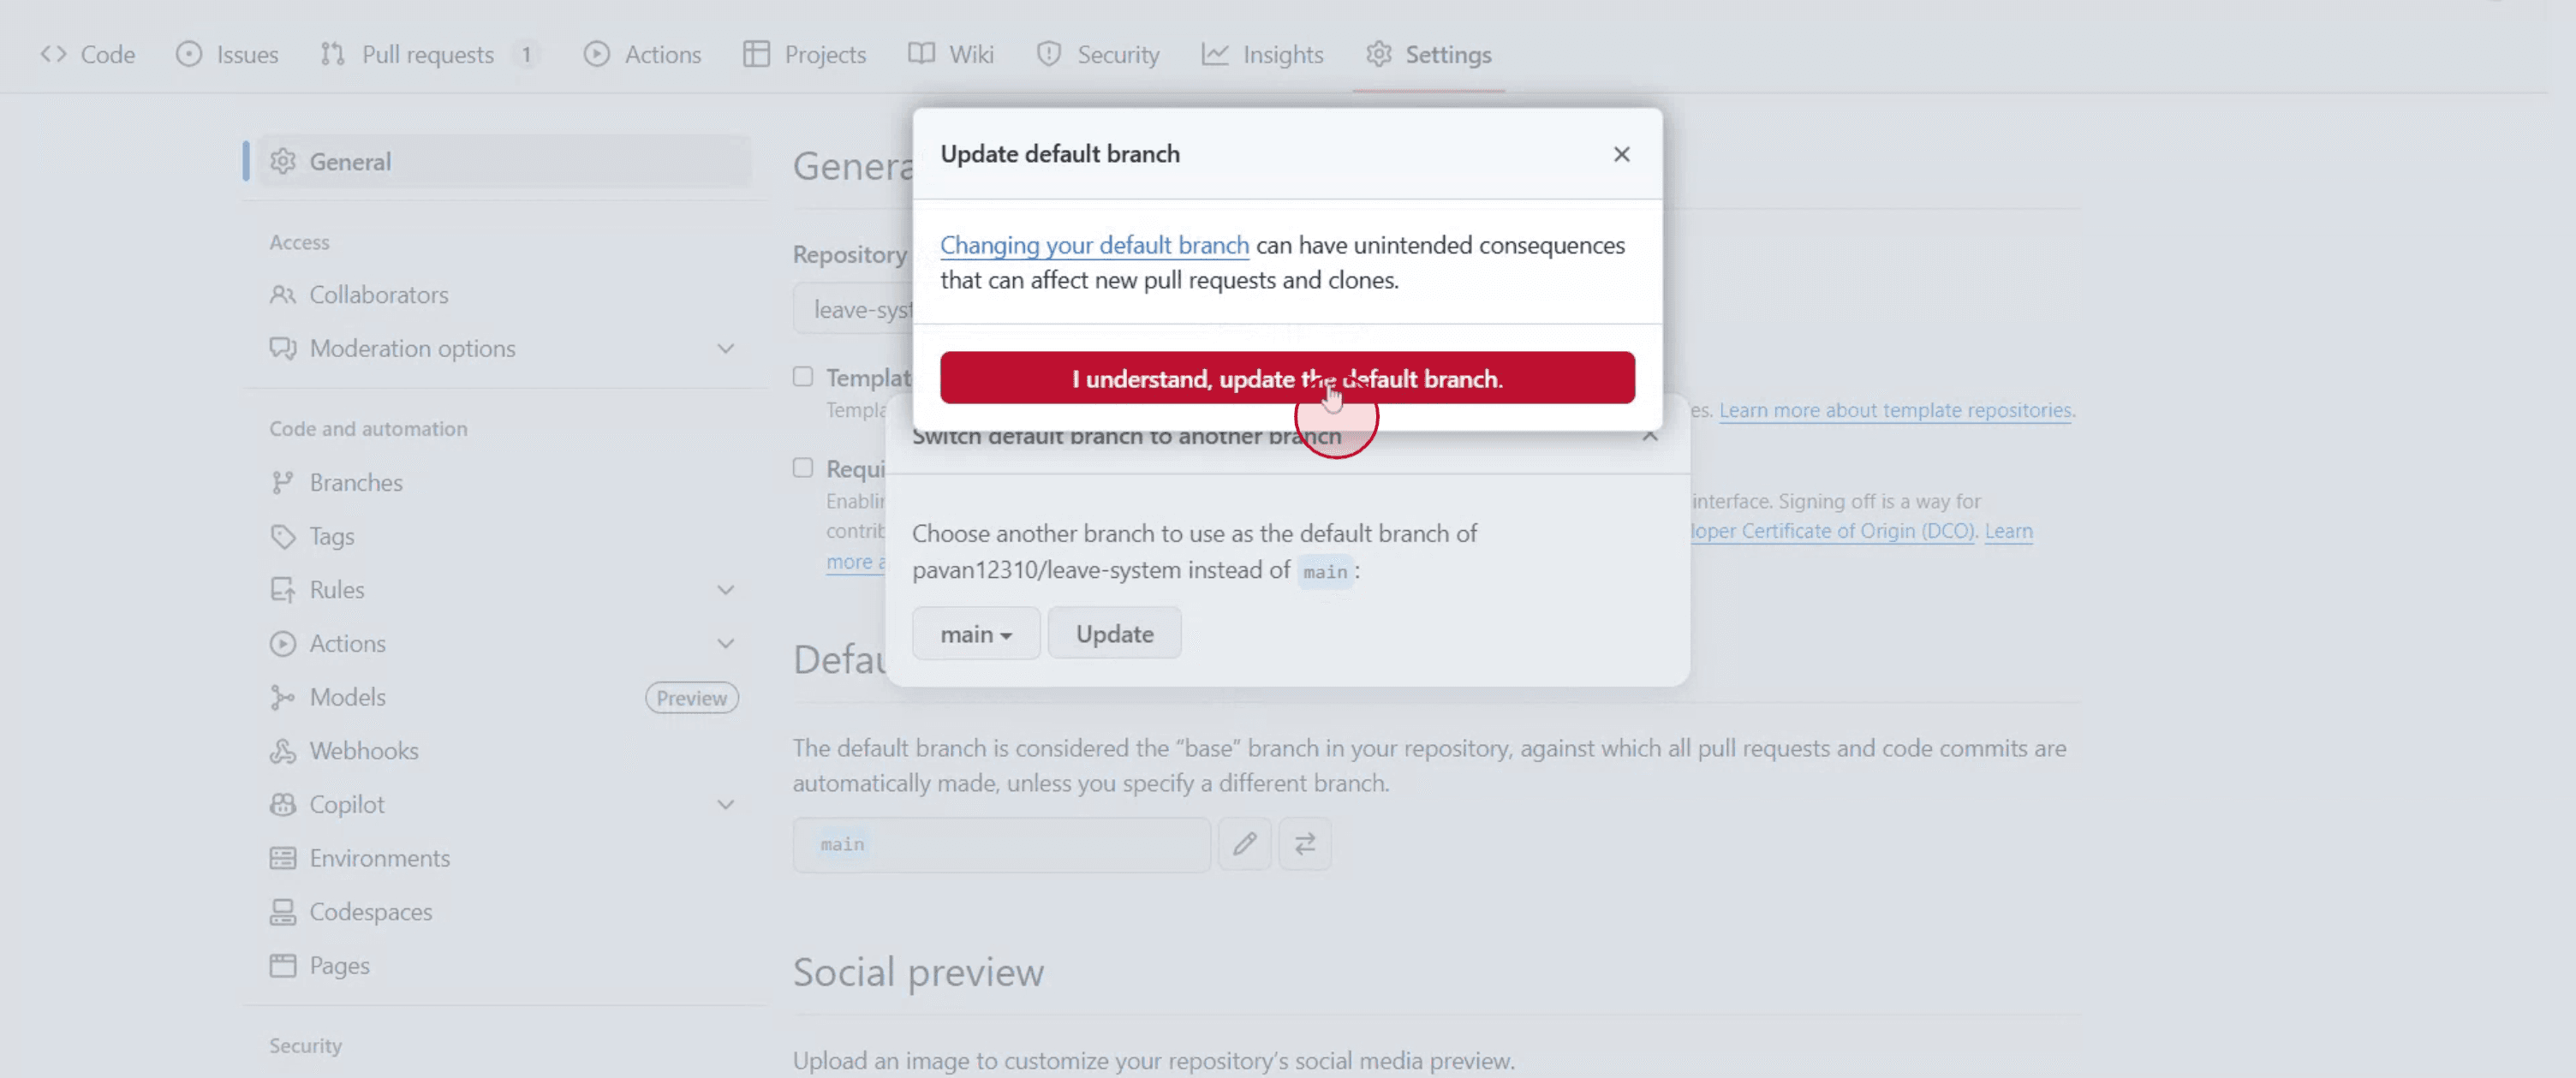
Stap 4
Bevestig de actie door te klikken op 'Ik begrijp het, werk de standaardtak bij'.
Pro-tips voor het wijzigen van de standaardbranch in GitHub
Log in bij GitHub
Ga naar github.com en log in op je account.Navigeer naar je repository
Open de repository waarin je de standaardbranch wilt wijzigen.Klik op het tabblad Instellingen
Klik in het bovenste menu van je repo op “Instellingen.” Als je het niet ziet, heb je mogelijk geen beheerdersrechten.Ga naar de sectie “Branches”
Klik in de linkerzijbalk onder de categorie “Code en automatisering” op “Branches”.Wijzig de standaardbranch
Klik in de sectie “Standaardbranch” op het potloodpictogram (bewerken) naast de huidige standaardbranch.Selecteer een nieuwe branch
Kies uit het vervolgkeuzemenu de branch die je als nieuwe standaard wilt instellen.Bevestig de wijziging
Nadat je de nieuwe branch hebt geselecteerd, klik je op “Bijwerken” en bevestig je je keuze in het pop-upvenster.
Veelvoorkomende valkuilen en hoe je ze kunt vermijden
Branch nog niet aangemaakt
Je kunt een branch alleen als standaard instellen als die al bestaat. Maak indien nodig eerst de nieuwe branch aan.Machtigingsproblemen
Alleen gebruikers met beheerdersrechten voor de repository kunnen de standaardbranch wijzigen.Pull requests en workflows kunnen stuklopen
Het wijzigen van de standaardbranch kan gevolgen hebben voor open pull requests of CI/CD-pijplijnen. Werk die paden indien nodig bij.Per ongeluk de oude standaardbranch verwijderen
Verwijder de oude standaardbranch pas nadat je alle verwijzingen in andere tools of in de klonen van medewerkers hebt bijgewerkt.Verwarring bij medewerkers
Laat je team weten dat de wijziging is doorgevoerd om miscommunicatie of pushen naar de verkeerde branch te voorkomen.
Veelgestelde vragen over het wijzigen van de standaardtak in GitHub
Hoe wijzig ik de standaardtak in GitHub?
Ga naar de Instellingen > Takken van je repository, klik op het bewerkpictogram, kies een nieuwe tak en bevestig.Kan ik de standaardtak later weer wijzigen?
Ja, je kunt deze op elk moment opnieuw instellen met dezelfde methode.Verwijdert het wijzigen van de standaardtak de oude?
Nee, de oude tak blijft bestaan tenzij je deze handmatig verwijdert.Werken bestaande pull requests nog steeds?
Pull requests worden niet automatisch verplaatst. Mogelijk moet je ze handmatig rebasen of het doel wijzigen.Kan ik dit doen vanuit de GitHub mobiele app?
Nee, het wijzigen van de standaardtak is alleen beschikbaar via de webinterface van GitHub.Hoe neem ik het scherm op op een Mac?
Om schermopname te maken op een Mac, kun je Trupeer AI gebruiken. Het stelt je in staat het volledige scherm vast te leggen en biedt AI-mogelijkheden zoals het toevoegen van AI-avatars, voice-over toevoegen, in- en uitzoomen in de video. Met de AI-videotranslatiefunctie van Trupeer kun je de video naar meer dan 30 talen vertalen.Hoe voeg ik een AI-avatar toe aan een schermopname?
Om een AI-avatar toe te voegen aan een schermopname, moet je een AI-schermopnametool gebruiken. Trupeer AI is een AI-schermopnametool die je helpt video's te maken met meerdere avatars, en helpt je ook bij het maken van je eigen avatar voor de video.Hoe neem ik het scherm op in Windows?
Om het scherm op te nemen in Windows, kun je de ingebouwde Game Bar gebruiken (Windows + G) of een geavanceerde AI-tool zoals Trupeer AI voor meer geavanceerde functies zoals AI-avatars, voice-over, vertaling enz.Hoe voeg ik een voice-over toe aan video?
Om voice-overs aan video's toe te voegen, download je de Chrome-extensie van Trupeer AI. Na aanmelding upload je je video met stem, kies je de gewenste voice-over van Trupeer en exporteer je je bewerkte video.Hoe zoom ik in op een schermopname?
Om tijdens een schermopname in te zoomen, gebruik je de zoomeffecten in Trupeer AI, waarmee je op specifieke momenten in en uit kunt zoomen en zo de visuele impact van je videocontent vergroot.
Mensen vragen ook
Technische documentatiegenerator
Gerelateerde tutorials

