

So erstellen Sie ein Voiceover in Canva
Erfahren Sie mit dieser einfachen Schritt-für-Schritt-Anleitung, wie Sie in Canva eine Sprachaufnahme hinzufügen. Perfekt für ansprechende Videos, Präsentationen und Reels mit Audio-Narration.
Schritt-für-Schritt-Anleitung: So erstellen Sie ein Voiceover in Canva
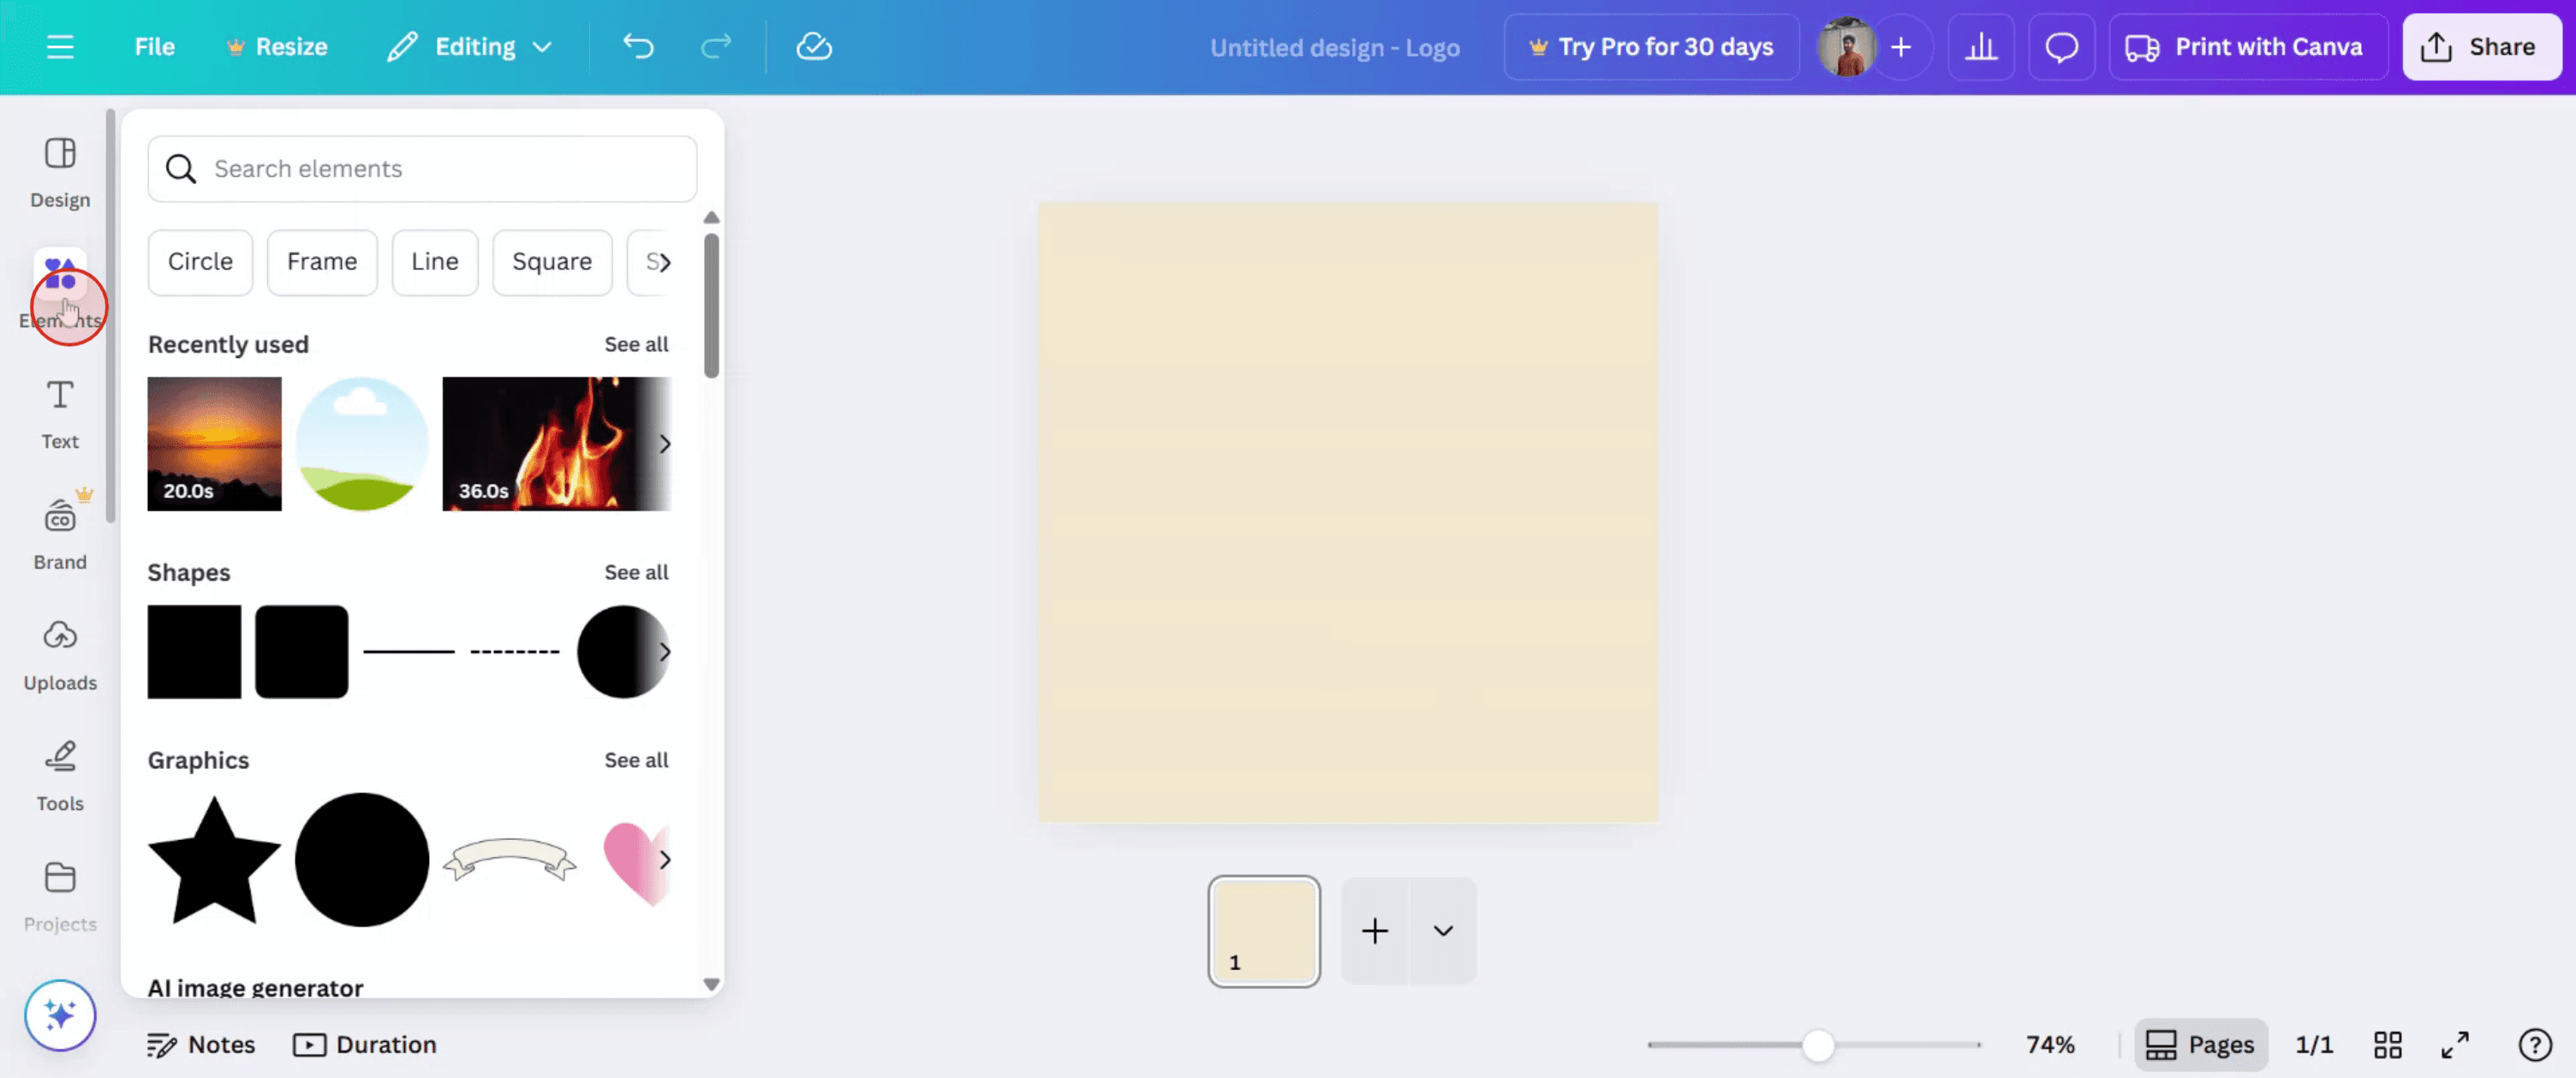
Schritt 1
Klicken Sie in der Bearbeitungs-Symbolleiste auf 'Elemente'.
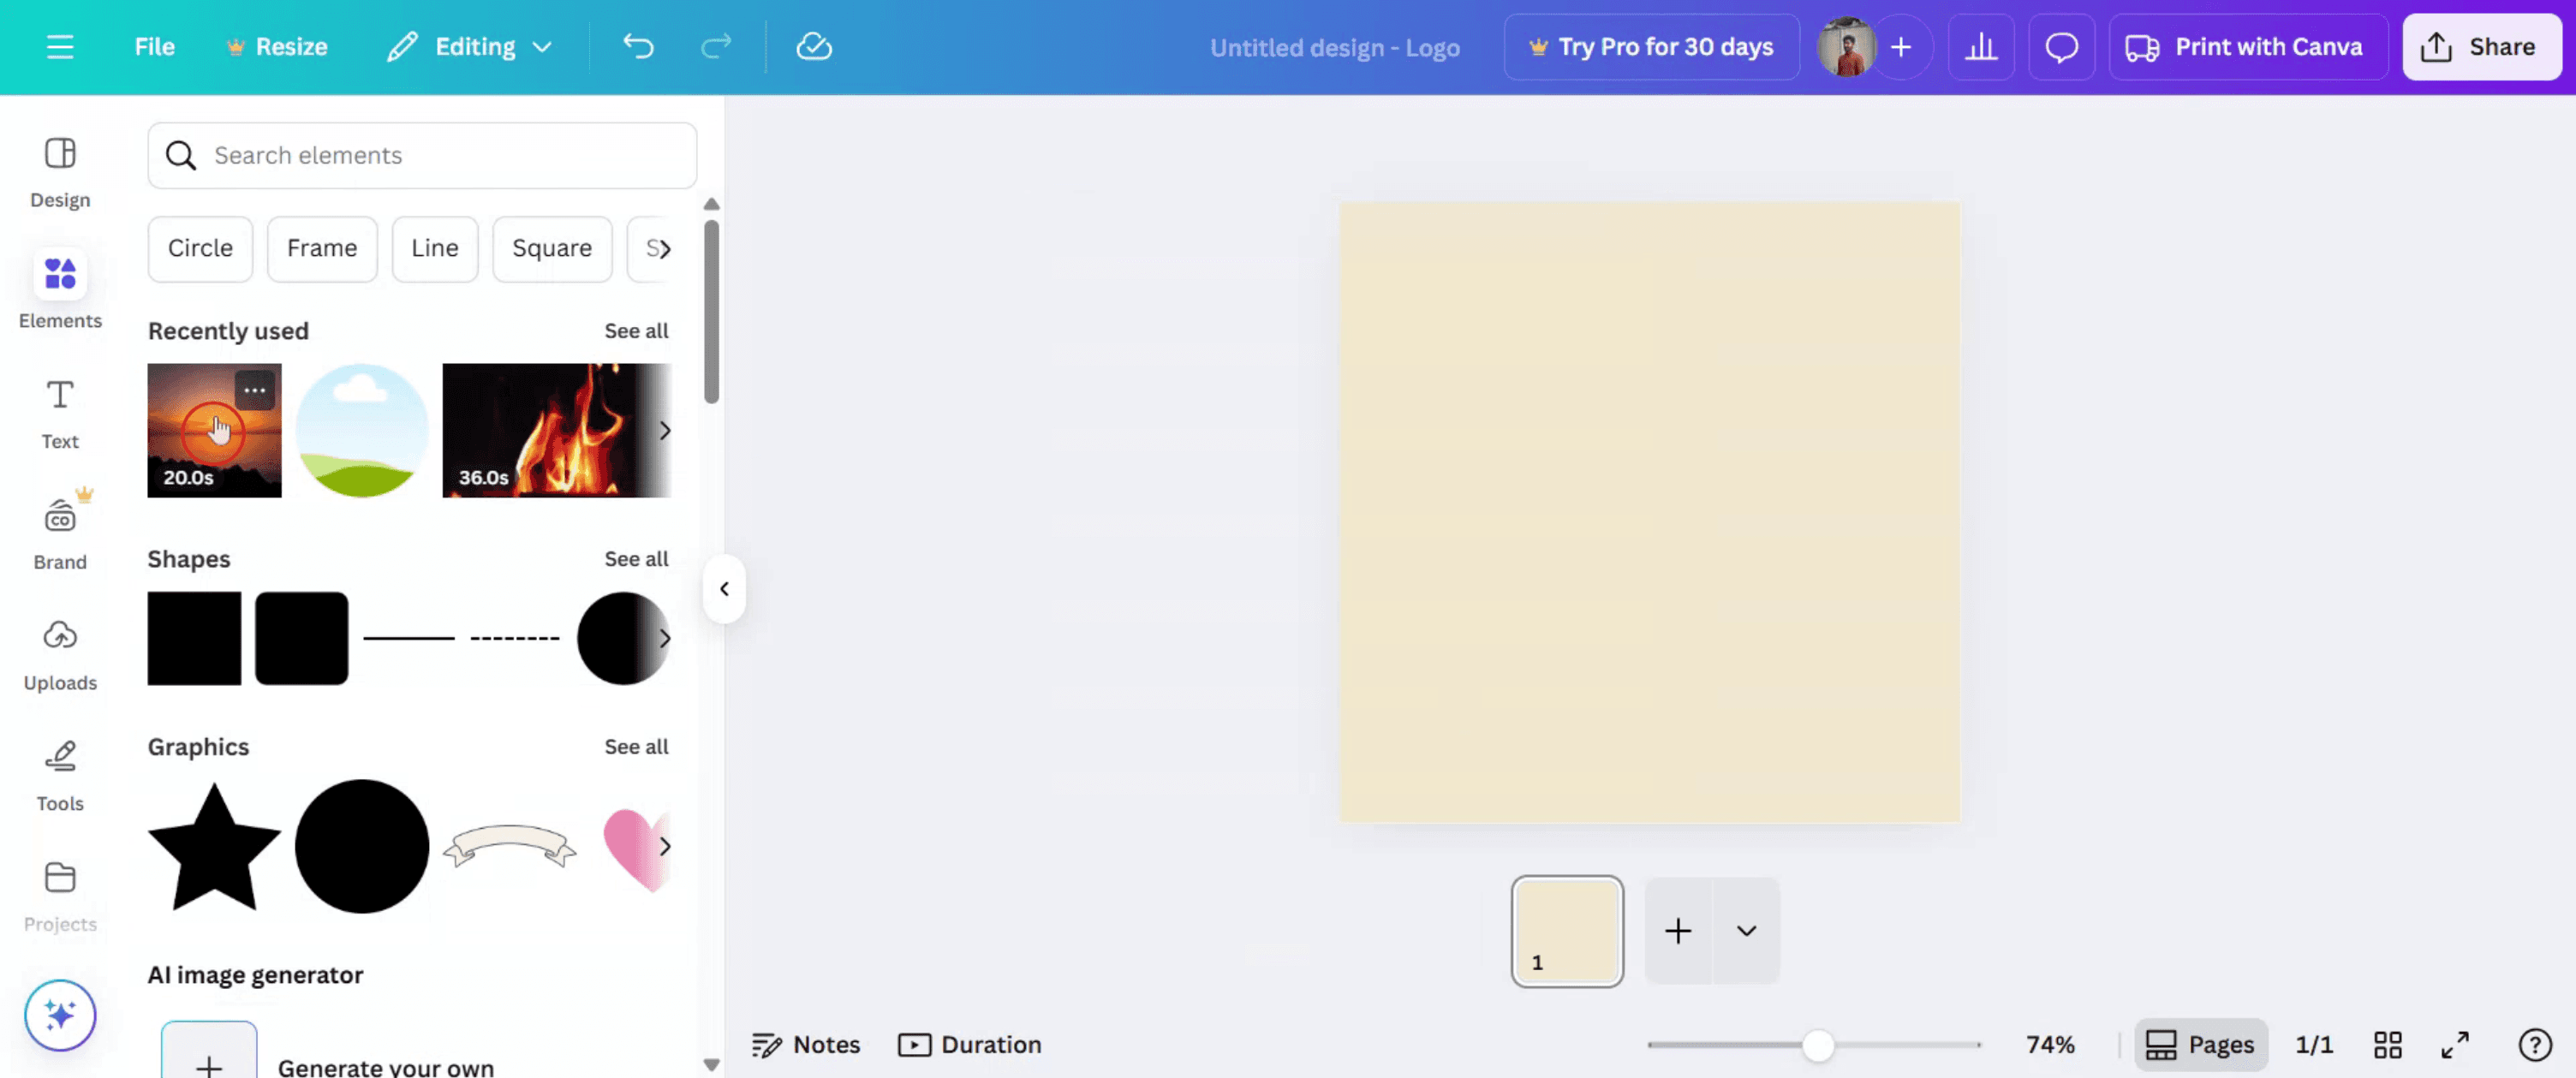
Schritt 2
Geben Sie in die Suchleiste Ihr bevorzugtes Video ein und wählen Sie es aus.
Schritt 3
Sobald es hinzugefügt wurde, gehen Sie zu 'Apps'.

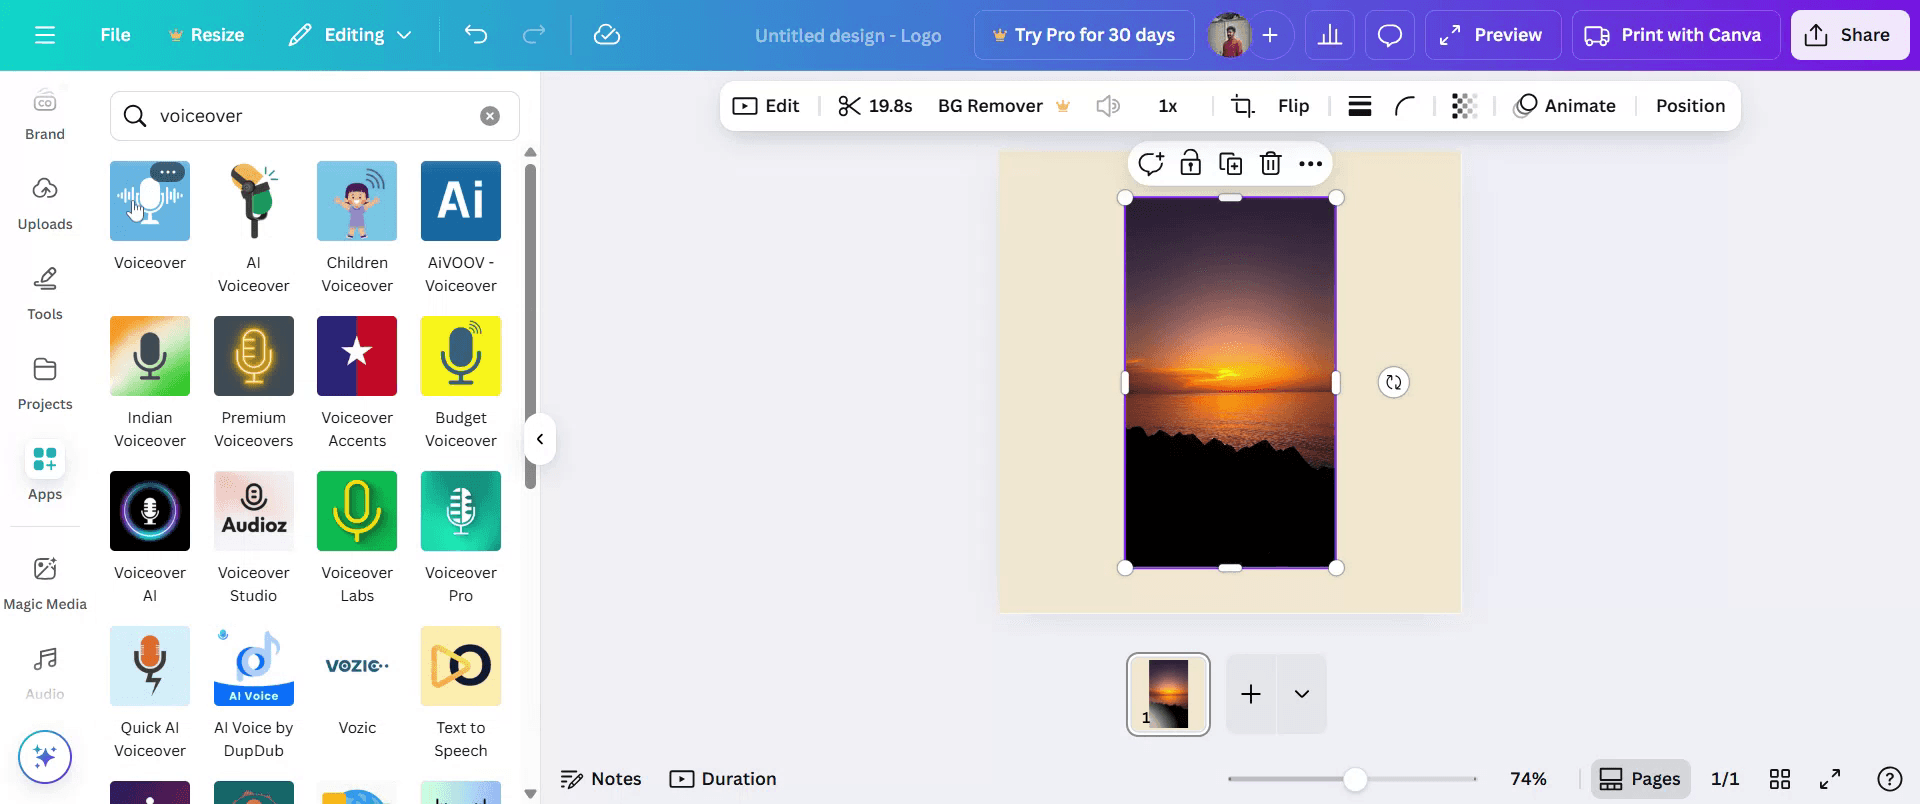
Schritt 4
Geben Sie in die Suchleiste 'voiceover' ein und drücken Sie dann ENTER.
Schritt 5
Schreiben Sie im Bereich 'Script' Ihr bevorzugtes Skript für das Voiceover.

Schritt 6
Wählen Sie im Menü 'Speaker' Ihren bevorzugten Sprecher aus.
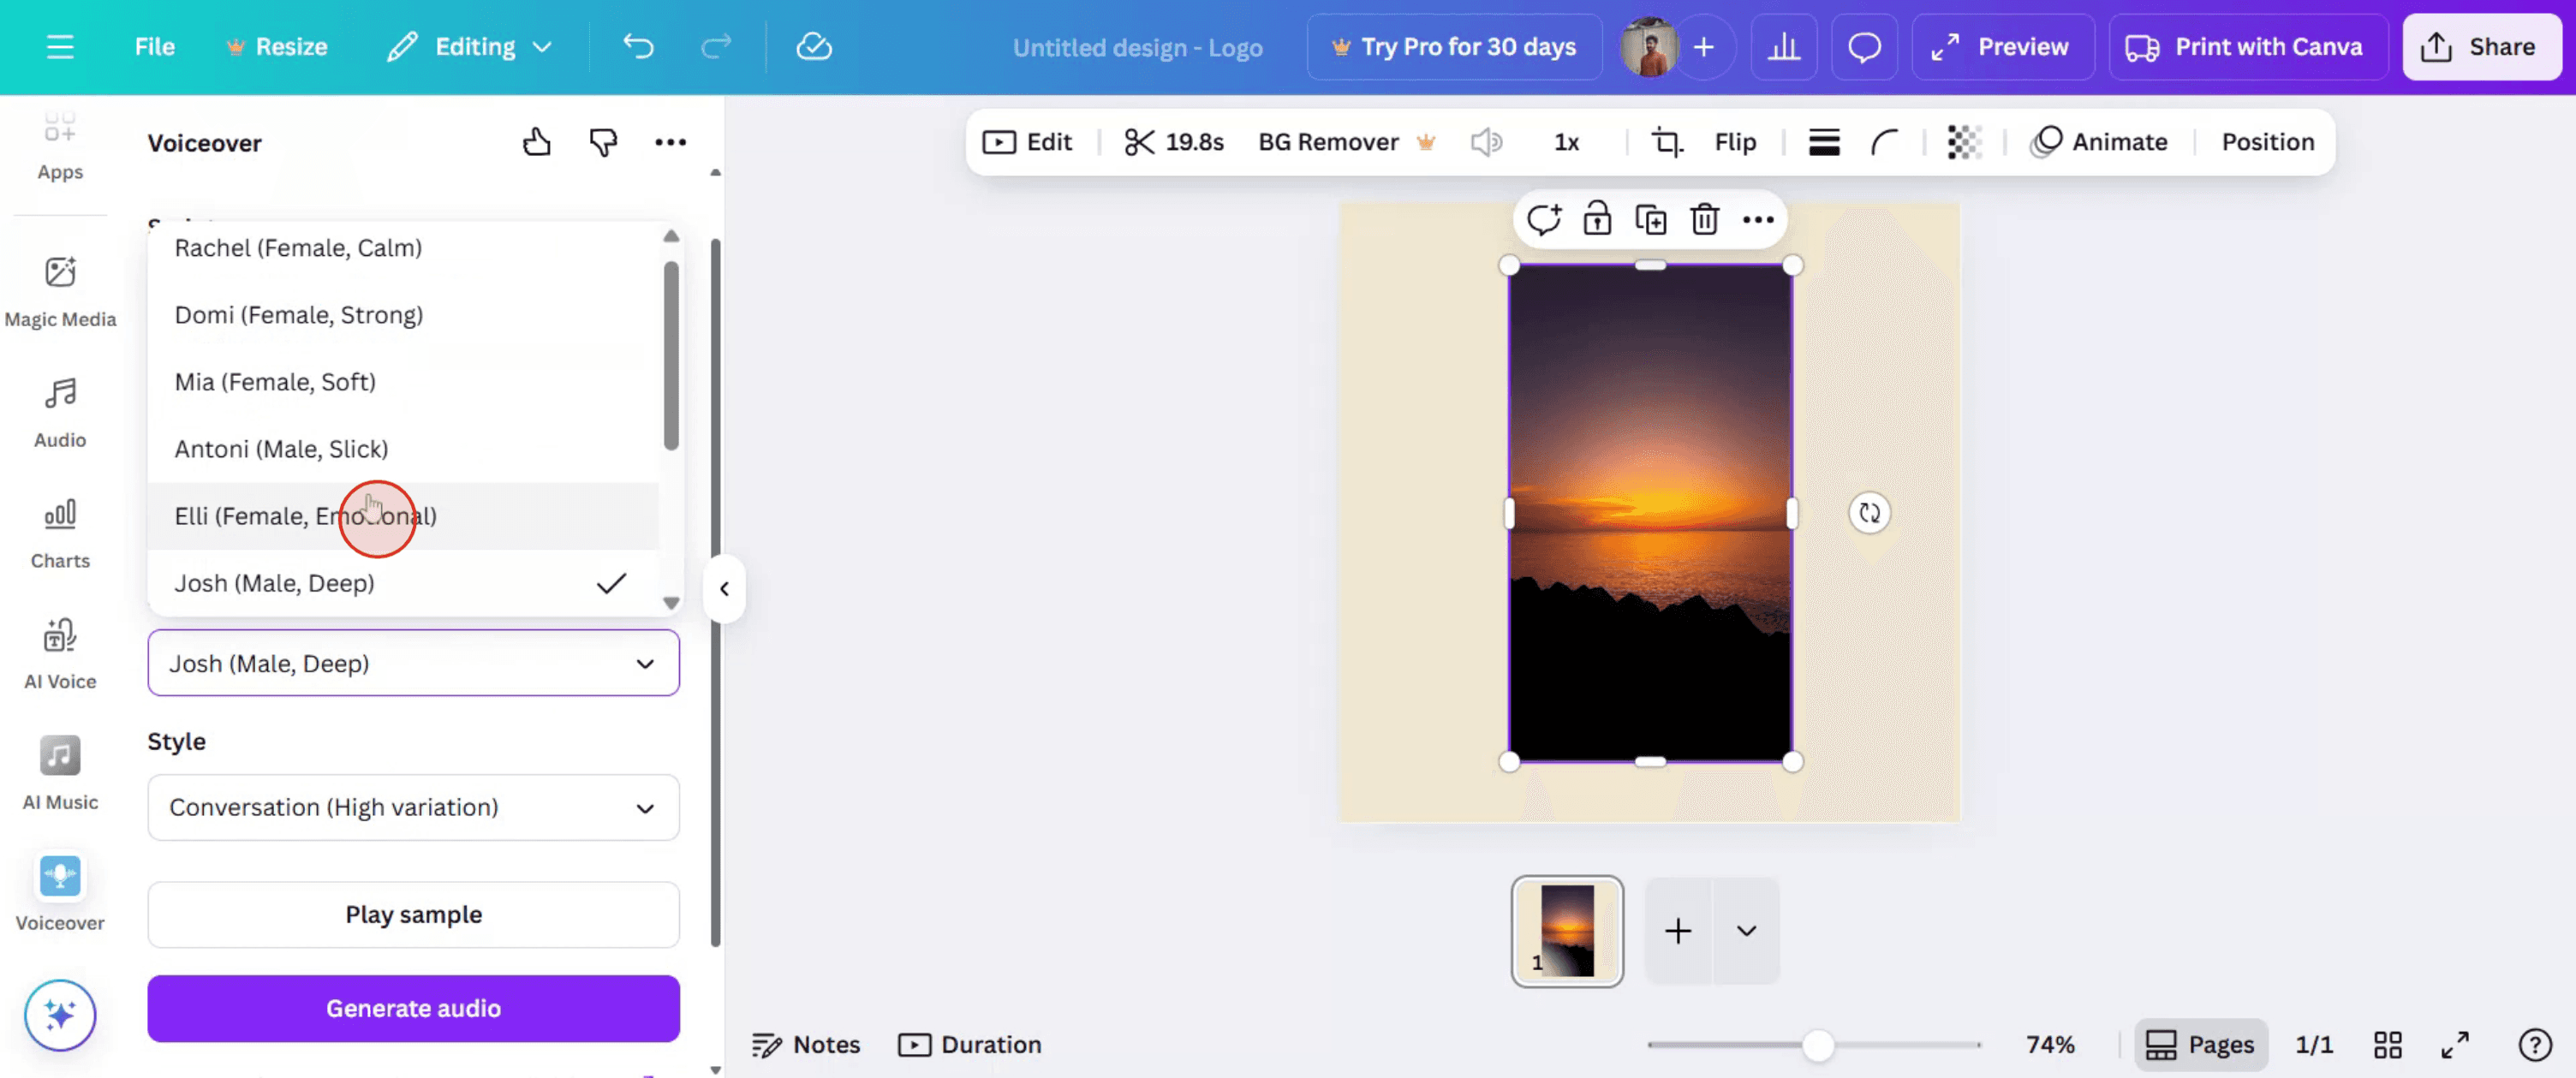
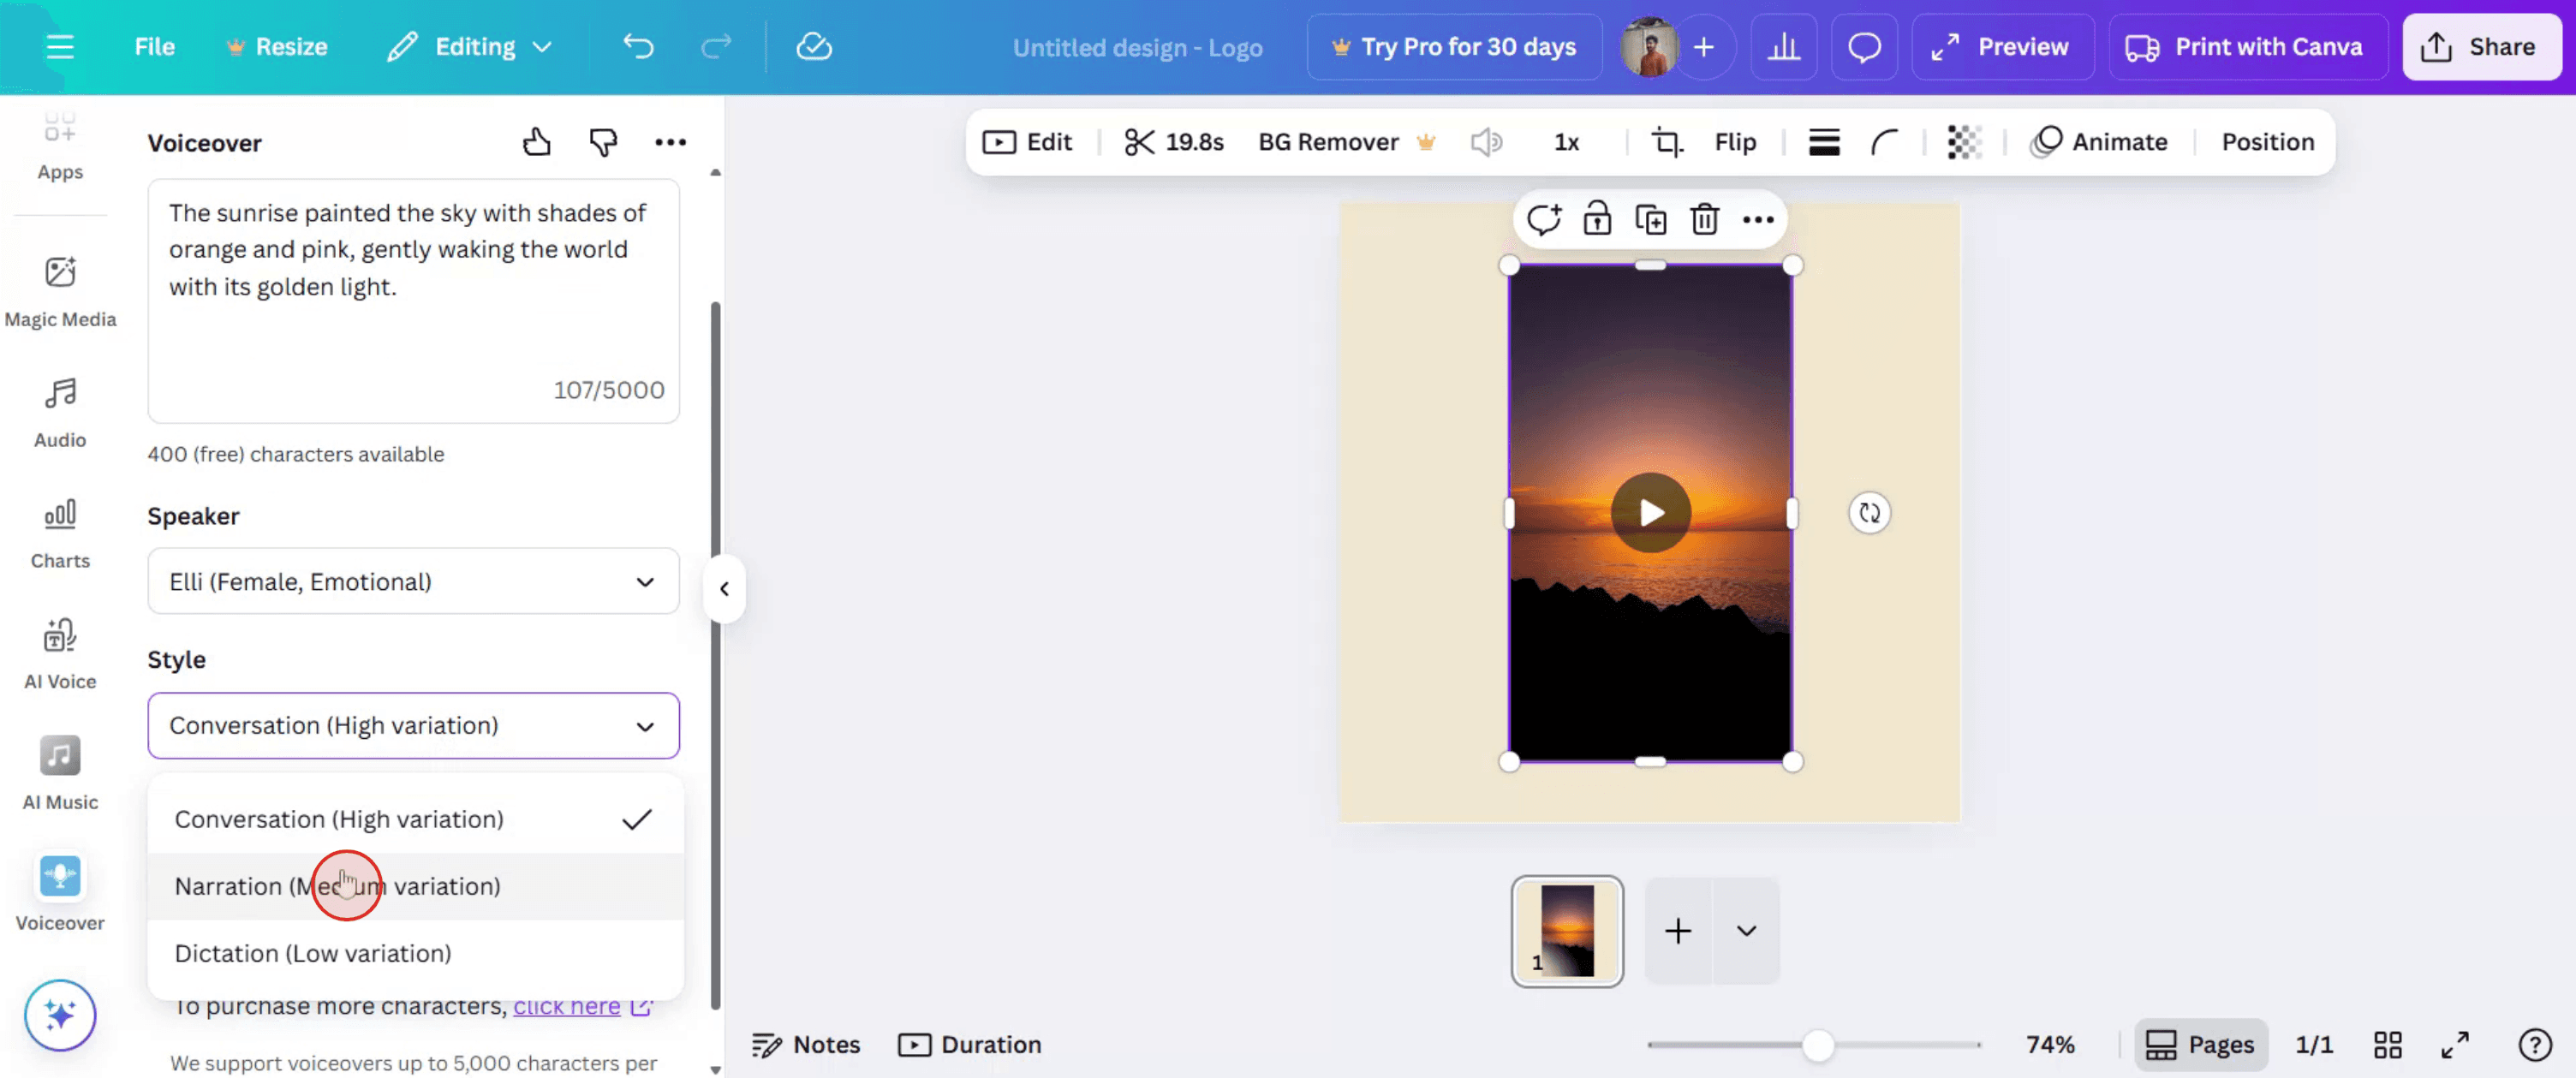
Schritt 7
Wählen Sie im Menü 'Style' einen Stil aus, den Sie möchten.
Schritt 8
Klicken Sie auf 'Generate Audio'. Sobald dies abgeschlossen ist, wird die Audiodatei automatisch zu Ihrem Projekt hinzugefügt.
Profi-Tipps für ein Voiceover in Canva
Bei Canva anmelden
Gehen Sie zu canva.com und melden Sie sich mit Ihren Zugangsdaten bei Ihrem Konto an.Ein Design öffnen oder erstellen
Wählen Sie ein vorhandenes Design aus oder erstellen Sie ein neues mit einer Videovorlage oder einer leeren Arbeitsfläche.Klicken Sie auf den Tab „Hochladen“
In der linken Symbolleiste klicken Sie auf den Tab „Uploads“, wo Sie Medienoptionen wie Bilder, Videos und Audio finden.Gehen Sie zum Abschnitt „Audio“
Im Tab „Uploads“ klicken Sie auf „Audio“. Hier können Sie Ihre Voiceover-Datei hochladen oder, falls unterstützt, direkt eine aufnehmen.Laden Sie Ihre Voiceover-Datei hoch
Klicken Sie auf „Dateien hochladen“ und wählen Sie Ihre vorab aufgenommene Voiceover-Datei (MP3, M4A, WAV usw.) von Ihrem Gerät aus.Ziehen Sie das Audio auf die Zeitleiste
Sobald es hochgeladen ist, ziehen Sie das Audio auf die Zeitleiste Ihres Canva-Videos, um es mit Ihren visuellen Inhalten zu synchronisieren.Passen Sie Timing und Position an
Verwenden Sie die Steuerelemente der Zeitleiste, um das Voiceover zuzuschneiden, den Startpunkt anzupassen oder es präzise mit Ihrem Videoinhalt zu synchronisieren.
Häufige Fehler und wie man sie vermeidet
Voiceover-Datei wird nicht unterstützt
Stellen Sie sicher, dass Ihre Audiodatei in einem unterstützten Format vorliegt (MP3, M4A oder WAV). Nicht unterstützte Dateien werden nicht korrekt hochgeladen.Die Zeitleiste wird nicht angezeigt
Sie müssen sich im Videobearbeitungsmodus befinden, um die Zeitleiste zu sehen. Wenn sie ausgeblendet ist, klicken Sie auf „Video bearbeiten“ oder wählen Sie eine Videovorlage aus.Audio wird nicht richtig synchronisiert
Ziehen Sie das Audio entlang der Zeitleiste, um es an den visuellen Inhalten auszurichten. Sehen Sie es sich mehrmals in der Vorschau an, um das Timing zu überprüfen.Lautstärke zu niedrig oder zu hoch
Klicken Sie auf die Audiospur und passen Sie die Lautstärkeeinstellungen an, damit das Voiceover klar ist und gut mit der Hintergrundmusik ausbalanciert wird.Einschränkungen des kostenlosen Plans verwenden
Voiceover-Funktionen wie die direkte Aufnahme sind in Canva Free möglicherweise nicht verfügbar. Ziehen Sie Canva Pro in Betracht oder nehmen Sie Audio extern auf.
Häufige FAQs zum Erstellen eines Voiceovers in Canva
Wie füge ich in Canva ein Voiceover hinzu?
Laden Sie Ihre Voiceover-Datei über den Tab „Uploads“ hoch, ziehen Sie sie auf die Videotimeline und passen Sie sie an Ihre visuellen Elemente an.Kann ich Voiceovers direkt in Canva aufnehmen?
Canva unterstützt derzeit keine direkte Sprachaufnahme. Sie müssen mit einem anderen Tool aufnehmen und die Datei hochladen.Welche Audioformate unterstützt Canva?
Canva unterstützt MP3-, M4A- und WAV-Audiodateien zum Hochladen in Designs.Kann ich mehrere Voiceovers in einem Video hinzufügen?
Ja, Sie können mehrere Audioclips hochladen und auf der Timeline platzieren, um komplexe Voiceovers zu erstellen.Bietet Canva KI-generierte Voiceovers an?
Nein, Canva bietet keine integrierten KI-Voiceovers. Sie müssen externe Tools verwenden, um sie zu generieren, und sie dann in Canva hochladen.Wie nimmt man den Bildschirm auf dem Mac auf?
Zum Bildschirmaufzeichnen auf einem Mac können Sie Trupeer AI verwenden. Es ermöglicht Ihnen, den gesamten Bildschirm aufzuzeichnen, und bietet KI-Funktionen wie das Hinzufügen von KI-Avataren, Voiceover hinzufügen, Hinein- und Herauszoomen im Video. Mit der KI-Videoübersetzungsfunktion von trupeer können Sie das Video in über 30 Sprachen übersetzen.Wie füge ich einen KI-Avatar zu einer Bildschirmaufzeichnung hinzu?
Um einen KI-Avatar zu einer Bildschirmaufzeichnung hinzuzufügen, müssen Sie ein KI-Bildschirmaufzeichnungstool verwenden. Trupeer AI ist ein KI-Bildschirmaufzeichnungstool, das Ihnen hilft, Videos mit mehreren Avataren zu erstellen und außerdem Ihren eigenen Avatar für das Video zu erstellen.Wie nimmt man den Bildschirm auf Windows auf?
Zum Bildschirmaufzeichnen unter Windows können Sie die integrierte Game Bar (Windows + G) oder ein fortgeschrittenes KI-Tool wie Trupeer AI für erweiterte Funktionen wie KI-Avatare, Voiceover, Übersetzung usw. verwenden.Wie füge ich ein Voiceover zu einem Video hinzu?
Um Videos ein Voiceover hinzuzufügen, laden Sie die Chrome-Erweiterung von trupeer ai herunter. Nach der Anmeldung laden Sie Ihr Video mit Stimme hoch, wählen das gewünschte Voiceover von trupeer aus und exportieren Sie Ihr bearbeitetes Video.Wie zoome ich in eine Bildschirmaufzeichnung hinein?
Um während einer Bildschirmaufzeichnung hineinzuzoomen, verwenden Sie die Zoomeffekte in Trupeer AI, mit denen Sie an bestimmten Momenten hinein- und herauszoomen können, um die visuelle Wirkung Ihres Videoinhalts zu verbessern.
Empfohlene Lektüre
Technischer Dokumentationsgenerator
So laden Sie mehrere Canva-Seiten als einen Anhang herunter
So verwandeln Sie ein Bild in eine Ausmalseite in Canva
Verwandte Tutorials

