

How to Create Rounded Corners in Figma
Learn how to create rounded corners in Figma using the corner radius tool. This quick guide covers adjusting individual corners, applying uniform curves, and shortcut tips.
Step-by-Step Guide: How to Create Rounded Corners in Figma
Step 1
Select the design in Figma for which you want to apply rounded corners.

Step 2
In this menu, locate the "Appearance" section.
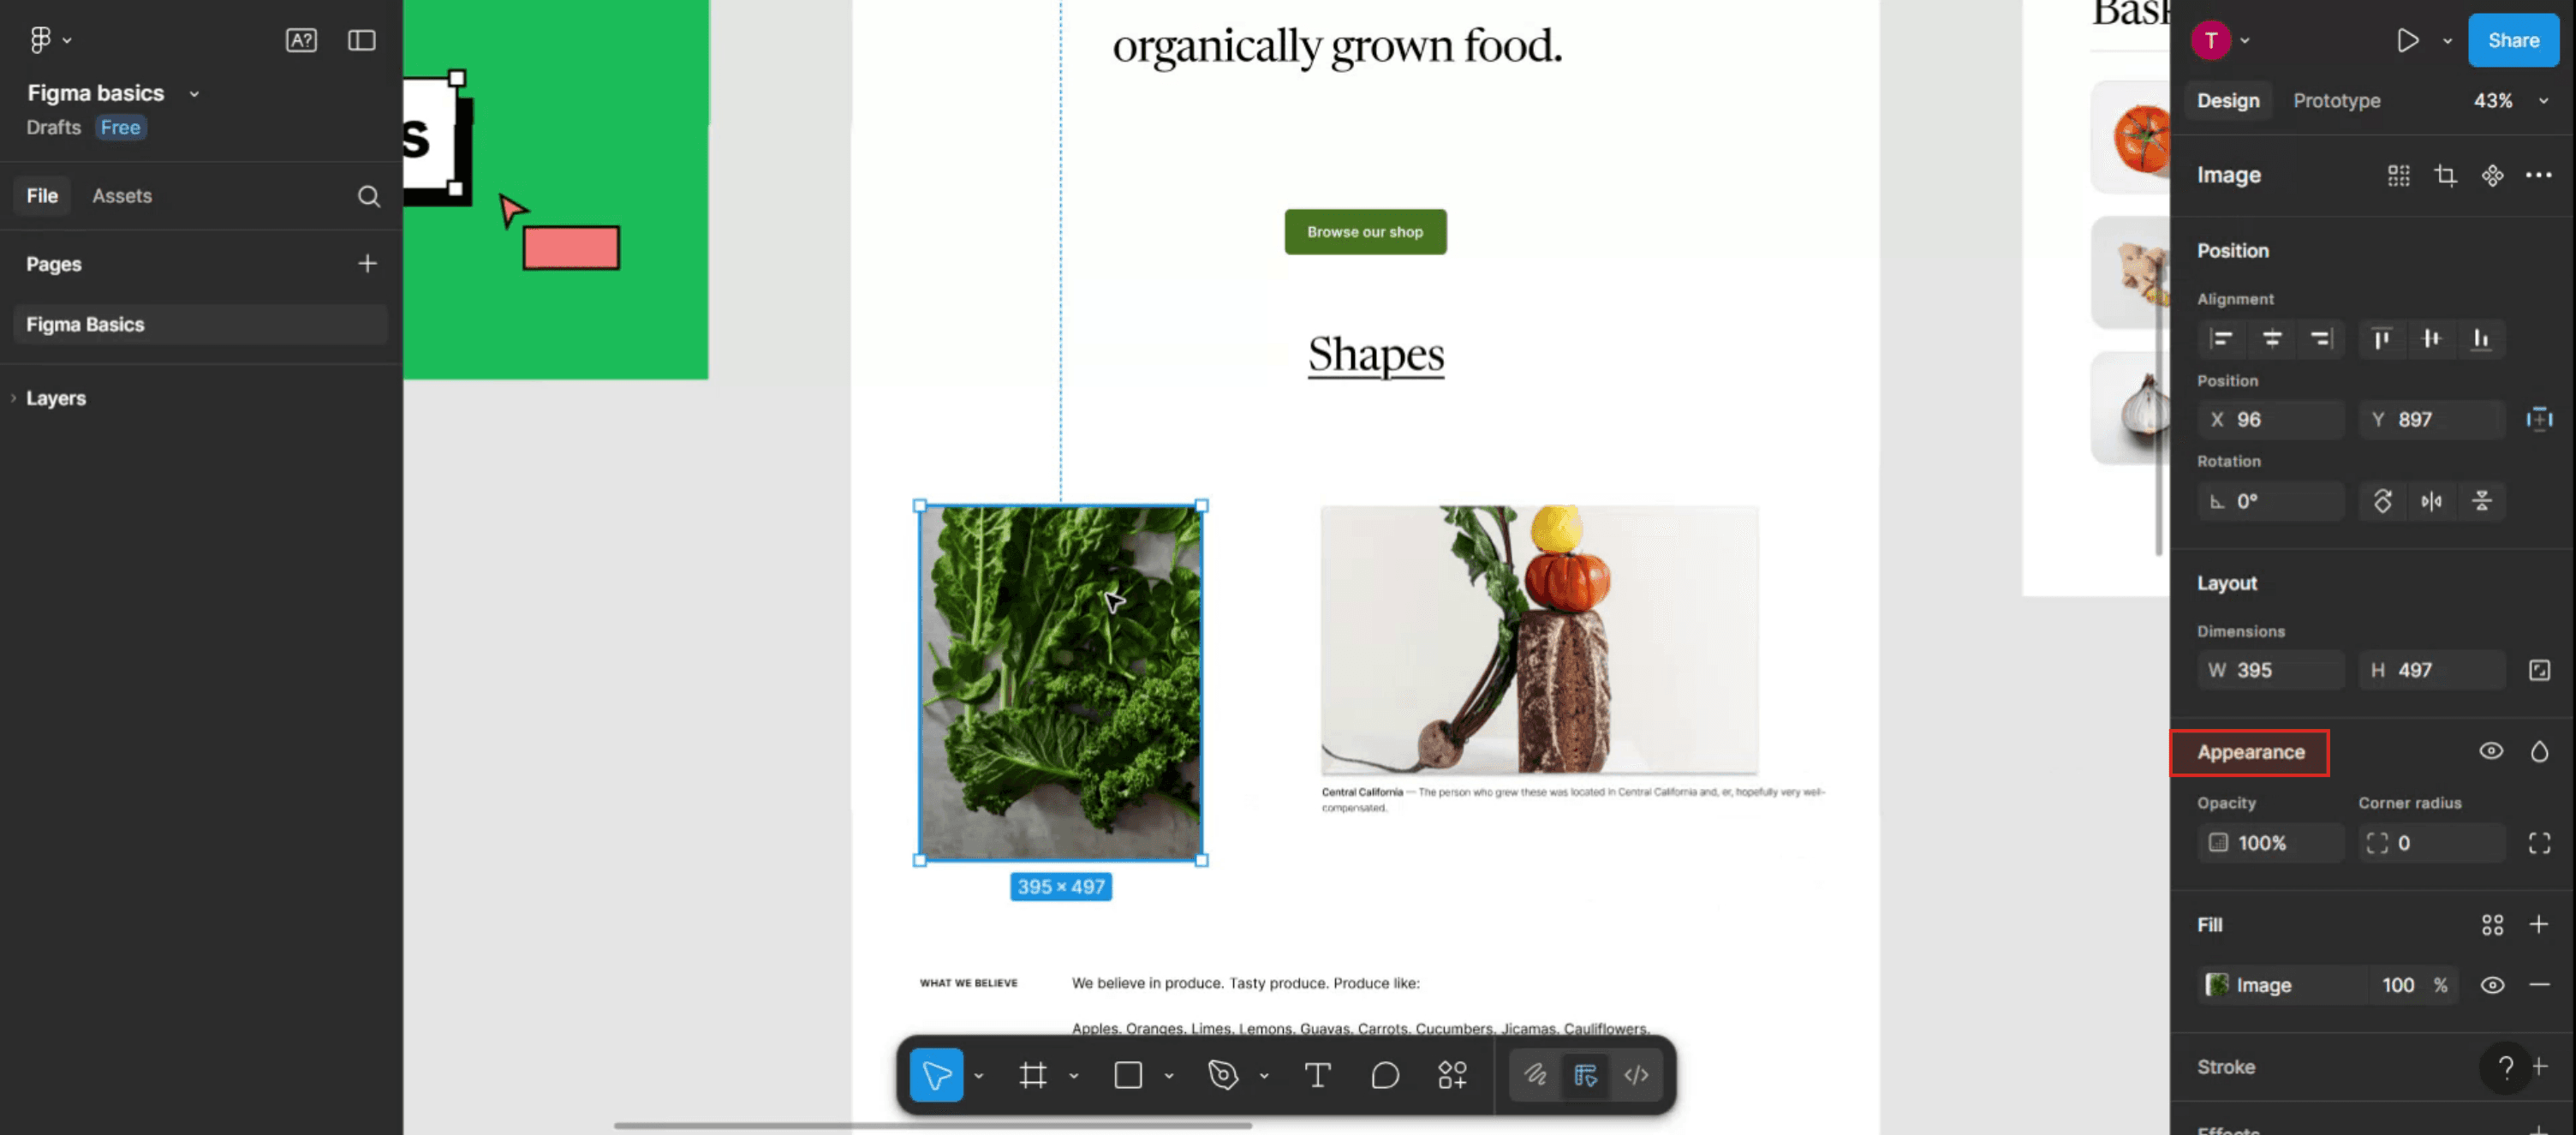
Step 3
Click on it and enter your desired value for the corner radius.

Step 4
After entering the value, click anywhere within the Figma template to apply the changes.

Step 5
You will then see the rounded corners applied to your design.

Pro Tips for Creating Rounded Corners in Figma
Open Your Design File
Start by launching Figma and opening the file that contains the shape or element you want to edit.Select the Object
Click on the shape, frame, or component you want to modify. You can select multiple objects if needed.Locate the Corner Radius Option
Look at the right-hand side properties panel. You’ll see a field labeled "Corner radius" under the “Design” tab.Input a Specific Radius Value
Click into the "Corner radius" field and type a number to set a uniform radius for all corners. For example, entering “10” will apply 10-pixel rounding to each corner.Use the Corner Radius Handles
You can also adjust corners visually by dragging the small circular handles at each corner of the selected shape.
Common Pitfalls and How to Avoid Them
Shape Not Allowing Corner Edits
Some shapes like lines or grouped elements may not support corner radius edits. Ungroup them or use a rectangle for full control.Radius Not Visibly Changing
If the object is too small, applying a large radius won’t show visible changes. Increase the shape’s size or use a smaller radius value.Forgetting to Unlock Individual Corners
If you want different radii per corner but forget to unlock the setting, all corners will stay the same.Overdoing Corner Radius
Very large corner radii can distort the shape or clash with the overall design. Keep it proportional.Auto Layout Conflicts
Some nested Auto Layout elements may reset or override corner radius values. Adjust frame structure carefully.
Common FAQs About Creating Rounded Corners in Figma
Can I round only one corner of a shape?
Yes, by clicking the independent corner radius icon, you can assign unique values to each corner.Is there a shortcut to apply corner radius?
No keyboard shortcut applies radius directly, but you can use the properties panel or corner handles for quick adjustments.Can I use rounded corners on images?
Yes, select the image, then apply a corner radius just like any other shape.Does corner radius apply to components?
Yes, you can round corners of components, and the changes will apply to all instances unless overridden.How do I reset corner radius?
Set the radius value back to “0” in the properties panel to return to sharp corners.How to screen record on mac?
To screen record on a Mac, you can use Trupeer AI. It allows you to capture the entire screen and provides AI capabilities such as adding AI avatars, add voiceover, add zoom in and out in the video. With trupeer’s AI video translation feature, you can translate the video into 30+ languages.How to add an AI avatar to screen recording?
To add an AI avatar to a screen recording, you'll need to use an AI screen recording tool. Trupeer AI is an AI screen recording tool, which helps you create videos with multiple avatars, also helps you in creating your own avatar for the video.How to screen record on windows?
To screen record on Windows, you can use the built-in Game Bar (Windows + G) or advanced AI tool like Trupeer AI for more advanced features such as AI avatars, voiceover, translation etc.How to add voiceover to video?
To add voiceover to videos, download trupeer ai chrome extension. Once signed up, upload your video with voice, choose the desired voiceover from trupeer and export your edited video.How do I Zoom in on a screen recording?
To zoom in during a screen recording, use the zoom effects in Trupeer AI which allows you to zoom in and out at specific moments, enhancing the visual impact of your video content.
People also ask
Technical Documentation Generator

