

如何更改 GitHub 中的默认分支
轻松了解如何更改 GitHub 仓库中的默认分支。按照这份分步指南设置新的主分支,同时不丢失任何数据。
分步指南:如何在 GitHub 中更改默认分支
第 1 步
前往你的仓库,并点击仓库顶部的“设置”选项卡。

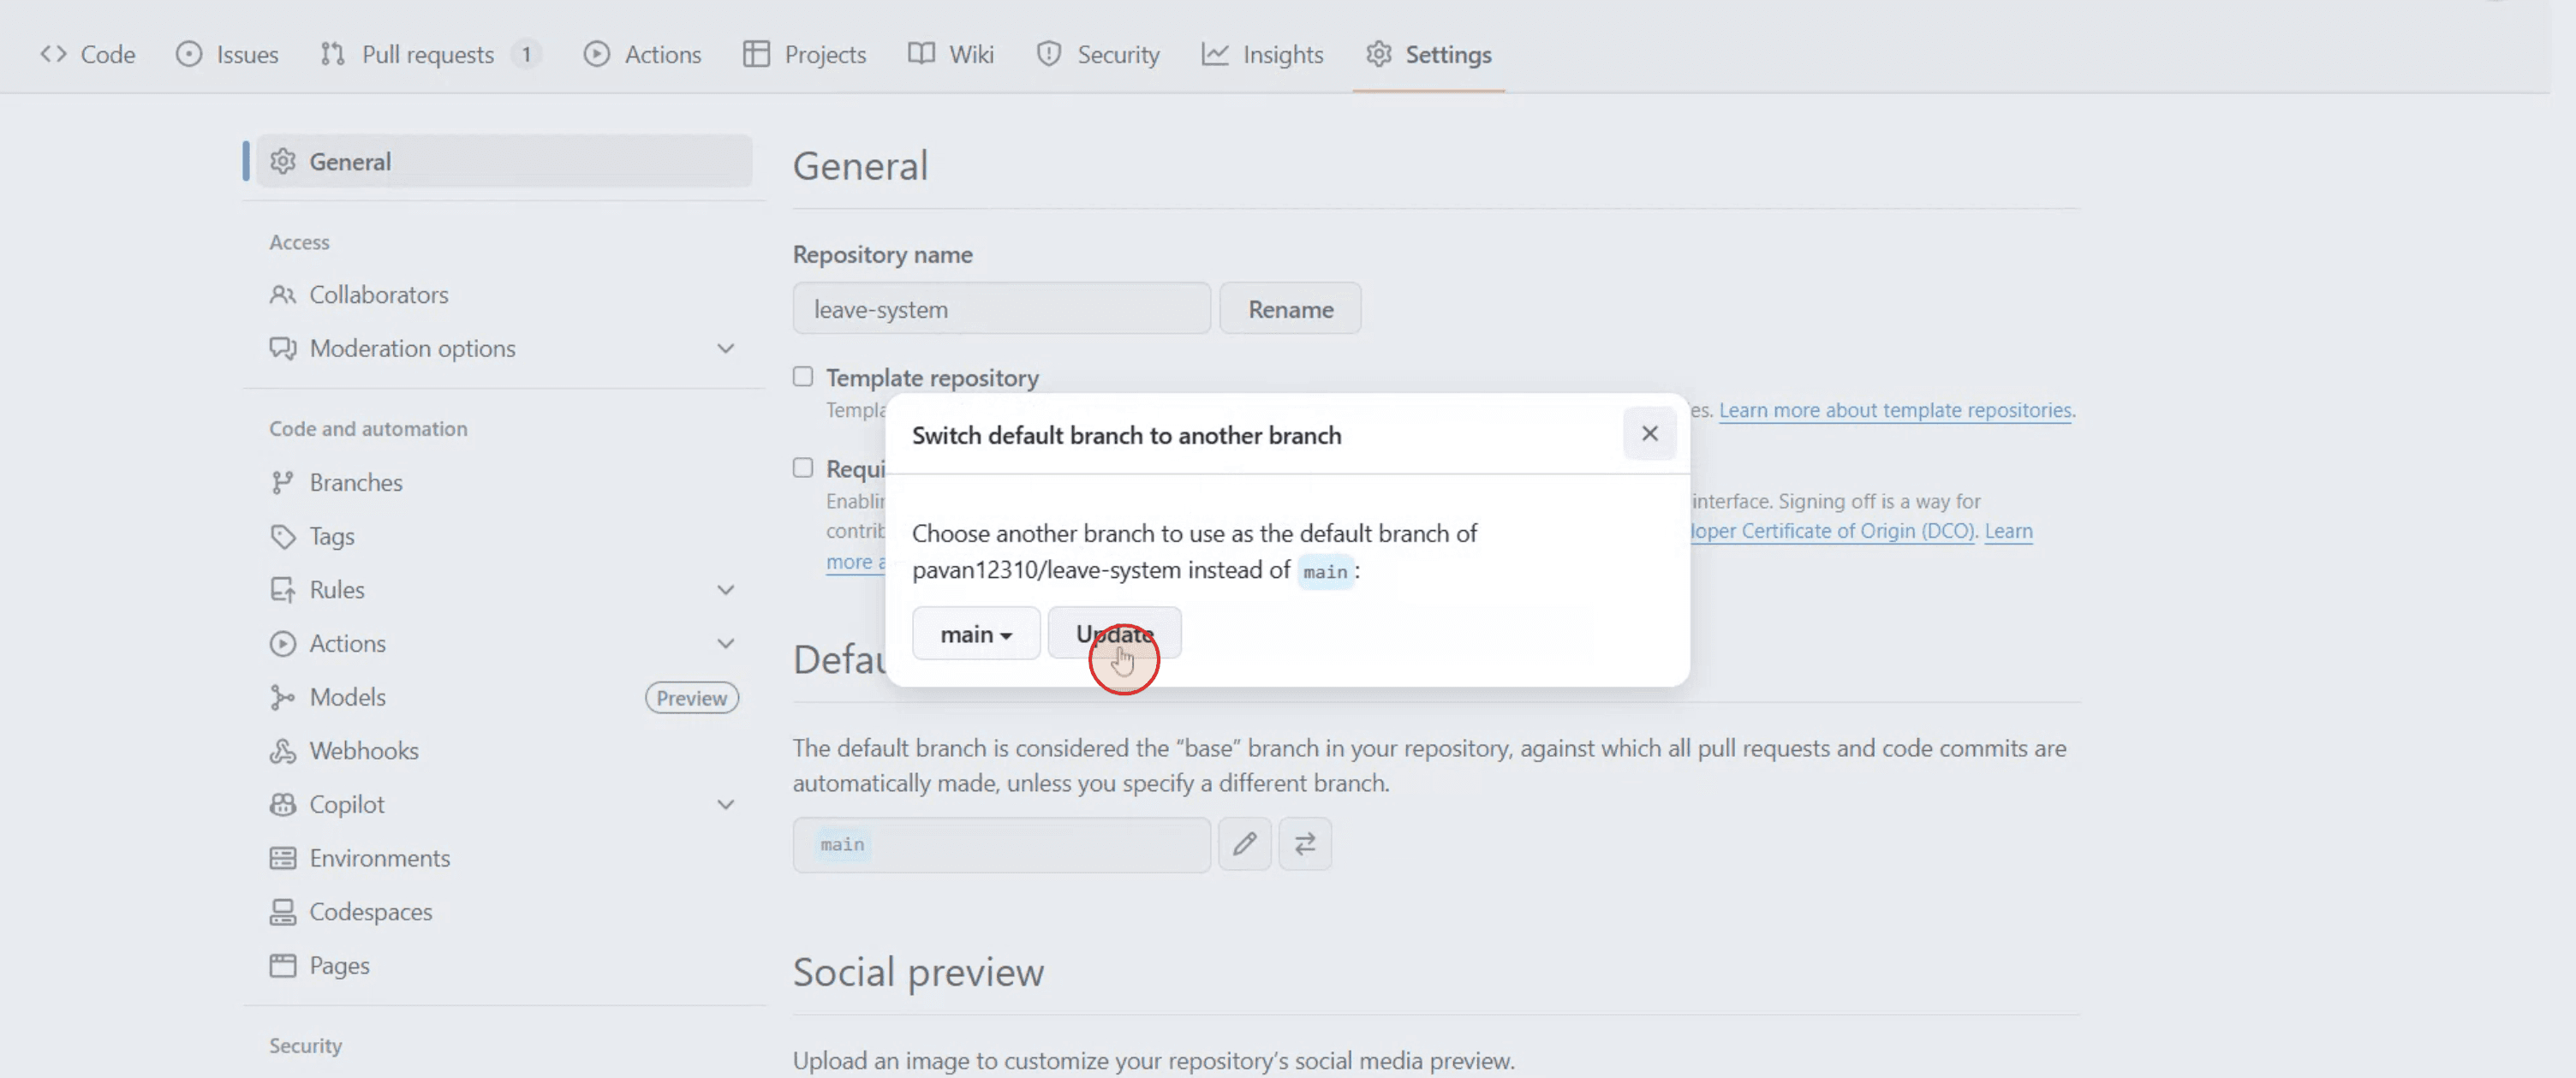
第 2 步
在“默认分支”部分,点击允许你切换到其他分支的按钮。

第 3 步
点击“更新”以确认更改。
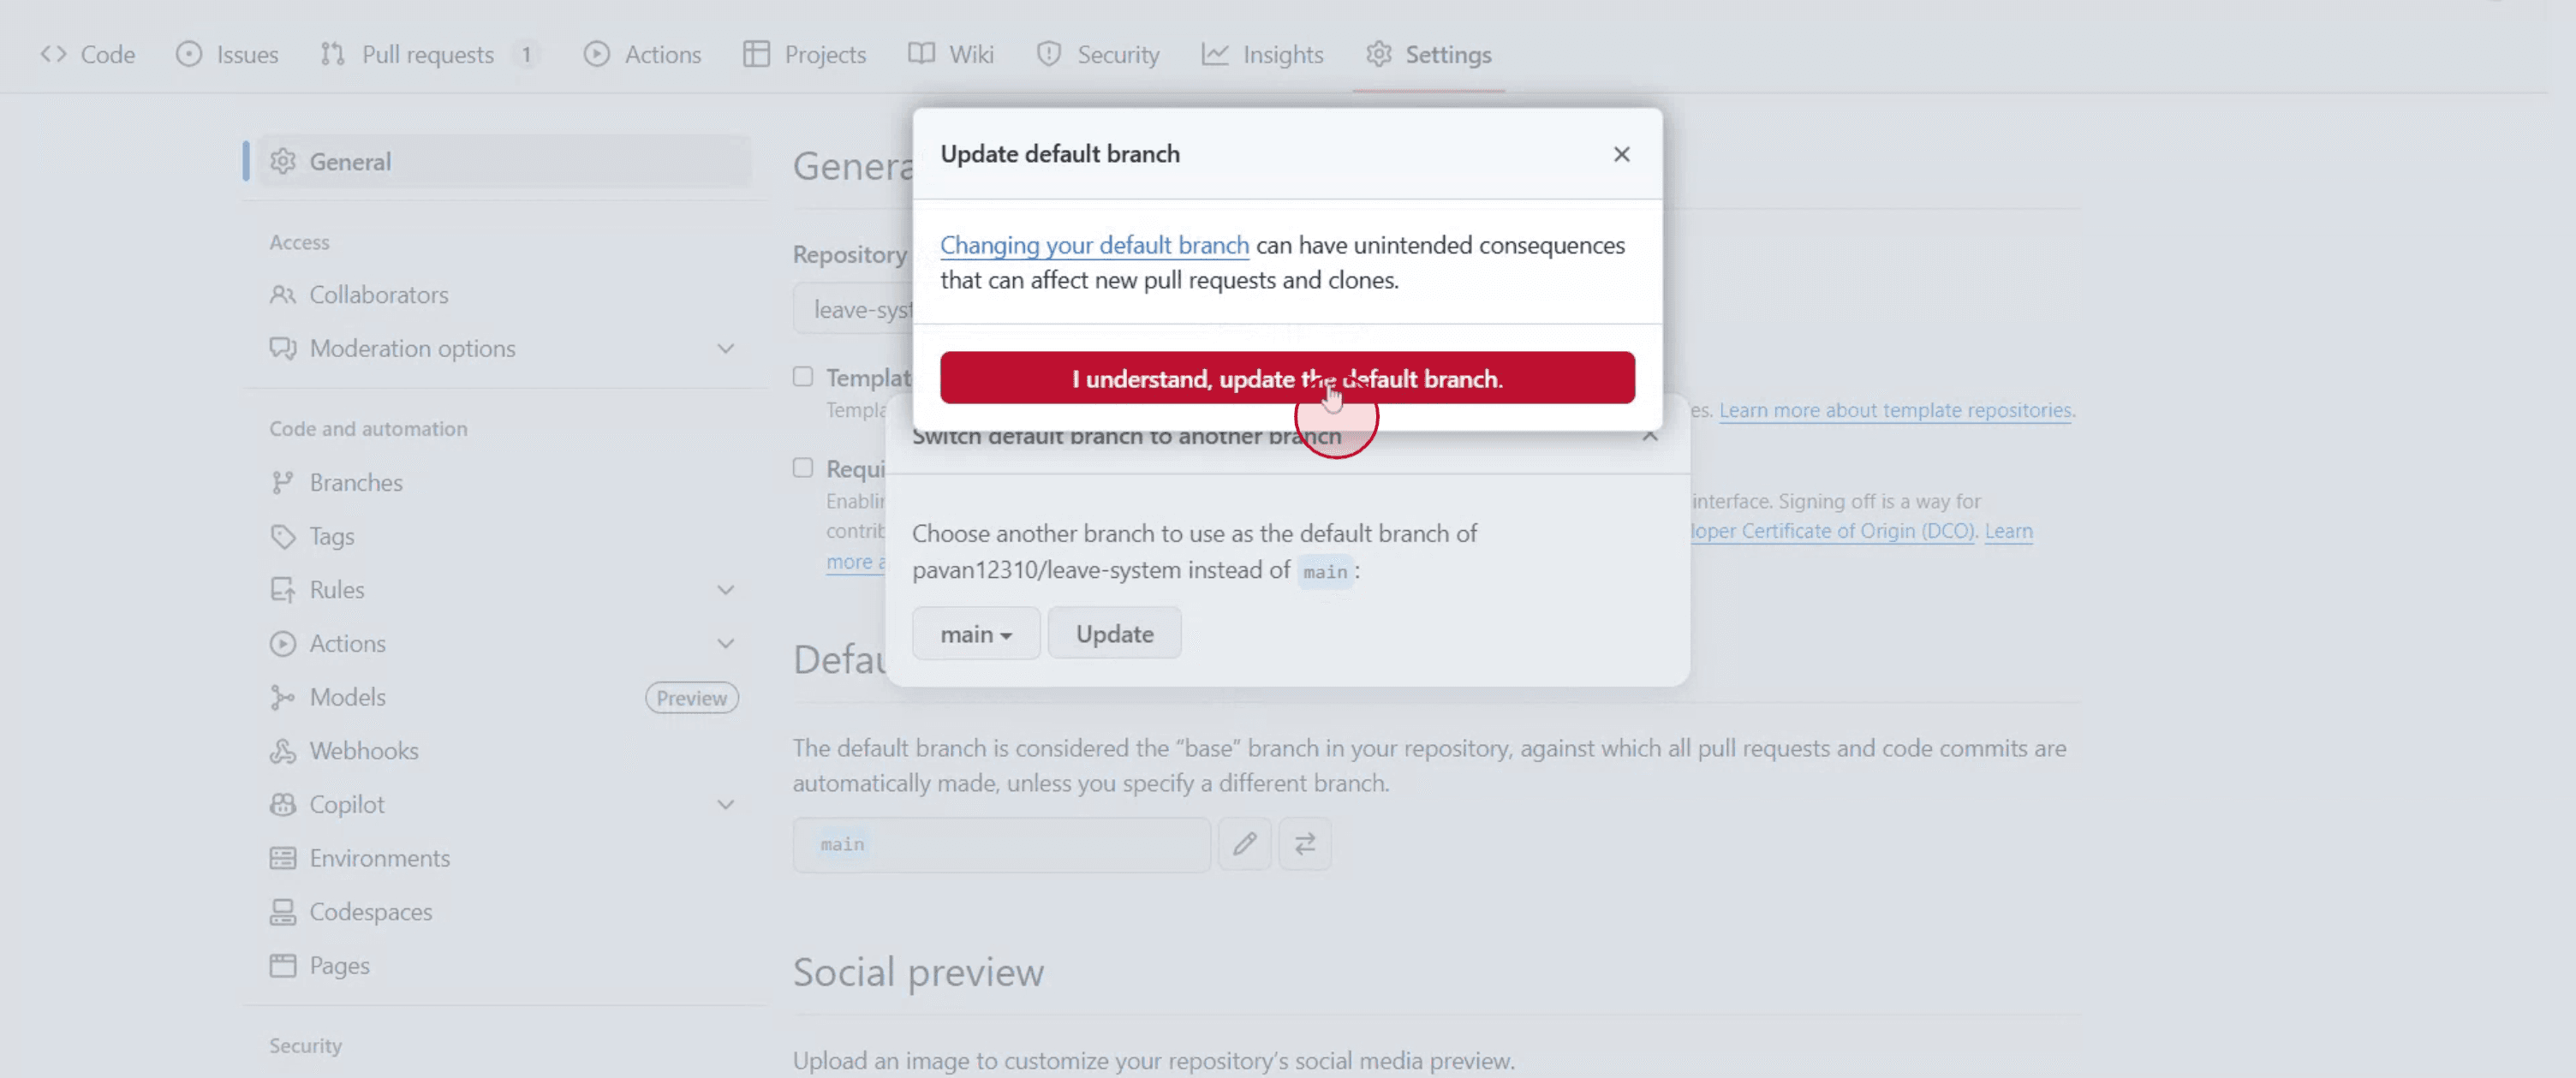
第 4 步
通过点击“我理解,更新默认分支”来确认此操作。
在 GitHub 中更改默认分支的实用技巧
登录 GitHub
前往 github.com 并登录您的账户。进入您的仓库
打开您想要更改默认分支的仓库。点击“设置”选项卡
在仓库顶部菜单中,点击“设置”。如果您看不到它,您可能没有管理员访问权限。前往“分支”部分
在左侧边栏中,在“代码和自动化”类别下点击“分支”。更改默认分支
在“默认分支”部分下,点击当前默认分支旁边的铅笔(编辑)图标。选择新分支
从下拉菜单中选择您想设为新默认分支的分支。确认更改
选择新分支后,点击“更新”,并在弹出对话框中确认您的选择。
常见问题及避免方法
分支尚未创建
只有在某个分支已经存在时,您才能将其设为默认分支。如有需要,请先创建新分支。权限问题
只有对该仓库拥有管理员权限的用户才能更改默认分支。拉取请求和工作流可能会中断
更改默认分支可能会影响未关闭的拉取请求或 CI/CD 流水线。请根据需要更新这些路径。误删旧默认分支
在您更新其他工具中的所有引用或协作者的克隆副本之前,不要删除旧的默认分支。让协作者感到困惑
请告知您的团队这一更改,以避免沟通不畅或推送到错误的分支。
关于在 GitHub 中更改默认分支的常见问题
如何在 GitHub 中更改默认分支?
前往你的仓库设置 > 分支,点击编辑图标,选择一个新分支,然后确认。我之后还能改回默认分支吗?
可以,你可以随时使用同样的方法再次切换。更改默认分支会删除旧分支吗?
不会,旧分支仍然存在,除非你手动删除它。现有的拉取请求还会正常工作吗?
拉取请求不会自动迁移。你可能需要手动重新基于它们或重新指定目标分支。我可以在 GitHub 移动应用中执行此操作吗?
不,更改默认分支仅可在 GitHub 网页界面上进行。如何在 Mac 上录屏?
要在 Mac 上录屏,你可以使用 Trupeer AI。它允许你捕获整个屏幕,并提供 AI 功能,例如添加 AI 虚拟形象、添加旁白、在视频中放大和缩小。借助 trupeer 的 AI 视频翻译功能,你可以将视频翻译成 30 多种语言。如何向录屏中添加 AI 虚拟形象?
要向屏幕录制中添加 AI 虚拟形象,你需要使用AI 屏幕录制工具。 Trupeer AI 是一款 AI 屏幕录制工具,可帮助你创建包含多个虚拟形象的视频,还能帮助你为视频创建自己的虚拟形象。如何在 Windows 上录屏?
要在 Windows 上录屏,你可以使用内置的 Game Bar(Windows + G),或使用像 Trupeer AI 这样的高级 AI 工具,以获得 AI 虚拟形象、旁白、翻译等更高级的功能。如何为视频添加旁白?
要为视频添加旁白,请下载 trupeer ai chrome 扩展程序。注册后,上传带有声音的视频,从 trupeer 中选择所需的旁白,然后导出编辑后的视频。如何在录屏中放大?
要在录屏过程中放大,请使用 Trupeer AI 中的缩放效果,它允许你在特定时刻放大和缩小,从而增强视频内容的视觉冲击力。

