
如何在 Canva 中模糊处理
了解如何在 Canva 中模糊图片、背景或特定元素。分步指南,教你使用模糊效果打造富有创意且专业的设计。
要模糊 Canva 中的图像,请选择图像,单击“编辑图片”,然后单击“调整”,并使用模糊滑块控制强度。对于选择性模糊,请在模糊效果中使用画笔工具来针对特定区域。您还可以通过使用“编辑照片”和“自动对焦”功能,或在“调整”选项卡中调节清晰度来模糊视频背景。
以下是更详细的说明:
模糊整张图像:
选择图像:单击您想在Canva 设计中模糊的图像。
访问编辑器:单击顶部工具栏上的“编辑图片”按钮。
调整模糊:进入“调整”部分,使用模糊滑块控制模糊强度。
下载:满意后,下载您的设计。
模糊特定区域:
选择图像:单击您想要模糊的图像。
访问编辑器:单击“编辑图片”按钮。
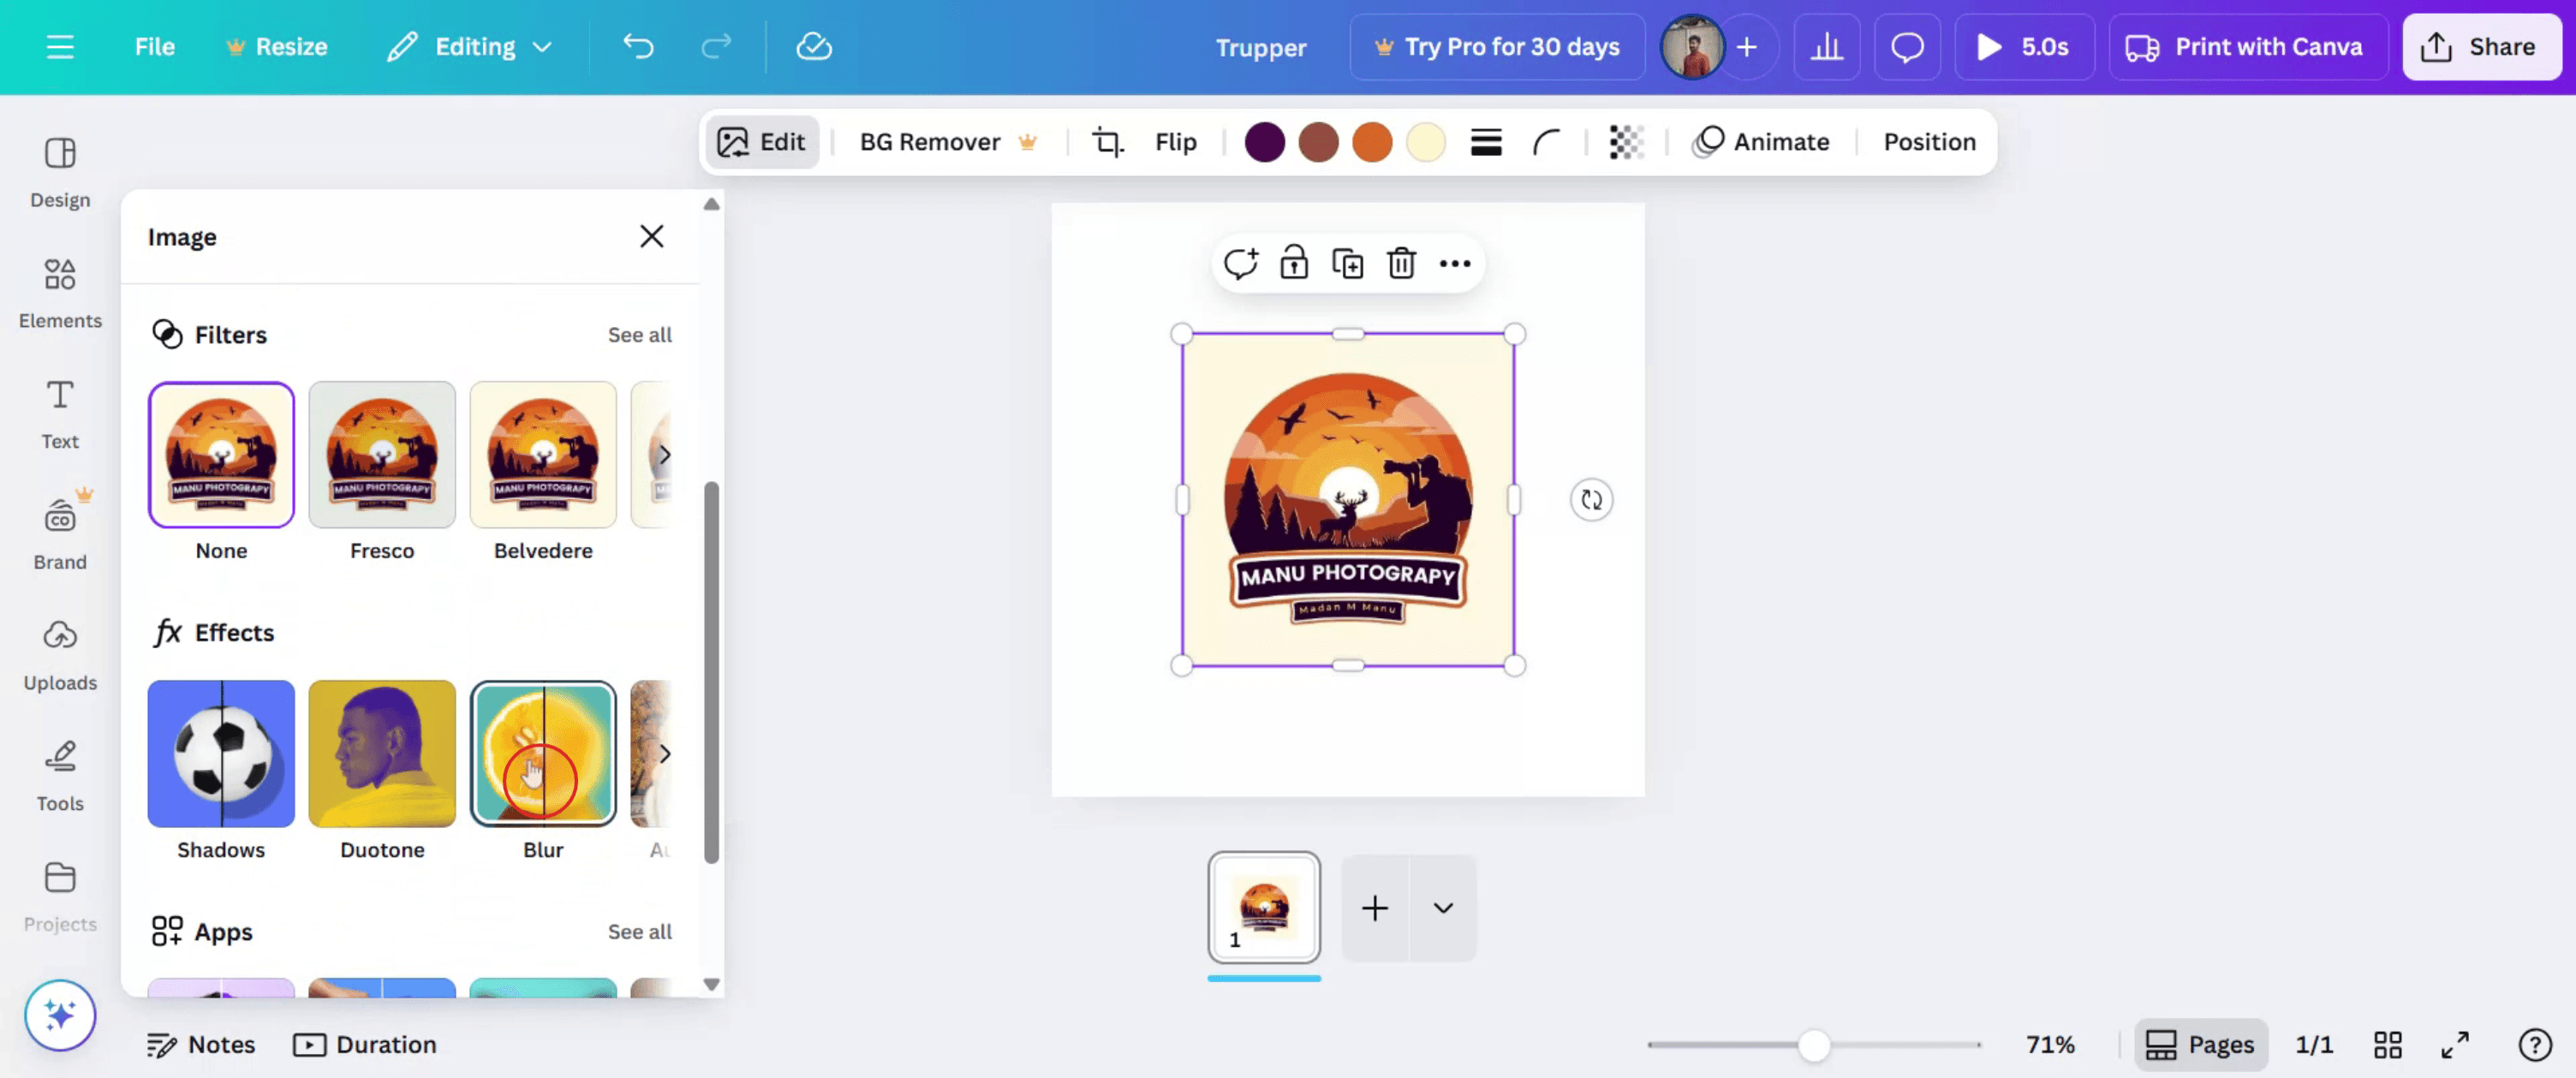
应用模糊效果:在左侧面板中,转到“fx 效果”部分并找到模糊效果。
使用画笔:选择画笔工具,并根据需要调整画笔大小和强度。
定位区域:在您想要模糊的区域上单击并拖动画笔。
调整强度:使用强度滑块控制模糊效果。
分步指南:如何在 Canva 中模糊
步骤 1
首先,在 Canva 中进入上传部分并点击它以开始此过程。

步骤 2
选择后,单击图像,然后选择“编辑”选项。
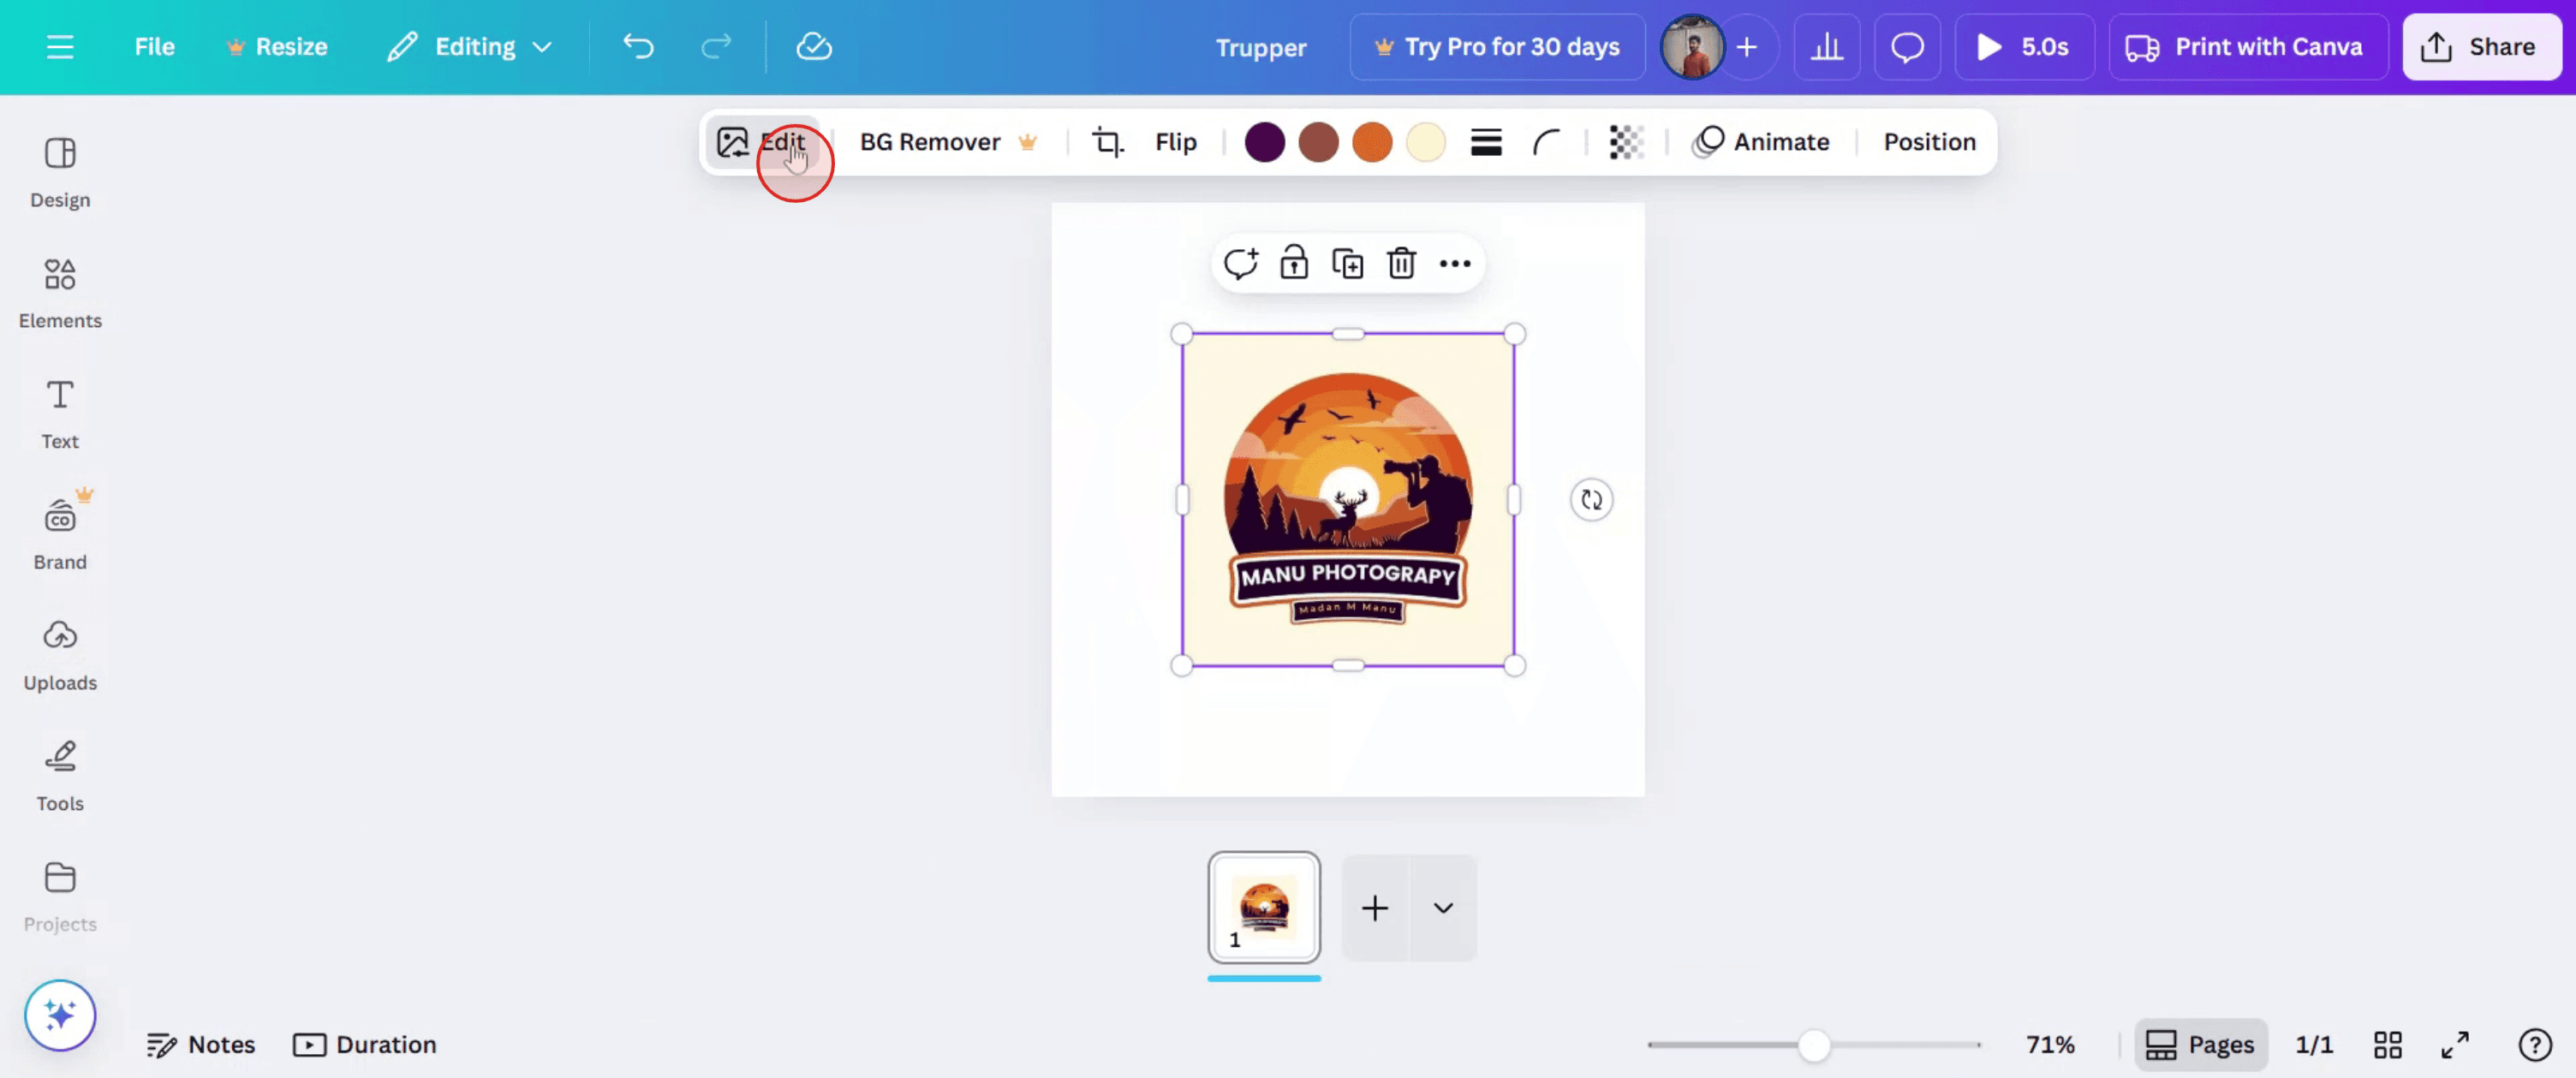
步骤 3
在编辑菜单中,找到并选择“模糊”选项。
步骤 4
您会看到两个选项,可让您模糊图像的特定部分。此外,您还可以模糊整张图像。
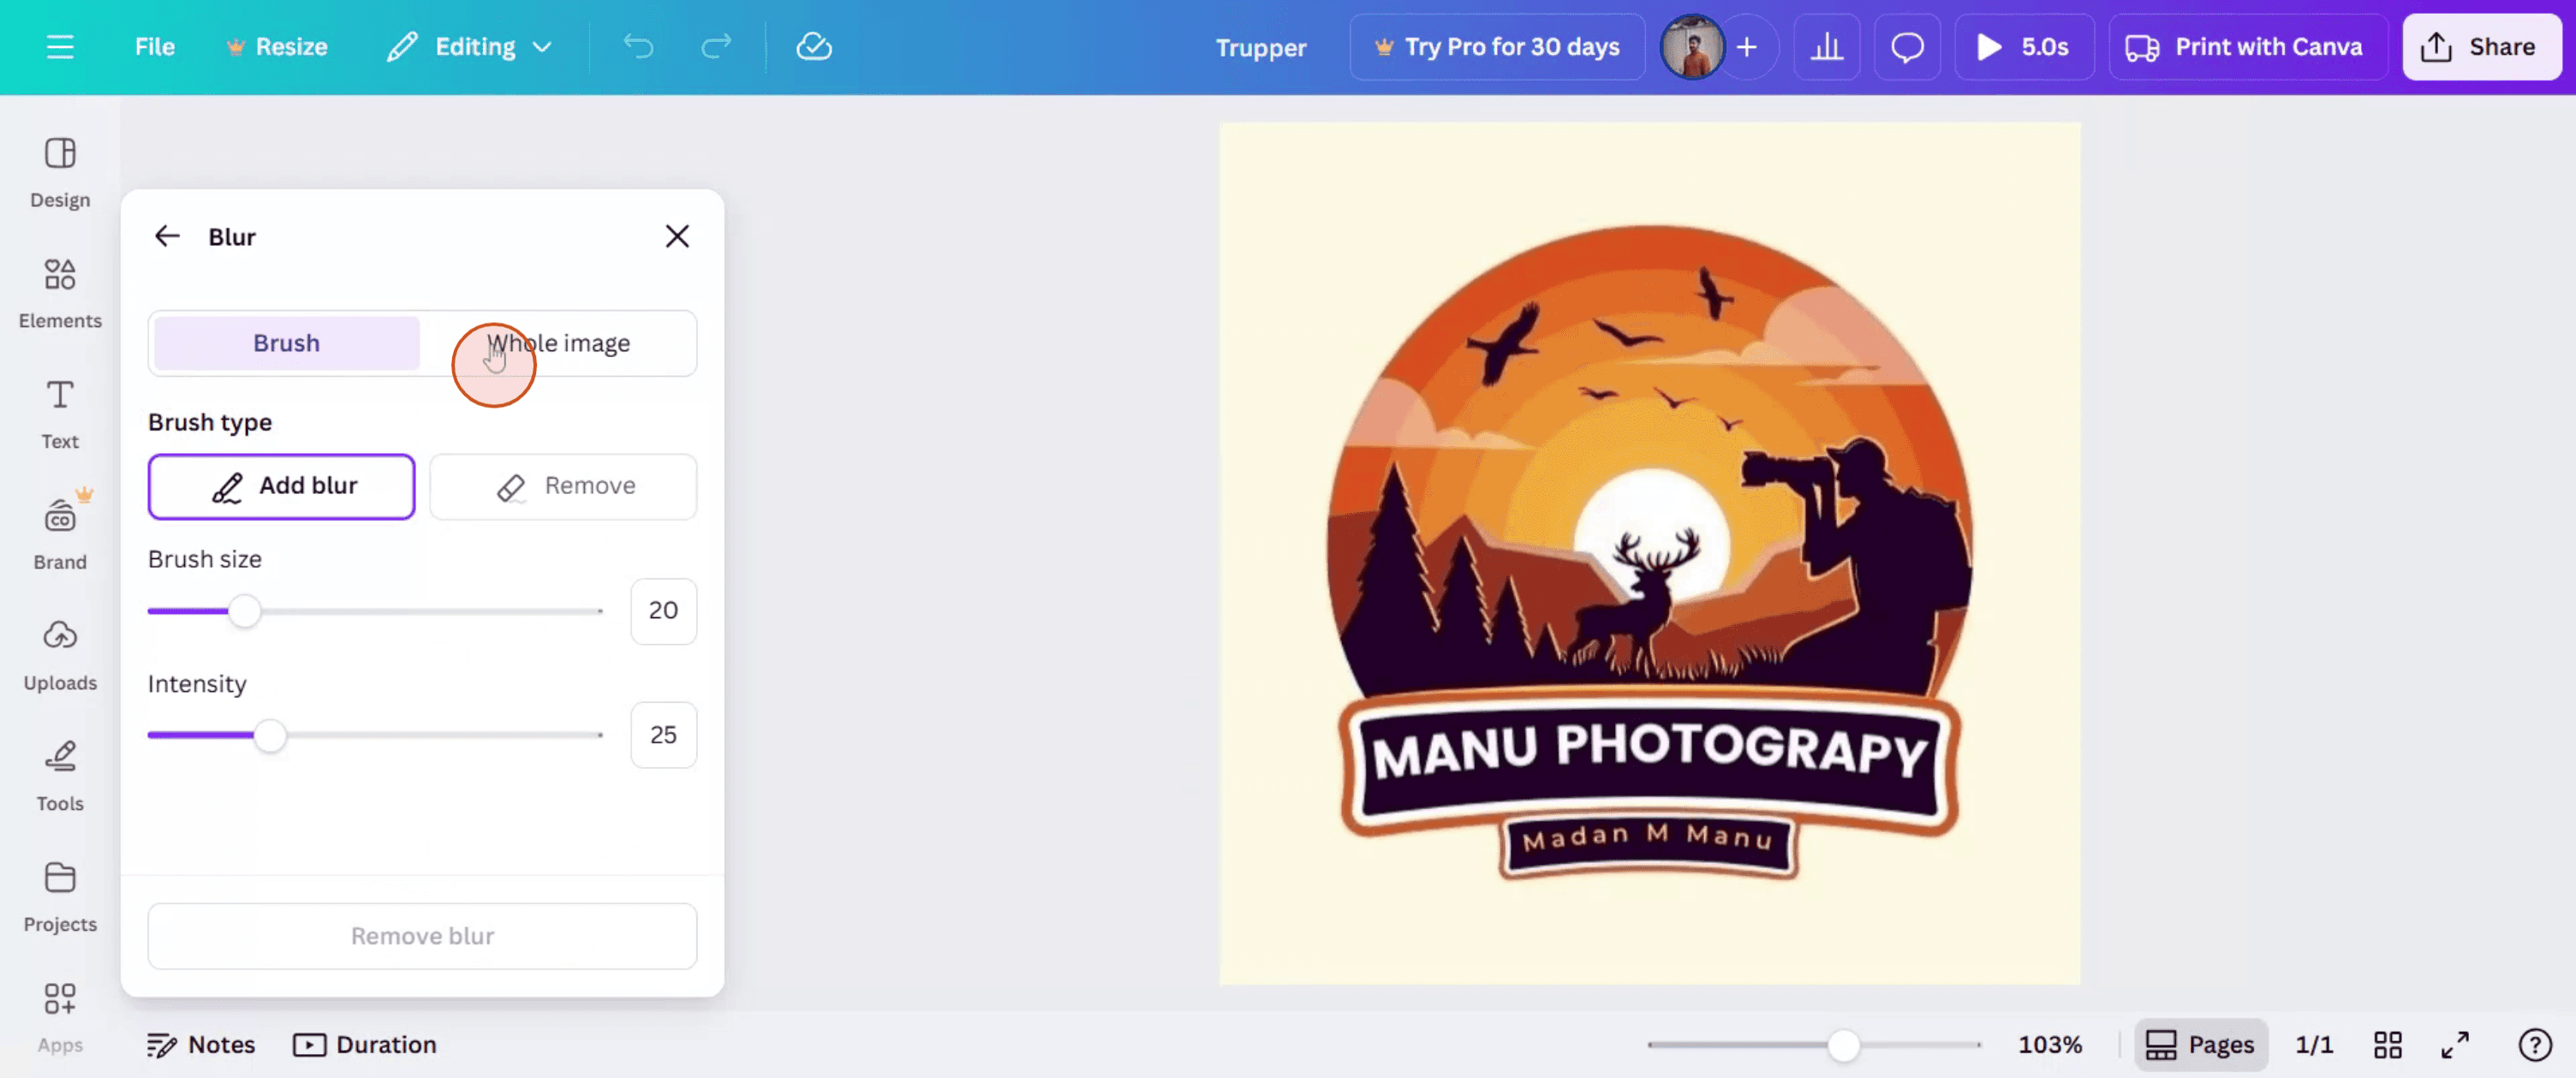
步骤 5
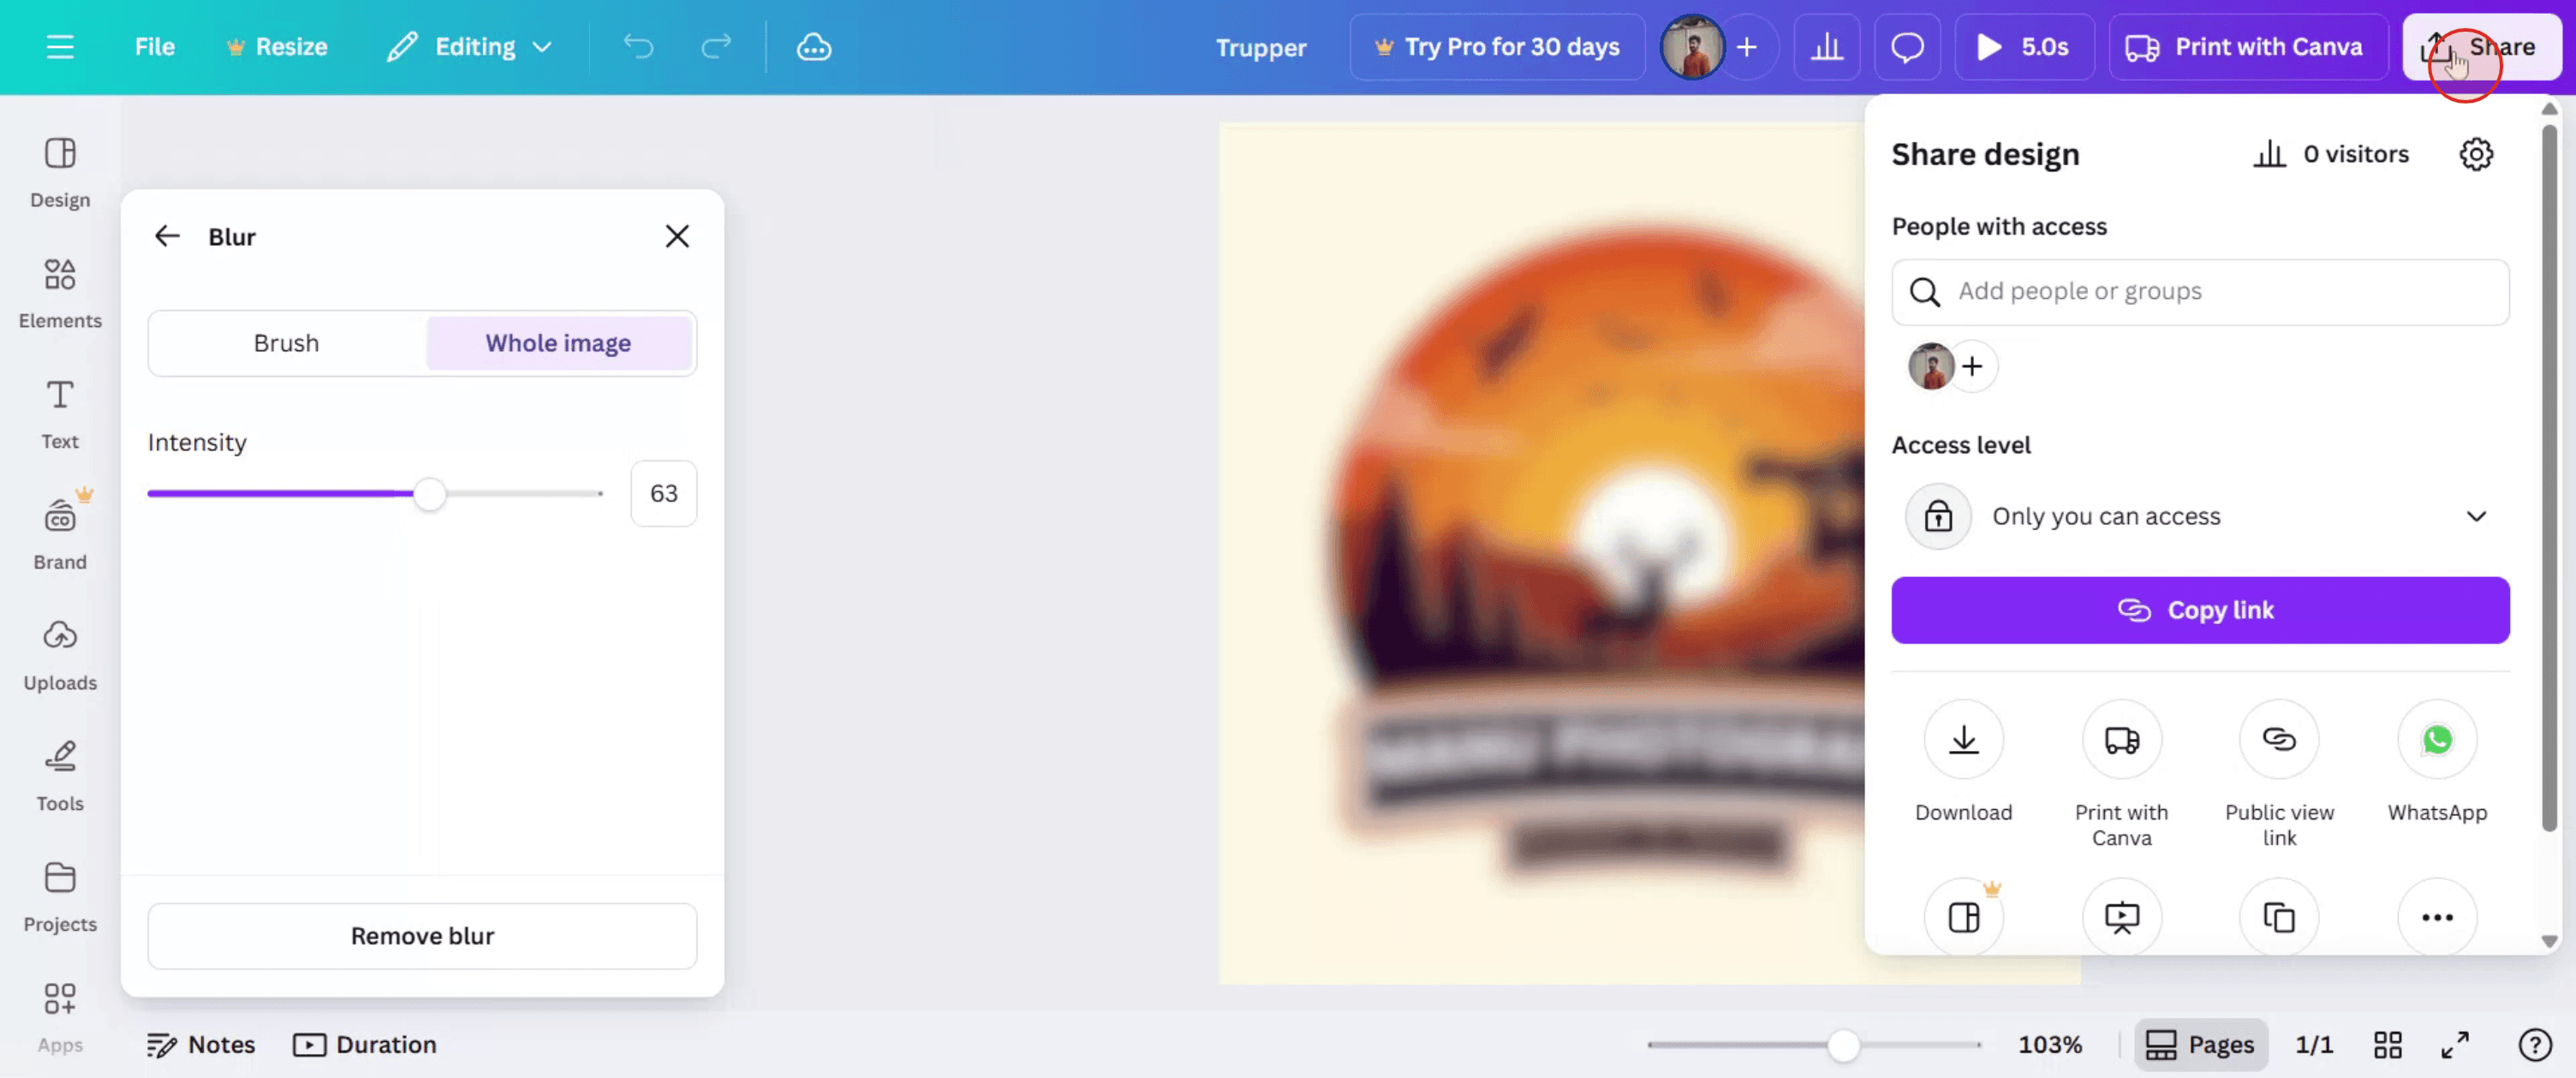
在这里,您可以调整应用于整张图像的模糊效果强度。

步骤 6
当您对调整满意后,单击“分享”以分发您编辑后的图像。
Canva 中模糊处理的专业技巧
在 Canva 中打开你的设计
登录 Canva 并打开你想应用模糊效果的设计。选择要模糊的图像或元素
点击你想模糊的照片、背景或图形元素。点击“编辑图片”按钮
选中元素后,在顶部工具栏中点击“编辑图片”选项。选择模糊工具
浏览可用效果,在“调整”或“效果”下选择“模糊”工具。调整模糊强度
使用模糊滑块增加或减少模糊程度。向右滑动可获得更强的模糊效果。应用并查看模糊效果
调整后,点击图片外部以应用效果。预览设计,确保模糊效果符合预期。
常见问题及避免方法
看不到模糊工具
确保已选择正确的图片。如果工具仍未出现,请检查你使用的是受支持的图片格式。模糊了错误的区域
Canva 会模糊整个所选元素。若只想模糊图片的一部分,请复制图片并遮罩你想影响的部分。图片变得不清晰
除非必要,不要过度模糊。使用轻微效果以保持重要视觉元素可辨识。试图直接模糊文本
文本元素无法直接模糊。如有需要,可先将文本下载并重新上传为图片。免费版中的模糊选项有限
某些高级模糊滤镜可能仅在 Canva Pro 中可用。如果你使用的是免费版,请使用基础模糊工具。
关于 Canva 模糊功能的常见问题
如何在 Canva 中模糊图片
选择图片,点击“编辑图片”,选择“模糊”工具,然后调整滑块以应用效果。可以模糊图片的一部分吗
不能直接实现。若只想模糊图片的某一部分,可使用形状或蒙版覆盖特定区域,或者在外部编辑后重新上传。可以模糊背景图片吗
可以,背景图片也能像其他照片或图形一样被选中并模糊处理。免费用户可以使用模糊效果吗
可以,基础模糊工具在免费版中可用,但高级功能可能需要 Canva Pro。应用模糊后可以取消吗
可以,只需重新选择图片,返回“编辑图片”面板,然后重置或调整模糊程度。如何在 Mac 上录屏?
要在 Mac 上录屏,您可以使用 Trupeer AI。它支持捕捉整个屏幕,并提供 AI 功能,例如添加 AI 虚拟形象、添加旁白以及在视频中放大和缩小。借助 trupeer 的 AI 视频翻译功能,您可以将视频翻译成 30 多种语言。如何向屏幕录制中添加 AI 虚拟形象?
若要向屏幕录制中添加 AI 虚拟形象,您需要使用 AI 屏幕录制工具。 Trupeer AI 是一款 AI 屏幕录制工具,可帮助您创建包含多个虚拟形象的视频,还能帮助您为视频创建自己的虚拟形象。如何在 Windows 上录屏?
要在 Windows 上录屏,您可以使用内置的 Game Bar(Windows + G),或者使用像 Trupeer AI 这样的高级 AI 工具,以获得 AI 虚拟形象、旁白、翻译等更高级的功能。如何给视频添加旁白?
要为视频添加旁白,请下载 trupeer ai Chrome 扩展。注册后,上传带有声音的视频,从 trupeer 中选择所需的旁白,并导出编辑后的视频。如何在屏幕录制中放大?
在屏幕录制过程中放大时,请使用 Trupeer AI 中的缩放效果,它允许您在特定时刻放大和缩小,从而增强视频内容的视觉冲击力。

