
如何在 Canva 中为可印刷设计添加出血
了解如何在 Canva 中添加出血,以确保您的设计打印时不会出现白边。非常适合名片、传单和宣传册。
本文概述了在 Canva 中为设计项目添加出血的简单流程。这可确保您的设计可直接用于印刷,避免打印后出现不需要的白边。
添加出血可确保您的印刷设计呈现干净、无边界的满版色彩,不会出现意外的白色边框。
分步骤指南:
1. 启用打印出血
在 Canva 中打开您的设计。
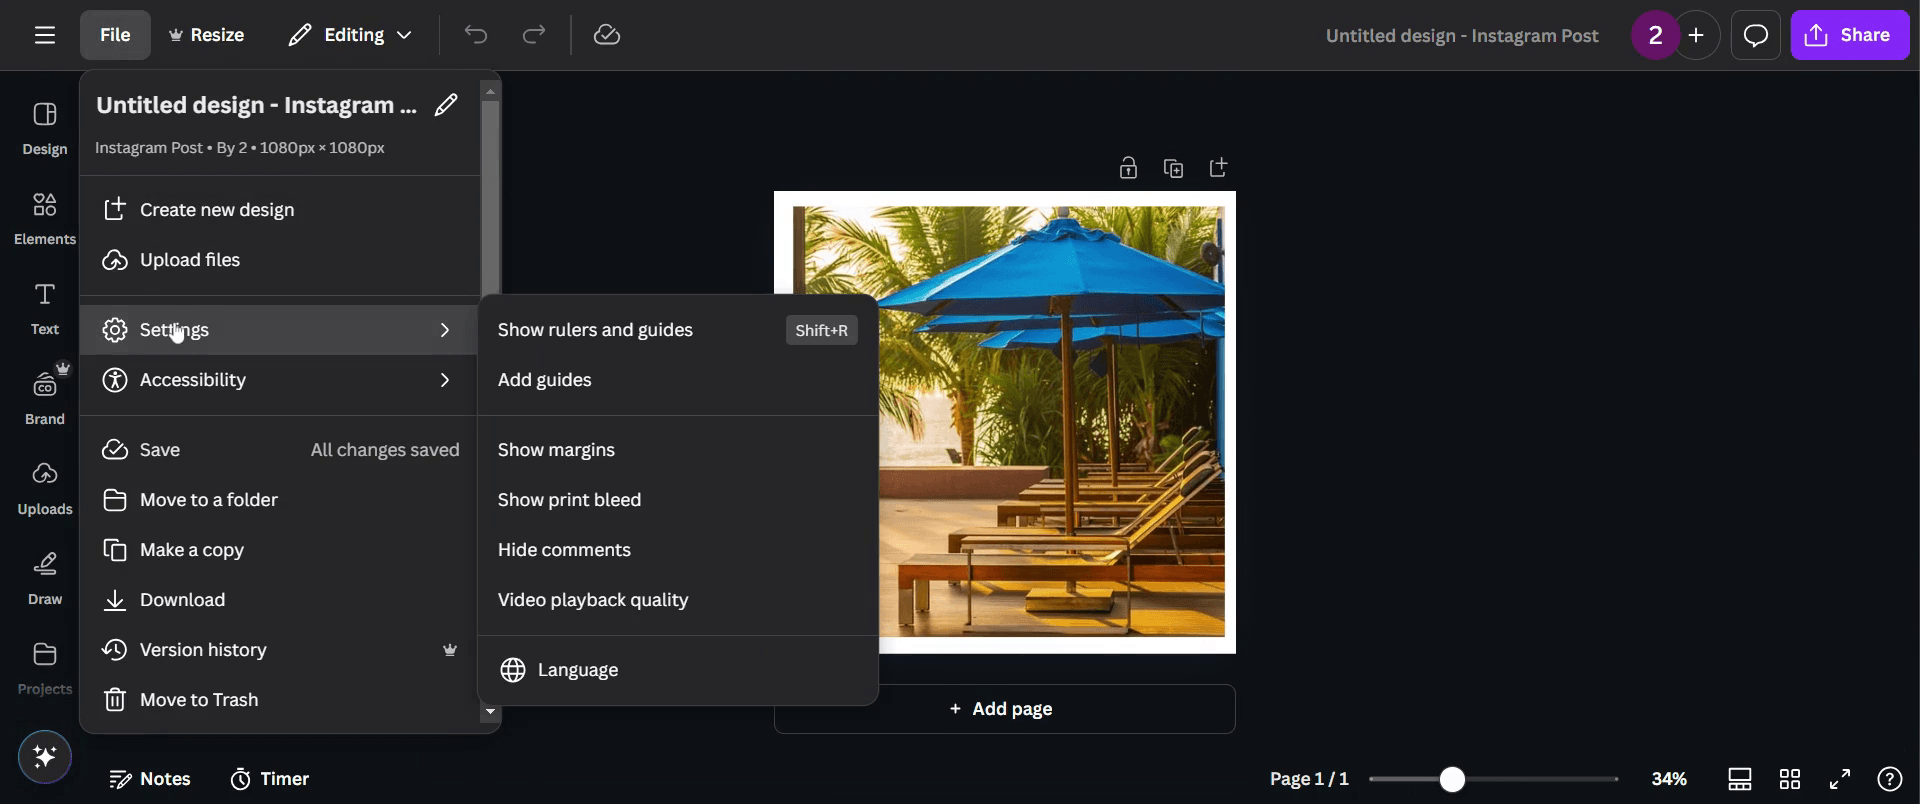
转到顶部菜单,点击 文件 > 显示打印出血。
边缘附近会出现一条虚线,这表示出血开始的位置。
2. 延伸设计元素
背景、图片和颜色应延伸到虚线之外,直至画布边缘。
将文字和关键图形保留在安全区域内(虚线以内),以避免裁切问题。
3. 下载可直接打印的文件
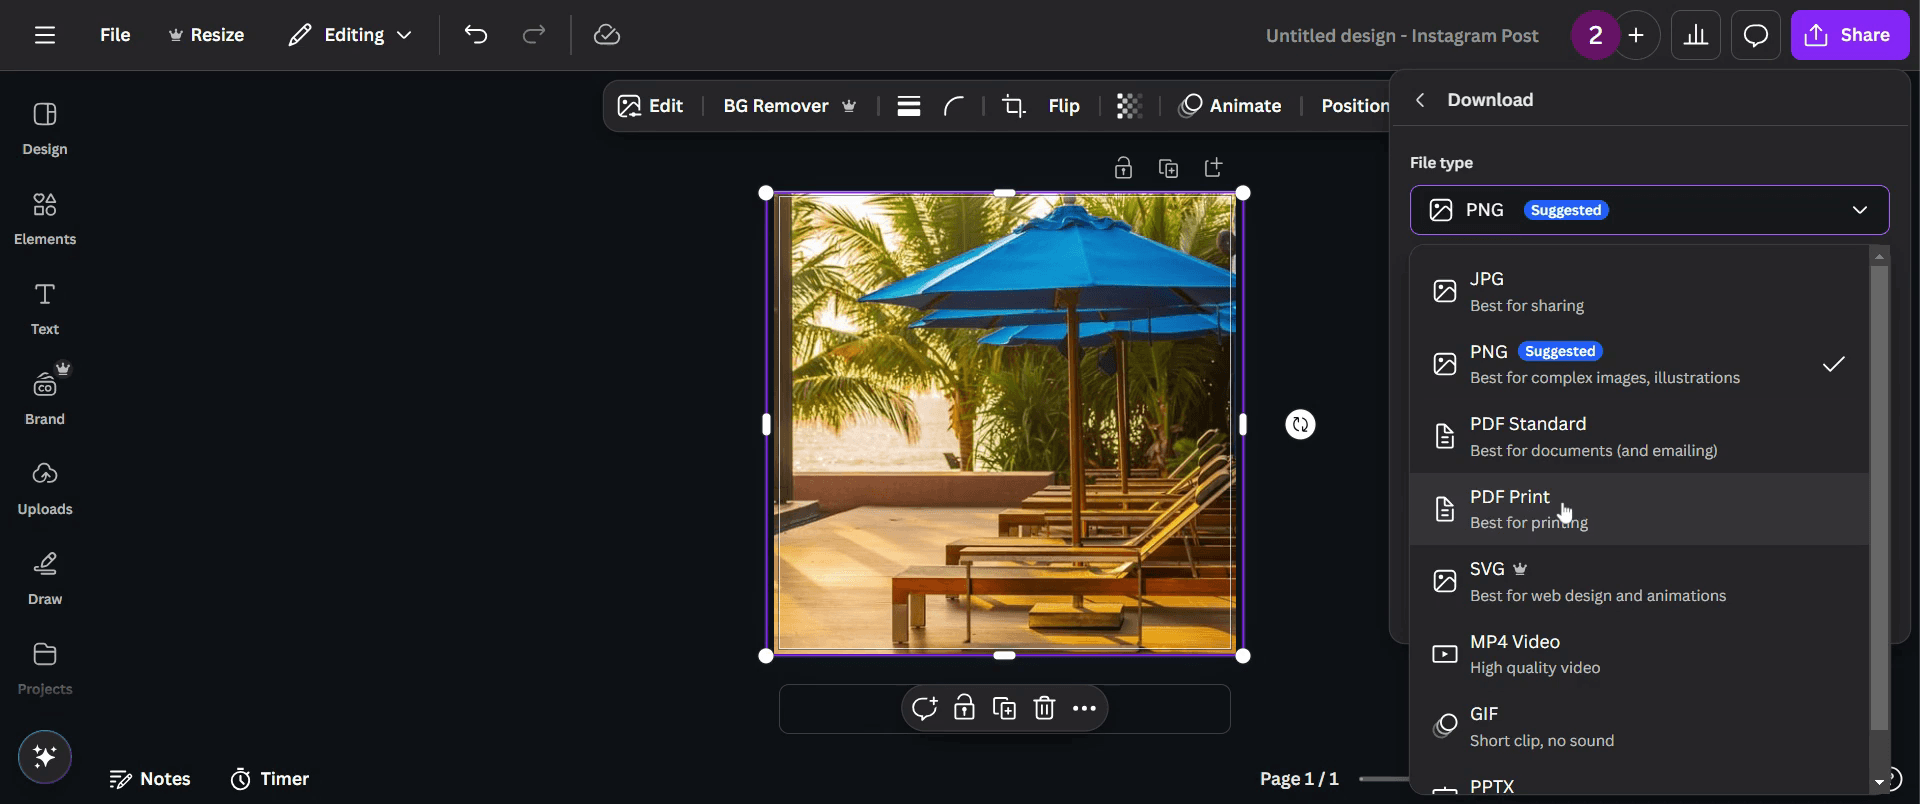
点击 分享 > 下载。
将文件类型设置为 PDF Print。
勾选 "裁切标记和出血"。
点击 下载。
分步骤指南:如何在 Canva 中为打印添加出血
第 1 步
选择您希望修改的现有项目。

第 2 步
接下来,导航到“文件”选项并点击它。

第 3 步
选择“设置”。
第 4 步
点击“显示打印出血”。

第 5 步
调整您的图片,以覆盖边缘周围的任何白色空隙。

第 6 步
调整完成后,点击“分享”按钮继续。

第 7 步
然后点击“下载”。

第 8 步
现在,将文件类型更改为“PDF Print”。
第 9 步
确保点击“裁切标记和出血”。

第 10 步
最后,点击“下载”,这样您的设计就准备好了。

在 Canva 中添加出血的专业提示
在 Canva 的“文件”菜单中启用出血设置,确保重要的设计元素在打印时不会被裁切
将背景图片和颜色延伸到出血线之外,以避免裁切后出现白边
始终将设计下载为带裁切标记和出血的 PDF,以获得专业的打印效果
在 Canva 中添加出血时的常见错误及其避免方法
忘记启用出血设置可能会导致不需要的白边,因此在完成前务必检查出血设置
将文字或重要元素放得离出血区域太近可能会被裁掉,请将它们放在安全边距内
未使用正确的导出格式会影响打印质量,始终以带裁切标记和出血的 PDF Print 格式下载
Canva 中添加出血的常见 FAQ
1. 为什么出血在 Canva 设计中很重要?
出血可确保你的设计延伸到裁切线之外,避免打印时出现不需要的白边
2. 我可以在 Canva 中调整出血尺寸吗?
Canva 会自动设置标准出血边距,且无法在平台内手动调整
3. 如何导出带出血的 Canva 设计用于打印?
点击“下载”,选择 PDF Print 格式,然后在保存前勾选“裁切标记和出血”选项
4. 打印我的设计时,出血区域会显示出来吗?
不会,出血区域会被裁掉,只留下最终设计,不会有多余边框
5. 如何在 Mac 上录屏?
要 在 Mac 上录屏,你可以使用 Trupeer AI。它允许你捕获整个屏幕,并提供 AI 功能,例如添加 AI 头像、添加旁白、在视频中放大和缩小。借助 trupeer 的 AI 视频翻译功能,你可以将视频翻译成 30+ 种语言。
6. 如何为录屏添加 AI 头像?
要为录屏添加 AI 头像,你需要使用 AI 屏幕录制工具。 Trupeer AI 是一款 AI 屏幕录制工具,可帮助你创建包含多个头像的视频,也可帮助你为视频创建自己的头像。
7. 如何在 Windows 上录屏?
要在 Windows 上录屏,你可以使用内置的 Game Bar(Windows + G)或像 Trupeer AI 这样的高级 AI 工具,以获得 AI 头像、旁白、翻译等更高级功能。
8. 如何为视频添加旁白?
要为视频添加旁白,请下载 trupeer ai Chrome 扩展程序。注册后,上传带有声音的视频,从 trupeer 中选择所需的旁白,然后导出编辑后的视频。
9. 如何在录屏中放大?
要在录屏过程中放大,请使用 Trupeer AI 中的缩放效果,它允许你在特定时刻放大和缩小,从而增强视频内容的视觉冲击力。

