
Como fazer um recuo no Notion
Aprenda a recuar texto, blocos e listas no Notion usando atalhos de teclado e arrastar e largar. Passos simples para organizar o conteúdo de forma visual e clara
Aqui está uma análise mais detalhada:
1. Indentação: Coloque o cursor no início da linha ou bloco que pretende indentar.
Prima a tecla Tab. O conteúdo será deslocado para a direita, criando uma indentação.
2. Remover a indentação: Coloque o cursor no início da linha ou bloco indentado. Prima Shift + Tab. O conteúdo será movido de volta para o nível de indentação anterior.
Guia Passo a Passo: Como Indentar no Notion
Passo 1
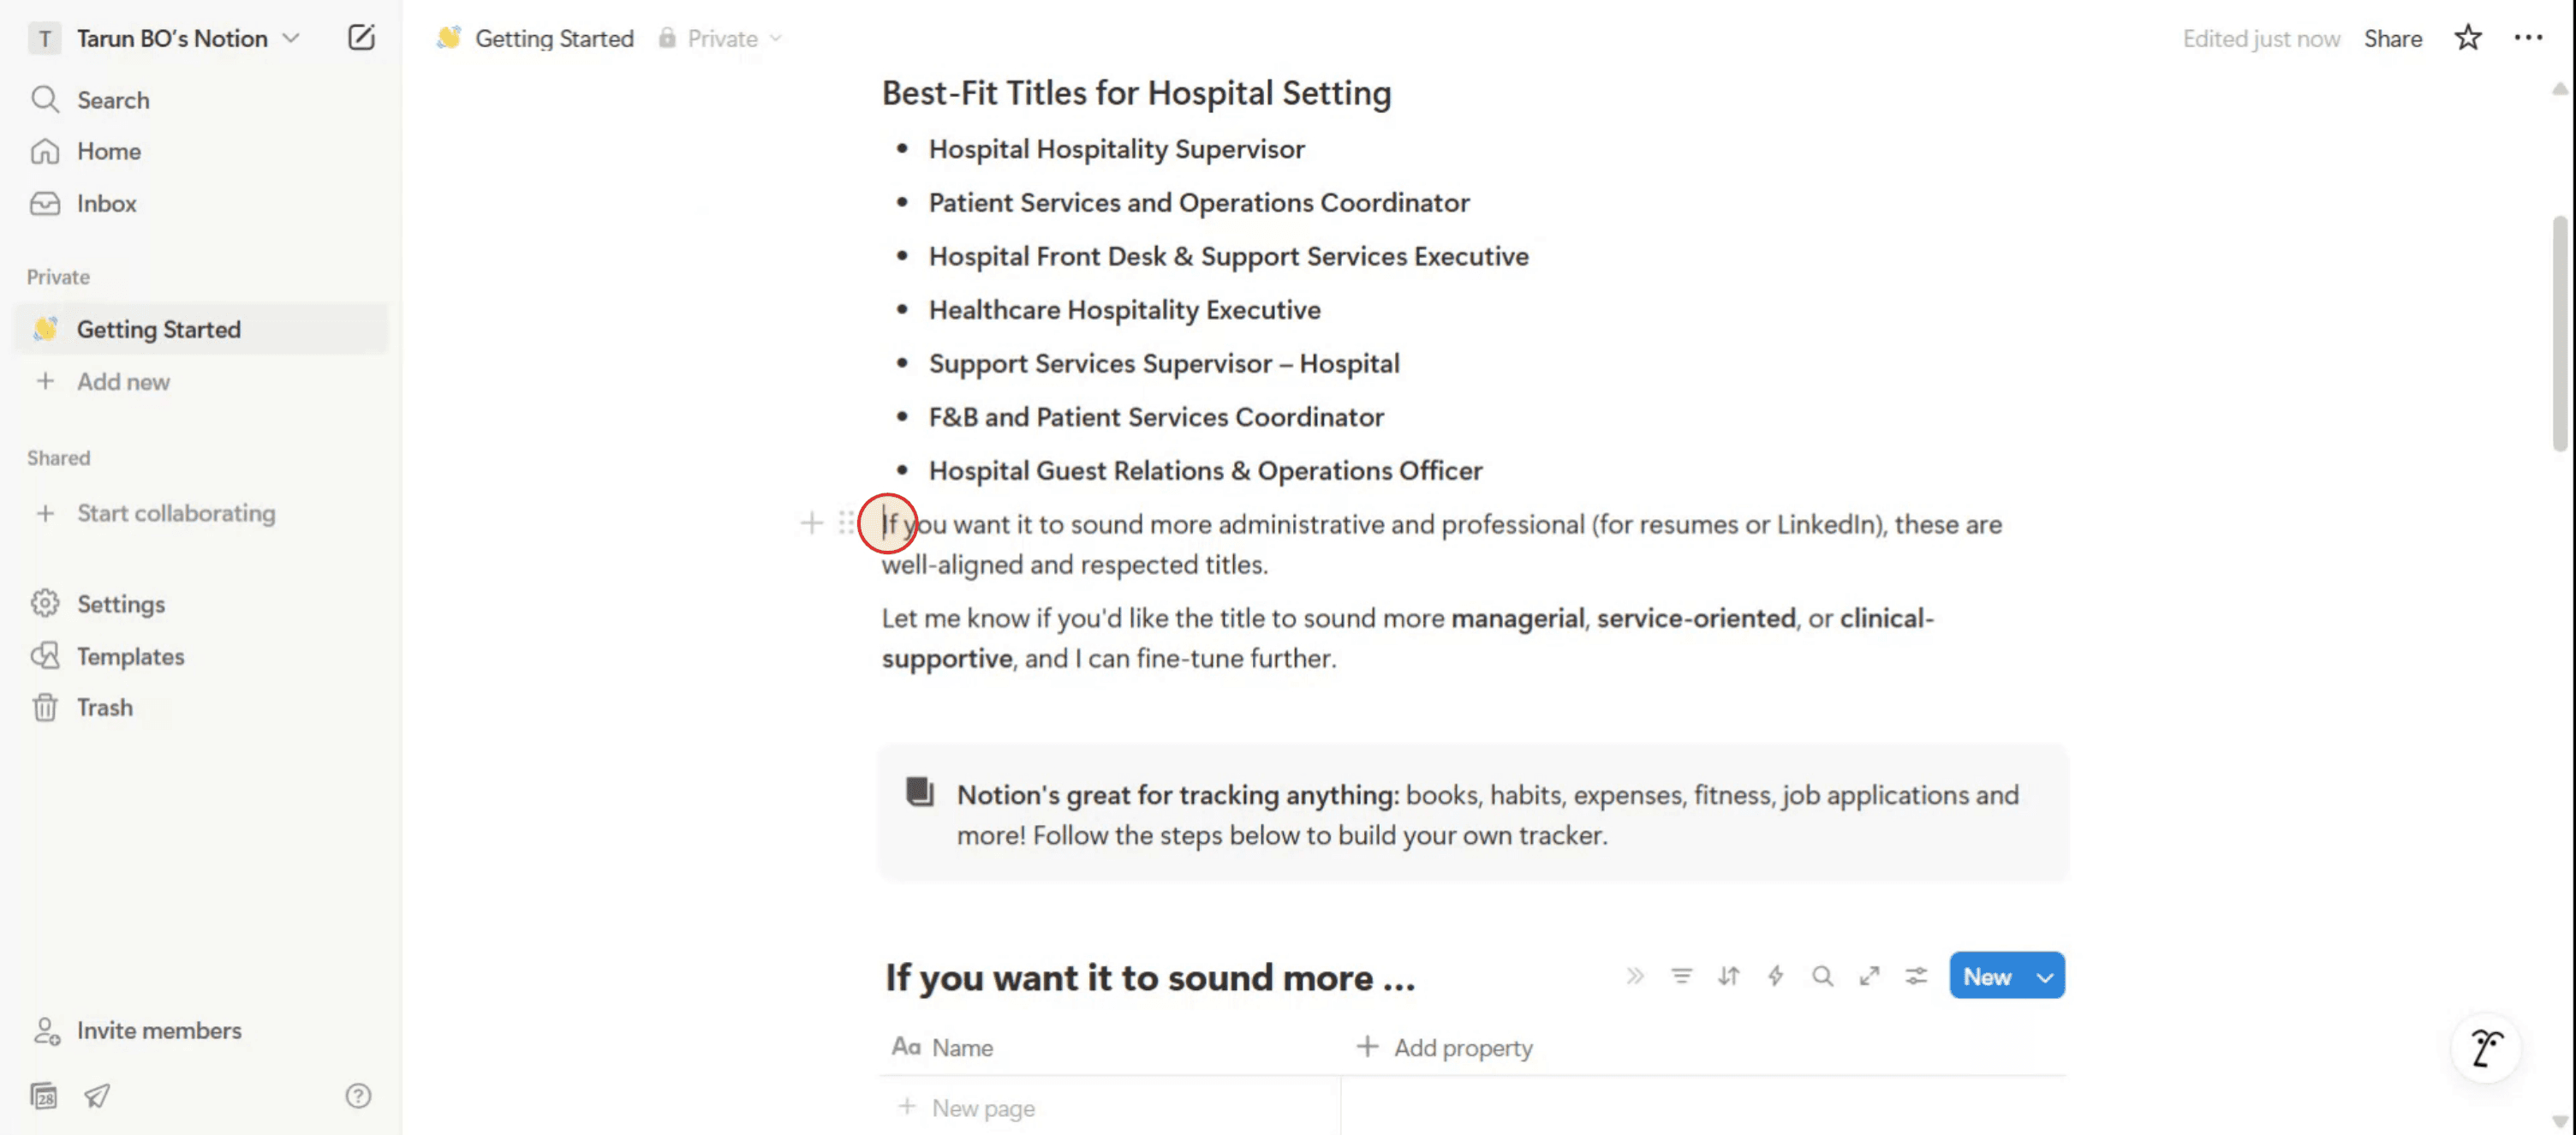
Comece por colocar o cursor na posição onde pretende indentar o texto no Notion.
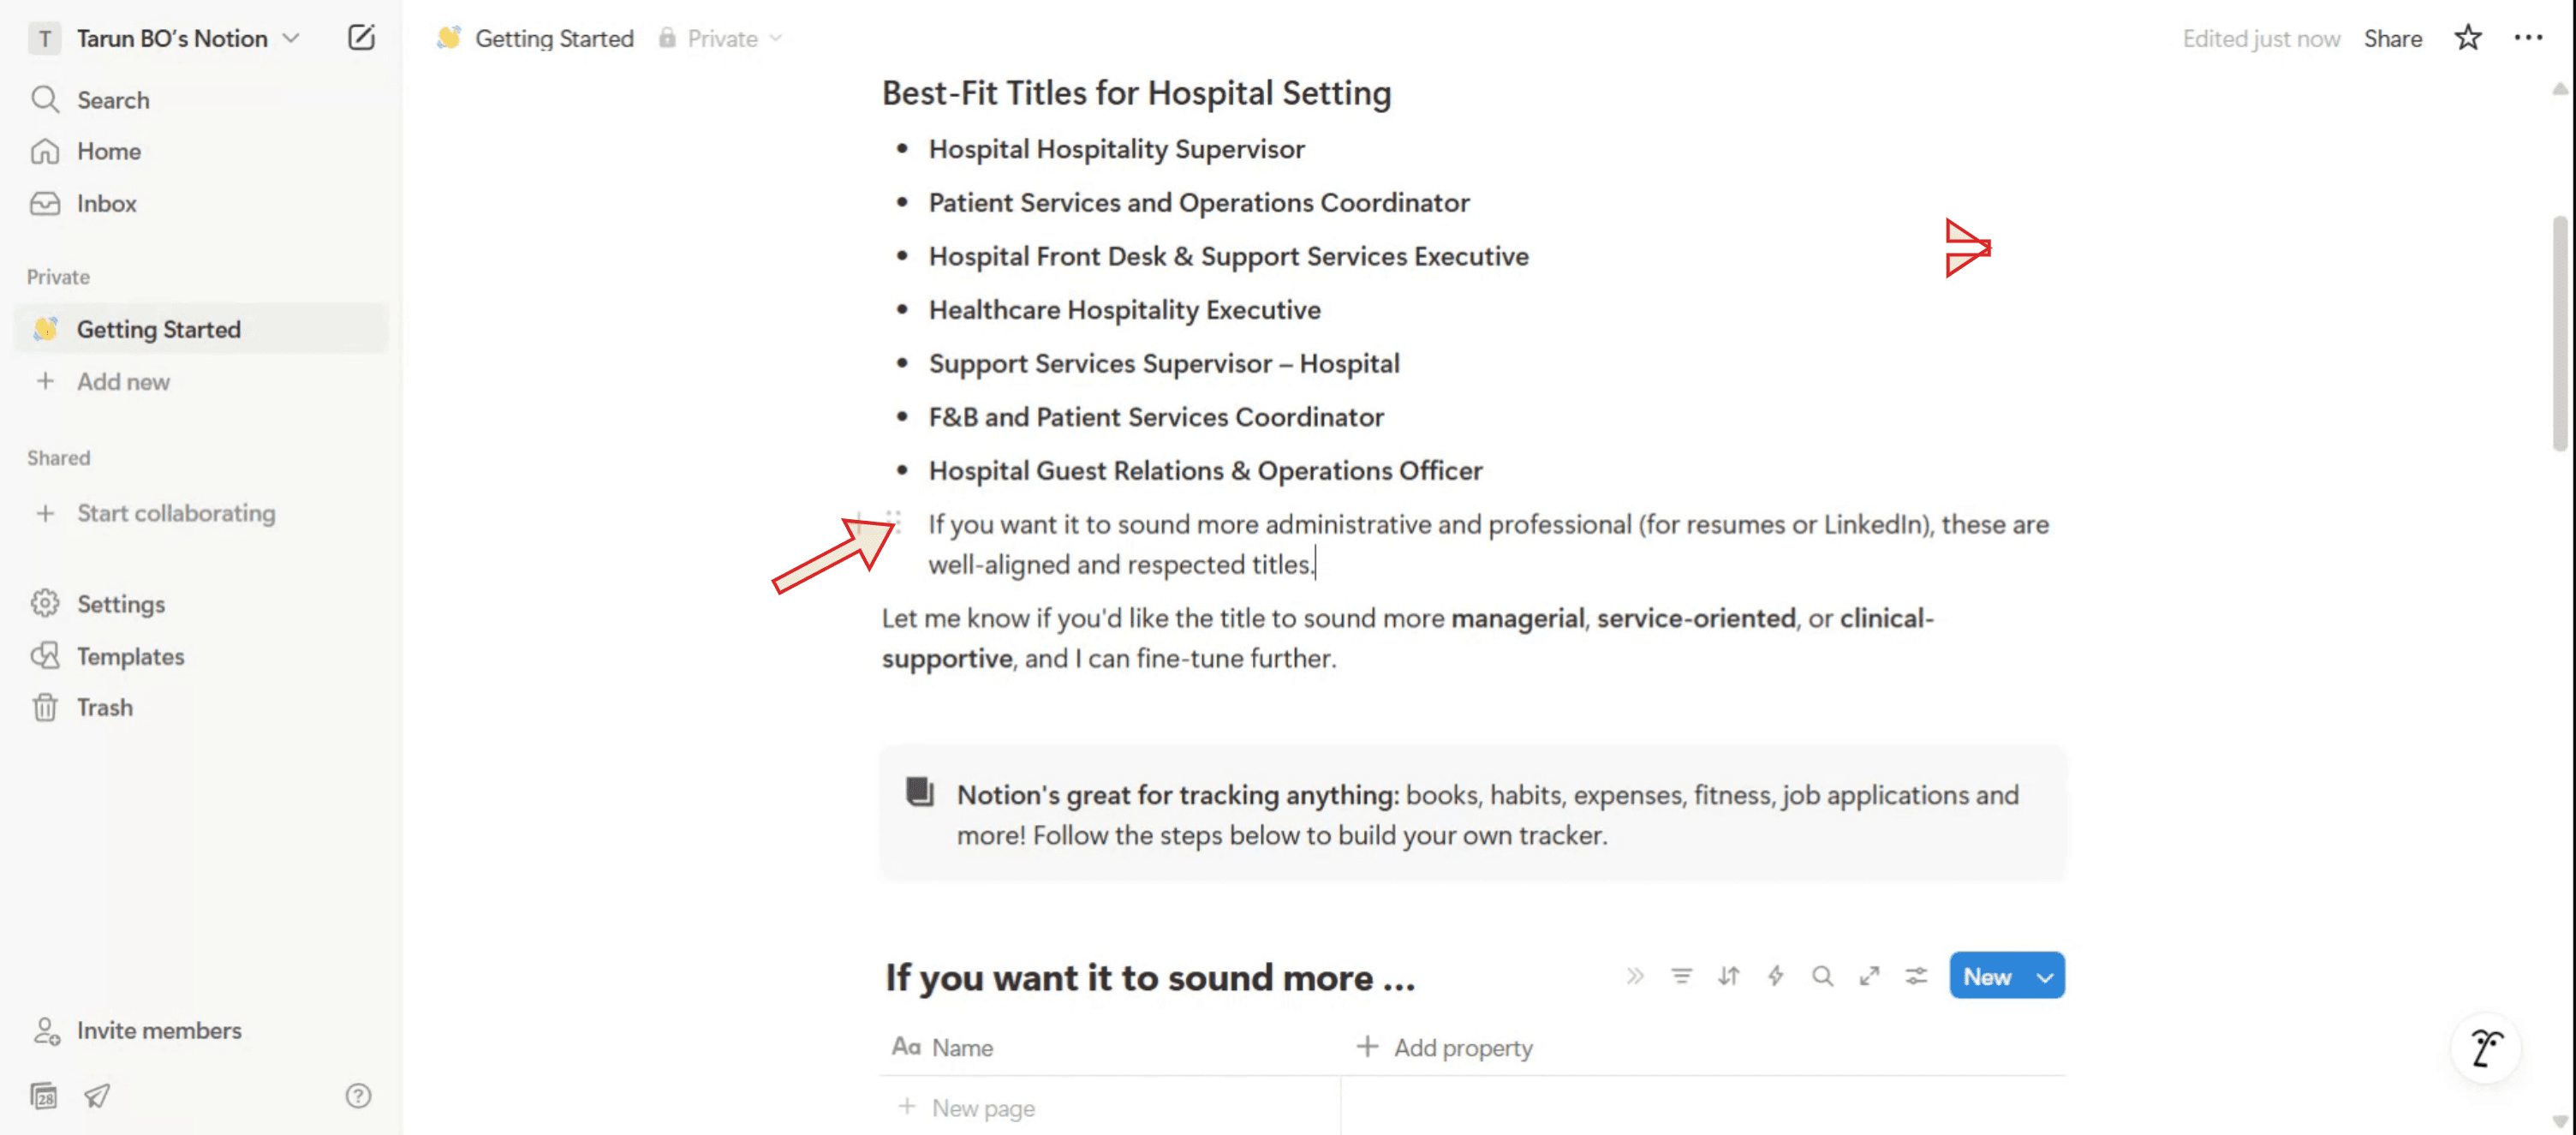
Passo 2
De seguida, prima a tecla 'Tab' no seu teclado. Verá que o texto avança ligeiramente.
Passo 3
basta colocar o cursor aí e premir 'Shift' + 'Tab' no teclado. Verá agora que o texto regressou à sua posição inicial.

Dicas de especialista para indentar no Notion
Use a tecla Tab para pontos ou listas com marcadores
Clique num ponto com marcador ou num item numerado e prima Tab no teclado. Isto irá indentar o item e colocá-lo como subitem do anterior.Use Shift + Tab para desindentar
Se quiser reverter a indentação, prima Shift + Tab enquanto o item da lista estiver selecionado. O item voltará um nível atrás.Use o manipulador de arrastar e largar
Passe o cursor à esquerda de qualquer bloco para revelar o manipulador de seis pontos. Arraste-o ligeiramente para a direita para o indentar manualmente por baixo de outro bloco.Indente listas alternáveis ou títulos
Crie uma lista alternável ou um bloco de título. Depois prima Tab ou arraste-o para baixo de outro bloco para o indentar. Ótimo para organizar secções.Indente vários blocos de uma só vez
Mantenha Shift premido e clique para selecionar vários blocos. Depois prima Tab para os indentar todos em conjunto num só passo.
Erros comuns e como evitá-los
Tentar indentar parágrafos diretamente
O Notion não suporta a indentação tradicional de parágrafos de texto. Use pontos com marcadores ou listas alternáveis em vez disso.Indentar dentro de bases de dados
Não pode indentar diretamente dentro de linhas de tabela. Use listas alternáveis ou ligue bases de dados para obter um aspeto estruturado semelhante.Usar espaços para indentar
Escrever espaços não criará uma verdadeira indentação. Use sempre Tab ou arraste o bloco para a direita.Dificuldade em selecionar vários blocos
Certifique-se de que mantém Shift premido e clica em cada bloco pela ordem correta. Depois use Tab para indentar todos os blocos selecionados em conjunto.Perder o controlo do conteúdo aninhado
O excesso de aninhamento pode dificultar a localização do conteúdo. Mantenha a indentação simples e use listas alternáveis para ocultar detalhes em excesso.
Perguntas Frequentes Comuns Sobre a Indentação no Notion
Como faço um recuo num ponto com marcador no Notion?
Clique no marcador e prima Tab no seu teclado. Ele ficará recuado abaixo do marcador anterior.Posso fazer recuo de parágrafos normais no Notion?
Não, o Notion não suporta a indentação padrão de parágrafos. Em vez disso, use marcadores ou alternadores.Como desfaço um recuo?
Prima Shift + Tab para mover o bloco ou item um nível para trás na hierarquia.Posso fazer recuo de um título ou subtítulo?
Sim, pode fazer recuo de títulos usando arrastar e largar ou premindo Tab quando estiver posicionado sob outro bloco.Porque é que a tecla Tab não funciona em alguns blocos?
A tecla Tab só funciona em blocos específicos, como listas ou marcadores. Para blocos de texto, use alternadores ou arraste manualmente para os aninhar.Como gravar o ecrã no Mac?
Para gravar o ecrã num Mac, pode usar o Trupeer AI. Permite-lhe captar o ecrã inteiro e oferece capacidades de IA, como adicionar avatares de IA, adicionar narração, adicionar zoom in e out no vídeo. Com a funcionalidade de tradução de vídeo por IA do Trupeer, pode traduzir o vídeo para mais de 30 idiomas.Como adicionar um avatar de IA a uma gravação de ecrã?
Para adicionar um avatar de IA a uma gravação de ecrã, terá de usar uma ferramenta de gravação de ecrã com IA. O Trupeer AI é uma ferramenta de gravação de ecrã com IA, que ajuda a criar vídeos com vários avatares e também ajuda a criar o seu próprio avatar para o vídeo.Como gravar o ecrã no Windows?
Para gravar o ecrã no Windows, pode usar a Game Bar integrada (Windows + G) ou uma ferramenta avançada de IA como o Trupeer AI para funcionalidades mais avançadas, como avatares de IA, narração, tradução, etc.Como adicionar narração a um vídeo?
Para adicionar narração a vídeos, descarregue a extensão do Chrome da trupeer ai. Depois de se registar, carregue o seu vídeo com voz, escolha a narração pretendida da Trupeer e exporte o vídeo editado.Como faço zoom numa gravação de ecrã?
Para aplicar zoom durante uma gravação de ecrã, use os efeitos de zoom no Trupeer AI, que permitem ampliar e reduzir em momentos específicos, melhorando o impacto visual do seu conteúdo de vídeo.
As pessoas também perguntam
Gerador de Documentação Técnica
Software de base de conhecimento
Como Fazer o Notion em Modo Escuro
Como descarregar o Notion no Mac
