

Cómo añadir un selector de fechas de calendario a las celdas en MS Excel
Aprende a añadir un calendario selector de fechas a las celdas de Excel usando las herramientas de desarrollador o complementos para una selección rápida de fechas. Sigue este tutorial paso a paso y crea guías con Trupeer.
Para agregar un calendario selector de fecha a las celdas en MS Excel, puede usar el control integrado "Selector de fecha" (también conocido como "Control de selección de fecha y hora de Microsoft") desde la pestaña Desarrollador. Como alternativa, puede utilizar un complemento como "Mini Calendar and Date Picker" para una experiencia más simple y fácil de usar.
Aquí tiene un desglose de los métodos:
1. Uso de la pestaña Desarrollador (control integrado):
1. Habilite la pestaña Desarrollador: haga clic con el botón derecho en la cinta, seleccione "Personalizar la cinta de opciones" y marque la casilla "Desarrollador".
2. Inserte el control: vaya a la pestaña Desarrollador, haga clic en "Insertar" y elija el control "Selector de fecha" en "Controles ActiveX". Si no está visible, es posible que deba hacer clic en "Más controles" y seleccionar "Microsoft Control de selección de fecha y hora 6.0 (SP6)" después de registrarlo, si es necesario.
3. Colóquelo y configúrelo: haga clic en la celda donde desea el selector de fecha, luego haga clic con el botón derecho en el control y seleccione "Formato de control" para personalizar sus propiedades, incluida la celda vinculada.
4. Uso: haga clic en la celda para activar el selector de fecha, seleccione una fecha y se insertará en la celda.
2. Uso del complemento "Mini Calendar and Date Picker":
Obtenga el complemento: vaya a la pestaña "Insertar", haga clic en "Obtener complementos" y busque "Mini Calendar and Date Picker".
Instale y abra: agregue el complemento y ábralo desde el botón "Complementos" en la pestaña Inicio.
Seleccione y use: haga clic en la celda deseada y luego seleccione la fecha del calendario.
Guía paso a paso: cómo agregar un calendario selector de fecha a las celdas en MS Excel
Paso 1
Seleccione una celda específica donde desee insertar el selector de fecha.
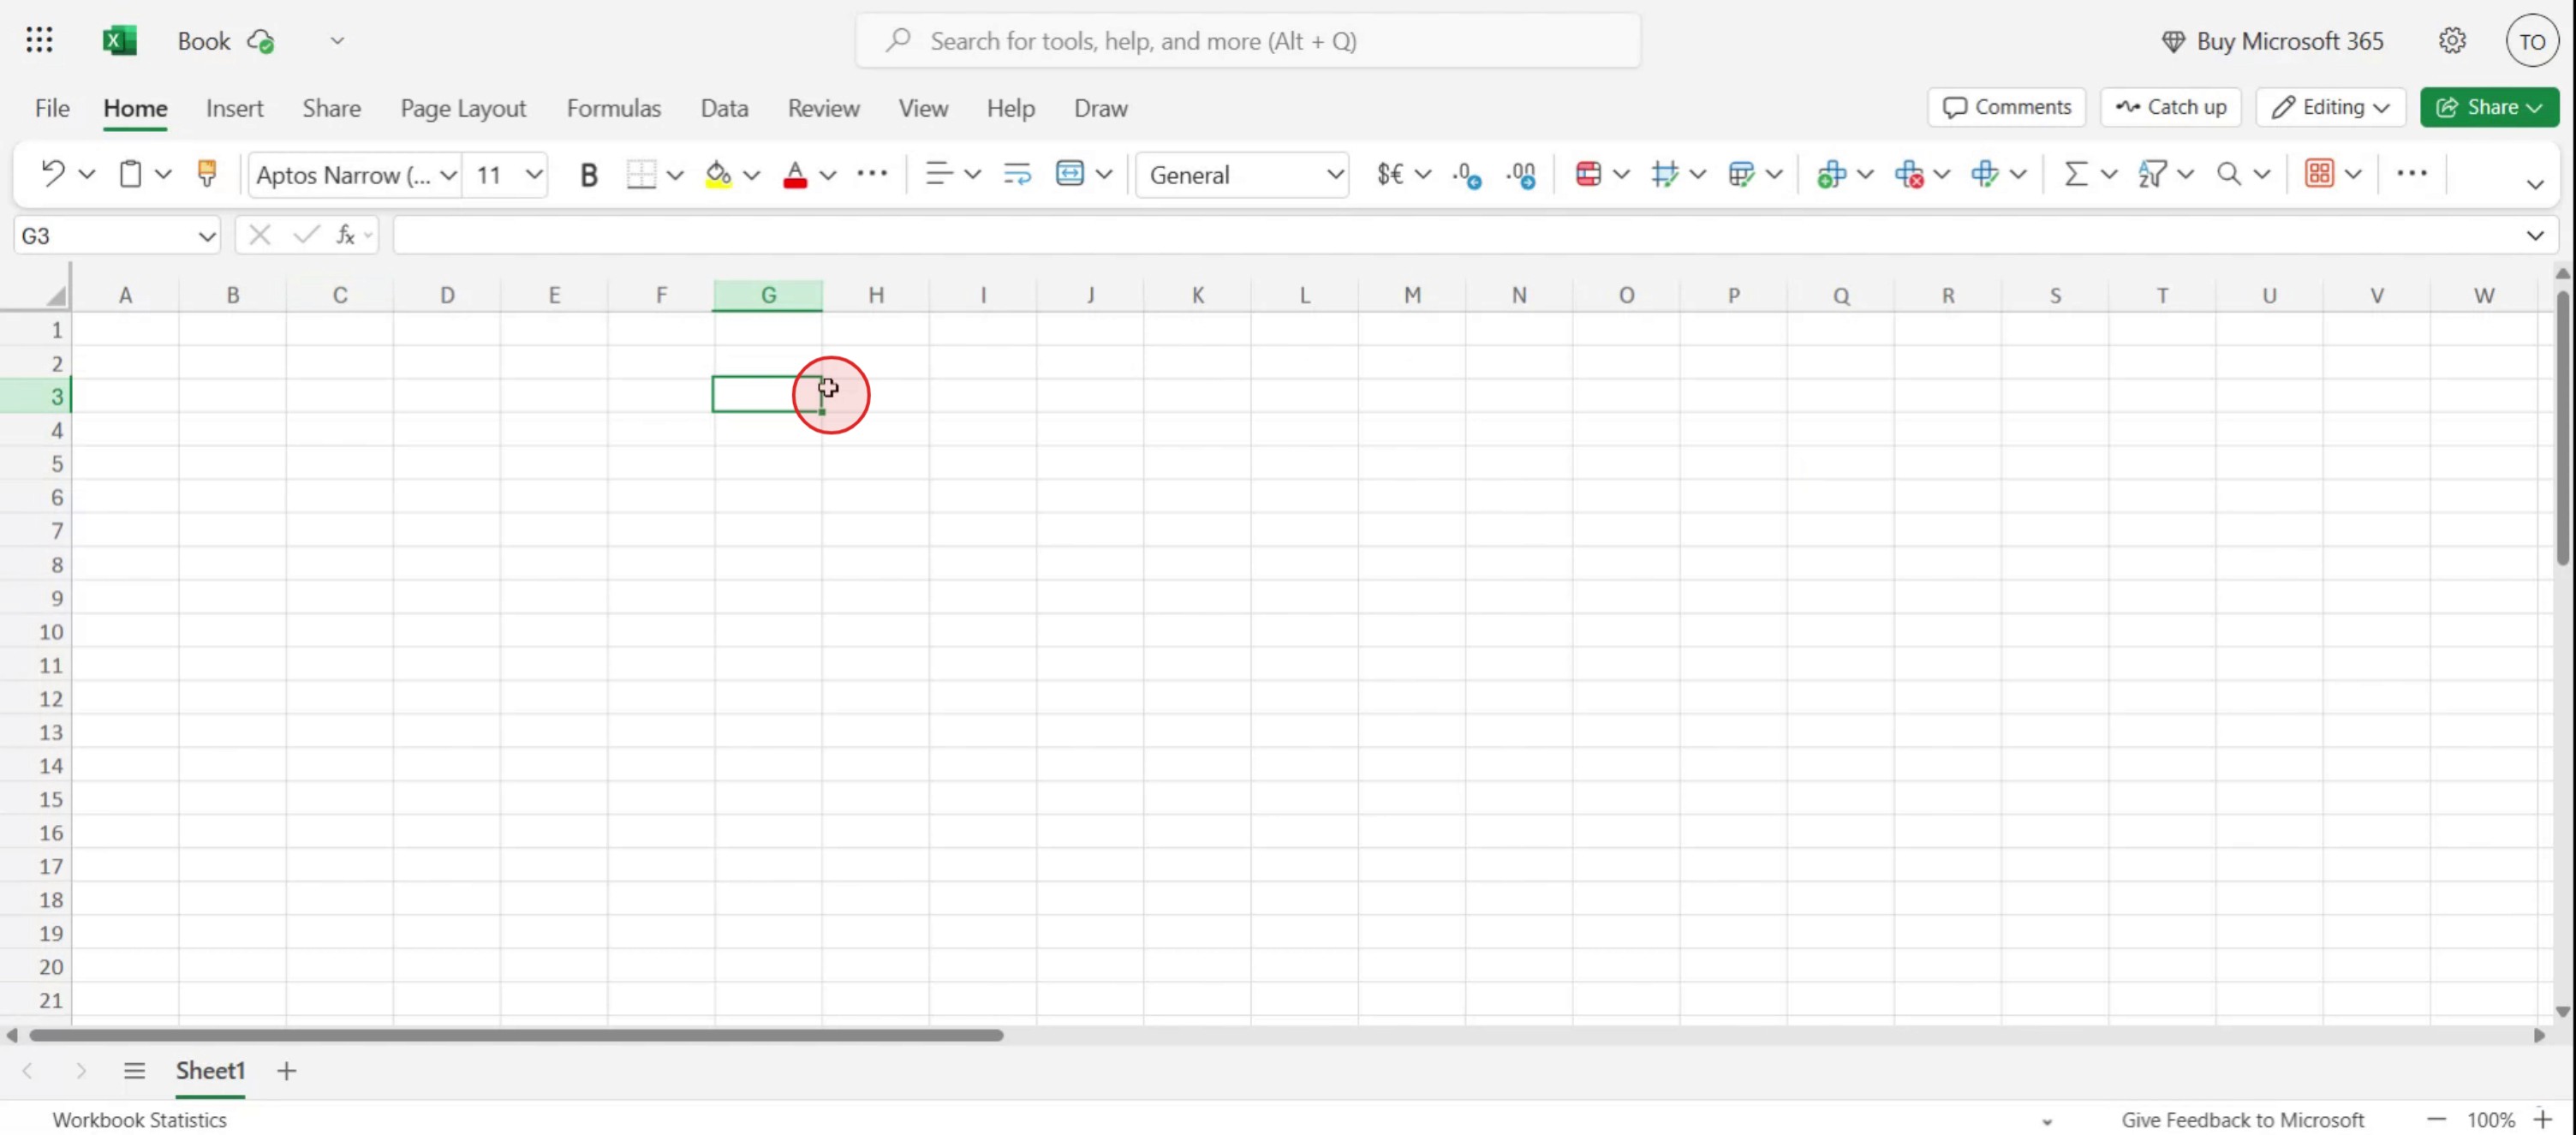
Paso 2
Desde la barra de herramientas de formato, seleccione la opción de formato de número.

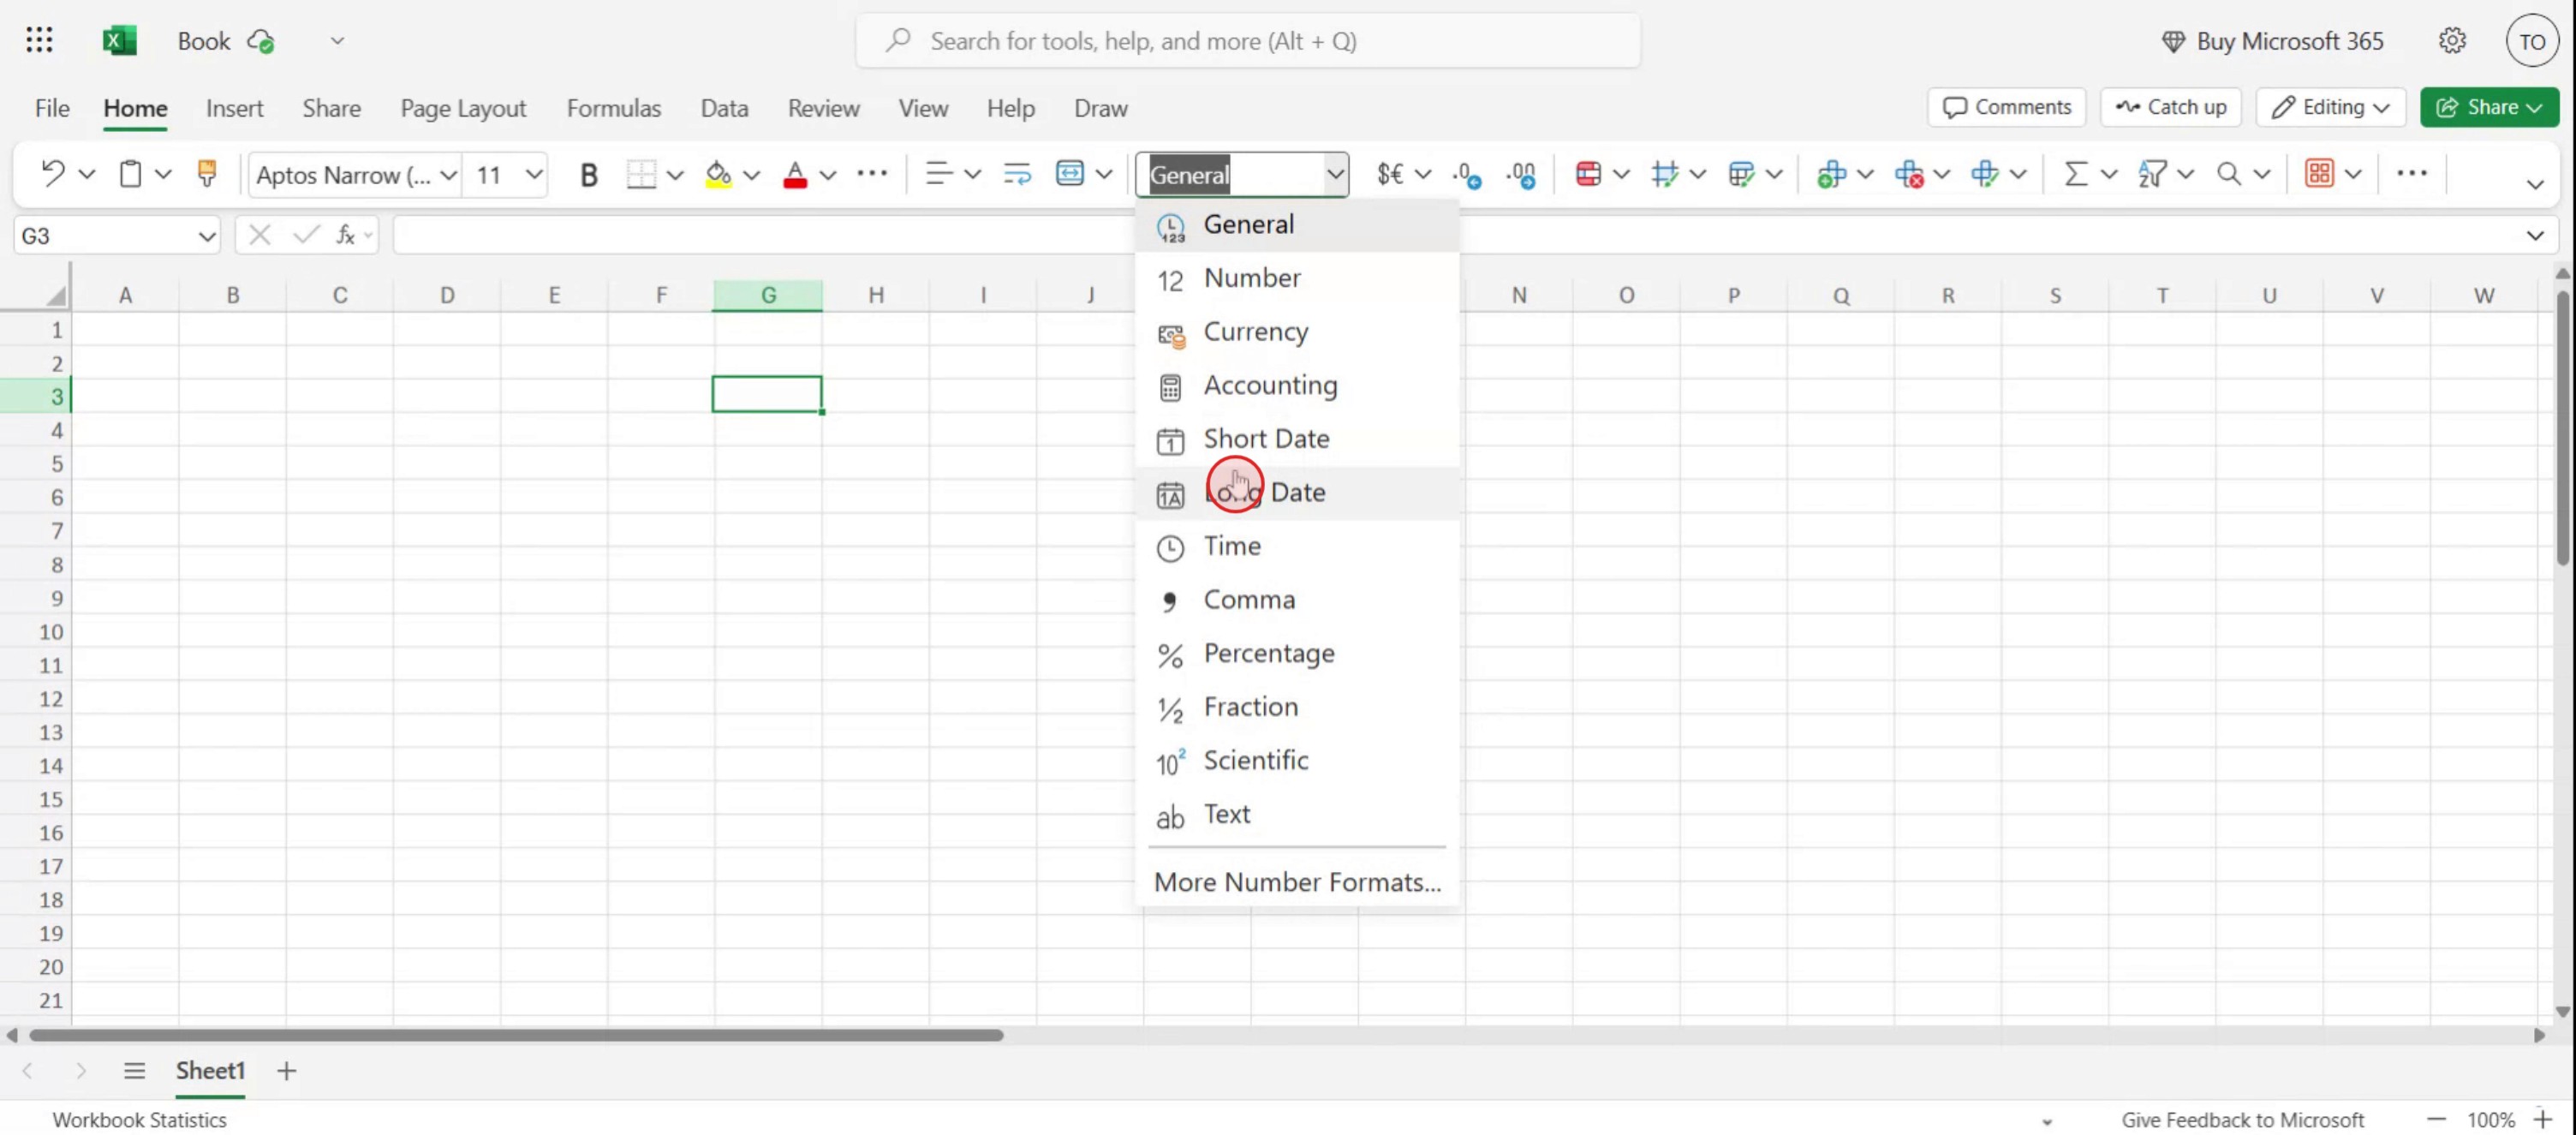
Paso 3
Desde el menú desplegable, elija la opción 'Fecha larga',
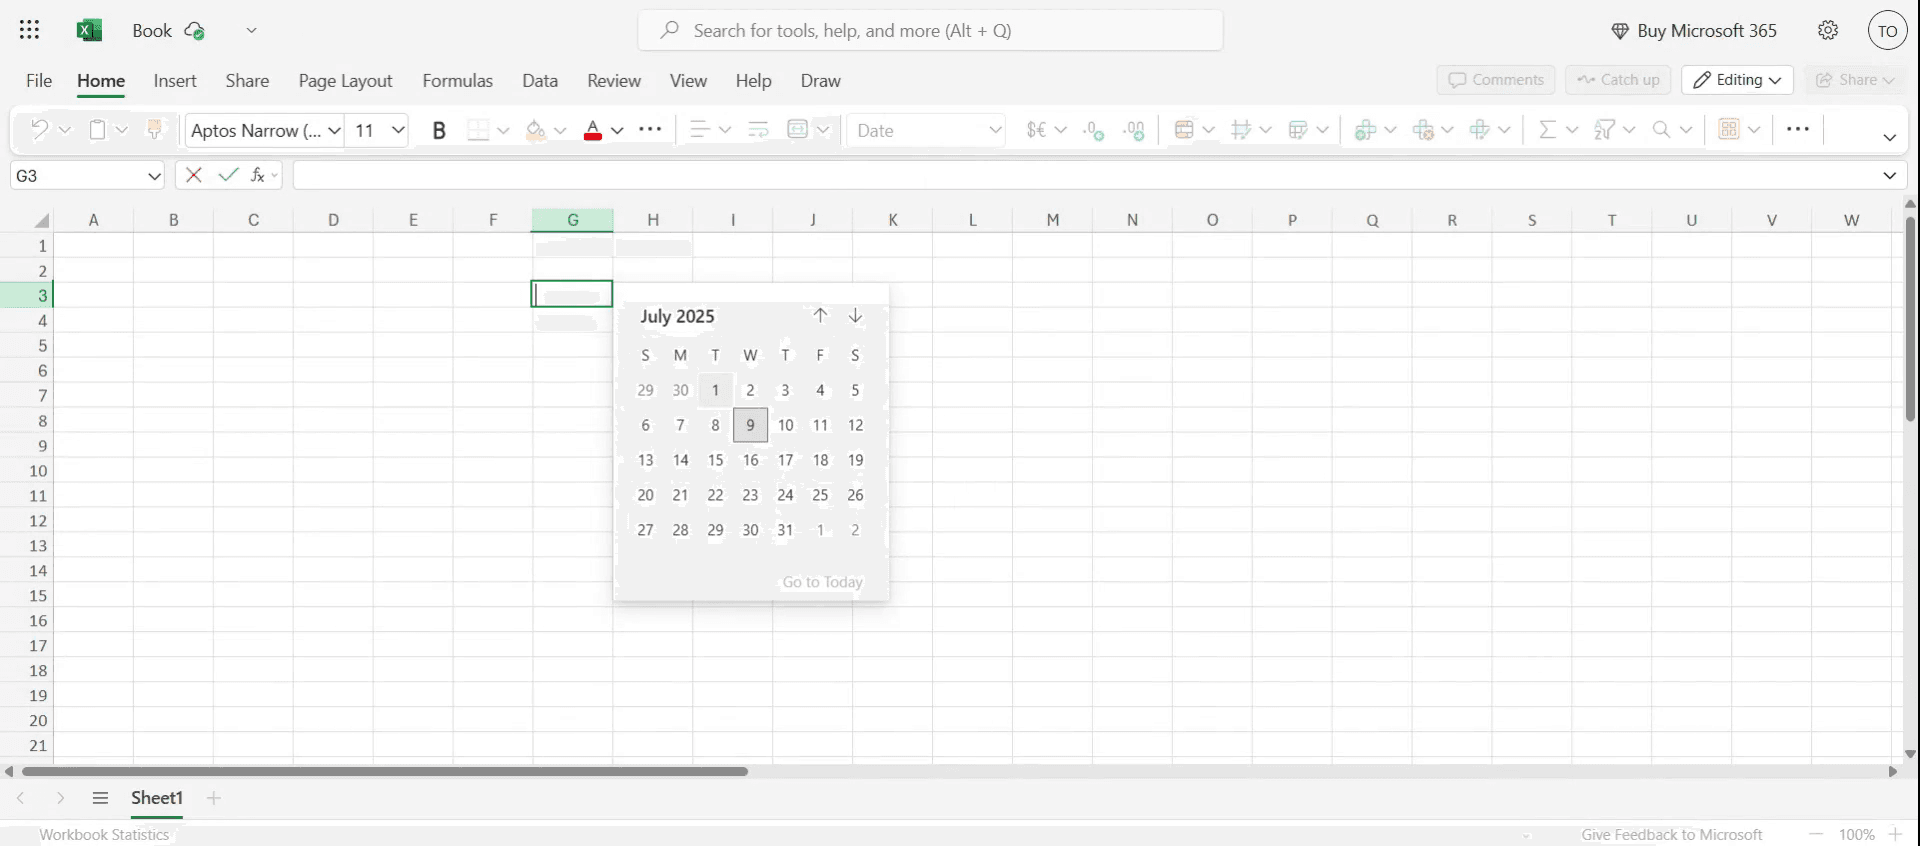
Paso 4
Al hacer doble clic en la celda, la fecha aparecerá como se especificó.
Consejos profesionales para agregar un calendario selector de fecha a las celdas en MS Excel
Abre tu archivo de Excel
Inicia Microsoft Excel y abre el libro de trabajo en el que quieres agregar el selector de fecha.Habilita la pestaña Desarrollador
Ve a la cinta de opciones, haz clic en Archivo → Opciones → Personalizar cinta de opciones y luego marca la casilla de Desarrollador para que sea visible.Inserta el control Selector de fecha
En la pestaña Desarrollador, haz clic en Insertar → Más controles (el icono de la llave inglesa y el martillo). Desplázate hacia abajo y selecciona “Microsoft Date and Time Picker Control” y haz clic en Aceptar.Dibuja el selector de fecha en la hoja
El cursor cambiará a una cruz. Haz clic y arrastra para dibujar el calendario en tu hoja de cálculo.Vincula el selector de fecha a una celda
Haz clic con el botón derecho en el selector de fecha, elige Propiedades y establece la propiedad LinkedCell en la celda en la que quieres que aparezca la fecha.Prueba el selector de fecha
Haz clic en el calendario y selecciona una fecha. La celda vinculada debería mostrar automáticamente la fecha seleccionada.
Errores comunes y cómo evitarlos
El selector de fecha no está disponible en la lista de controles
El control Selector de fecha solo está disponible en las versiones de Excel de 32 bits. Si usas 64 bits, considera usar métodos alternativos como formularios de calendario ActiveX o soluciones VBA.Falta la pestaña Desarrollador
Si no ves la pestaña Desarrollador, asegúrate de que esté habilitada a través de Excel Options → Customize Ribbon.La celda vinculada no se actualiza
Asegúrate de que la referencia de celda esté escrita correctamente en la propiedad LinkedCell, sin errores tipográficos.El calendario aparece demasiado grande o demasiado pequeño
Cambia el tamaño del selector de fecha arrastrando sus bordes para que se ajuste mejor a tu diseño.La fecha no se muestra correctamente en la celda
Da formato a la celda de destino como Fecha (clic derecho en la celda → Formato de celdas → Fecha) para una visualización coherente.
Preguntas frecuentes comunes sobre añadir un selector de fecha en Excel
¿Está disponible el selector de fecha en todas las versiones de Excel?
No, solo está disponible en Excel de 32 bits y puede que no esté presente en las versiones más recientes de 64 bits.¿Y si estoy usando Excel de 64 bits?
Puedes usar VBA para crear un selector de fecha personalizado o usar complementos de Excel de terceros.¿Puedo aplicar un selector de fecha a varias celdas?
No, cada selector de fecha debe vincularse a una celda específica. Puedes copiarlo y configurarlo para varias celdas individualmente.¿Funcionará el selector de fecha después de compartir el archivo?
Solo si el destinatario también tiene el control del selector de fecha instalado y habilitado en Excel.¿Puedo usar Validación de datos como alternativa?
Sí, usar Validación de datos con una lista de fechas es una solución básica, pero no proporciona un calendario interactivo.¿Cómo grabar la pantalla en Mac?
Para grabar la pantalla en un Mac, puedes usar Trupeer AI. Te permite capturar toda la pantalla y ofrece funciones de IA como añadir avatares de IA, añadir voz en off, hacer zoom in y out en el video. Con la función de traducción de video con IA de Trupeer, puedes traducir el video a más de 30 idiomas.¿Cómo añadir un avatar de IA a una grabación de pantalla?
Para añadir un avatar de IA a una grabación de pantalla, tendrás que usar una herramienta de grabación de pantalla con IA. Trupeer AI es una herramienta de grabación de pantalla con IA, que te ayuda a crear videos con múltiples avatares y también te ayuda a crear tu propio avatar para el video.¿Cómo grabar la pantalla en Windows?
Para grabar la pantalla en Windows, puedes usar la barra de juegos integrada (Windows + G) o una herramienta avanzada de IA como Trupeer AI para funciones más avanzadas como avatares de IA, voz en off, traducción, etc.¿Cómo añadir voz en off a un video?
Para añadir voz en off a los videos, descarga la extensión de Chrome de trupeer ai. Una vez registrado, sube tu video con voz, elige la voz en off deseada de trupeer y exporta tu video editado.¿Cómo hago zoom en una grabación de pantalla?
Para acercar el zoom durante una grabación de pantalla, usa los efectos de zoom en Trupeer AI, que te permiten acercar y alejar el zoom en momentos específicos, mejorando el impacto visual del contenido de tu video.
Lecturas sugeridas
Generador de documentación técnica
Software de base de conocimientos
Cómo habilitar la regla en Microsoft Excel
Cómo mantener visible la fila superior en Microsoft Excel
Cómo insertar una nueva hoja de cálculo en Microsoft Excel
Tutoriales relacionados

