

So ändern Sie den Standard-Branch in GitHub
Erfahren Sie, wie Sie den Standard-Branch in Ihrem GitHub-Repository ganz einfach ändern. Folgen Sie dieser Schritt-für-Schritt-Anleitung, um einen neuen Main-Branch festzulegen, ohne Daten zu verlieren.
Schritt-für-Schritt-Anleitung: So ändern Sie den Standard-Branch in GitHub
Schritt 1
Navigieren Sie zu Ihrem Repository und klicken Sie oben im Repository auf die Registerkarte 'Settings'.

Schritt 2
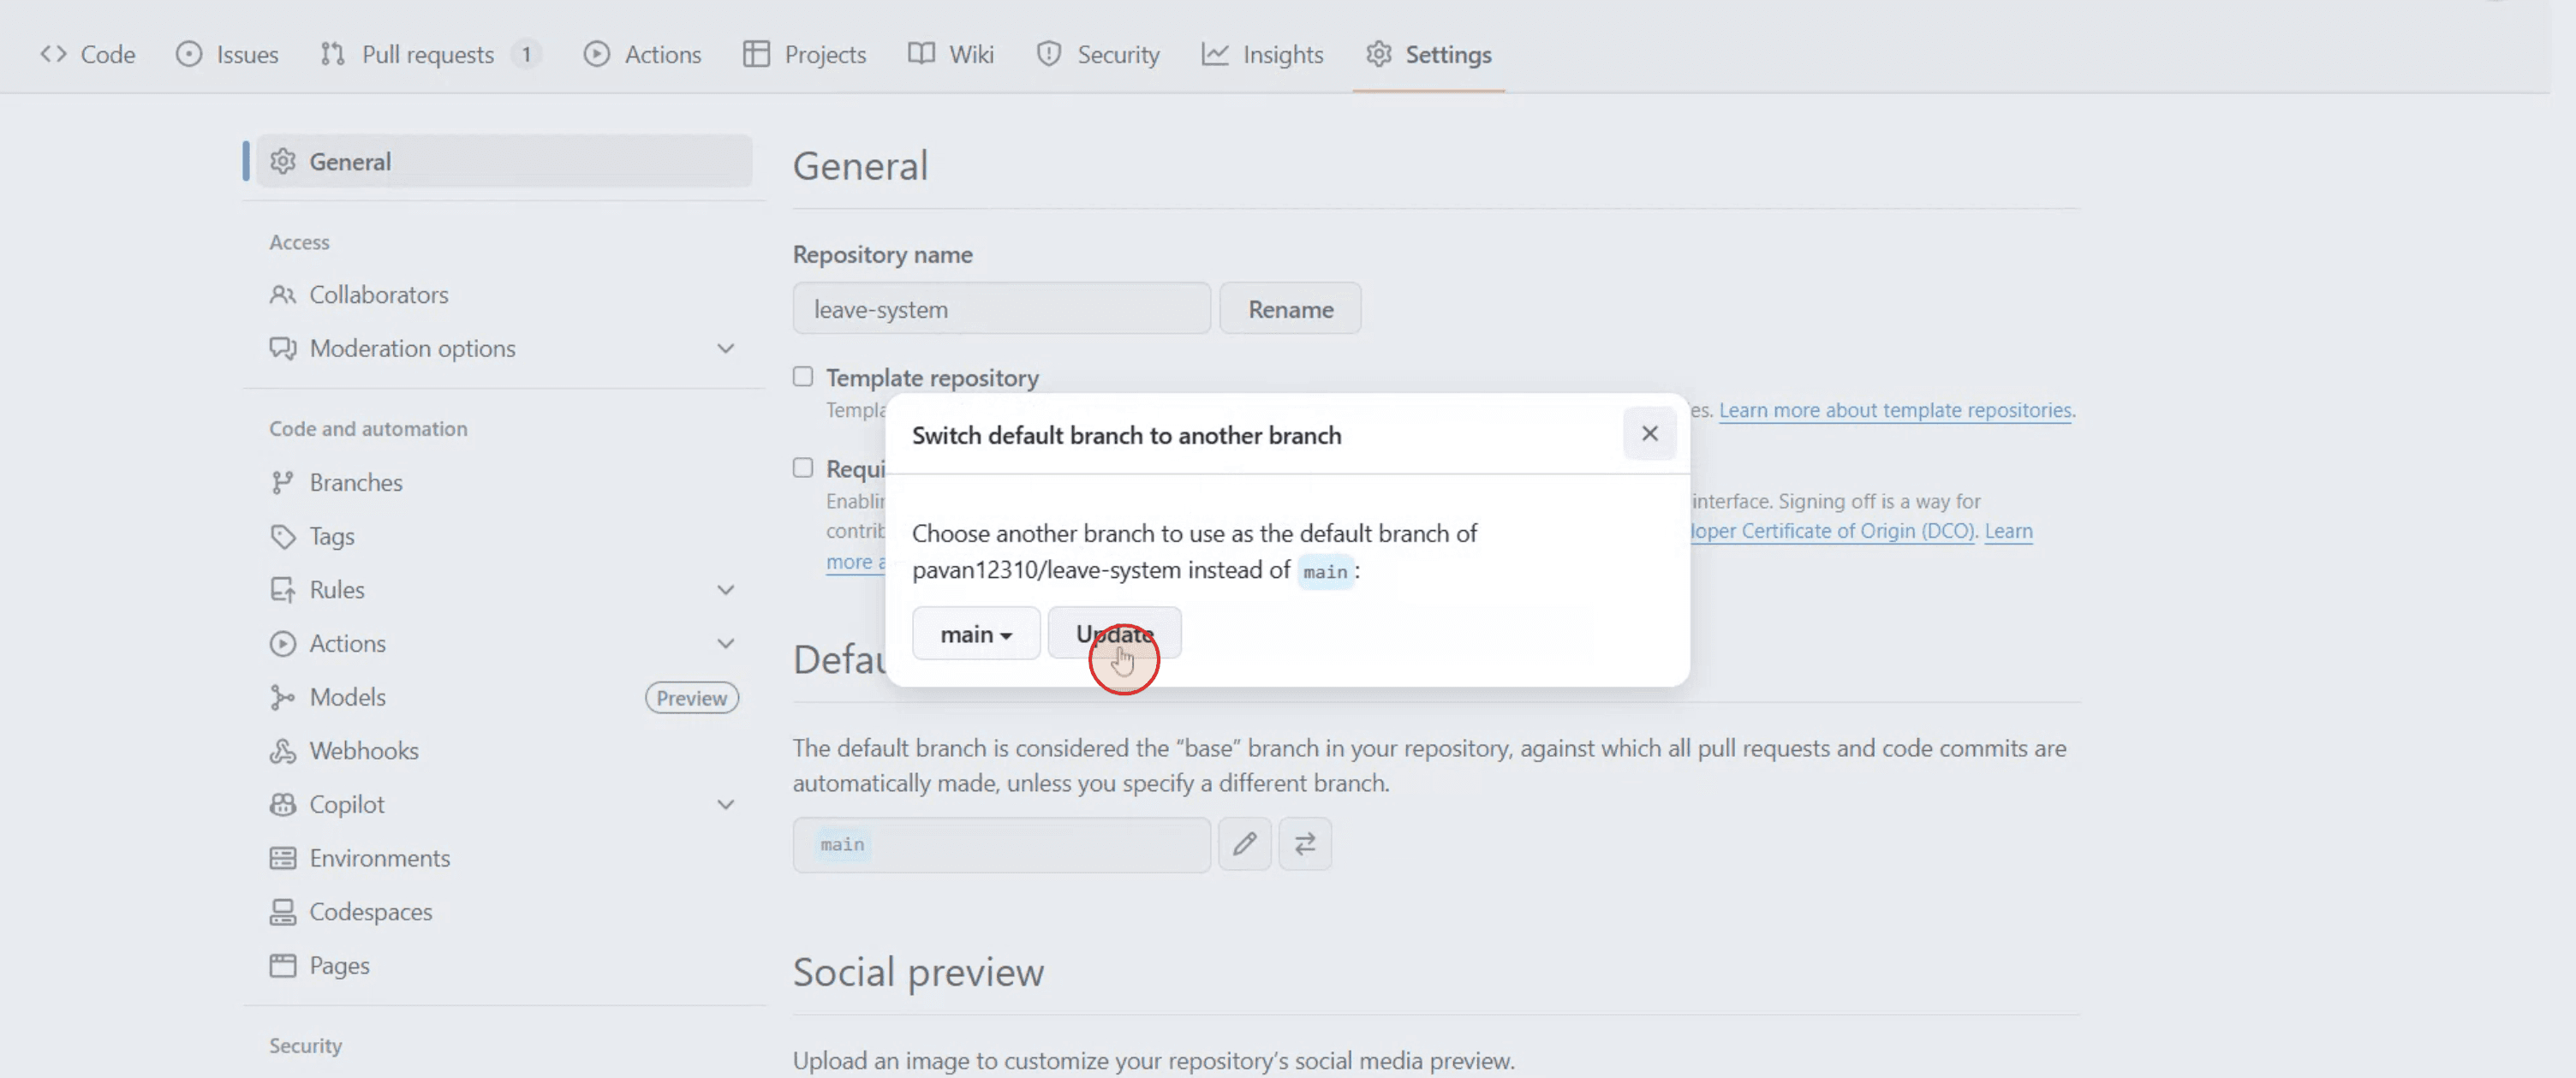
Klicken Sie im Abschnitt 'Default branch' auf die Schaltfläche, mit der Sie zu einem anderen Branch wechseln können.

Schritt 3
Klicken Sie auf 'Update', um die Änderung zu bestätigen.
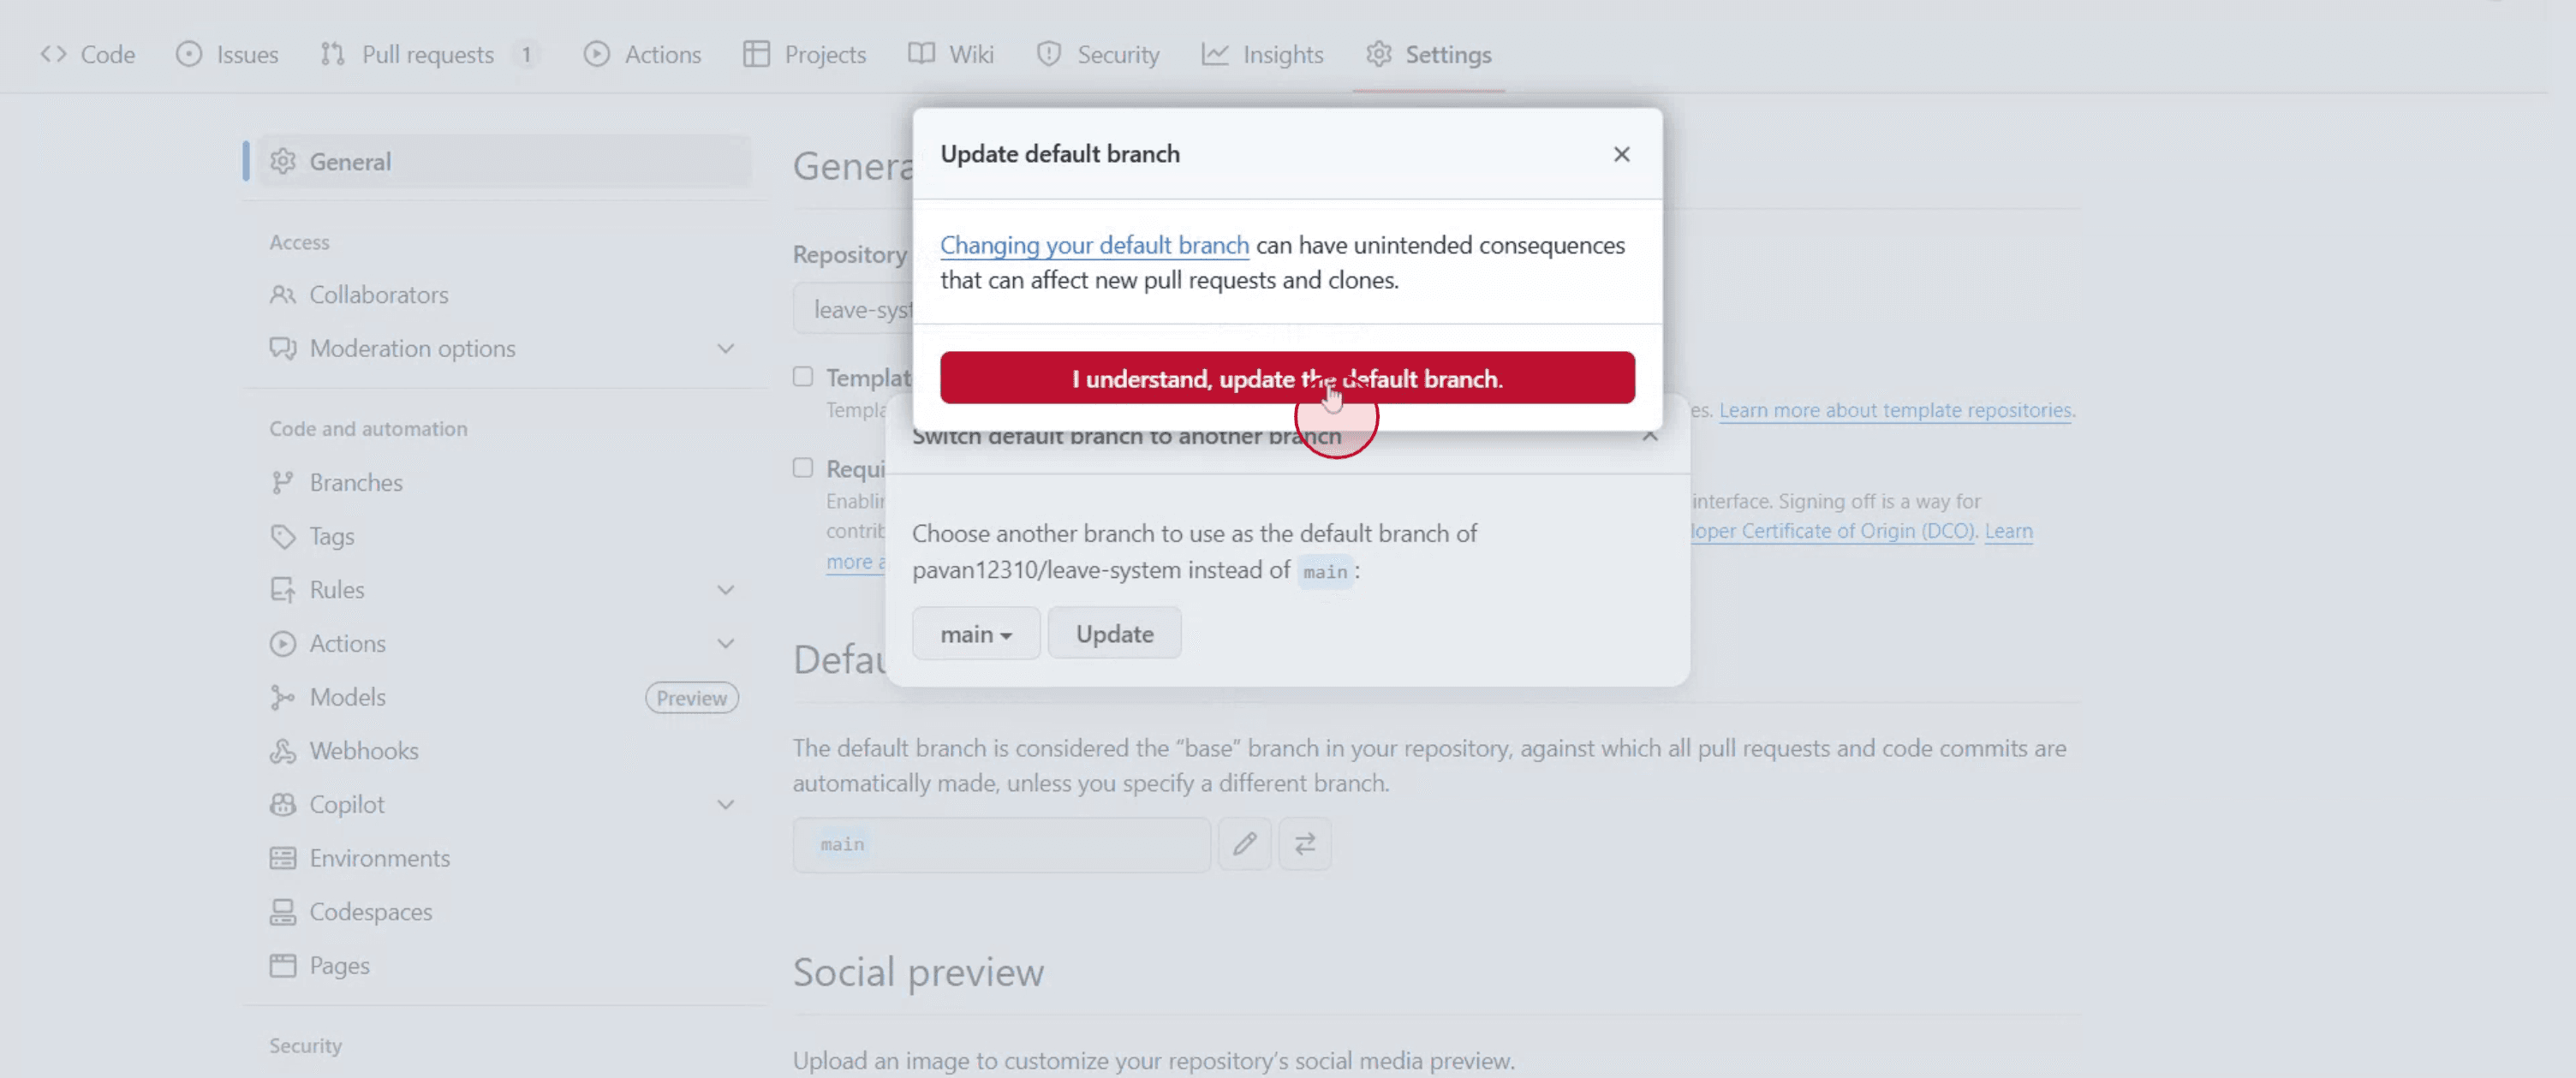
Schritt 4
Bestätigen Sie die Aktion, indem Sie auf 'I understand, update the default branch' klicken.
Profi-Tipps zum Ändern des Standard-Branches in GitHub
Bei GitHub anmelden
Gehen Sie zu github.com und melden Sie sich bei Ihrem Konto an.Zu Ihrem Repository navigieren
Öffnen Sie das Repository, in dem Sie den Standard-Branch ändern möchten.Klicken Sie auf den Tab „Einstellungen“
Klicken Sie im oberen Menü Ihres Repos auf „Einstellungen“. Wenn Sie ihn nicht sehen, haben Sie möglicherweise keine Administratorrechte.Gehen Sie zum Abschnitt „Branches“
Klicken Sie in der linken Seitenleiste unter der Kategorie „Code und Automatisierung“ auf „Branches“.Den Standard-Branch ändern
Klicken Sie im Abschnitt „Standard-Branch“ auf das Stift-Symbol (Bearbeiten) neben dem aktuellen Standard-Branch.Einen neuen Branch auswählen
Wählen Sie im Dropdown-Menü den Branch aus, den Sie als neuen Standard festlegen möchten.Änderung bestätigen
Nachdem Sie den neuen Branch ausgewählt haben, klicken Sie auf „Aktualisieren“ und bestätigen Sie Ihre Auswahl im Popup-Dialog.
Häufige Fehlerquellen und wie man sie vermeidet
Branch noch nicht erstellt
Sie können einen Branch nur dann als Standard festlegen, wenn er bereits existiert. Erstellen Sie den neuen Branch zuerst, falls nötig.Berechtigungsprobleme
Nur Nutzer mit Administratorrechten für das Repository können den Standard-Branch ändern.Pull Requests und Workflows können fehlschlagen
Das Ändern des Standard-Branches kann offene Pull Requests oder CI/CD-Pipelines beeinflussen. Aktualisieren Sie diese Pfade bei Bedarf.Den alten Standard-Branch versehentlich löschen
Löschen Sie den alten Standard-Branch erst, nachdem Sie alle Verweise in anderen Tools oder in den Klonen Ihrer Mitarbeitenden aktualisiert haben.Verwirrung bei Mitarbeitenden
Informieren Sie Ihr Team über die Änderung, um Missverständnisse oder das Pushen auf den falschen Branch zu vermeiden.
Häufige Fragen zum Ändern des Standard-Branches in GitHub
Wie ändere ich den Standard-Branch in GitHub?
Gehe in den Einstellungen deines Repos zu Branches, klicke auf das Bearbeiten-Symbol, wähle einen neuen Branch aus und bestätige.Kann ich den Standard-Branch später wieder ändern?
Ja, du kannst ihn jederzeit mit derselben Methode erneut ändern.Wird beim Ändern des Standard-Branches der alte gelöscht?
Nein, der alte Branch bleibt bestehen, es sei denn, du löschst ihn manuell.Funktionieren vorhandene Pull Requests weiterhin?
Pull Requests werden nicht automatisch verschoben. Möglicherweise musst du sie manuell rebasen oder neu ausrichten.Kann ich das in der GitHub-Mobile-App machen?
Nein, das Ändern des Standard-Branches ist nur in der GitHub-Weboberfläche verfügbar.Wie nehme ich den Bildschirm auf dem Mac auf?
Um den Bildschirm auf einem Mac aufzunehmen, kannst du Trupeer AI verwenden. Es ermöglicht dir, den gesamten Bildschirm aufzunehmen, und bietet KI-Funktionen wie das Hinzufügen von KI-Avataren, Sprachaufnahmen sowie das Hinein- und Herauszoomen im Video. Mit der KI-Videoübersetzungsfunktion von Trupeer kannst du das Video in über 30 Sprachen übersetzen.Wie füge ich einer Bildschirmaufnahme einen KI-Avatar hinzu?
Um einer Bildschirmaufnahme einen KI-Avatar hinzuzufügen, brauchst du ein KI-Tool zur Bildschirmaufnahme. Trupeer AI ist ein KI-Tool zur Bildschirmaufnahme, das dir hilft, Videos mit mehreren Avataren zu erstellen, und dir außerdem dabei hilft, deinen eigenen Avatar für das Video zu erstellen.Wie nehme ich den Bildschirm unter Windows auf?
Um unter Windows eine Bildschirmaufnahme zu machen, kannst du die integrierte Game Bar (Windows + G) oder ein fortschrittliches KI-Tool wie Trupeer AI für erweiterte Funktionen wie KI-Avatare, Sprachaufnahmen, Übersetzung usw. verwenden.Wie füge ich einem Video eine Sprachaufnahme hinzu?
Um Sprachaufnahmen zu Videos hinzuzufügen, lade die Trupeer-AI-Chrome-Erweiterung herunter. Nach der Registrierung lädst du dein Video mit Ton hoch, wählst die gewünschte Sprachaufnahme von Trupeer aus und exportierst dein bearbeitetes Video.Wie zoome ich in einer Bildschirmaufnahme hinein?
Um während einer Bildschirmaufnahme hineinzuzoomen, verwende die Zoom-Effekte in Trupeer AI, mit denen du an bestimmten Stellen hinein- und herauszoomen kannst, um die visuelle Wirkung deines Videoinhalts zu verstärken.
Andere fragen auch
Generator für technische Dokumentation
Wie man ein GitHub-Repository per Link teilt
Wie man dein GitHub-Profil teilt
Verwandte Tutorials

