

如何在 GitHub 中删除分支
了解如何通过网站和 Git 命令行在 GitHub 中删除分支。按照这份分步指南安全地删除本地和远程分支。
要查找 Zoom 会议 ID,您可以在 Zoom 应用程序、会议邀请或会议链接中找到它。如果您是主持人,可以在 Zoom 桌面应用或网页门户的“会议”选项卡中找到它。作为参会者,ID 会嵌入在会议链接或邀请中。您也可以通过点击“信息”图标在会议窗口本身中找到它。
作为主持人查找会议 ID:
在 Zoom 桌面应用中:打开 Zoom 应用并前往“会议”选项卡。 找到您已安排的会议并点击它以查看详细信息,包括会议 ID。 在 Zoom 网页门户中:登录 Zoom 网页门户。 导航到“会议”,然后到“即将举行的会议”。 选择会议以查看其详细信息,包括 ID。 在会议中:点击会议窗口左上角的“信息”图标(通常是圆圈中的“i”)。 将显示会议 ID
作为参会者查找会议 ID:
从会议链接中:会议 ID 通常包含在 Zoom 会议 URL 中的 /j/ 之后。例如,在 https://zoom.us/j/1234567890 中,会议 ID 是 1234567890。从会议邀请中:无论是通过电子邮件还是日历发送的会议邀请,通常都会包含会议 ID。在会议中:点击会议窗口左上角的“信息”图标(通常是圆圈中的“i”)。会议 ID 将显示。
查找个人会议 ID(PMI):
在 Zoom 桌面应用中:点击“会议”选项卡。 点击右上角的“个人会议 ID”。 将显示您的 PMI 和邀请链接。 在 Zoom 网页门户中:登录 Zoom 网页门户。 前往“会议”,然后到“个人会议室”。 将显示您的 PMI 和邀请链接。 在会议中:点击会议窗口左上角的“信息”图标。 将显示 PMI。
分步指南:如何在 GitHub 中删除分支
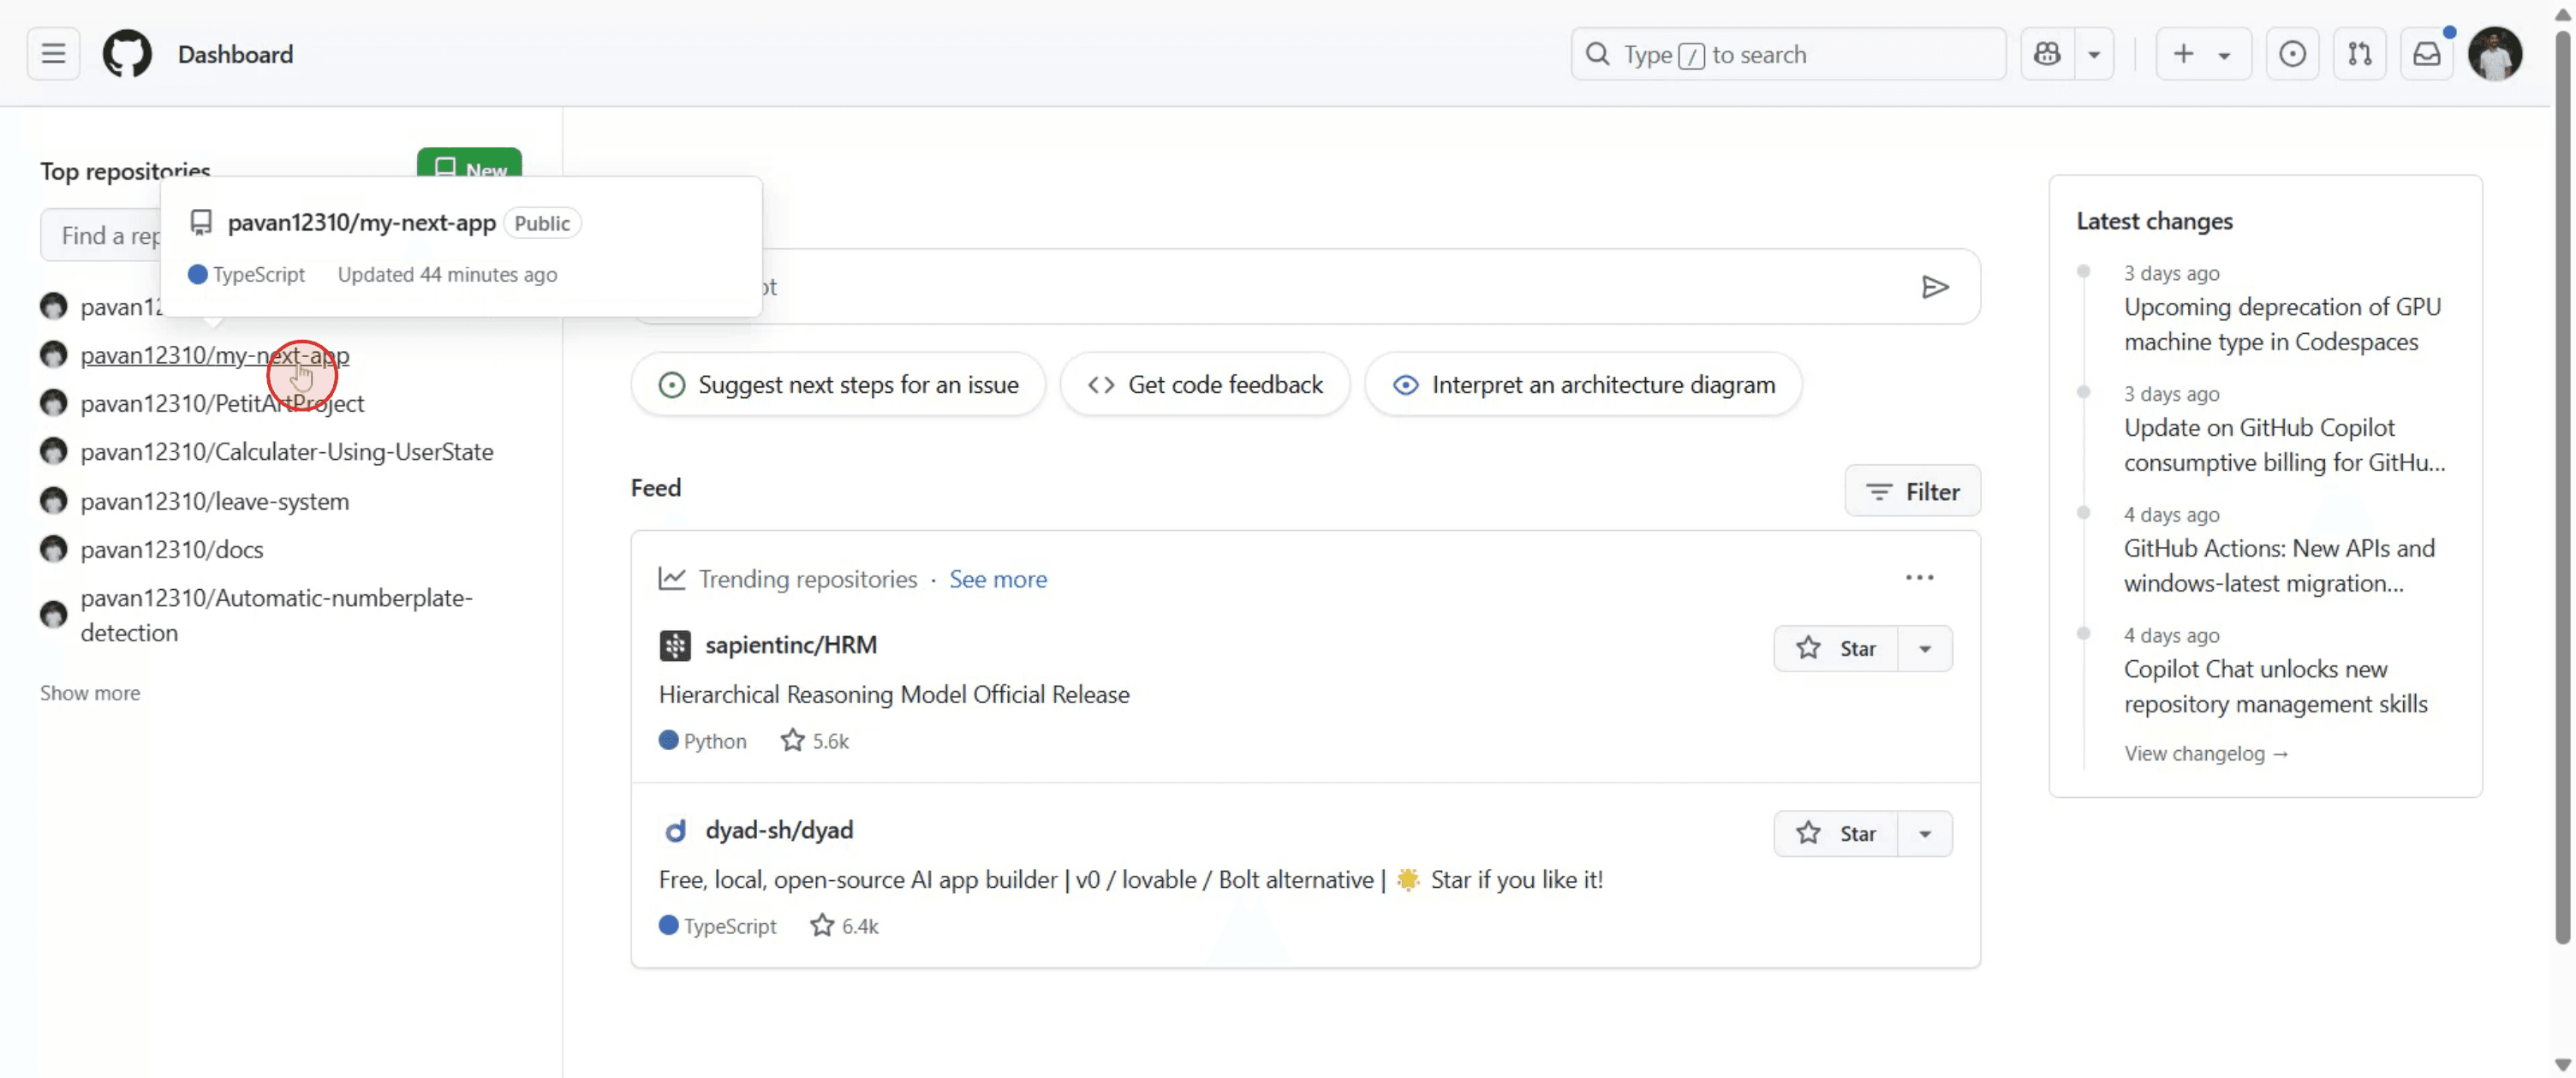
步骤 1
导航到您想要打开的仓库。
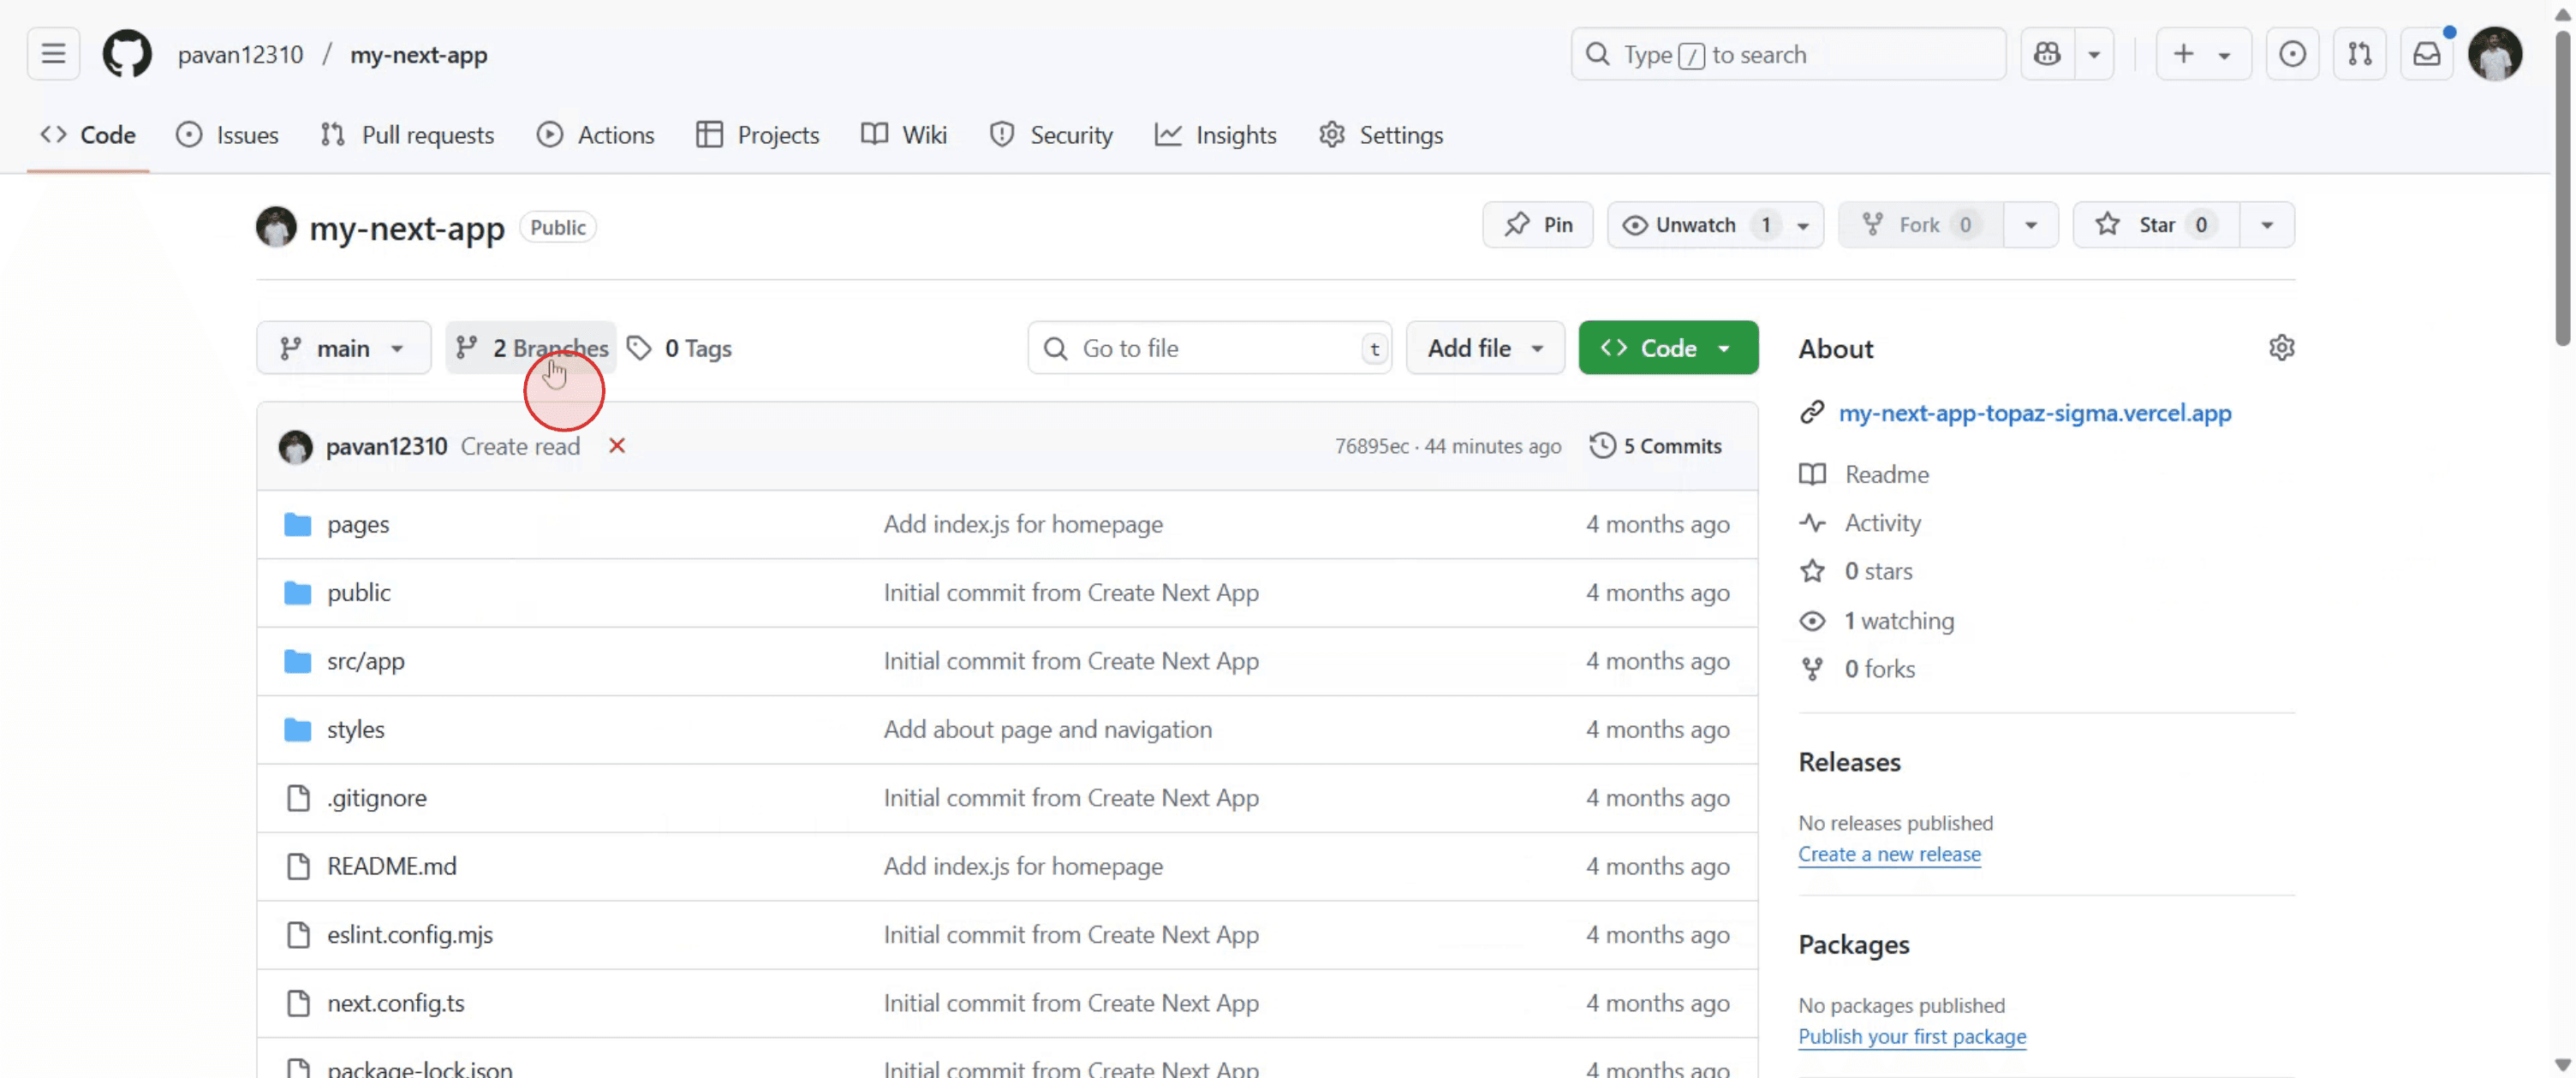
步骤 2
选择“分支”以打开。
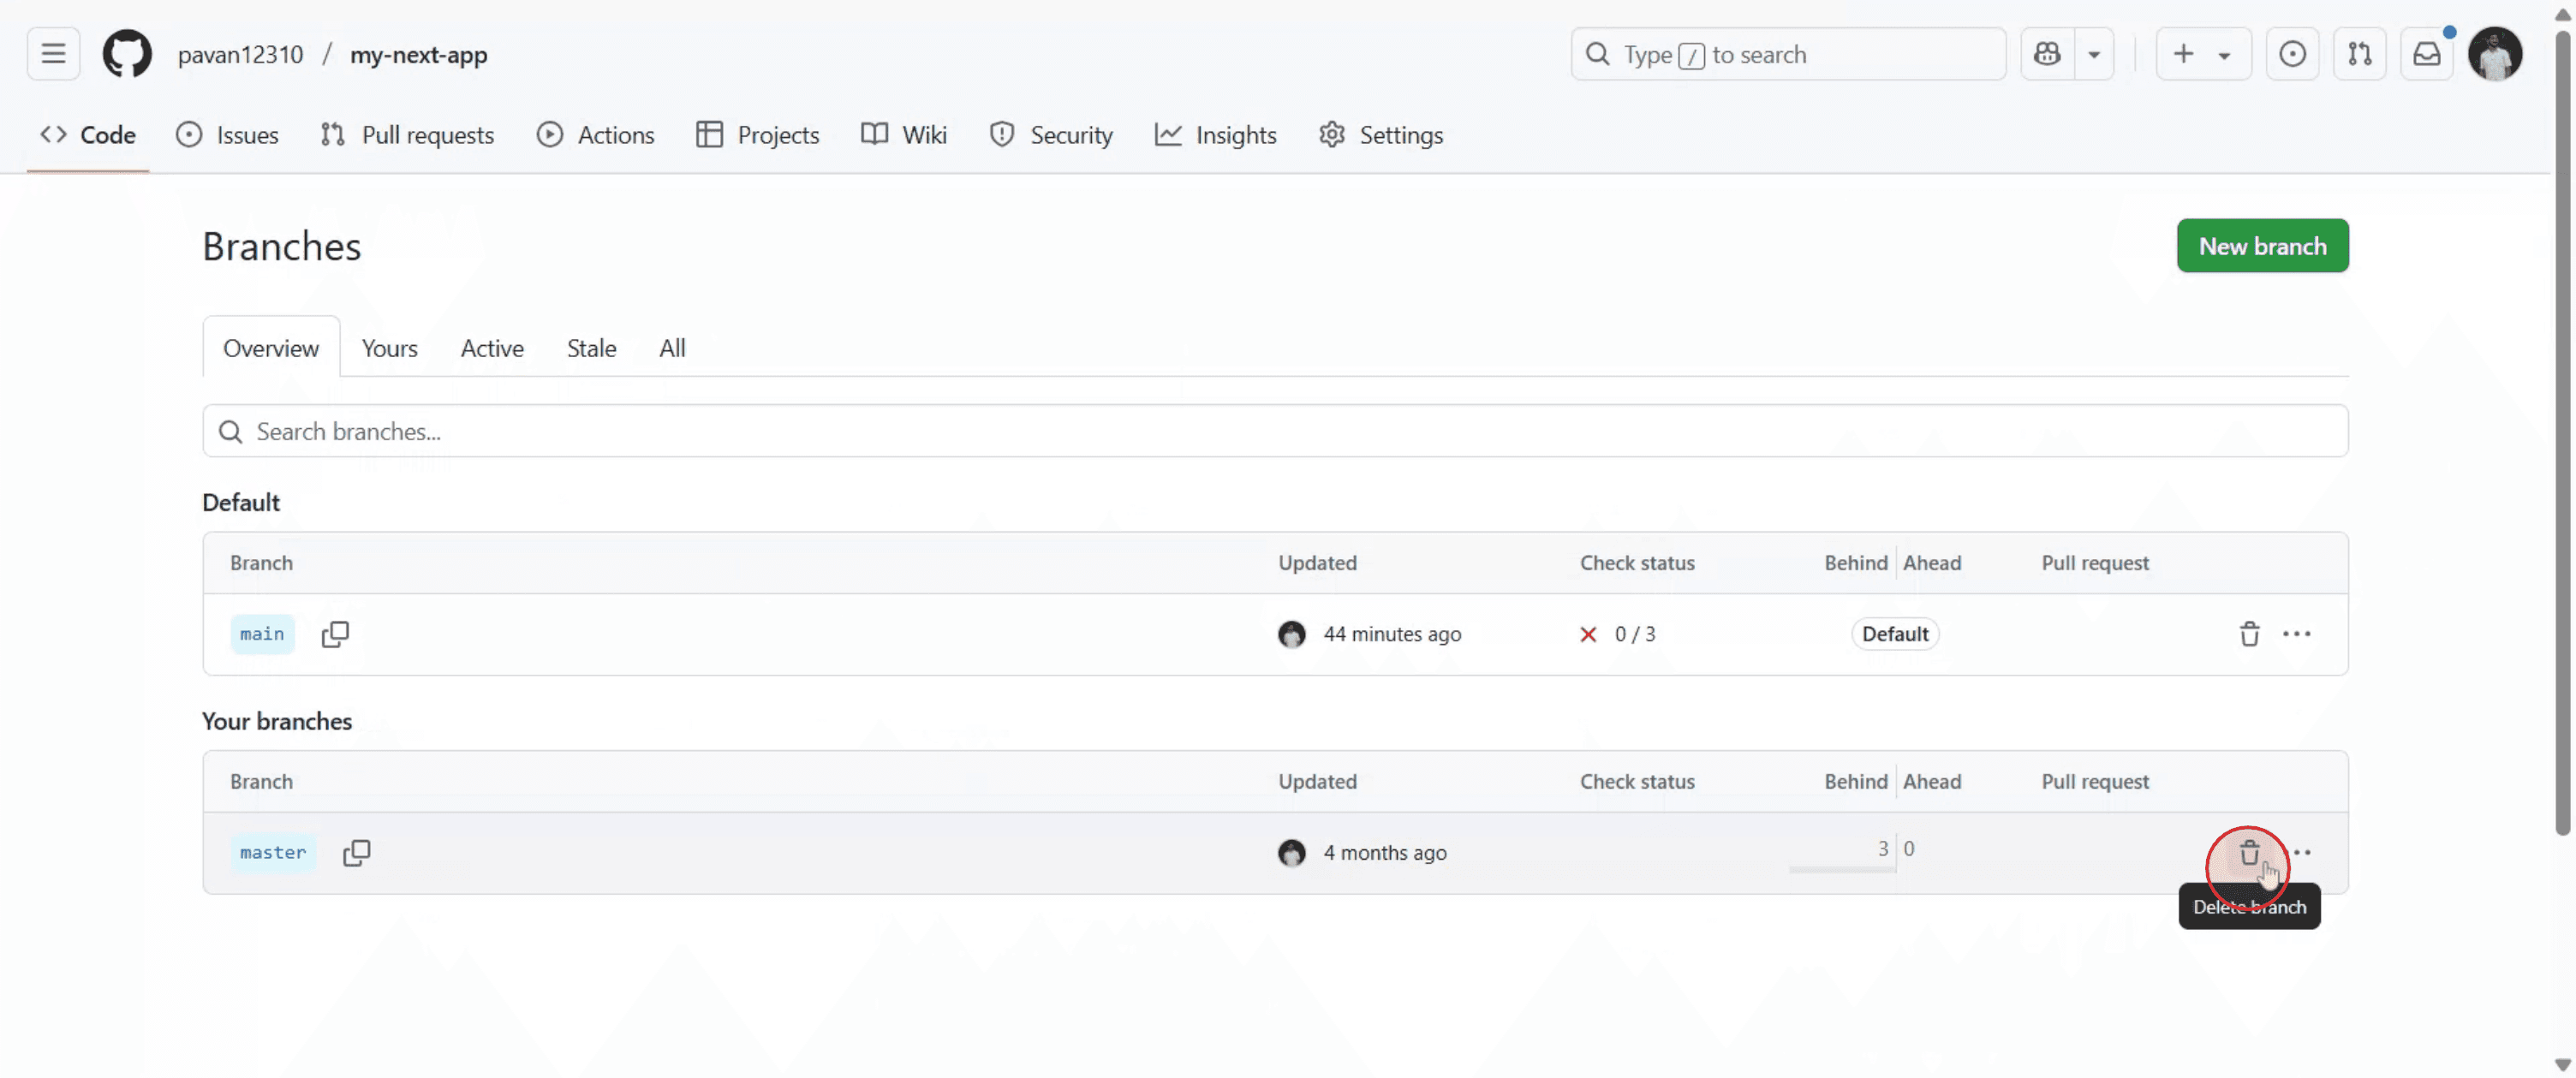
步骤 3
转到您想要删除的分支并点击垃圾桶图标。
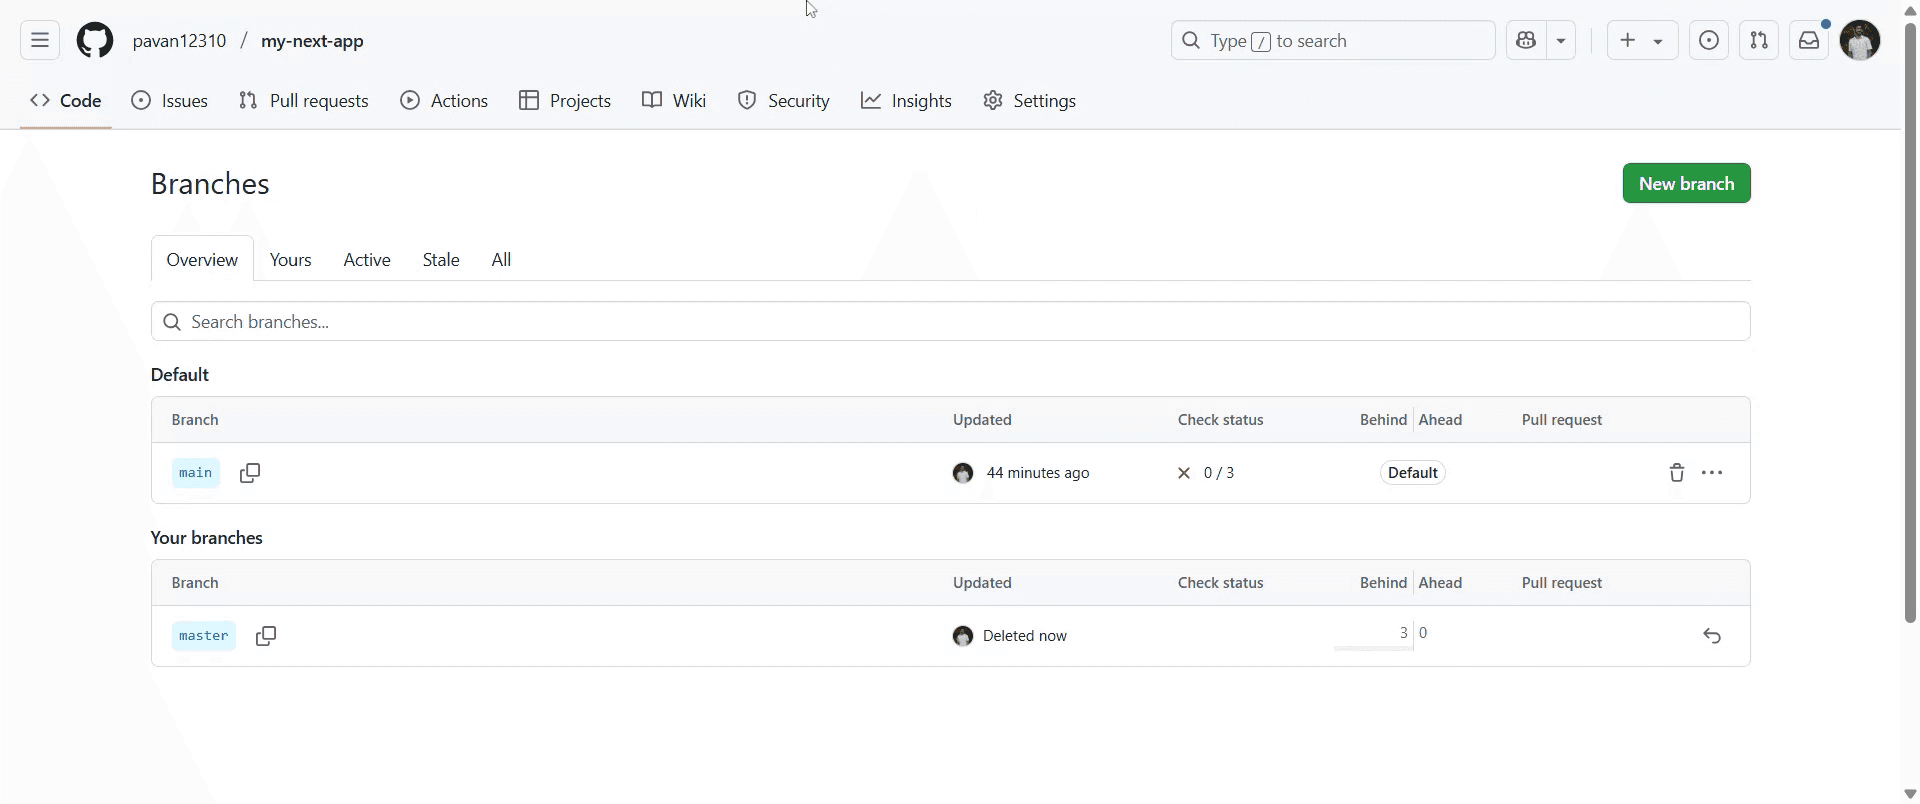
步骤 4
删除分支后,它会自动更新。
在 GitHub 中删除分支的专业提示
登录 GitHub
访问 github.com 并使用你的凭据登录。导航到仓库
打开包含你要删除的分支的仓库。进入“Branches”部分
点击“Branches”选项卡。你会在仓库顶部附近找到它,就在仓库名称和导航菜单下方。找到要删除的分支
在“Active branches”部分下找到你要删除的分支。确保它不是默认分支。点击垃圾桶图标
在分支名称右侧,点击垃圾桶图标以删除该分支。确认删除
将会出现确认提示。点击“Delete”以永久从仓库中移除该分支。
常见陷阱及其避免方法
尝试删除默认分支
你无法删除默认分支。如有需要,先在 Settings > Branches 中更改默认分支。删除仍在使用或仍需要的分支
在删除之前,仔细检查该分支的内容,并确认它已不再需要,以避免丢失有价值的工作。没有所需权限
你需要写入或管理员权限才能删除分支。如果你看不到垃圾桶图标,请检查你的访问级别。忘记在本地删除分支
在 GitHub 上删除分支不会将其从你的本地机器中移除。在本地运行git branch -d branch-name来清理。误删错误的分支
在确认删除之前,一定要核实分支名称,尤其是在共享项目中。
关于删除 GitHub 分支的常见问题
我可以删除默认分支吗?
不可以,GitHub 不允许删除默认分支。如果需要删除,请先更改默认分支。删除分支会移除其代码吗?
会,如果之前没有合并到其他分支,分支及其提交将不再可访问。我可以恢复已删除的分支吗?
不能直接恢复。如果你知道提交哈希,可以使用它进行恢复,但 GitHub 不提供“回收站”功能。我如何在本地删除分支?
在终端中使用命令git branch -d branch-name或git branch -D branch-name。我可以从拉取请求中删除分支吗?
可以,如果分支已不再需要,GitHub 会在合并拉取请求后提供删除它的选项。如何在 mac 上录屏?
要 在 Mac 上录屏,你可以使用 Trupeer AI。它可以让你录制整个屏幕,并提供诸如添加 AI 虚拟形象、添加旁白、在视频中放大和缩小等 AI 功能。借助 trupeer 的 AI 视频翻译功能,你可以将视频翻译成 30 多种语言。如何为屏幕录制添加 AI 虚拟形象?
要为屏幕录制添加 AI 虚拟形象,你需要使用一个 AI 屏幕录制工具。Trupeer AI 是一款 AI 屏幕录制工具,可帮助你创建包含多个虚拟形象的视频,还能帮助你为视频创建自己的虚拟形象。如何在 windows 上录屏?
要在 Windows 上录屏,你可以使用内置的 Game Bar(Windows + G),或像 Trupeer AI 这样的高级 AI 工具,以获得 AI 虚拟形象、旁白、翻译等更高级的功能。如何为视频添加旁白?
要为视频添加旁白,请下载 trupeer ai chrome 扩展程序。注册后,上传带有声音的视频,从 trupeer 中选择所需的旁白,然后导出编辑后的视频。如何在屏幕录制中放大?
要在屏幕录制过程中放大,请使用 Trupeer AI 中的缩放效果,它允许你在特定时刻放大和缩小,从而增强视频内容的视觉效果。

