
كيفية جعل الخلفية شفافة في كانفا – دليل سهل
تعرّف على كيفية جعل الخلفيات شفافة في Canva باستخدام أداة إزالة الخلفية أو خيارات التصدير. مثالي للشعارات وملفات PNG والتراكبات.
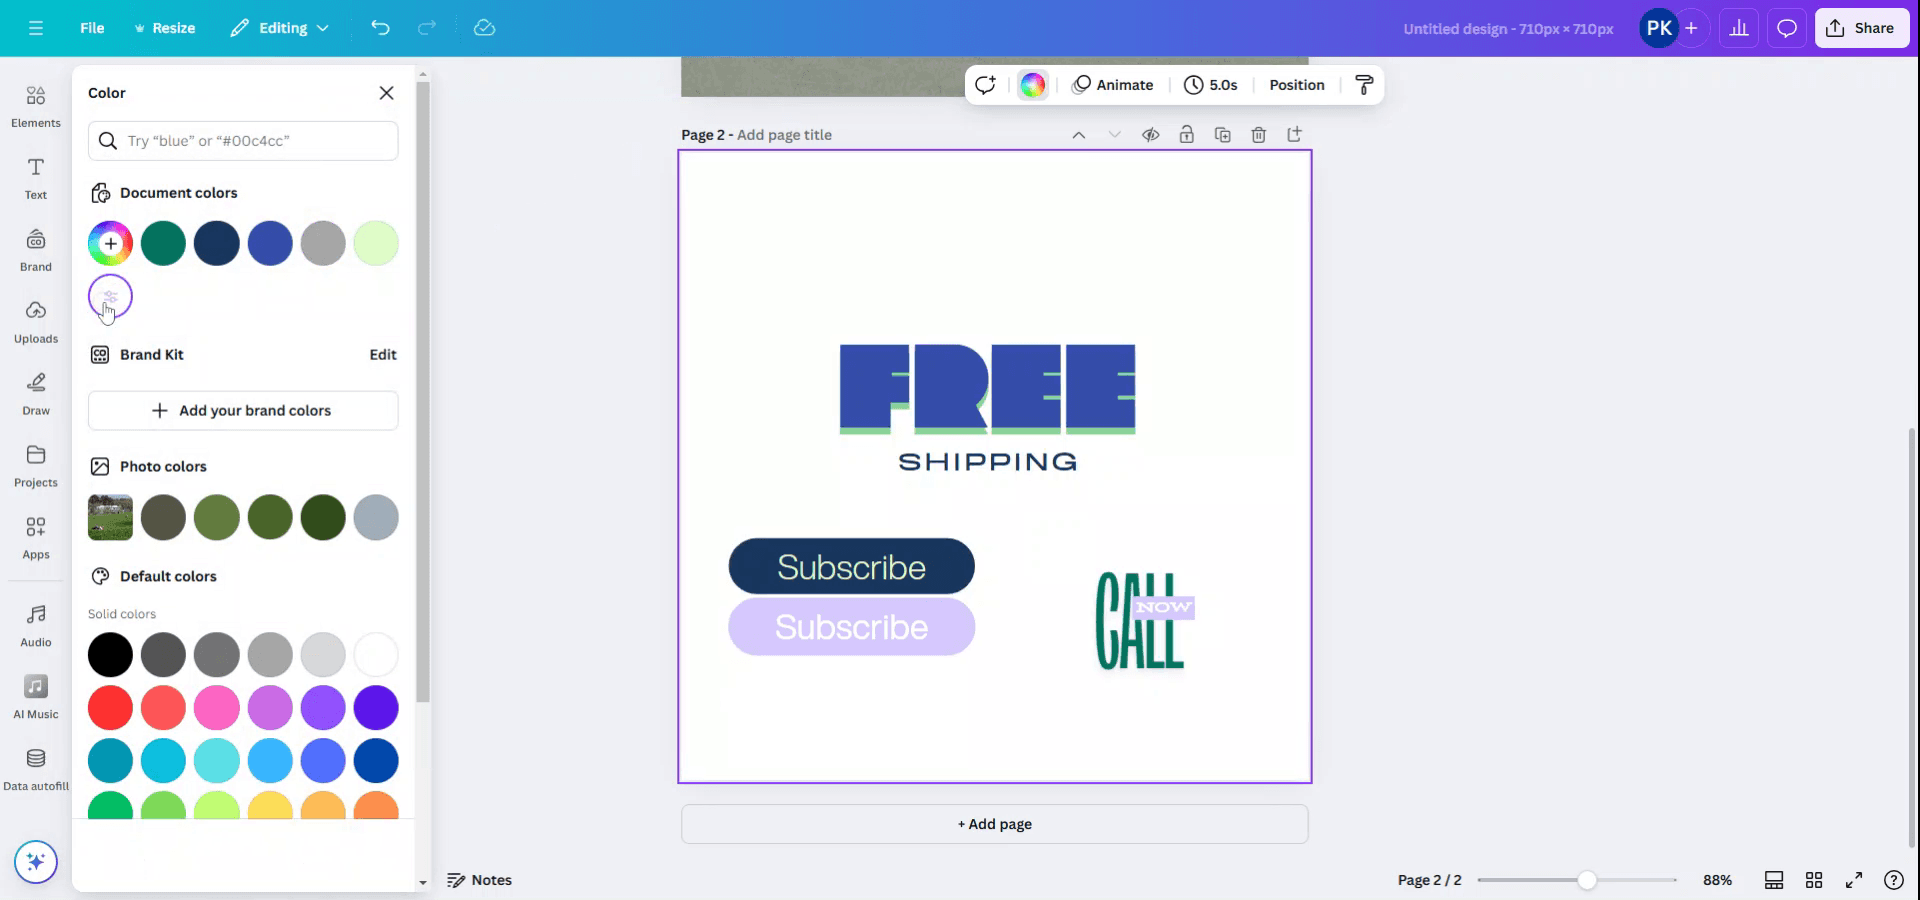
يقدم هذا الدليل عملية مباشرة لجعل خلفية تصميمك شفافة في Canva.
سواء كنت تعمل على صورة أو لونًا صلبًا، اتبع هذه الخطوات لتحقيق تأثير الشفافية المطلوب بسهولة.
يمكنك إزالة خلفية الصورة وتصديرها مع الشفافية باستخدام أداة إزالة الخلفية (BG Remover) في Canva Pro. إليك دليلًا خطوة بخطوة:
الطريقة 1: إزالة الخلفية باستخدام BG Remover
1. حمّل صورتك أو حدّدها
افتح مشروعك في Canva وقم بتحميل الصورة التي تريد تعديلها أو اخترها.
2. استخدم أداة إزالة الخلفية
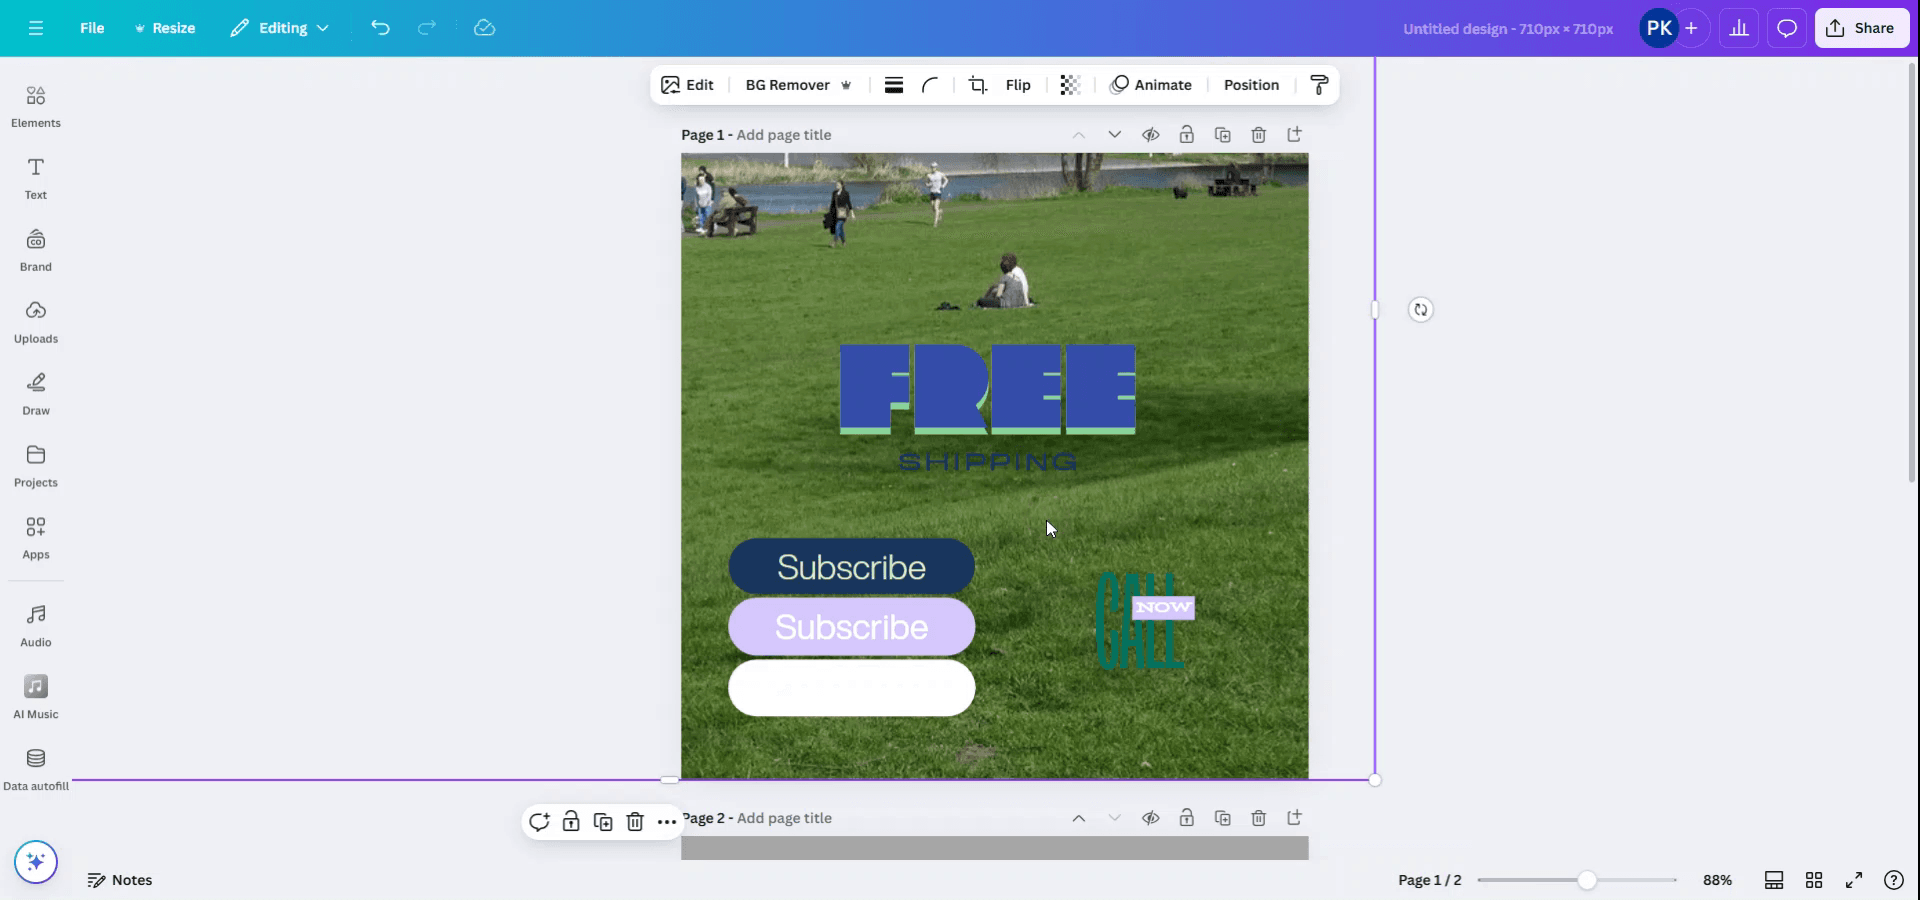
انقر على الصورة.
في شريط الأدوات العلوي، اختر "تعديل الصورة."
ضمن "الأدوات،" اختر "BG Remover."
سيقوم Canva بإزالة الخلفية تلقائيًا.
3. حمّلها بصيغة PNG شفافة
انقر "مشاركة" > "تنزيل."
اضبط نوع الملف على PNG.
ضع علامة في المربع الخاص بـ "خلفية شفافة."
انقر "تنزيل."
الطريقة 2: ضبط شفافية العنصر (لتأثير التلاشي)
1. حدّد العنصر
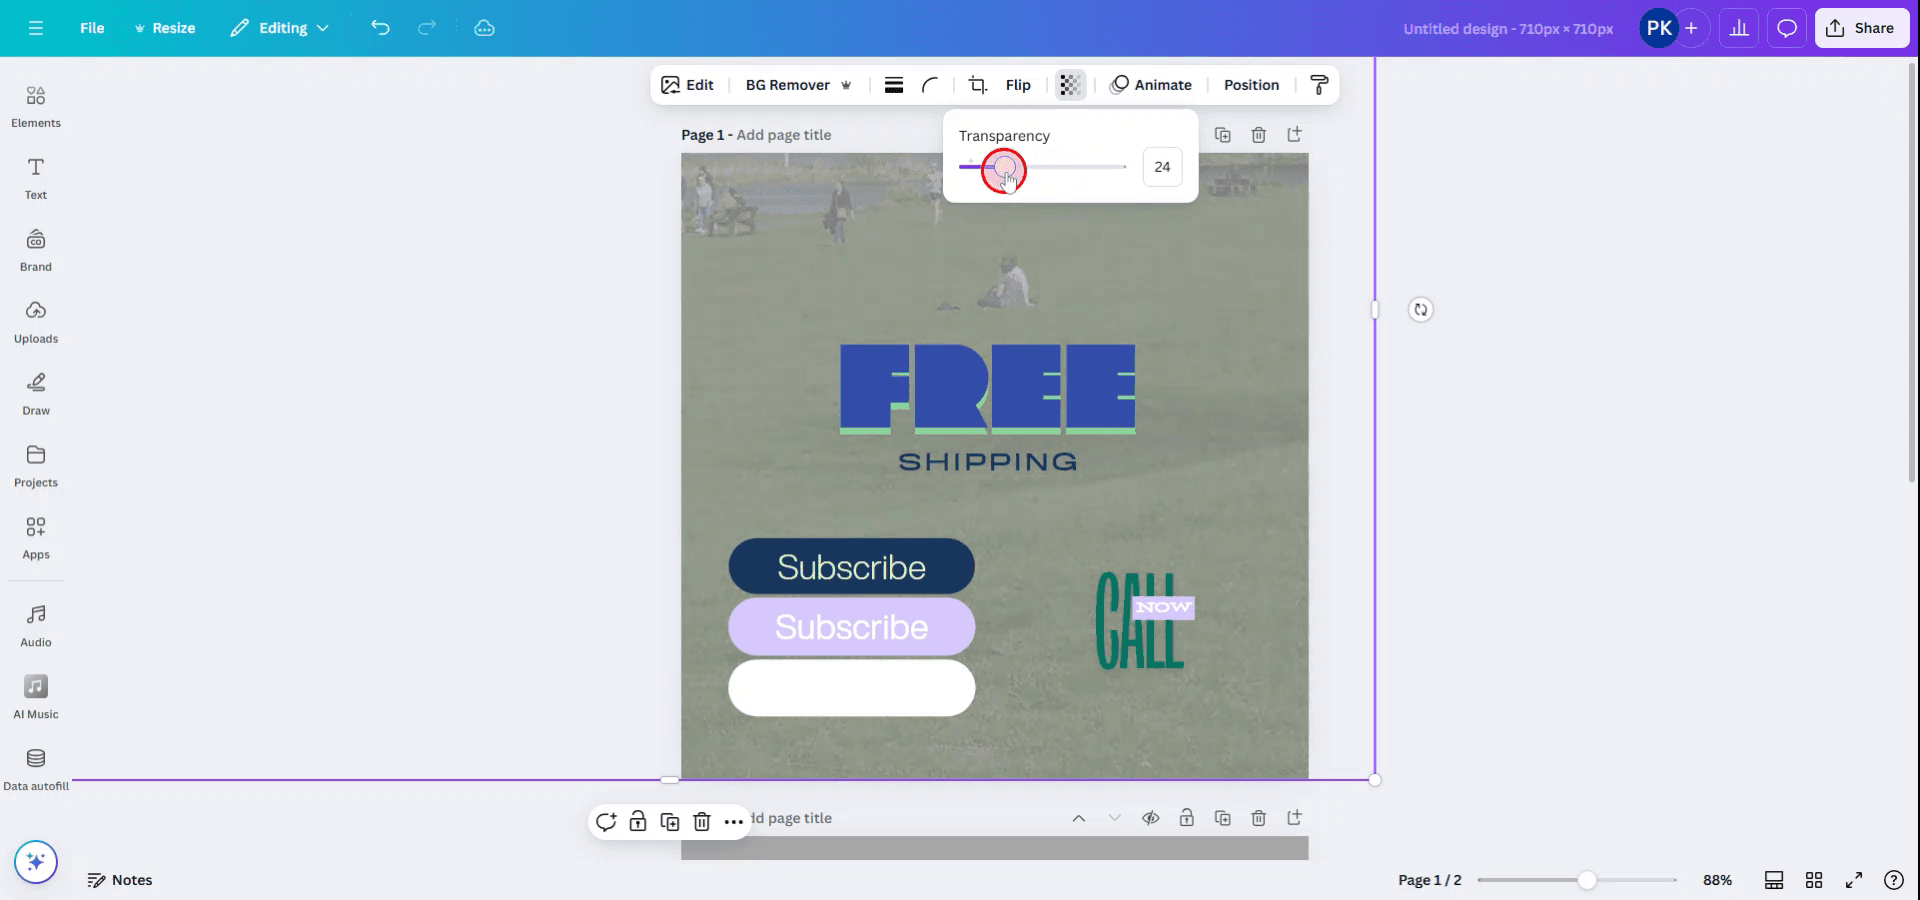
انقر على الصورة أو النص أو الشكل الذي تريد جعله شبه شفاف.
2. استخدم شريط الشفافية
ابحث عن أيقونة مربعات الشطرنج (الشفافية) في شريط الأدوات العلوي.
اضبط الشريط أو أدخل قيمة محددة (مثل 50%).
هذه الطريقة لا تزيل الخلفية، بل تقلل فقط من وضوحها.
دليل خطوة بخطوة: كيفية جعل الخلفية شفافة في Canva
الطريقة 1
الخطوة 1
لجعل الخلفية شفافة في Canva، ابدأ بتحديد صورتك إذا كانت تعمل كخلفية.
الخطوة 2
انقر على الصورة لتحديدها. ثم ابحث عن خيار "الشفافية" وانقر عليه في شريط الأدوات بالأعلى.

الخطوة 3
استخدم الشريط الظاهر لضبط مستوى الشفافية حسب رغبتك.
الطريقة 2
الخطوة 1
إذا كانت خلفيتك لونًا صلبًا وتريد تغيير شفافيته، فحدّد خلفية اللون الصلب.
الخطوة 2
لإزالة لون الخلفية أو جعله شفافًا، ما عليك سوى تغيير اللون إلى الأبيض بالنقر على خيار لون الخلفية.
نصائح احترافية لجعل الخلفية شفافة في Canva
استخدم خيار الخلفية الشفافة (Canva Pro): بعد الانتهاء من تصميمك، انقر على زر "Download" في الزاوية العلوية اليمنى. اختر "PNG" كتنسيق الملف، ثم ضع علامة في المربع الذي يقول "Transparent background" لإزالة الخلفية. هذا الخيار متاح فقط لمستخدمي Canva Pro.
إزالة الخلفية من الصور: حدّد صورة، ثم انقر على "Edit Image" في شريط الأدوات، واختر "Background Remover" لإزالة الخلفية تلقائيًا. وهذه أيضًا ميزة من Canva Pro.
أنشئ خلفية شفافة من الصفر: ابدأ تصميمًا جديدًا بمقاس مخصص وتأكد من أن اللوحة نفسها لا تحتوي على لون خلفية (وسيكون ذلك شفافًا افتراضيًا). أضف العناصر (النصوص، الرسومات، إلخ) ثم حمّل التصميم مع خيار الخلفية الشفافة.
استخدم عناصر شفافة: إذا كنت تضيف عناصر، فتأكد من استخدام صور PNG بخلفيات شفافة. يمكنك العثور عليها بالبحث عن "transparent" في شريط البحث عن الصور.
تحقق من تصميمك قبل التنزيل: اعرض معاينة التصميم للتأكد من عدم بقاء أي لون خلفية أو عناصر غير مرغوب فيها ظاهرة. إذا رأيت خلفية، فانقر عليها واضغط مفتاح الحذف لإزالتها.
المشكلات الشائعة وكيفية تجنبها عند جعل الخلفية شفافة في Canva
استخدام تنسيق ملف خاطئ: التنزيل بصيغة JPG لا يدعم الشفافية.
الحل: اختر دائمًا تنسيق PNG للشفافية.عدم تحديد "Transparent Background": نسيان وضع علامة في مربع "Transparent background" سيؤدي إلى خلفية غير شفافة.
الحل: تأكد من تحديد خيار "Transparent background" عند التنزيل.إغفال خلفيات الصور: قد تحتوي بعض الصور على خلفية بيضاء أو ملونة.
الحل: استخدم أداة "Background Remover" للتأكد من أن الصورة شفافة بالكامل، أو استخدم صورًا بخلفيات شفافة.الخيار الشفاف متاح فقط في Canva Pro: ميزة الخلفية الشفافة متاحة فقط لمستخدمي Canva Pro.
الحل: إذا كنت تستخدم النسخة المجانية، فاستخدم أدوات خارجية مثل remove.bg لإزالة الخلفيات قبل رفعها إلى Canva.الحفظ بخلفية بيضاء: أحيانًا قد يحتوي التصميم على خلفية بيضاء أو غير مرغوب فيها، ويتم تنزيلها.
الحل: تحقّق جيدًا من عدم وجود خلفية من خلال النقر عليها وحذفها.
الأسئلة الشائعة حول جعل الخلفية شفافة في كانفا
كيف أجعل الخلفية شفافة في كانفا؟
نزّل تصميمك كملف PNG وحدّد مربع "خلفية شفافة" قبل النقر على "تنزيل."هل يمكنني جعل خلفية صورة شفافة في كانفا؟
نعم، انقر على الصورة، ثم انتقل إلى "تعديل الصورة"، واستخدم أداة "إزالة الخلفية" (متاحة لمستخدمي Canva Pro).هل يمكنني جعل خلفية غير بيضاء شفافة في كانفا؟
نعم، ببساطة حدّد الخلفية واحذفها. تأكد من التنزيل بصيغة PNG للحفاظ على الشفافية.هل أحتاج إلى Canva Pro لجعل الخلفية شفافة؟
نعم، خيار الخلفية الشفافة متاح فقط لمستخدمي Canva Pro.هل يمكنني استخدام صور شفافة في كانفا؟
نعم، يمكنك رفع صور PNG بخلفيات شفافة إلى كانفا واستخدامها في تصاميمك.كيف أسجّل الشاشة على ماك؟
لـ تسجيل الشاشة على جهاز Mac، يمكنك استخدام Trupeer AI. فهو يتيح لك التقاط الشاشة بالكامل ويوفّر إمكانيات ذكاء اصطناعي مثل إضافة أفاتارات بالذكاء الاصطناعي، وإضافة تعليق صوتي، وإضافة تكبير وتصغير داخل الفيديو. ومع ميزة ترجمة الفيديو بالذكاء الاصطناعي من Trupeer، يمكنك ترجمة الفيديو إلى أكثر من 30 لغة.كيف أضيف أفاتار بالذكاء الاصطناعي إلى تسجيل الشاشة؟
لإضافة أفاتار بالذكاء الاصطناعي إلى تسجيل الشاشة، ستحتاج إلى استخدام أداة تسجيل شاشة بالذكاء الاصطناعي. Trupeer AI هي أداة تسجيل شاشة بالذكاء الاصطناعي، تساعدك على إنشاء فيديوهات متعددة الأفاتارات، كما تساعدك في إنشاء أفاتارك الخاص للفيديو.كيف أسجّل الشاشة على ويندوز؟
لتسجيل الشاشة على Windows، يمكنك استخدام شريط الألعاب المدمج (Windows + G) أو أداة ذكاء اصطناعي متقدمة مثل Trupeer AI للحصول على ميزات أكثر تقدمًا مثل أفاتارات الذكاء الاصطناعي، والتعليق الصوتي، والترجمة، إلخ.كيف أضيف تعليقًا صوتيًا إلى الفيديو؟
لإضافة تعليق صوتي إلى الفيديوهات، حمّل إضافة Trupeer AI على كروم. بعد التسجيل، ارفع الفيديو مع الصوت، واختر التعليق الصوتي المطلوب من Trupeer ثم صدّر الفيديو المعدّل.كيف أُكبّر جزءًا من تسجيل الشاشة؟
لتكبير جزء أثناء تسجيل الشاشة، استخدم تأثيرات التكبير في Trupeer AI التي تتيح لك التكبير والتصغير في لحظات محددة، مما يعزّز التأثير البصري لمحتوى الفيديو.
قراءات مقترحة
كيفية تحويل صورة إلى صفحة تلوين في كانفا
كيفية الطباعة على الوجهين في كانفا
دروس ذات صلة

