

كيفية إنشاء جدول زمني في Notion
تعرّف على كيفية إنشاء مخطط زمني في Notion لتتبّع المشاريع والمواعيد النهائية والمهام بصريًا. دليل بسيط باستخدام عرض المخطط الزمني المدمج وميزات قاعدة البيانات.
دليل خطوة بخطوة: كيفية إنشاء خط زمني في Notion
الخطوة 1
ابدأ بفتح صفحة جديدة في Notion. ابحث عن خيار النقاط الثلاث في الصفحة.

الخطوة 2
من بين الخيارات المتاحة، اختر خيار الخط الزمني.

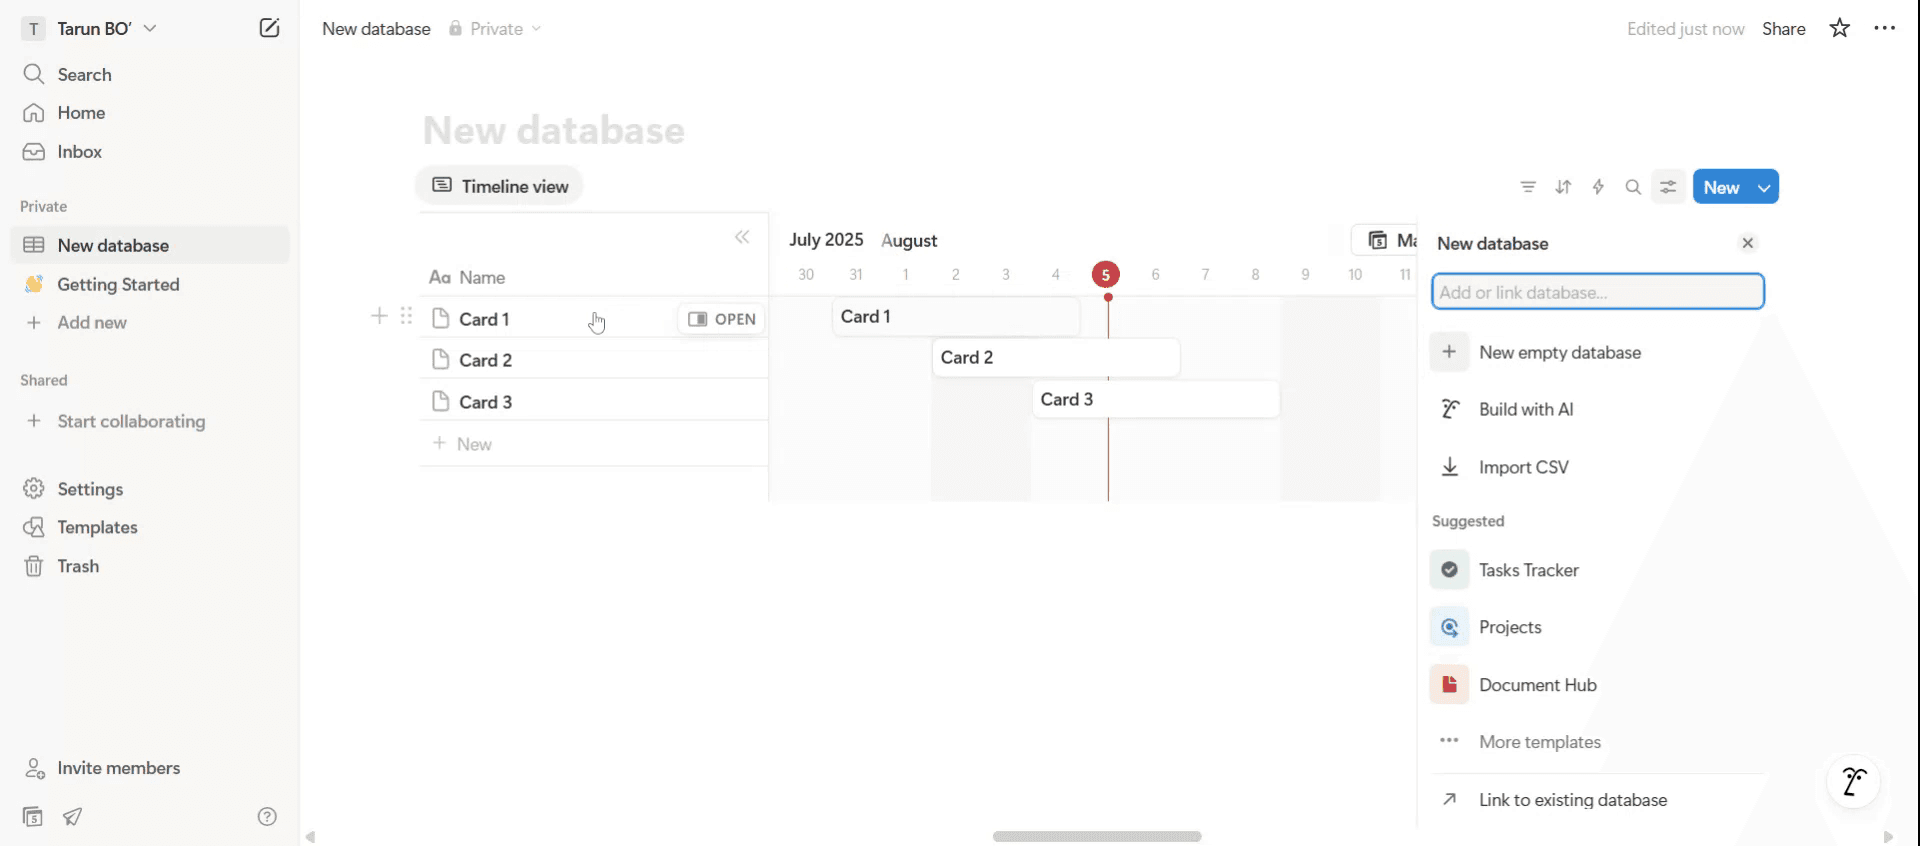
الخطوة 3
سيظهر خط زمني. أضف قاعدة بيانات جديدة بالنقر على خيار قاعدة البيانات الفارغة، أو قم بتعديل قواعد البيانات الحالية حسب الحاجة.
الخطوة 4
يمكنك إعادة تسمية قاعدة البيانات. بناءً على احتياجاتك، أعد تسميتها بالشكل المناسب.

الخطوة 5
استخدم السحب والإفلات لتنظيم الخط الزمني وفقًا لمواصفاتك.
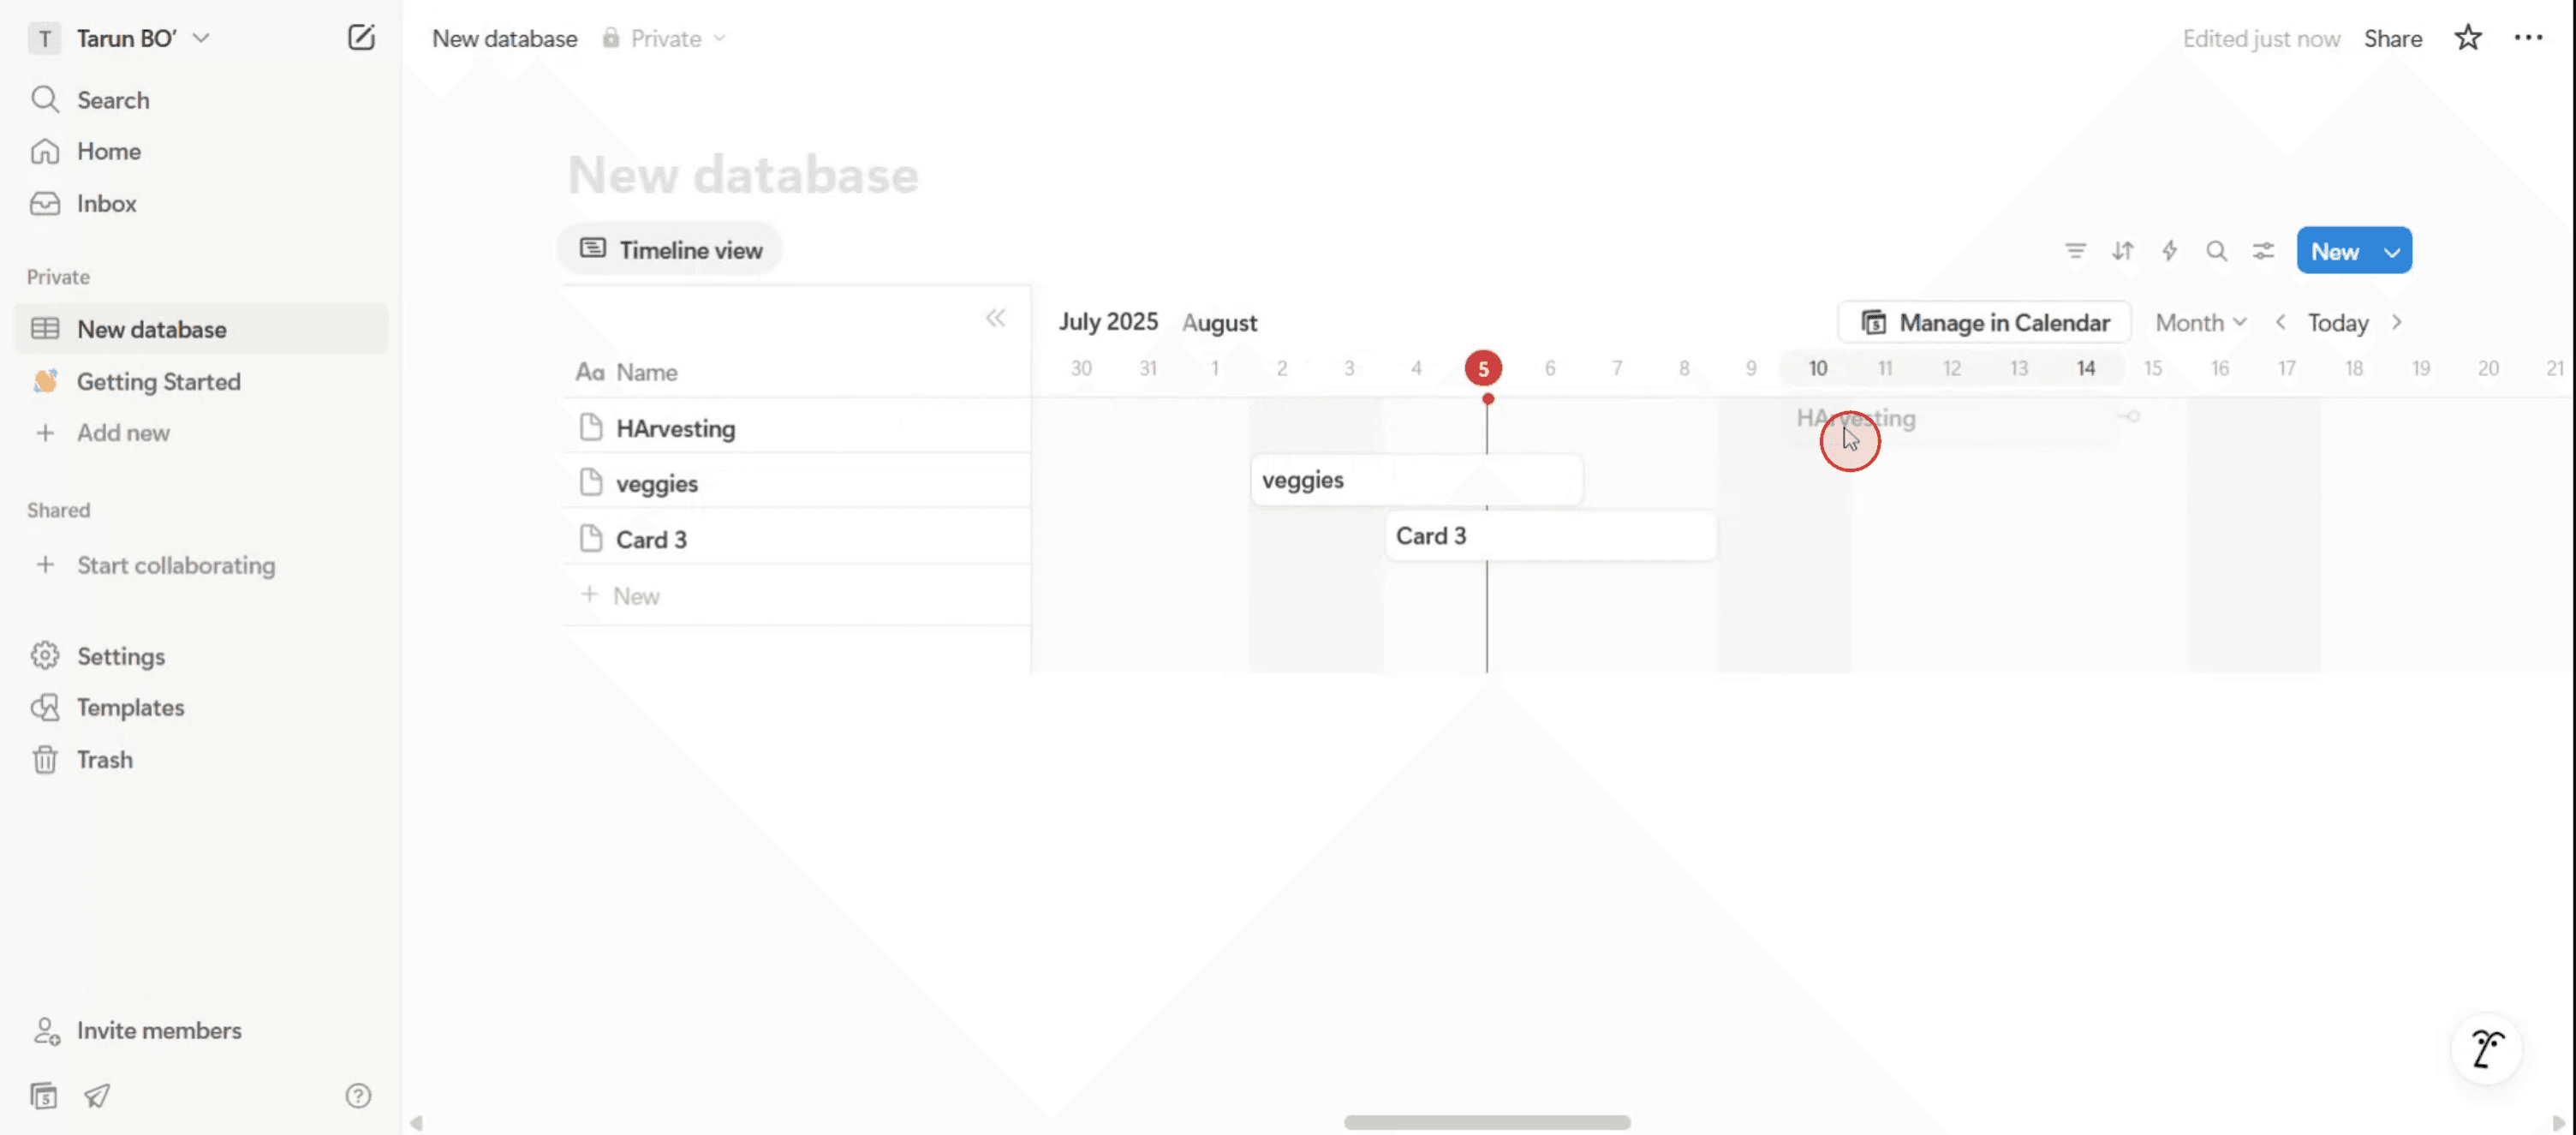
الخطوة 6
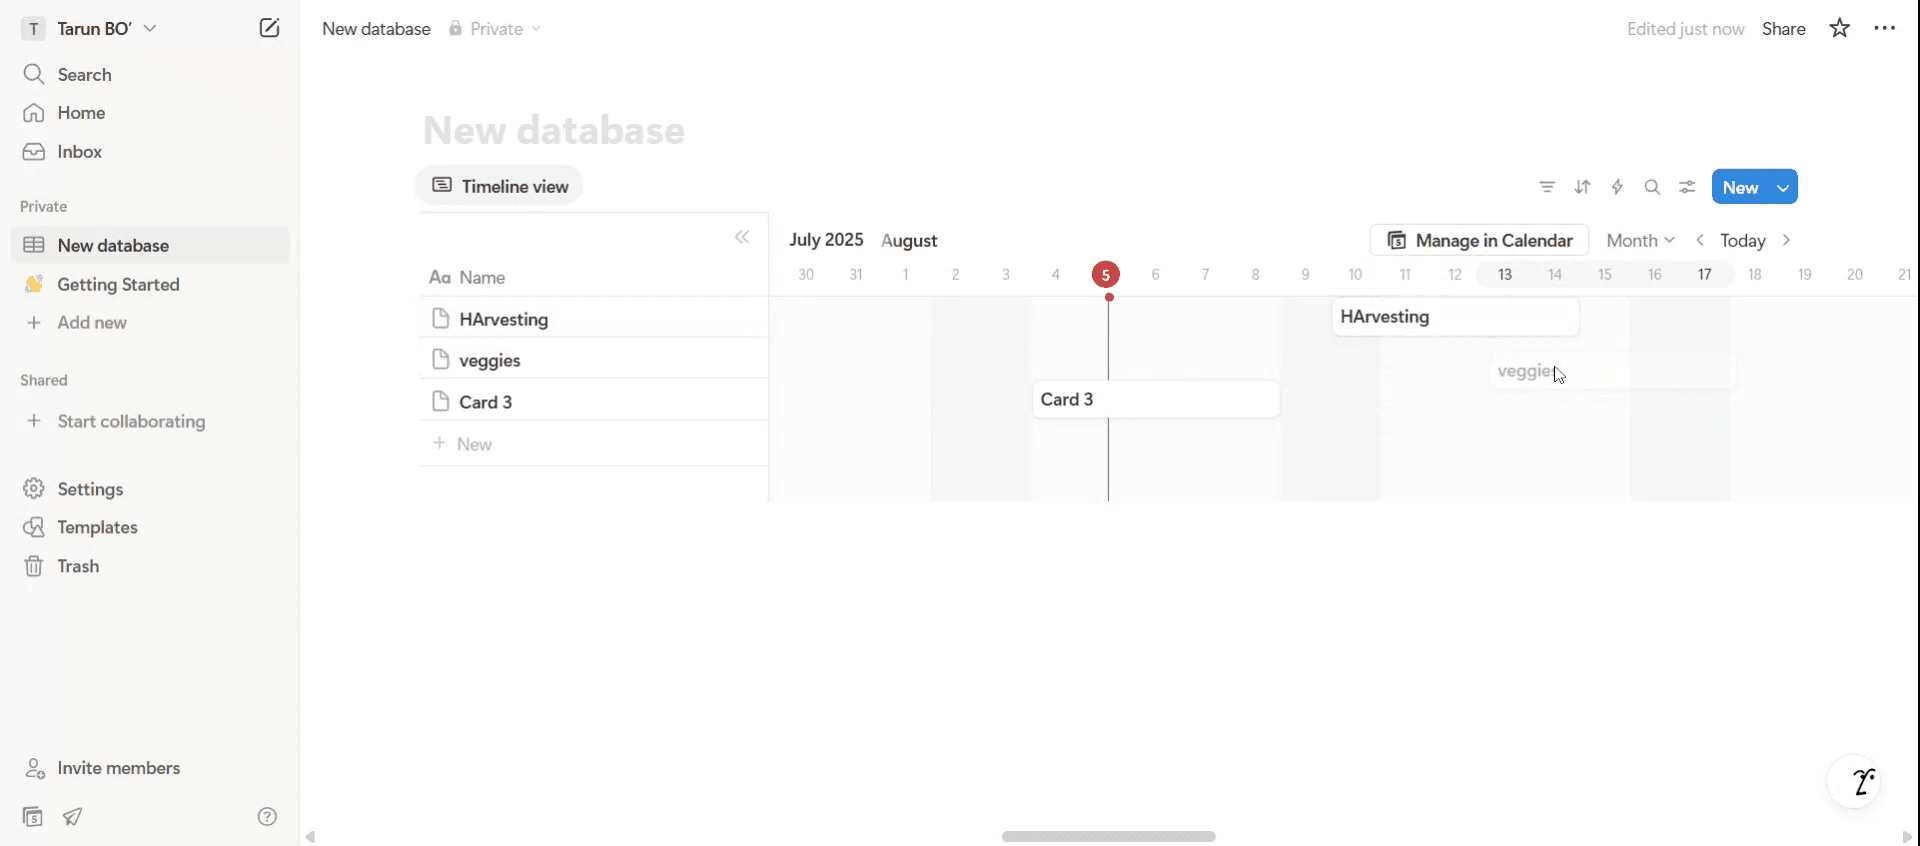
يتضمن ذلك سحب العناصر وإفلاتها في تواريخ محددة وتخصيص الخط الزمني لتواريخ وأوقات معينة.
نصائح احترافية لإنشاء خط زمني في Notion
استخدم عرض “الخط الزمني” في قاعدة بيانات
ابدأ بإنشاء قاعدة بيانات (مثل جدول أو لوحة)، ثم أضف عرضًا جديدًا واختر “الخط الزمني”. يتيح لك هذا تصور المهام أو الأحداث أو المشاريع على مقياس زمني أفقي. يجب أن يحتوي كل عنصر على خاصية تاريخ لكي يظهر في الخط الزمني بشكل صحيح.أضف خاصية تاريخ إلى عناصرك
تأكد من أن قاعدة البيانات تتضمن خاصية “التاريخ”. من دونها، لن تظهر العناصر على الخط الزمني. يمكنك استخدام تواريخ مفردة أو نطاقات تاريخ حسب احتياجاتك.خصّص الخط الزمني بالخصائص
اعرض التفاصيل الأساسية مثل حالة المشروع أو الأولوية أو الشخص المعيّن مباشرةً على أشرطة الخط الزمني. انتقل إلى “الخصائص” وفعّل حقولًا مثل “الوسوم” أو “المسند إليه” لإدارة أفضل من النظرة الأولى.استخدم المجموعات لتنظيم أفضل
جمّع الخط الزمني حسب خاصية مثل مرحلة المشروع أو القسم أو عضو الفريق. يؤدي هذا إلى إنشاء مسارات أفقية على الخط الزمني، مما يساعد على فصل فئات العمل المختلفة.اضبط مقياس الخط الزمني
كبّر أو صغّر العرض لرؤيته حسب اليوم أو الأسبوع أو الشهر أو الربع أو السنة، وذلك وفق نطاق مشروعك. يساعدك هذا على إبقاء المهام قصيرة الأمد والخطط طويلة الأمد في منظور واحد.
الأخطاء الشائعة وكيفية تجنبها
نسيان إضافة خاصية تاريخ
إذا لم تظهر عناصر الخط الزمني، فتحقق من أن لكل عنصر خاصية “التاريخ” مضبوطة. من دونها، لن يعمل الخط الزمني.الإفراط في إضافة معلومات كثيرة
قد تؤدي كثرة الخصائص الظاهرة إلى ازدحام الخط الزمني. اعرض فقط أهم التفاصيل للحفاظ على مظهره مرتبًا وسهل القراءة.عدم التجميع عند الحاجة
إذا كان مشروعك يتضمن عدة فرق أو فئات، فاستخدم ميزة “التجميع” لتجنب الالتباس والبقاء منظمًا.فوات المواعيد النهائية
استخدم التذكيرات ضمن خاصية التاريخ أو اربطها بمديري مهام آخرين لتبقى على اطلاع دائم بالمراحل المهمة.استخدام العرض الخاطئ للمهمة
إذا كان من الأفضل إدارة مشروعك كقائمة أو لوحة كانبان، فلا تفرضه داخل خط زمني. اختر العرض الذي يناسب سير العمل بشكل أفضل.
الأسئلة الشائعة حول إنشاء خط زمني في Notion
هل يمكنني إنشاء خط زمني بدون قاعدة بيانات؟
لا، عرض الخط الزمني متاح فقط في قواعد بيانات Notion.هل يمكنني عرض عدة خطوط زمنية في صفحة واحدة؟
نعم، يمكنك إضافة قواعد بيانات متعددة مع عروض خط زمني مختلفة إلى صفحة Notion نفسها.كيف أغيّر تاريخ البدء والانتهاء لعنصر ما؟
انقر على خاصية التاريخ الخاصة بالعنصر وحدد نطاق تاريخ بدلًا من تاريخ واحد.هل يمكنني نسخ خط زمني؟
نعم، انسخ قاعدة البيانات أو العرض وخصّصه حسب الحاجة.هل يعمل عرض الخط الزمني على الجوال؟
نعم، لكنه قد يكون أكثر اختصارًا. ولتحسين سهولة الاستخدام، استخدم نسخة سطح المكتب أو نسخة الويب للحصول على رؤية كاملة.كيف أسجّل الشاشة على ماك؟
لـ تسجيل الشاشة على جهاز Mac، يمكنك استخدام Trupeer AI. يتيح لك التقاط الشاشة بالكامل ويوفر إمكانيات ذكاء اصطناعي مثل إضافة الأفاتارات الذكية، وإضافة تعليق صوتي، وإضافة تكبير وتصغير في الفيديو. مع ميزة ترجمة الفيديو بالذكاء الاصطناعي من trupeer، يمكنك ترجمة الفيديو إلى أكثر من 30 لغة.كيف أضيف أفاتار ذكاء اصطناعي إلى تسجيل الشاشة؟
لإضافة أفاتار ذكاء اصطناعي إلى تسجيل شاشة، ستحتاج إلى استخدام أداة تسجيل شاشة بالذكاء الاصطناعي. Trupeer AI هي أداة تسجيل شاشة بالذكاء الاصطناعي، تساعدك على إنشاء فيديوهات مع عدة أفاتارات، كما تساعدك في إنشاء أفاتارك الخاص للفيديو.كيف أسجّل الشاشة على ويندوز؟
لتسجيل الشاشة على Windows، يمكنك استخدام شريط الألعاب المدمج (Windows + G) أو أداة ذكاء اصطناعي متقدمة مثل Trupeer AI لمزايا أكثر تقدمًا مثل الأفاتارات الذكية، والتعليق الصوتي، والترجمة، إلخ.كيف أضيف تعليقًا صوتيًا إلى الفيديو؟
لإضافة تعليق صوتي إلى الفيديوهات، حمّل إضافة Chrome الخاصة بـ trupeer ai. بعد التسجيل، ارفع فيديوك مع الصوت، واختر التعليق الصوتي المطلوب من Trupeer، ثم صدّر الفيديو المعدّل الخاص بك.كيف أقرّب الصورة في تسجيل شاشة؟
للتكبير أثناء تسجيل الشاشة، استخدم تأثيرات التكبير في Trupeer AI التي تتيح لك التكبير والتصغير في لحظات محددة، مما يعزز التأثير البصري لمحتوى الفيديو الخاص بك.
قراءات مقترحة
دروس ذات صلة

