
كيفية نسخ ملف في Figma
هل تريد نسخ ملف Figma؟ تعرّف على كيفية تكرار أي ملف تصميم في Figma في ثوانٍ لتسهيل التحرير أو عمل نسخة احتياطية.
الطريقة 1
الخطوة 1
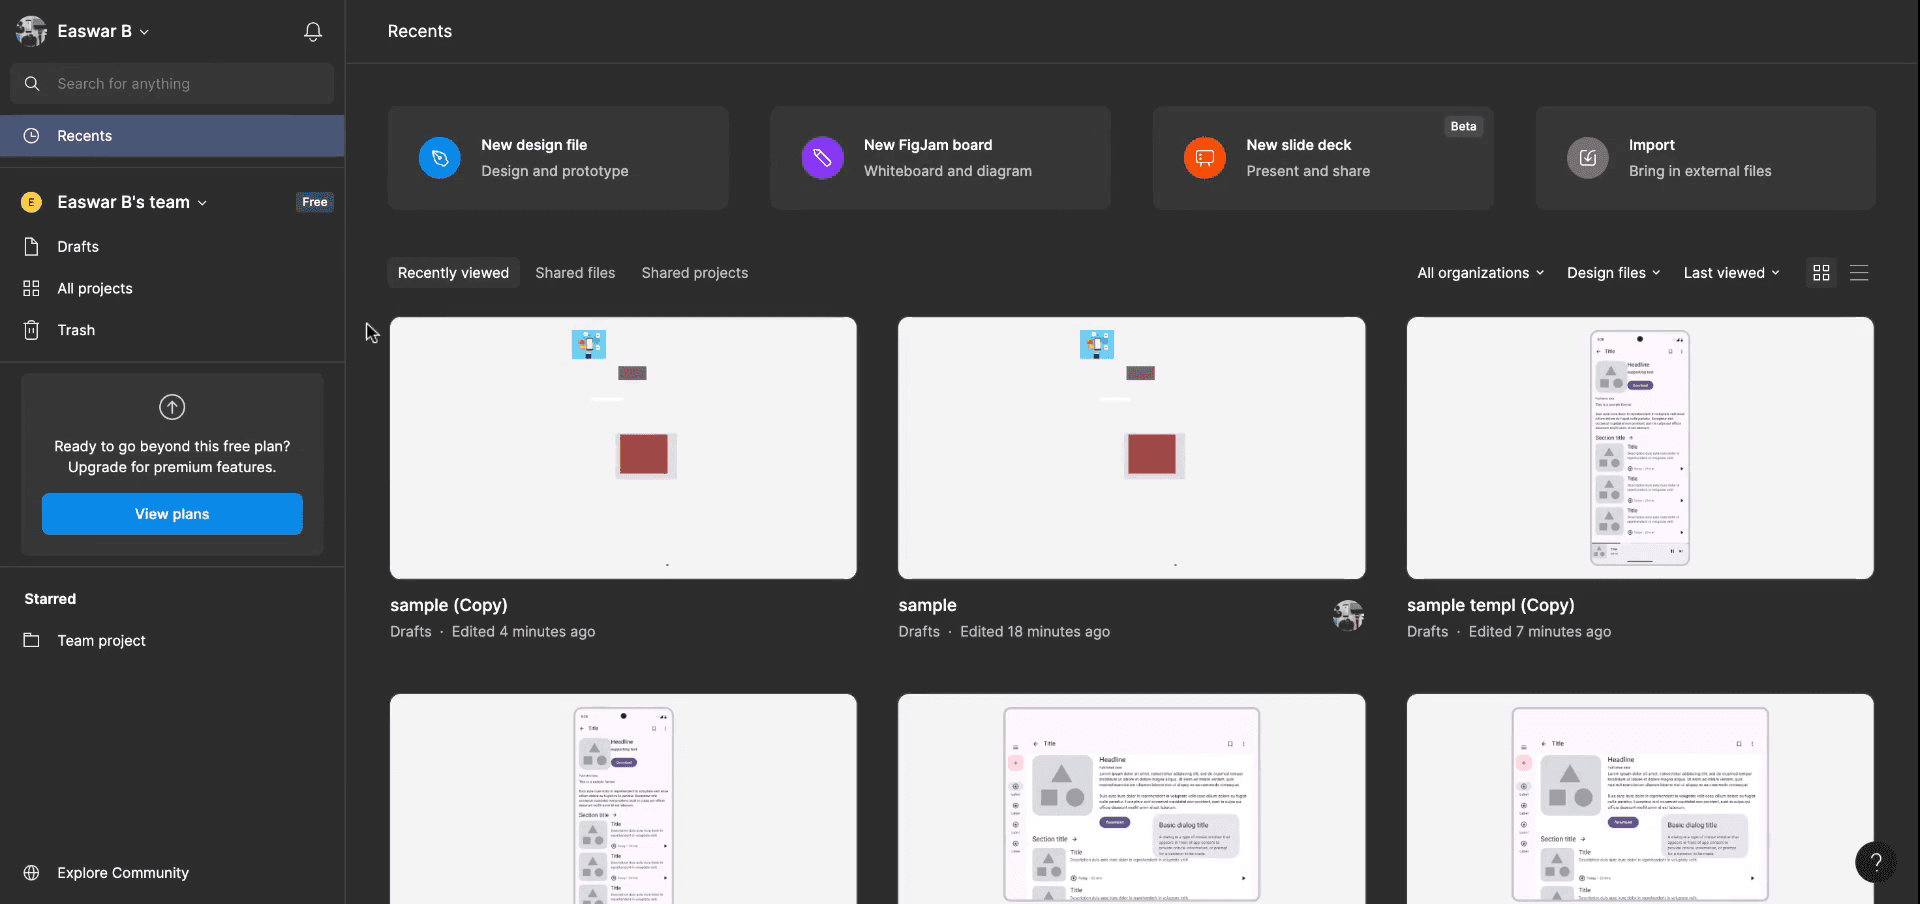
ابدأ بفتح الشاشة الرئيسية/لوحة التحكم في Figma.
الخطوة 2
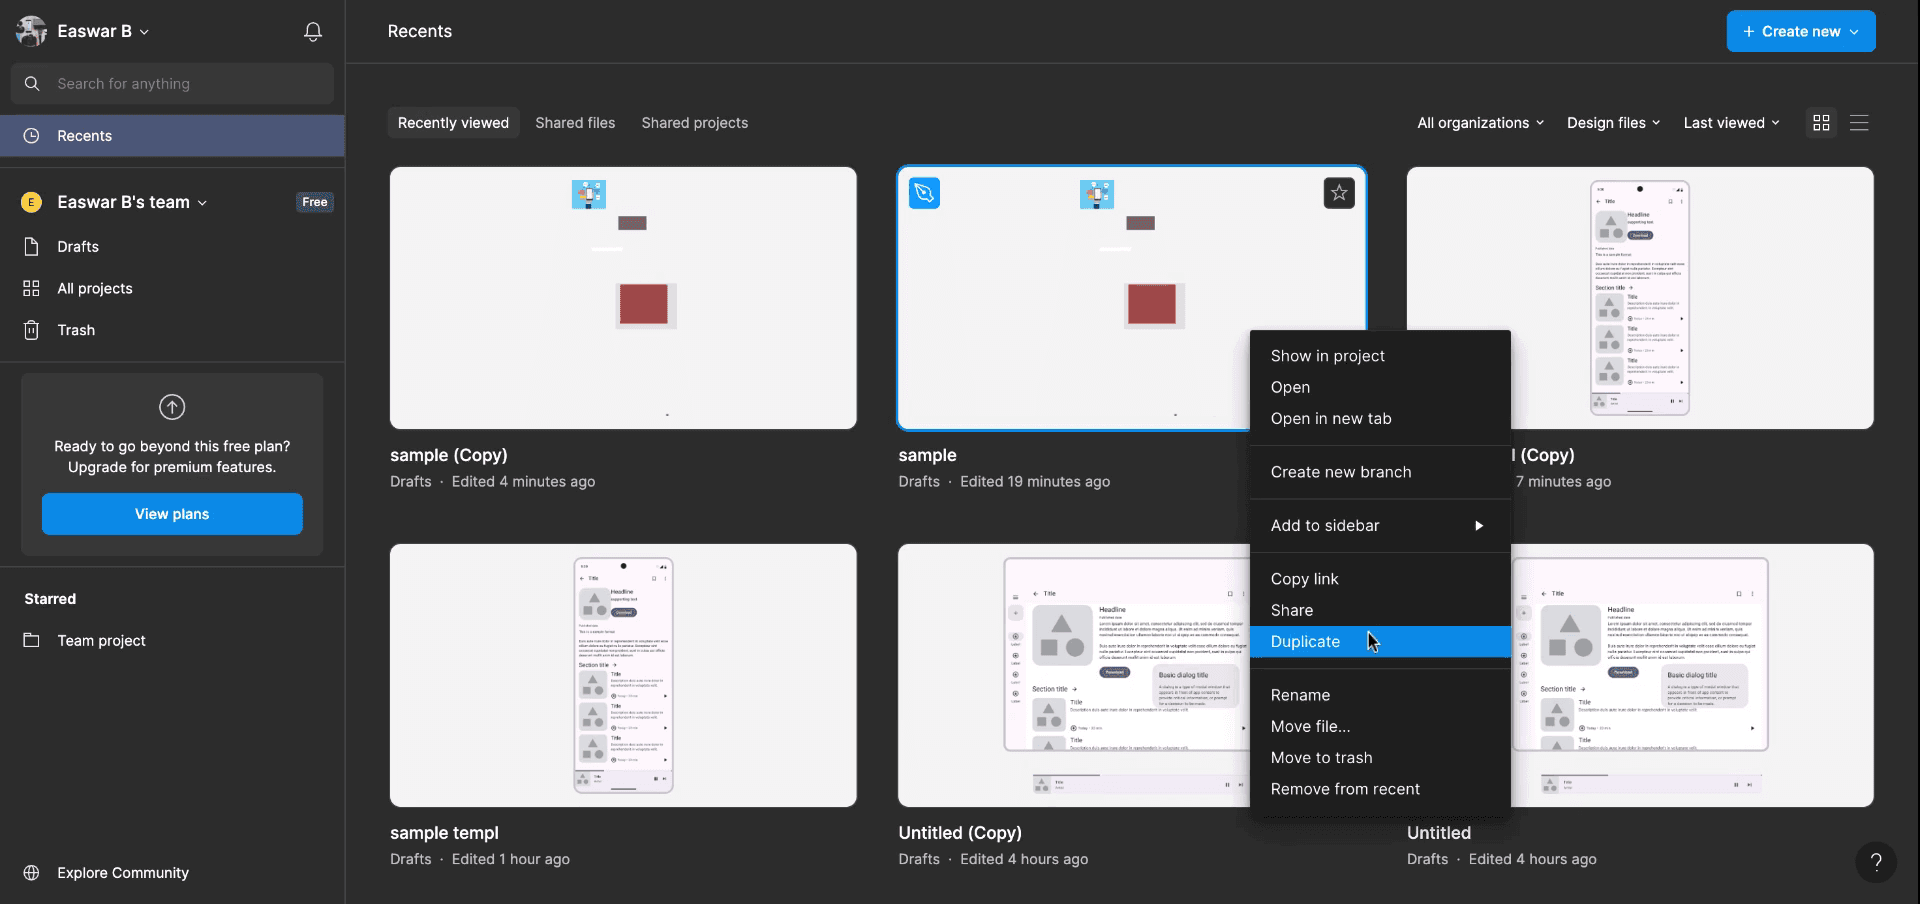
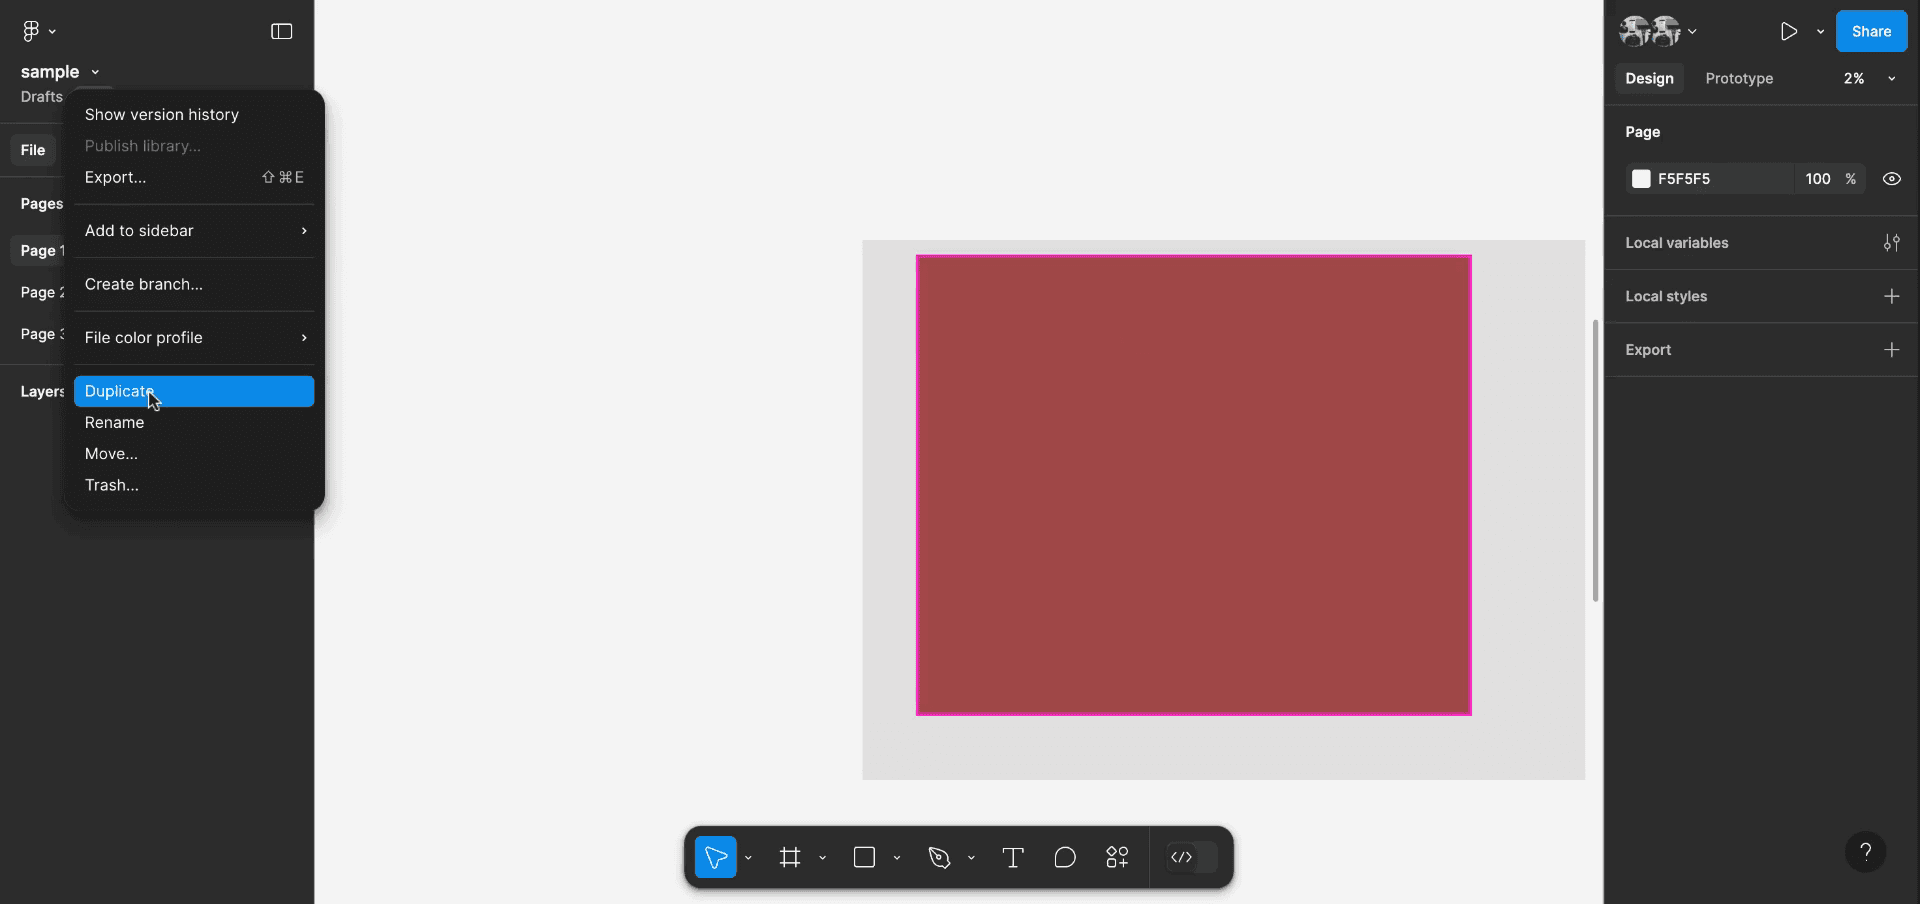
في الشاشة الرئيسية، اختر أيًا من ملفاتك أو مسوداتك. اختر الملف الذي تريد نسخه ثم انقر عليه بزر الفأرة الأيمن.
الخطوة 3
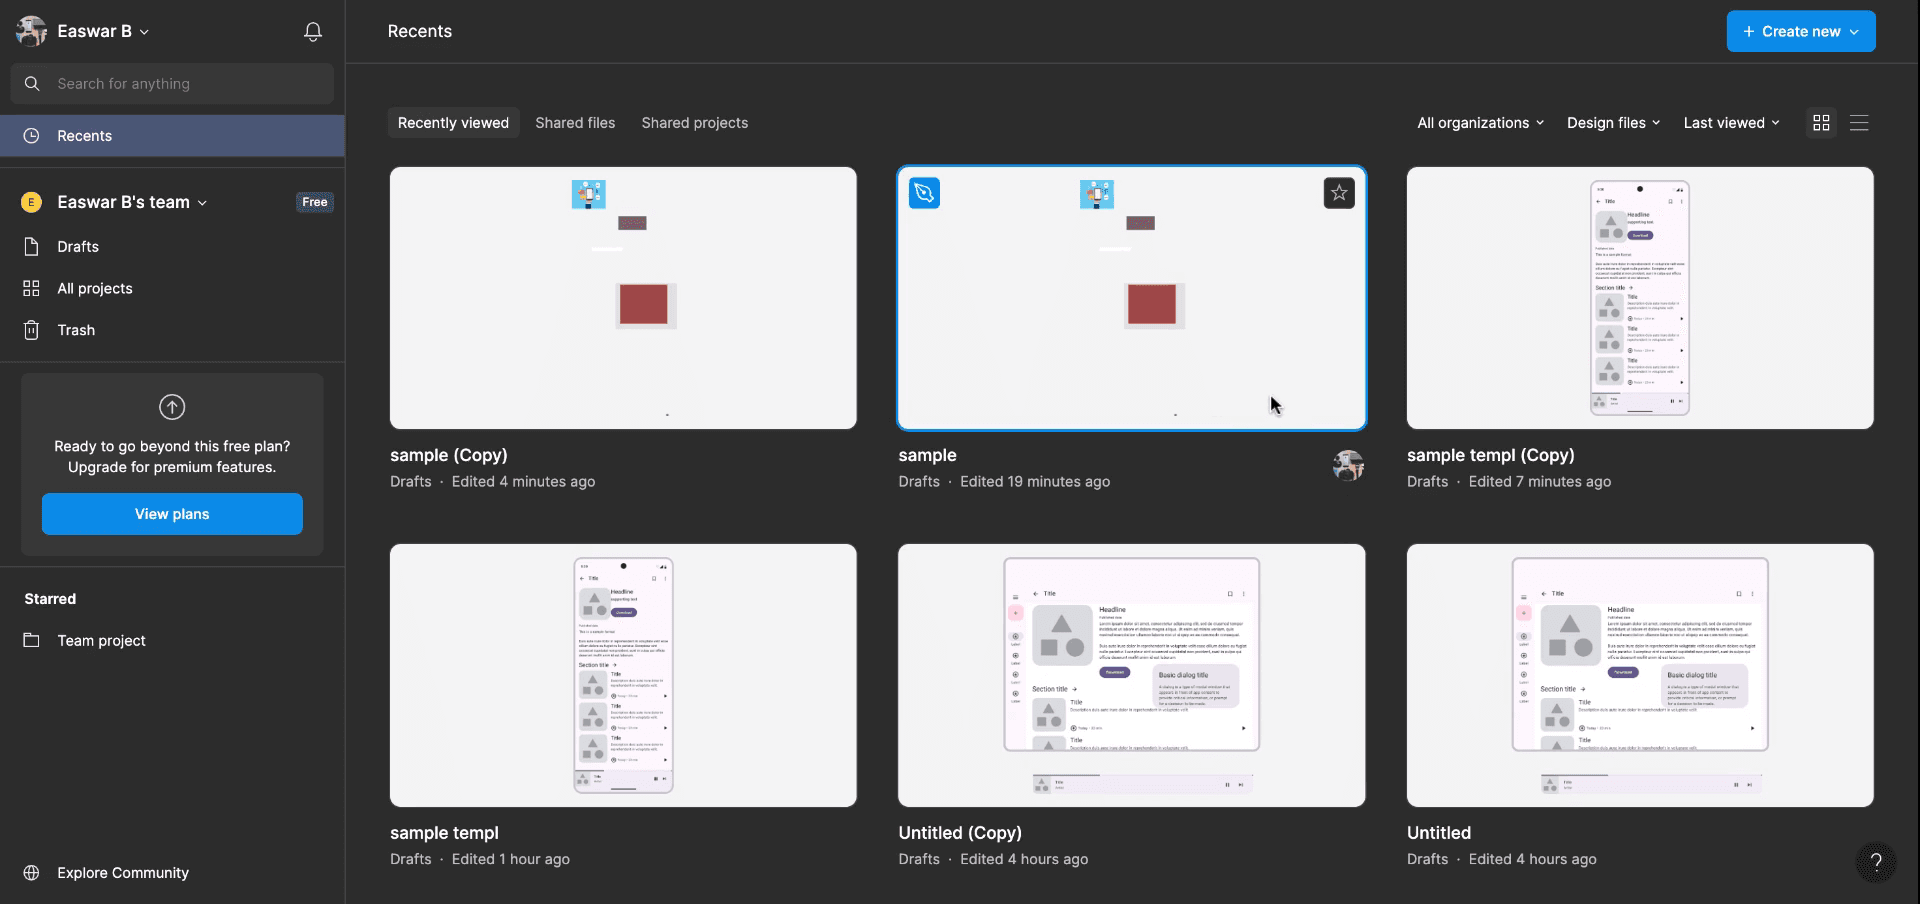
بعد النقر بزر الفأرة الأيمن على الملف المحدد، اختر خيار 'Duplicate'. سيؤدي هذا الإجراء إلى إنشاء ملف جديد بالاسم نفسه.
الطريقة 2
الخطوة 1
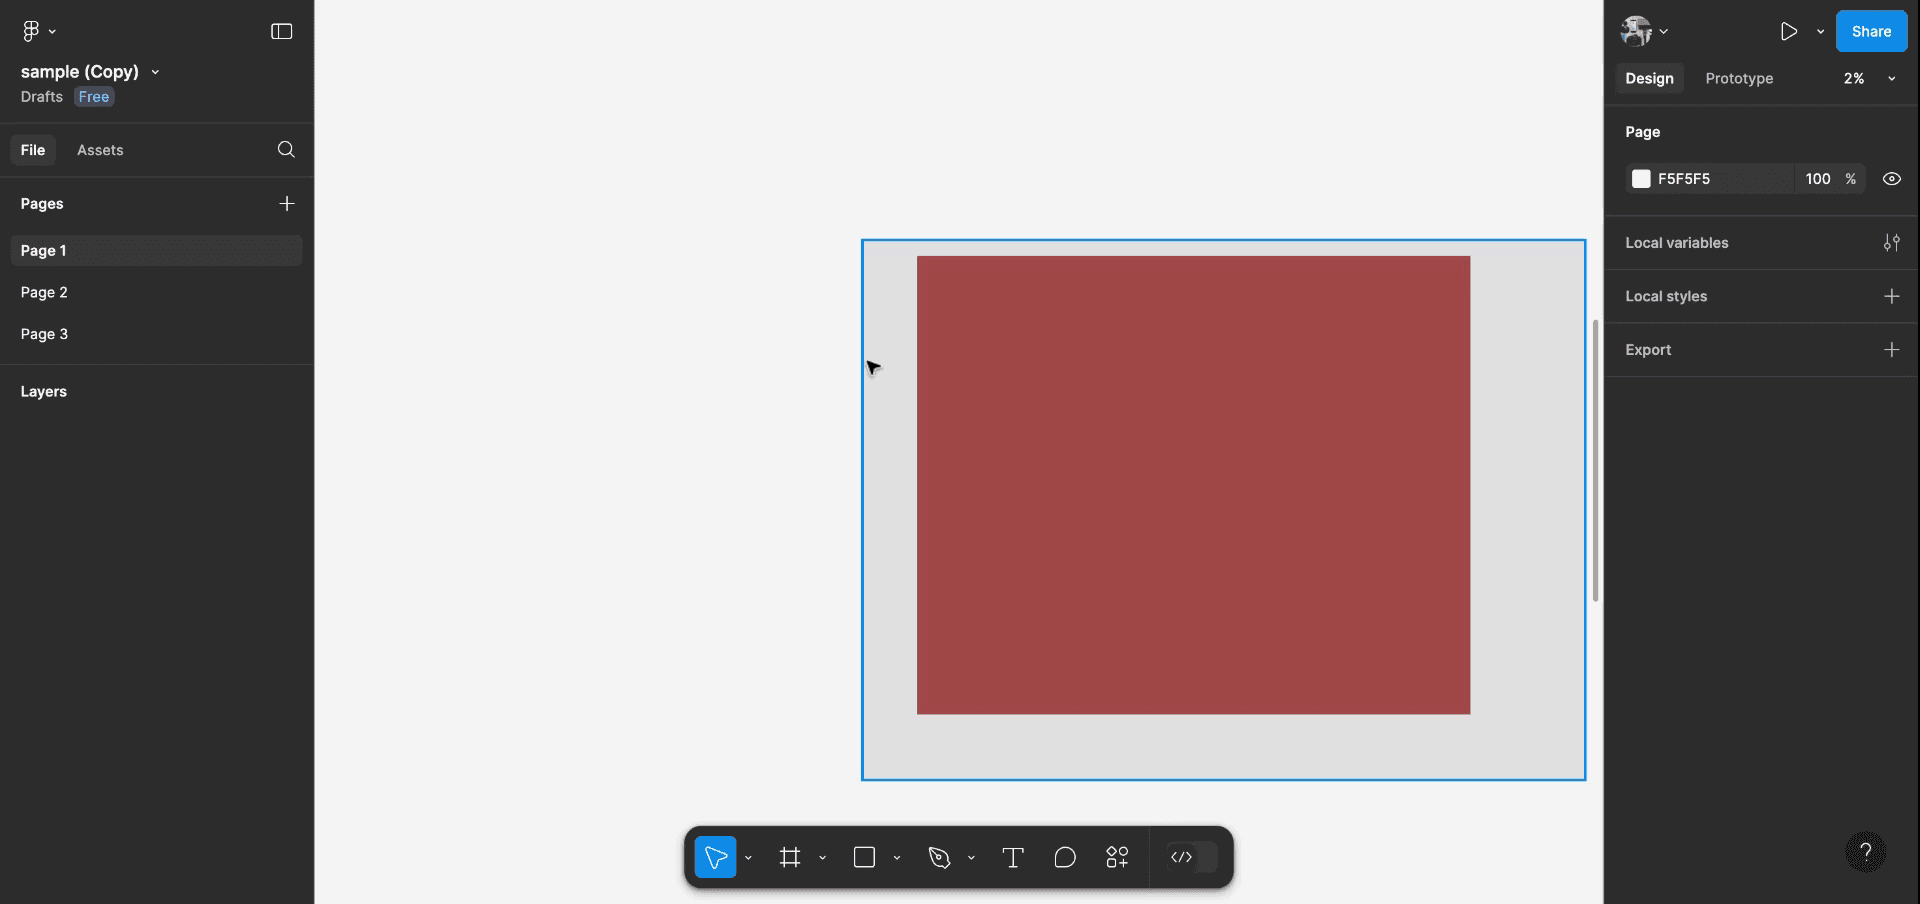
اختر الملف المطلوب، ثم انقر بزر الفأرة الأيمن مرة أخرى، واختر 'Duplicate'. سيؤدي ذلك إلى فتح الملف المنسوخ لتعمل عليه - في علامة تبويب أخرى.
الخطوة 2
سيتم عرض ملف النسخة المكررة والوصول إليه من لوحة التحكم. هذه هي طريقة تكرار ملف في Figma.
نصائح احترافية لتكرار ملف في Figma
استخدم قائمة الملفات:
افتح قائمة الملفات في الزاوية العلوية اليسرى من Figma واختر File > Duplicate. يؤدي ذلك إلى إنشاء نسخة مطابقة تمامًا من ملفك في مساحة عمل Figma.انقر بزر الفأرة الأيمن لتكرار الملف:
في مستعرض الملفات أو داخل مشروع فريق، انقر بزر الفأرة الأيمن على الملف الذي تريد تكراره واختر Duplicate. ستظهر النسخة في نفس المشروع أو الفريق.اختصار لوحة المفاتيح:
استخدم Cmd + D (Mac) أو Ctrl + D (Windows) أثناء استخدام مستعرض الملفات لتكرار ملف محدد بسرعة.أعد تسمية النسخة المكررة:
بعد التكرار، أعد تسمية الملف لتتبّع الإصدارات المختلفة. انقر بزر الفأرة الأيمن على الملف المكرّر واختر Rename، أو انقر مباشرةً على اسم الملف لتعديله.نظّم النسخ المكررة في مجلدات:
إذا كان لديك عدة إصدارات أو تصاميم ذات صلة، ففكّر في تنظيمها داخل مجلدات في مستعرض الملفات للحفاظ على كل شيء مرتبًا وسهل الوصول.
الأخطاء الشائعة وكيفية تجنبها عند تكرار ملف في Figma
الخلط بين الملف الأصلي والملف المكرّر:
الحل: أعد تسمية ملفك المكرّر مباشرةً بعد التكرار لتجنب الخلط بينه وبين النسخة الأصلية.تكرار الملفات دون تنظيم مناسب:
الحل: استخدم ميزة Folders في Figma لتجميع ملفاتك والحفاظ على مساحة العمل منظمة، خاصةً إذا كنت تعمل على عدة إصدارات من المشروع نفسه.عدم تحديث الروابط في الملفات المكررة:
الحل: إذا كان ملفك يحتوي على مكونات أو أنماط مرتبطة بملفات أخرى، فتحقق جيدًا من بقاء الروابط سليمة بعد التكرار، وإلا فستحتاج إلى إعادة إنشاء الاتصالات يدويًا.تجاوز حدود الملفات:
الحل: إذا كنت تكرر ملفات كبيرة عدة مرات، فكن منتبهًا لحدود التخزين وحجم الملفات في Figma، خاصةً في حسابات الفرق التي لديها قيود.
الأسئلة الشائعة الشائعة حول تكرار ملف في Figma
هل يمكنني تكرار الملفات بين الفرق أو المشاريع؟
نعم، يمكنك تكرار الملفات بين الفرق أو المشاريع عن طريق تحديد الملف، والنقر بزر الماوس الأيمن، ثم اختيار تكرار. بعد ذلك، انقل النسخة المكررة إلى المشروع المطلوب.هل تحتفظ الملفات المكررة بكل الأصول من الأصل؟
نعم، تحتفظ النسخة المكررة بجميع العناصر والطبقات والمكوّنات من الملف الأصلي.هل يمكنني تكرار تصميم Figma كامل أم فقط إطارات محددة؟
تكرار ملف يعني تكرار التصميم بالكامل. ومع ذلك، إذا كنت تريد تكرار إطارات محددة، يمكنك استخدام ميزة النسخ واللصق بدلاً من ذلك.هل يمكنني تكرار الملفات في تطبيق سطح المكتب Figma؟
نعم، عملية تكرار الملفات في تطبيق سطح المكتب هي نفسها كما في نسخة الويب—انقر بزر الماوس الأيمن أو استخدم قائمة الملف.كيف يمكنني مشاركة ملف مكرر مع فريقي؟
بعد تكرار ملف، يمكنك مشاركته مع فريقك عن طريق إضافتهم إلى الملف أو مشاركة الرابط مباشرةً.كيف أسجّل الشاشة على جهاز ماك؟
لتقوم بتسجيل الشاشة على جهاز ماك، يمكنك استخدام Trupeer AI. فهو يتيح لك التقاط الشاشة بالكامل ويوفر إمكانات ذكاء اصطناعي مثل إضافة صور رمزية بالذكاء الاصطناعي، وإضافة تعليق صوتي، وإضافة تكبير وتصغير في الفيديو. ومع ميزة ترجمة الفيديو بالذكاء الاصطناعي من trupeer، يمكنك ترجمة الفيديو إلى أكثر من 30 لغة.كيف أضيف صورة رمزية بالذكاء الاصطناعي إلى تسجيل الشاشة؟
لإضافة صورة رمزية بالذكاء الاصطناعي إلى تسجيل الشاشة، ستحتاج إلى استخدام أداة تسجيل شاشة بالذكاء الاصطناعي. Trupeer AI هي أداة تسجيل شاشة بالذكاء الاصطناعي، تساعدك في إنشاء مقاطع فيديو باستخدام صور رمزية متعددة، كما تساعدك في إنشاء صورتك الرمزية الخاصة للفيديو.كيف أسجّل الشاشة على ويندوز؟
لتسجيل الشاشة على ويندوز، يمكنك استخدام شريط الألعاب المدمج (Windows + G) أو أداة ذكاء اصطناعي متقدمة مثل Trupeer AI للحصول على ميزات أكثر تقدمًا مثل الصور الرمزية بالذكاء الاصطناعي، والتعليق الصوتي، والترجمة، إلخ.كيف أضيف تعليقًا صوتيًا إلى الفيديو؟
لإضافة تعليق صوتي إلى مقاطع الفيديو، نزّل إضافة كروم من trupeer ai. بعد التسجيل، ارفع الفيديو الخاص بك مع الصوت، واختر التعليق الصوتي المطلوب من trupeer، ثم صدّر الفيديو المعدّل.كيف أعمل تكبيرًا في تسجيل الشاشة؟
لتكبير الصورة أثناء تسجيل الشاشة، استخدم تأثيرات التكبير في Trupeer AI التي تتيح لك التكبير والتصغير في لحظات محددة، مما يعزز التأثير البصري لمحتوى الفيديو.
قراءات مقترحة
كيفية تحويل صورة إلى صفحة تلوين في Canva
كيفية الطباعة على الوجهين في Canva
دروس ذات صلة

