
Cómo mover filas hacia arriba y hacia abajo en Microsoft Excel
Aprende a mover filas hacia arriba o hacia abajo en Microsoft Excel usando sencillos métodos de arrastrar y soltar o de cortar e insertar. Guía rápida para reorganizar datos de forma eficiente."
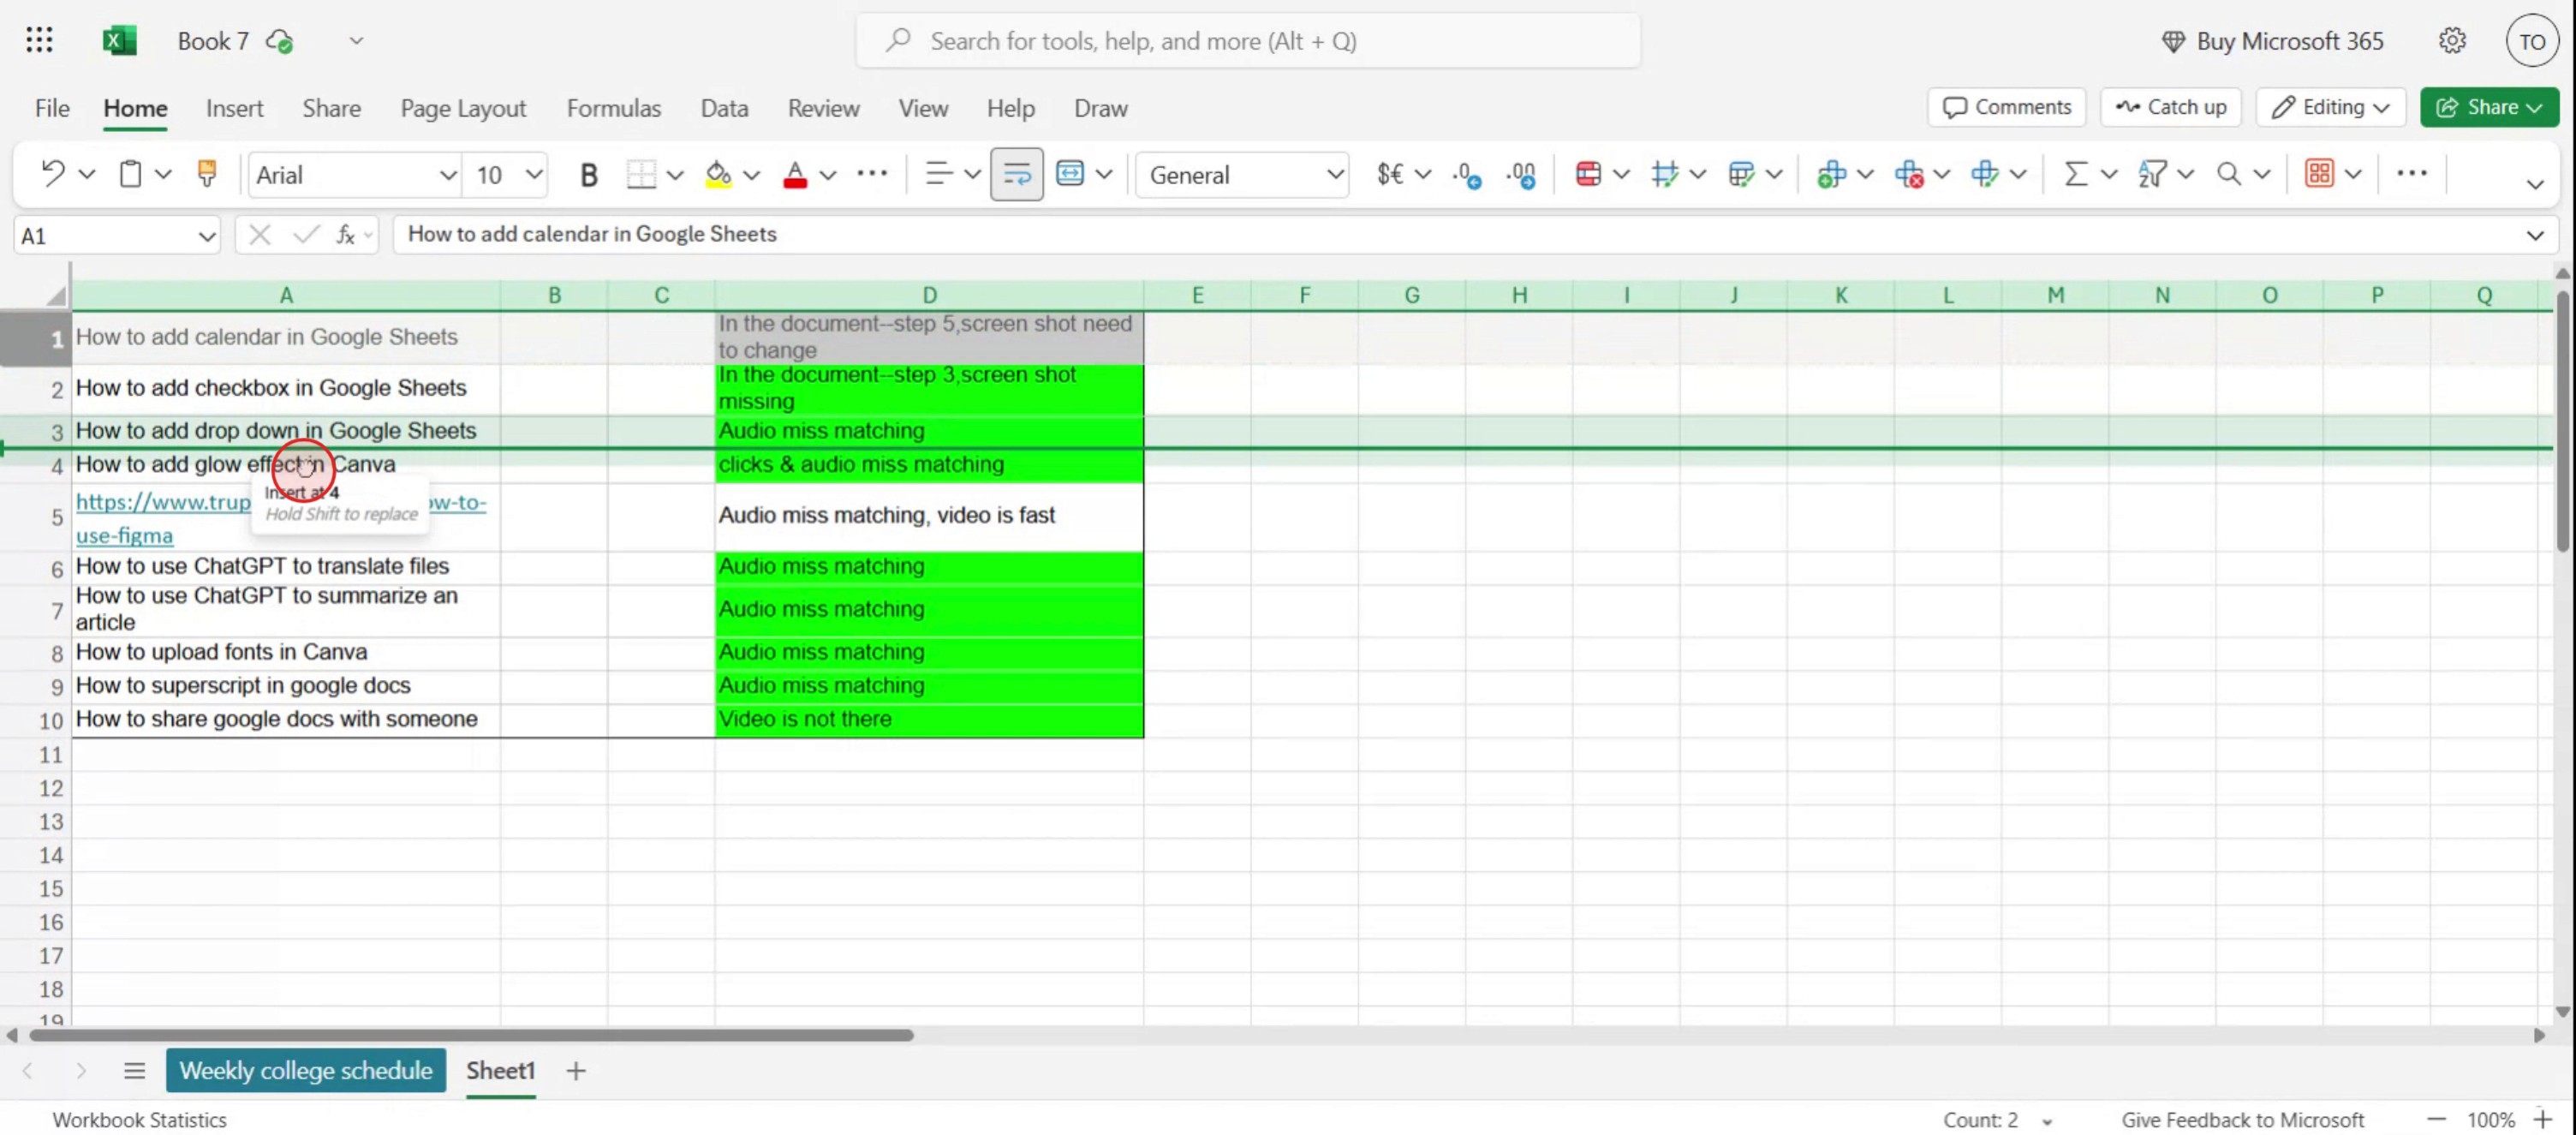
Para mover filas hacia arriba y hacia abajo en Excel, selecciona la(s) fila(s) que quieras mover, coloca el cursor sobre el borde hasta que se convierta en una flecha de cuatro puntas, mantén pulsada la tecla Shift y luego arrastra la(s) fila(s) a la ubicación deseada. Suelta el botón del ratón y luego la tecla Shift.
Aquí tienes un desglose más detallado:
Selecciona la(s) fila(s): Haz clic en el/los número(s) de fila de la izquierda de la hoja de cálculo para seleccionar la(s) fila(s) completa(s) que quieras mover.
Coloca el cursor y cambia el puntero: Mueve el cursor hasta el borde (borde superior o inferior) de la(s) fila(s) seleccionada(s). El cursor cambiará a una flecha de cuatro puntas (puntero de movimiento).
Mantén Shift y arrastra: Pulsa y mantén pulsada la tecla Shift en el teclado. Haz clic y arrastra la(s) fila(s) seleccionada(s) a la nueva ubicación con el ratón.
Suelta y coloca: Una vez que la(s) fila(s) estén colocadas donde quieras, suelta el botón del ratón y después suelta la tecla Shift. La(s) fila(s) se insertarán en la nueva ubicación y cualquier dato existente se desplazará para acomodar el movimiento.
Guía paso a paso: cómo mover filas hacia arriba y hacia abajo en Microsoft Excel
Paso 1
Selecciona la fila completa que quieras mover.

Paso 2
Luego, coloca el cursor sobre el icono de más del ratón y aparecerá,
Paso 3
Después, arrastra y suelta la fila
Paso 4
Entonces verás los cambios en las filas,

Consejos profesionales para mover filas hacia arriba y hacia abajo en Microsoft Excel
Selecciona la fila completa
Haz clic en el número de fila del lado izquierdo para resaltar la fila completa que quieres mover.Haz clic derecho y elige "Cortar"
Después de seleccionar la fila, haz clic derecho y elige “Cortar” en el menú contextual.Selecciona la fila de destino
Haz clic en el número de fila donde quieres insertar la fila cortada. Excel colocará la fila movida encima de la seleccionada.Haz clic derecho y elige "Insertar celdas cortadas"
Haz clic derecho en el número de la fila de destino y selecciona “Insertar celdas cortadas”. La fila se moverá a la nueva posición.Usa atajos de teclado para mover más rápido
Después de seleccionar una fila, pulsa Ctrl + X para cortarla y Ctrl + Shift + Plus (+) para insertarla encima de la fila seleccionada.Arrastrar y soltar para movimientos sencillos
Selecciona la fila, pasa el cursor sobre el borde hasta que aparezca el cursor de movimiento y luego arrástrala a la posición deseada mientras mantienes pulsada la tecla Shift.
Errores comunes y cómo evitarlos
Arrastrar sin mantener pulsada la tecla Shift
Si arrastras una fila sin mantener pulsada Shift, puedes sobrescribir datos existentes en lugar de moverla.Seleccionar solo algunas celdas en lugar de la fila completa
Haz clic siempre en el número de fila para seleccionar la fila completa. Seleccionar celdas individuales puede no desplazar la fila correctamente.Colocación incorrecta de la fila insertada
Asegúrate de hacer clic en la fila de destino exacta donde quieres que vaya la fila cortada. Se insertará encima de esa ubicación.Pérdida de datos por pegar en lugar de insertar
Evita usar “Pegar” después de cortar. Usa siempre “Insertar celdas cortadas” para evitar sobrescribir datos.Usar este método en filas filtradas
Mover filas en una vista filtrada puede causar una colocación incorrecta de los datos. Borra los filtros antes de mover filas.
Preguntas frecuentes sobre cómo mover filas en Excel
¿Cómo puedo mover una fila hacia arriba o hacia abajo en Excel?
Usa Cortar y luego Insertar celdas cortadas, o arrastra la fila mientras mantienes pulsada Shift.¿Puedo mover varias filas a la vez?
Sí, selecciona y corta varias filas juntas y luego insértelas en la ubicación deseada.¿Arrastrar una fila sobrescribirá otros datos?
Puede hacerlo si no mantienes pulsada Shift. Mantén siempre pulsada Shift mientras arrastras para insertar la fila en lugar de reemplazarla.¿Cuál es el atajo para mover una fila en Excel?
Ctrl + X para cortar y Ctrl + Shift + + para insertarla encima de la fila seleccionada.¿Puedo deshacer el movimiento de una fila?
Sí, pulsa Ctrl + Z para deshacer el movimiento si cometes un error.¿Cómo grabar la pantalla en Mac?
Para grabar la pantalla en un Mac, puedes usar Trupeer AI. Te permite capturar toda la pantalla y ofrece capacidades de IA como añadir avatares de IA, añadir voz en off y hacer zoom in y out en el vídeo. Con la función de traducción de vídeo con IA de Trupeer, puedes traducir el vídeo a más de 30 idiomas.¿Cómo añadir un avatar de IA a una grabación de pantalla?
Para añadir un avatar de IA a una grabación de pantalla, tendrás que usar una herramienta de grabación de pantalla con IA. Trupeer AI es una herramienta de grabación de pantalla con IA, que te ayuda a crear vídeos con varios avatares y también te ayuda a crear tu propio avatar para el vídeo.¿Cómo grabar la pantalla en Windows?
Para grabar la pantalla en Windows, puedes usar la Game Bar integrada (Windows + G) o una herramienta avanzada de IA como Trupeer AI para funciones más avanzadas como avatares de IA, voz en off, traducción, etc.¿Cómo añadir voz en off a un vídeo?
Para añadir voz en off a los vídeos, descarga la extensión de Chrome de Trupeer AI. Una vez registrado, sube tu vídeo con voz, elige la voz en off que desees en Trupeer y exporta tu vídeo editado.¿Cómo hago zoom en una grabación de pantalla?
Para hacer zoom durante una grabación de pantalla, usa los efectos de zoom de Trupeer AI, que te permiten acercar y alejar en momentos específicos, mejorando el impacto visual del contenido de tu vídeo.
Lecturas sugeridas
Generador de documentación técnica
Software de base de conocimientos
Cómo habilitar la regla en Microsoft Excel
Cómo mantener visible la fila superior en Microsoft Excel
Cómo insertar una nueva hoja de cálculo en Microsoft Excel
Cómo crear una hoja de calificaciones en MS Excel
Cómo agregar un calendario selector de fechas a las celdas en MS Excel
Cómo hacer referencia a una celda de otra hoja en Microsoft Excel
Tutoriales relacionados

