

كيفية رفع مجلد إلى GitHub
تعلّم كيفية رفع مجلد إلى GitHub باستخدام واجهة الويب أو أوامر Git لإضافة ملفات المشروع وإدارة المستودعات بسهولة. اتبع هذا الدليل السريع مع Trupeer.
يقدّم هذا الدليل عملية مبسطة لإضافة مجلد جديد إلى مستودع GitHub.
اتبع الخطوات أدناه لدمج دليل جديد بسلاسة في بنية المستودع الحالية.
دليل خطوة بخطوة: كيفية رفع مجلد إلى GitHub
الخطوة 1
اذهب إلى مستودع GitHub الذي ترغب في إضافة المجلد إليه وانقر عليه.

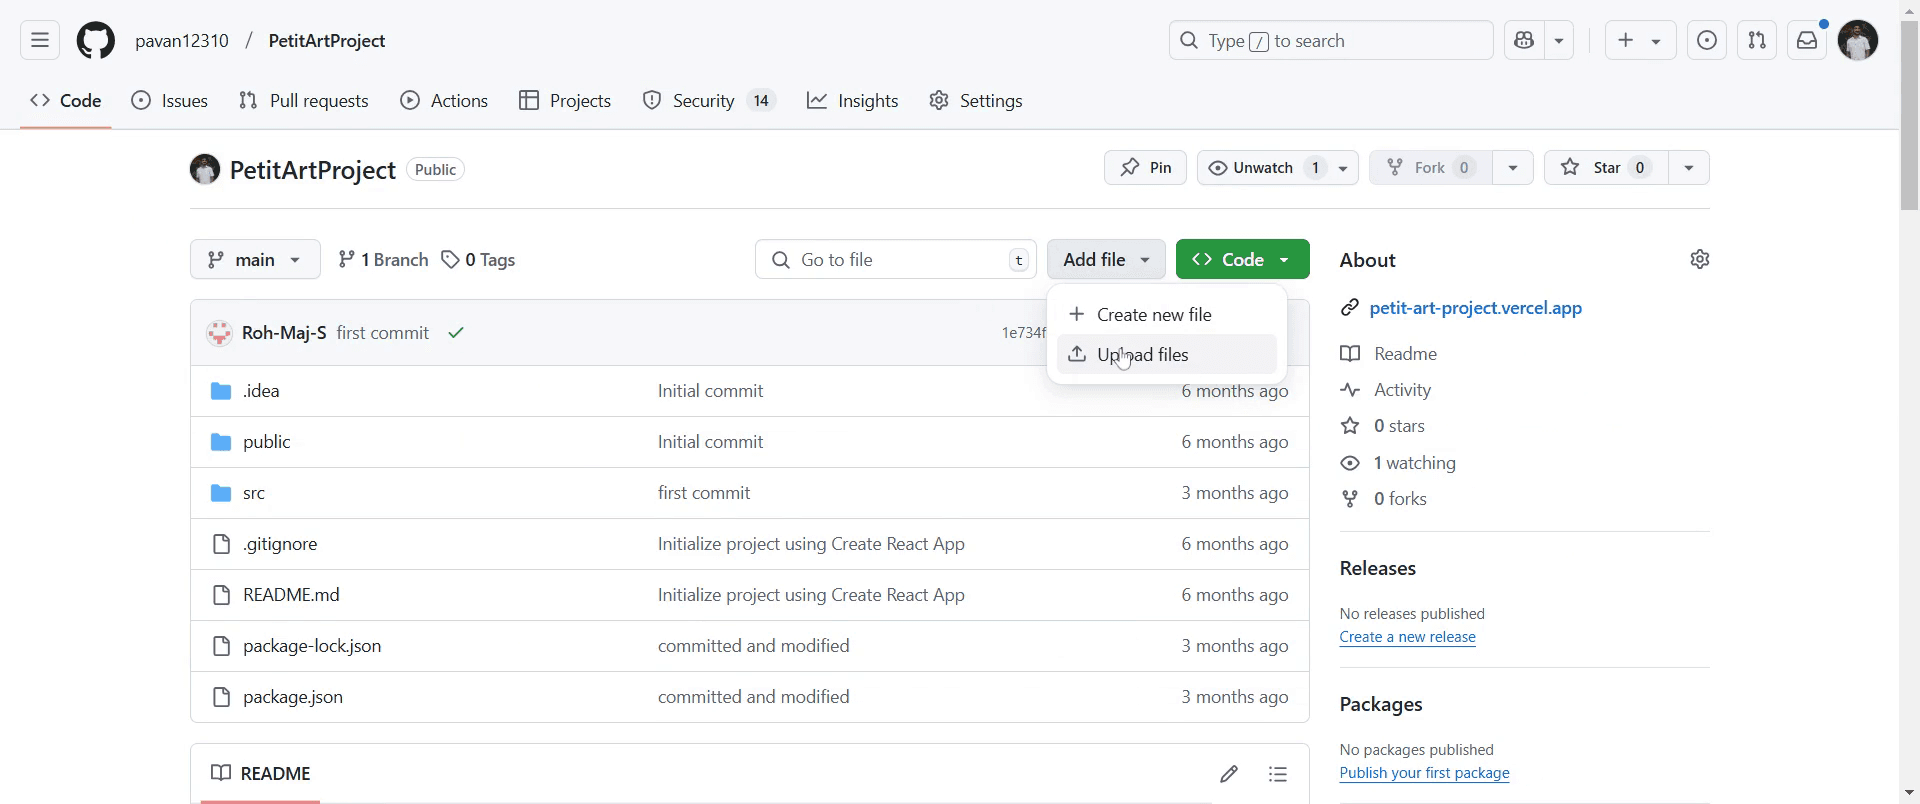
الخطوة 2
بعد ذلك، ابحث عن خيار "Add file" وانقر عليه داخل واجهة المستودع.

الخطوة 3
اختر "Upload files" للمتابعة في إضافة المجلد.
الخطوة 4
الآن، اختر الملفات التي تريد تضمينها في مجلدك الجديد بالنقر على الخيار المناسب.
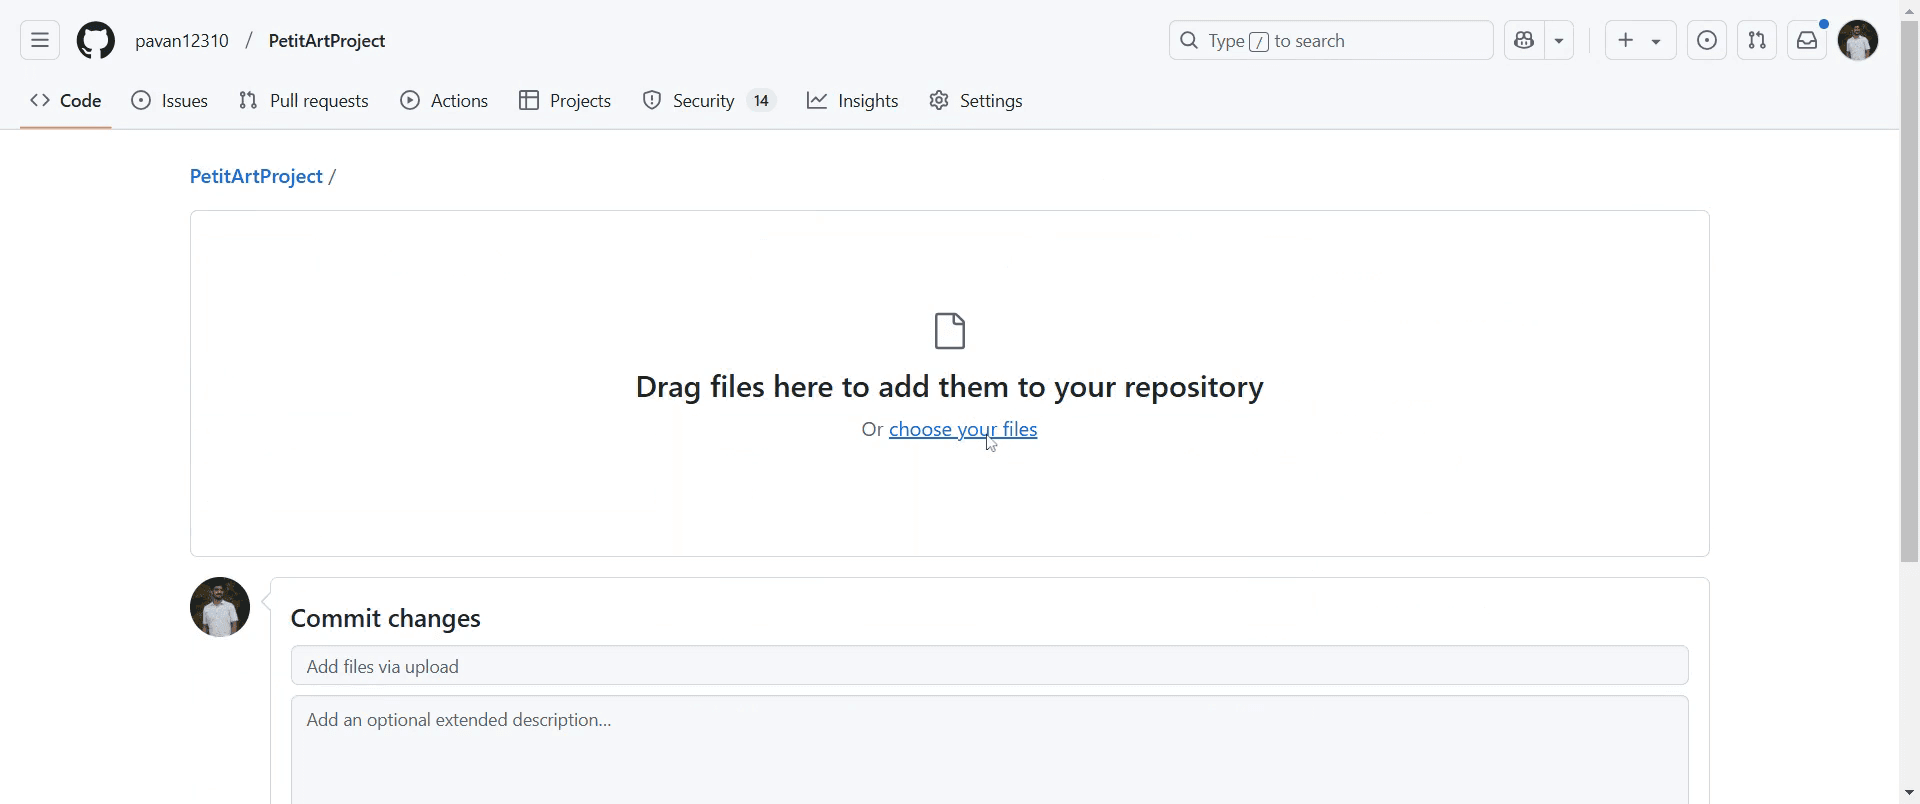
الخطوة 5
إذا رغبت، يمكنك إضافة رسالة commit وتقديم وصف للتغييرات لإعطاء المزيد من السياق.

الخطوة 6
أخيرًا، أكّد الإجراء بالنقر على "Commit changes".

الخطوة 7
بمجرد الانتهاء، سيتم إضافة المجلد بنجاح إلى المستودع.

نصائح احترافية لرفع مجلد إلى GitHub
استخدم سطر أوامر Git بالانتقال إلى المجلد وتشغيل
git add .وgit commit -m "Add folder"وgit push origin mainلرفع جميع الملفات.إذا كنت تستخدم واجهة GitHub على الويب، فاضغط المجلد إلى ملف ZIP قبل الرفع، لأن GitHub لا يدعم رفع المجلدات مباشرةً.
نظّم بنية المستودع بشكل صحيح قبل الرفع لضمان الوضوح وسهولة التنقل.
المخاطر الشائعة وكيفية تجنبها عند رفع مجلد إلى GitHub
محاولة رفع مجلد مباشرةً عبر واجهة GitHub على الويب؛ حيث يدعم GitHub رفع الملفات الفردية فقط.
نسيان تهيئة Git قبل الدفع؛ شغّل دائمًا
git initقبل إجراء commit للتغييرات في مستودع محلي جديد.عدم التحقق من ملف
.gitignore؛ تأكد من أن الملفات الضرورية لا يتم تجاهلها عن غير قصد.
الأسئلة الشائعة الشائعة حول رفع مجلد إلى GitHub
هل يمكنني رفع مجلد عبر واجهة GitHub على الويب؟
لا، لا يدعم GitHub رفع المجلدات مباشرةً، ولكن يمكنك رفع ملفات فردية أو ملف ZIP.كيف أضيف مجلدًا فارغًا إلى GitHub؟
أنشئ ملف.gitkeepداخل المجلد قبل إجراء الالتزام ثم الدفع.ماذا أفعل إذا لم يظهر رفع المجلد الخاص بي على GitHub؟
شغّلgit statusللتحقق من التغييرات غير الملتزم بها، ثم قم بالإلتزام والدفع مرة أخرى.هل يمكنني رفع مجلد إلى فرع محدد؟
نعم، انتقل إلى الفرع المطلوب باستخدامgit checkout <branch-name>قبل إضافة المجلد ودفعه.كيف أسجل الشاشة على Mac؟
لتسجيل الشاشة على جهاز Mac، يمكنك استخدام Trupeer AI. فهو يتيح لك التقاط الشاشة بالكامل ويوفر إمكانات ذكاء اصطناعي مثل إضافة صور رمزية بالذكاء الاصطناعي، وإضافة تعليق صوتي، وإضافة تقريب وتبعيد داخل الفيديو. وباستخدام ميزة ترجمة الفيديو بالذكاء الاصطناعي من trupeer، يمكنك ترجمة الفيديو إلى أكثر من 30 لغة.كيف أضيف صورة رمزية بالذكاء الاصطناعي إلى تسجيل الشاشة؟
لإضافة صورة رمزية بالذكاء الاصطناعي إلى تسجيل شاشة، ستحتاج إلى استخدام أداة لتسجيل الشاشة بالذكاء الاصطناعي. Trupeer AI هي أداة لتسجيل الشاشة بالذكاء الاصطناعي، والتي تساعدك على إنشاء مقاطع فيديو باستخدام عدة صور رمزية، كما تساعدك في إنشاء صورتك الرمزية الخاصة بالفيديو.كيف أسجل الشاشة على Windows؟
لتسجيل الشاشة على Windows، يمكنك استخدام Game Bar المدمجة (Windows + G) أو أداة ذكاء اصطناعي متقدمة مثل Trupeer AI للحصول على ميزات أكثر تقدمًا مثل الصور الرمزية بالذكاء الاصطناعي، والتعليق الصوتي، والترجمة، إلخ.كيف أضيف تعليقًا صوتيًا إلى الفيديو؟
لإضافة تعليق صوتي إلى مقاطع الفيديو، نزّل إضافة trupeer ai على Chrome. بعد التسجيل، ارفع الفيديو الخاص بك مع الصوت، واختر التعليق الصوتي المطلوب من trupeer ثم صدّر الفيديو المعدّل.كيف أقرّب في تسجيل الشاشة؟
لتكبير الجزء المطلوب أثناء تسجيل الشاشة، استخدم تأثيرات التكبير في Trupeer AI التي تتيح لك التكبير والتبعيد في لحظات محددة، مما يعزز التأثير البصري لمحتوى الفيديو الخاص بك.
قراءات مقترحة
كيفية إضافة رمز الروبية في Google Sheets
كيفية تغيير تنسيق العملة في Google Sheets
دروس ذات صلة

