
Cómo curvar el texto en Canva – guía rápida paso a paso
¿Quieres texto curvo en Canva? Aprende a usar la función Texto en curva para curvar fácilmente el texto para logotipos, etiquetas y más.
Esta guía proporciona un proceso paso a paso sobre cómo hacer que el texto se curve en Canva.
Sigue estas instrucciones claras para mejorar tus proyectos de diseño con elementos de texto curvado.
Curvar texto en Canva es una excelente manera de crear tipografía dinámica, circular o semicircular para logotipos, encabezados o elementos decorativos de diseño.
Guía paso a paso
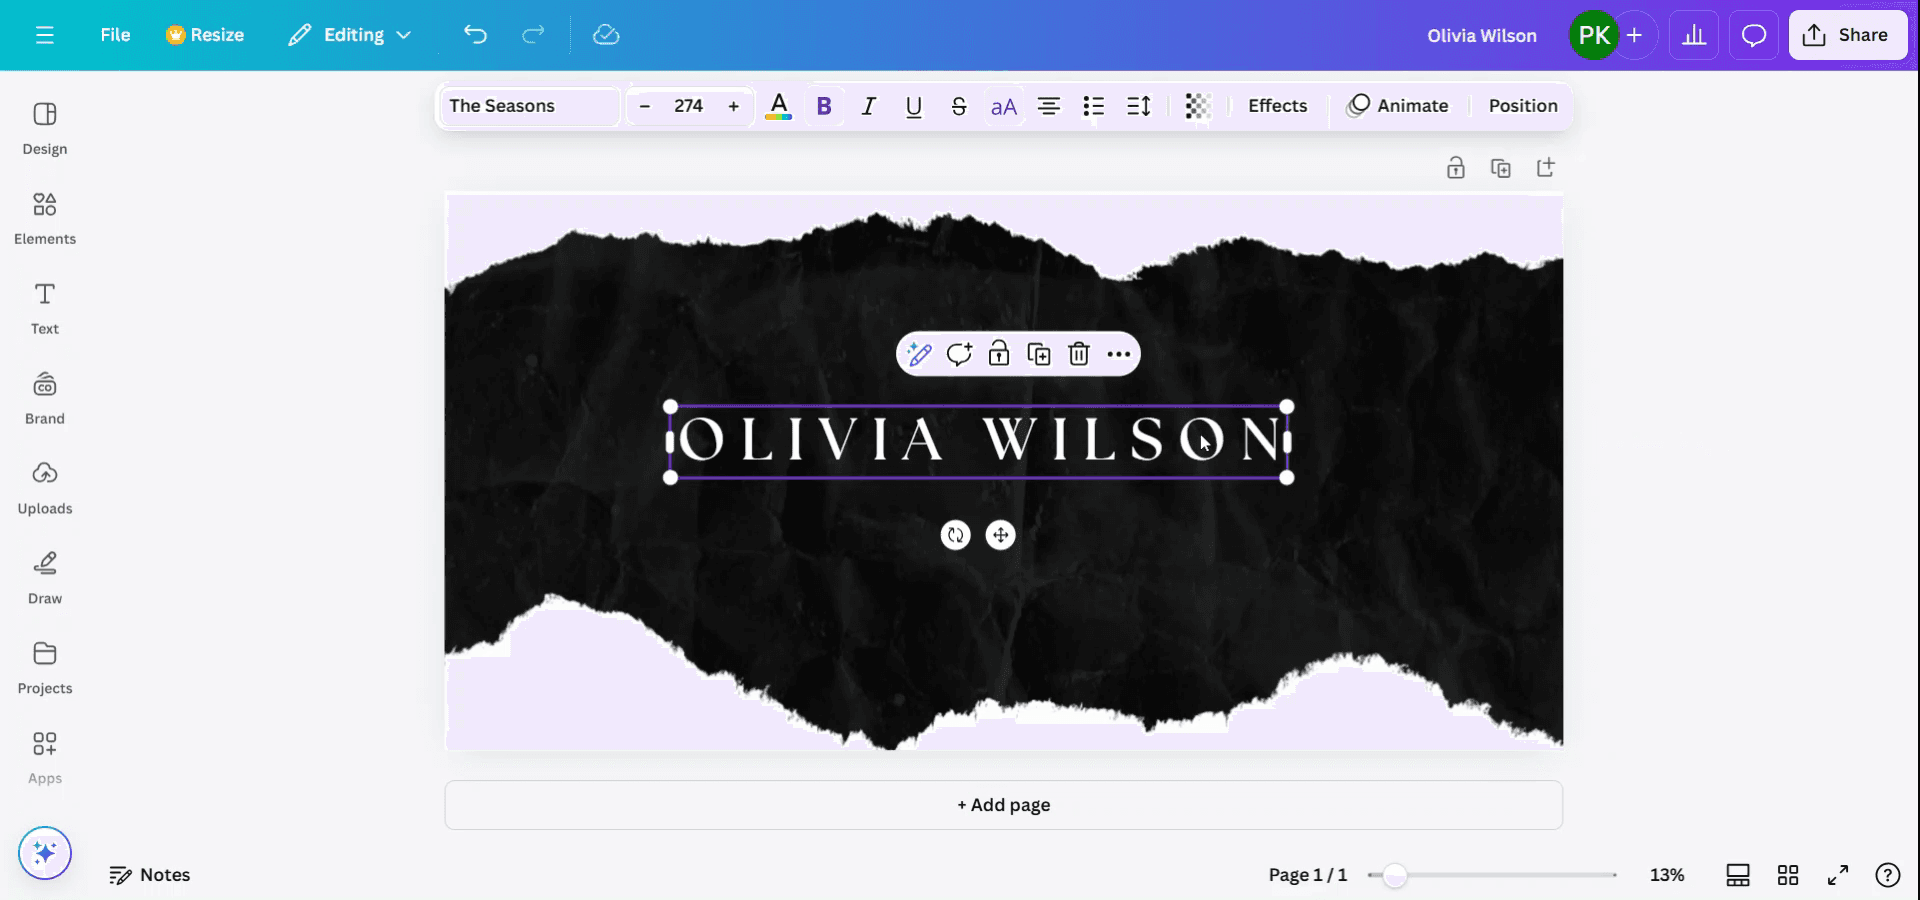
Selecciona el texto
Haz clic en el cuadro de texto que quieras curvar.
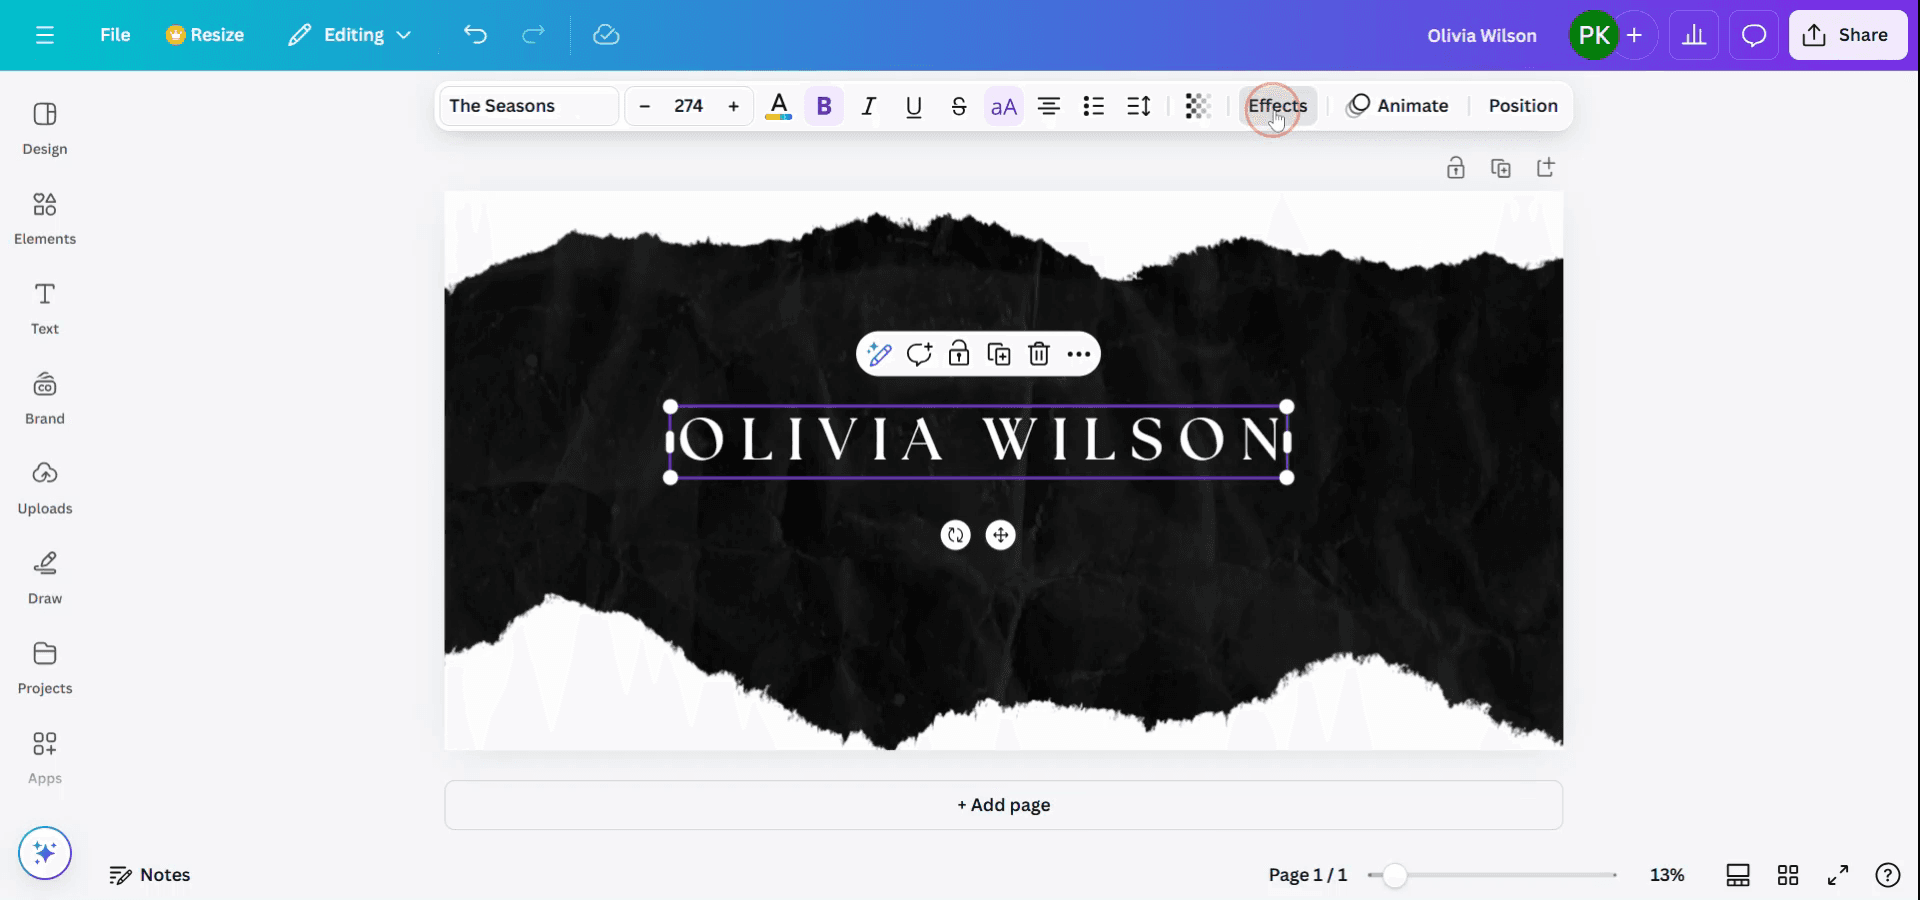
Abre el panel de efectos
En la barra de herramientas superior, haz clic en “Efectos”.
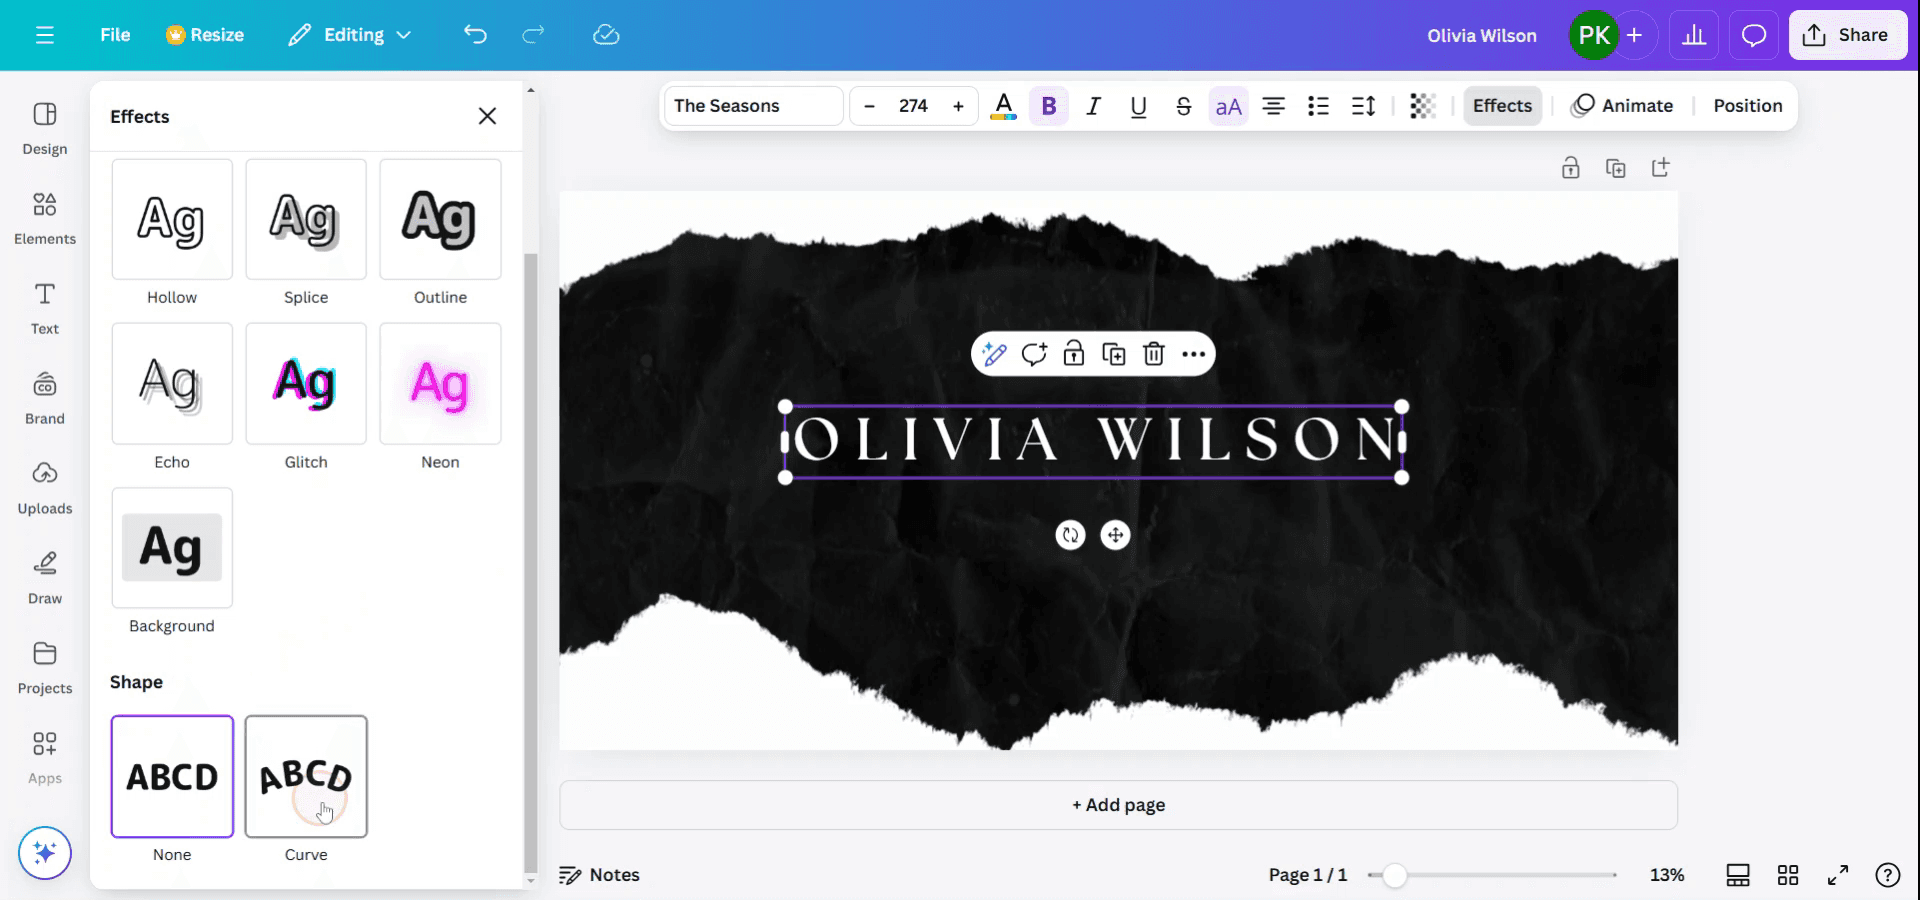
Aplica el efecto de curva
En Efectos de texto, selecciona “Curva”.
Tu texto se curvará al instante en un arco estándar.
Ajusta la curva
Usa el Control deslizante de curva para controlar la curvatura:
Desliza hacia la derecha para aumentar la curva (arco hacia arriba).
Desliza hacia la izquierda para una curva inversa (arco hacia abajo).
Ajustes finos (opcional)
Usa el espaciado entre letras para separar los caracteres y lograr una curva más limpia.
Combínalo con el espaciado entre líneas o el tamaño de fuente para un control adicional.
Guía paso a paso: Cómo curvar texto en Canva
Paso 1
Comienza abriendo tu diseño en Canva y seleccionando el texto que deseas curvar.
Paso 2
Una vez seleccionado el texto, aparecerá una barra de herramientas en la parte superior de la pantalla. Haz clic en la opción 'Efectos'.
Paso 3
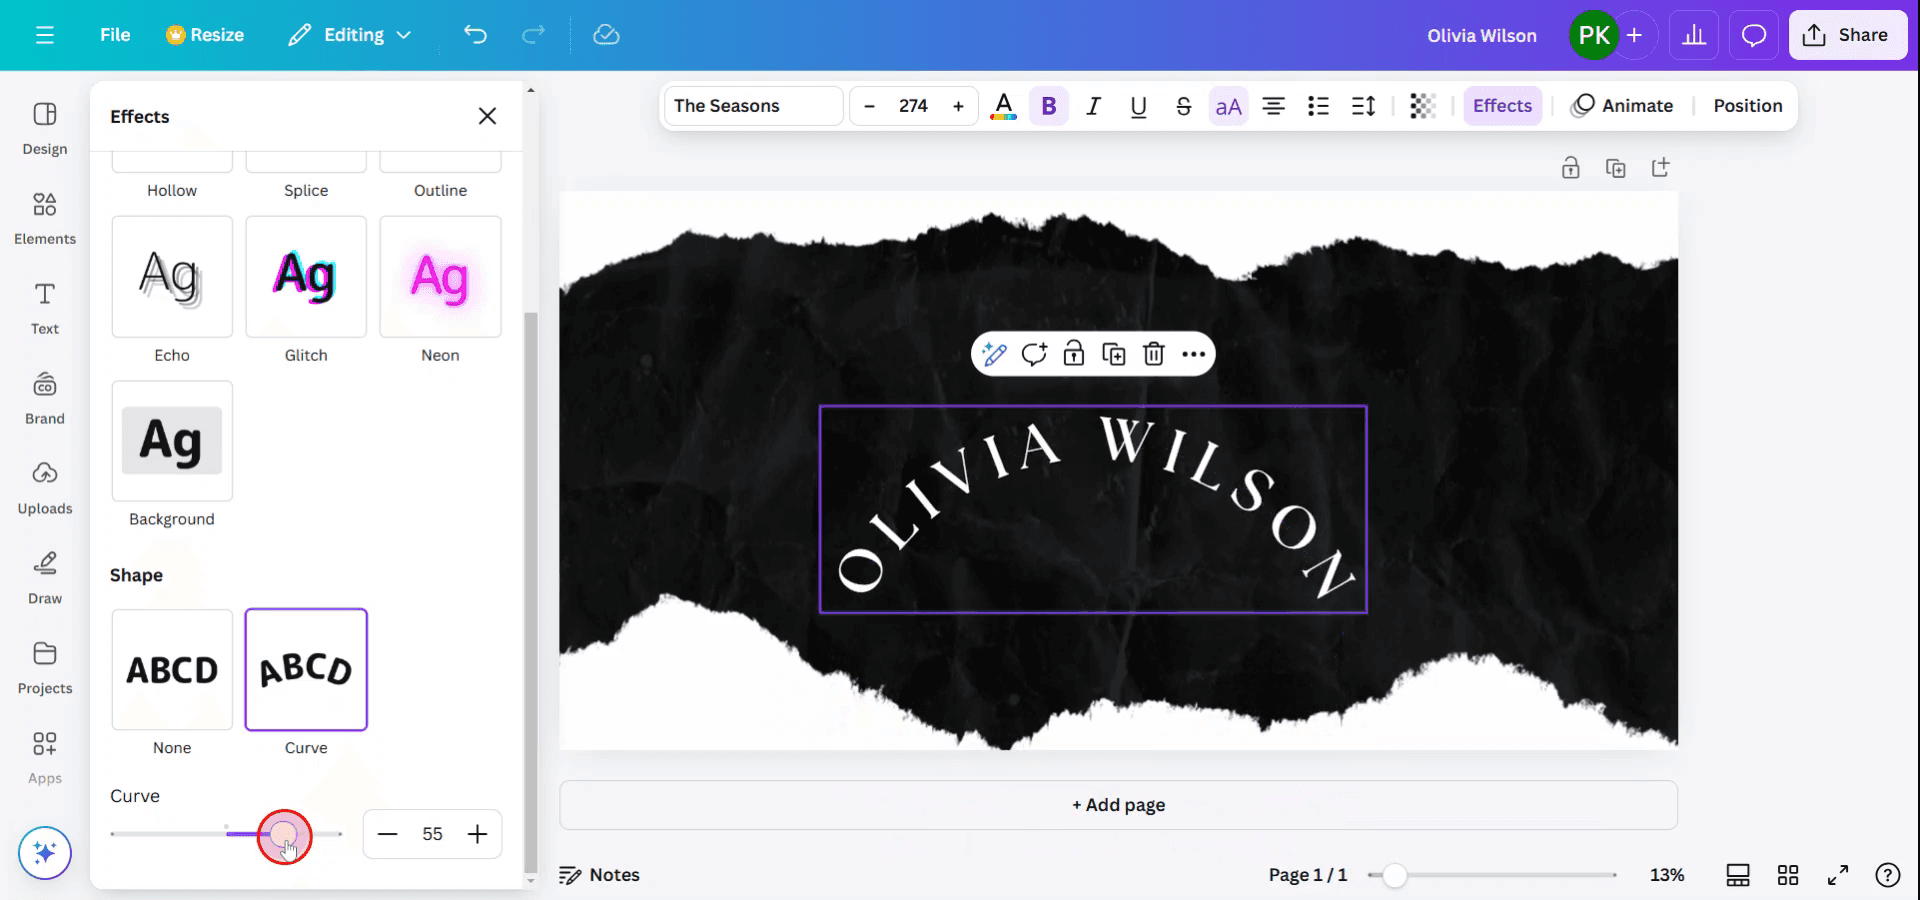
Después de seleccionar 'Efectos', explora los distintos estilos y formas que aparecen en la parte inferior de la interfaz.
Elige la opción 'Curva' entre las formas disponibles.
Paso 4
Observa que el texto ahora está curvado. Puedes ajustar la curvatura a tu gusto modificando la configuración de la curva.
Consejos profesionales para curvar texto en Canva
Selecciona tu texto:
Haz clic en el cuadro de texto que quieres curvar.Abre el panel "Efectos":
Una vez seleccionado el texto, haz clic en el botón “Efectos” de la barra de herramientas superior.Elige el efecto "Curva":
En el panel “Efectos”, desplázate hacia abajo y selecciona la opción “Curva”.Ajusta la curva:
Después de seleccionar la curva, usa el control deslizante para ajustar la intensidad de la curva. Arrástralo hacia la izquierda o hacia la derecha para curvar el texto más o menos, según las necesidades de tu diseño.Ajusta la posición con precisión:
Usa los controles de rotación para ajustar la orientación del texto si es necesario, y ajusta el tamaño o la posición del cuadro de texto para que se adapte correctamente a la curva.
Errores comunes y cómo evitarlos al curvar texto en Canva
El texto se vuelve demasiado distorsionado:
Solución: Evita usar ajustes de curva extremos que dificulten la lectura del texto. Ajusta la curva gradualmente hasta encontrar un equilibrio entre estilo y legibilidad.No puedes ajustar el texto después de curvarlo:
Solución: Una vez que curvas el texto, aún puedes editarlo como cualquier otro texto en Canva. Simplemente haz clic en el cuadro de texto y realiza cambios en el contenido o el estilo.La curva no encaja con el diseño:
Solución: Asegúrate de ajustar adecuadamente el tamaño del cuadro de texto antes de aplicar la curva. Si la curva distorsiona demasiado el texto, intenta redimensionar el cuadro para mantener la legibilidad.Problemas de alineación después de curvar:
Solución: Después de curvarlo, asegúrate de que el texto siga alineado correctamente con tu diseño. Puedes usar las herramientas de alineación de Canva para ajustarlo según sea necesario.No puedes curvar varias líneas de texto:
Solución: Si tu texto tiene varias líneas, puede que tengas que ajustar cada línea por separado o convertir el texto en una sola línea antes de aplicar el efecto de curva.
Preguntas frecuentes comunes sobre curvar texto en Canva
¿Puedo curvar cualquier texto en Canva?
Sí, puedes curvar cualquier texto en Canva, siempre que sea un cuadro de texto creado dentro de la plataforma.¿Cómo cambio la dirección de la curva?
Puedes ajustar la dirección de la curva arrastrando el control deslizante hacia la izquierda o la derecha en el panel “Effects” para hacer que el texto se curve hacia arriba o hacia abajo.¿Puedo aplicar una curva a varias líneas de texto?
Aunque puedes curvar varias líneas, tendrás que aplicar el efecto a cada línea individualmente si quieres que todas se curven en el mismo diseño.¿Puedo ajustar la curva después de aplicarla?
Sí, siempre puedes ajustar la curva seleccionando el texto y modificando el control deslizante de la curva en el panel “Effects”.¿Curvar texto es una función gratuita en Canva?
Sí, curvar texto está disponible en la versión gratuita de Canva.¿Cómo grabar la pantalla en Mac?
Para grabar la pantalla en una Mac, puedes usar Trupeer AI. Te permite capturar toda la pantalla y ofrece capacidades de IA como añadir avatares de IA, añadir voz en off y hacer acercamientos y alejamientos en el video. Con la función de traducción de video con IA de trupeer, puedes traducir el video a más de 30 idiomas.¿Cómo agregar un avatar de IA a una grabación de pantalla?
Para agregar un avatar de IA a una grabación de pantalla, deberás usar una herramienta de grabación de pantalla con IA. Trupeer AI es una herramienta de grabación de pantalla con IA, que te ayuda a crear videos con varios avatares y también te ayuda a crear tu propio avatar para el video.¿Cómo grabar la pantalla en Windows?
Para grabar la pantalla en Windows, puedes usar la barra de juegos integrada (Windows + G) o una herramienta de IA avanzada como Trupeer AI para funciones más avanzadas como avatares de IA, voz en off, traducción, etc.¿Cómo añadir voz en off a un video?
Para añadir voz en off a los videos, descarga la extensión de Chrome de Trupeer AI. Una vez registrado, sube tu video con voz, elige la voz en off deseada de Trupeer y exporta tu video editado.¿Cómo hago zoom en una grabación de pantalla?
Para hacer zoom durante una grabación de pantalla, usa los efectos de zoom en Trupeer AI, que te permiten acercar y alejar en momentos específicos, mejorando el impacto visual de tu contenido de video.
Lecturas sugeridas
Generador de documentación técnica
Software de base de conocimientos
Cómo convertir una imagen en una página para colorear en Canva
Cómo imprimir a doble cara en Canva
Tutoriales relacionados

