
So entnimmst du ein Foto aus einem Video in Canva
Erfahre, wie du in Canva ein Foto aus einem Video erstellst, indem du ein Einzelbild aufnimmst und es als Bild exportierst. Folge diesem einfachen Tutorial und erstelle mit Trupeer klare visuelle Anleitungen.
Diese Anleitung bietet einen umfassenden Schritt-für-Schritt-Leitfaden, wie Sie innerhalb von Canva ein Standbild aus einem Video aufnehmen können.
Folgen Sie den nachstehenden Schritten, um das gewünschte Foto effizient aus Ihrem Videoprojekt zu extrahieren.
Um in Canva ein Foto aus einem Video zu erfassen, laden Sie das Video hoch, positionieren Sie es so, dass der gewünschte Frame angezeigt wird, und laden Sie das Design dann als Bilddatei (PNG oder JPEG) herunter. Zwar hat Canva keine dedizierte "Frame-Grab"-Funktion, aber mit diesem Workaround können Sie effektiv ein Standbild extrahieren.
Schritt-für-Schritt-Anleitung:
1. Laden Sie Ihr Video hoch:
Öffnen Sie Ihr Canva-Projekt und laden Sie das Video hoch, das Sie verwenden möchten. Ziehen Sie es auf Ihre Arbeitsfläche.
2. Legen Sie den Frame fest:
Bewegen Sie den Abspielkopf (den Schieberegler) in der Videotimeline zu dem Frame, den Sie erfassen möchten. Passen Sie die Größe an und positionieren Sie das Video auf der Arbeitsfläche nach Bedarf.
3. Laden Sie den Frame als Bild herunter:
Klicken Sie oben rechts auf "Teilen".
Wählen Sie "Herunterladen".
Wählen Sie PNG oder JPEG als Dateityp.
Wählen Sie unter „Seiten auswählen“ nur die aktuelle Seite.
Schritt-für-Schritt-Anleitung: So extrahieren Sie ein Foto aus einem Video in Canva
Schritt 1
Um mit dem Erfassen eines Fotos aus einem Video in Canva zu beginnen, öffnen Sie ein bestehendes Design, das das Video enthält. Verwenden Sie den Zeitmesser unter dem Video, um es abzuspielen und genau an dem Moment anzuhalten, den Sie erfassen möchten.

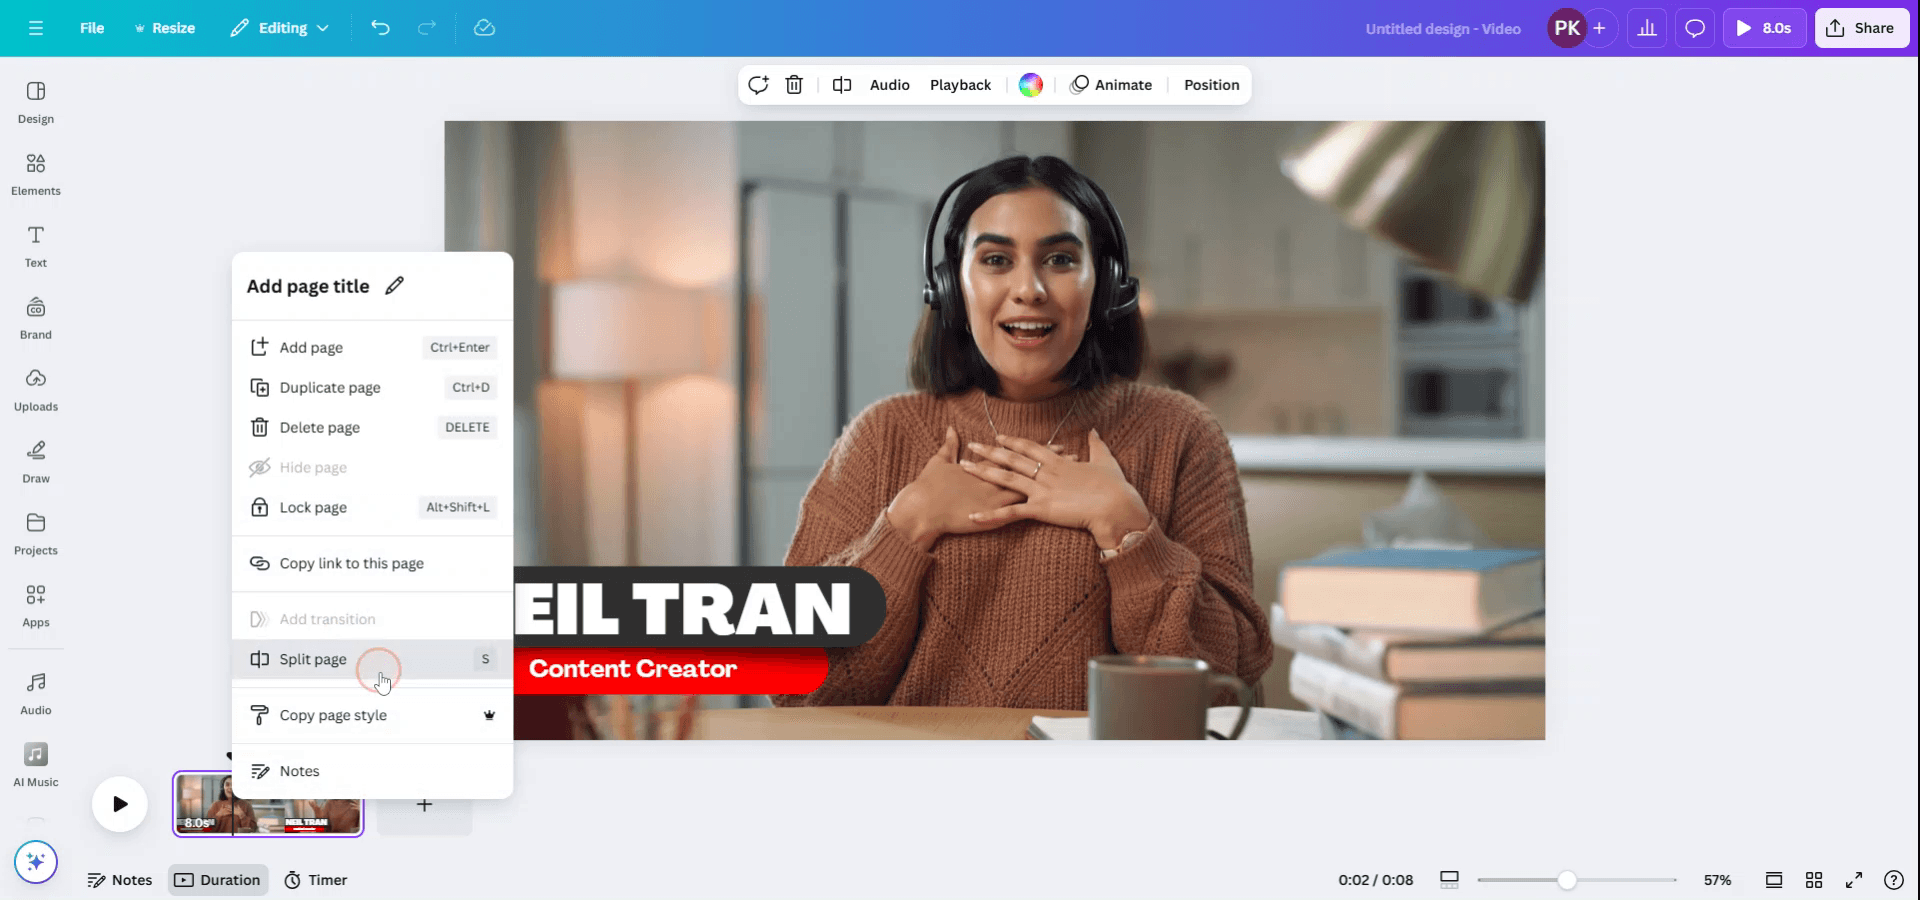
Schritt 2
Sobald Sie den genauen Frame identifiziert haben, den Sie erfassen möchten, klicken Sie auf "S", um das Video zu teilen. Alternativ können Sie mit der rechten Maustaste auf das Video klicken und "Seite teilen" wählen, um den Frame zu isolieren.
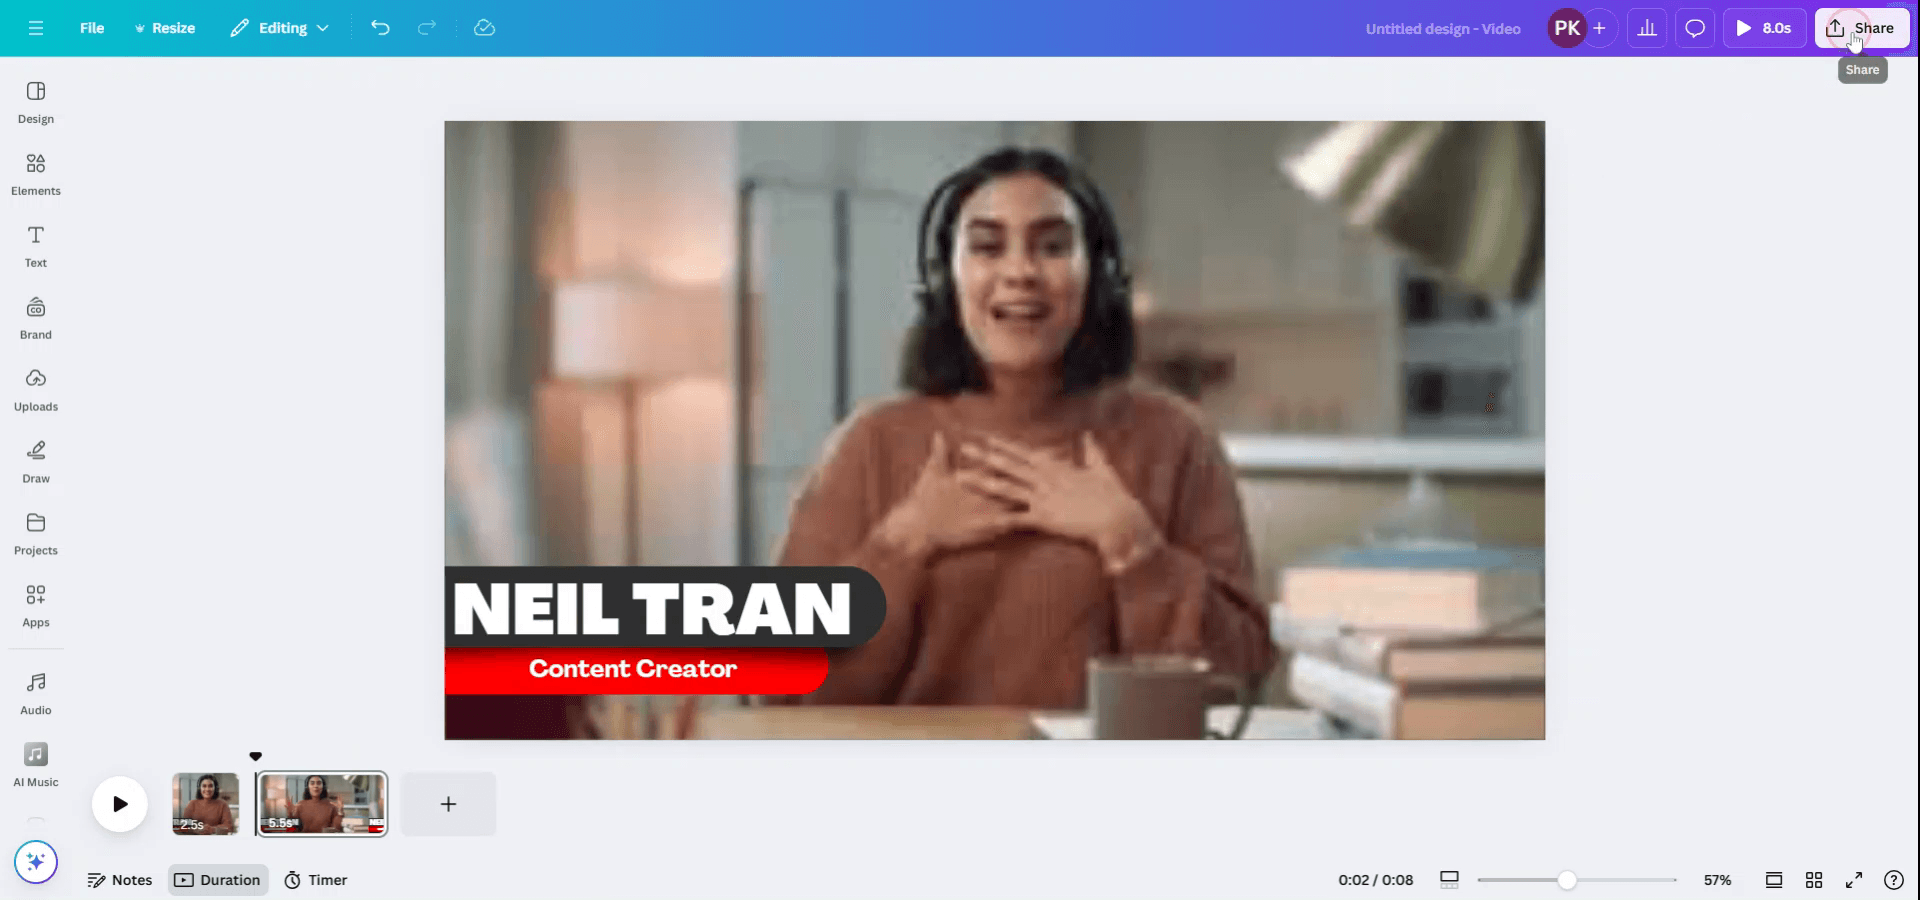
Schritt 3
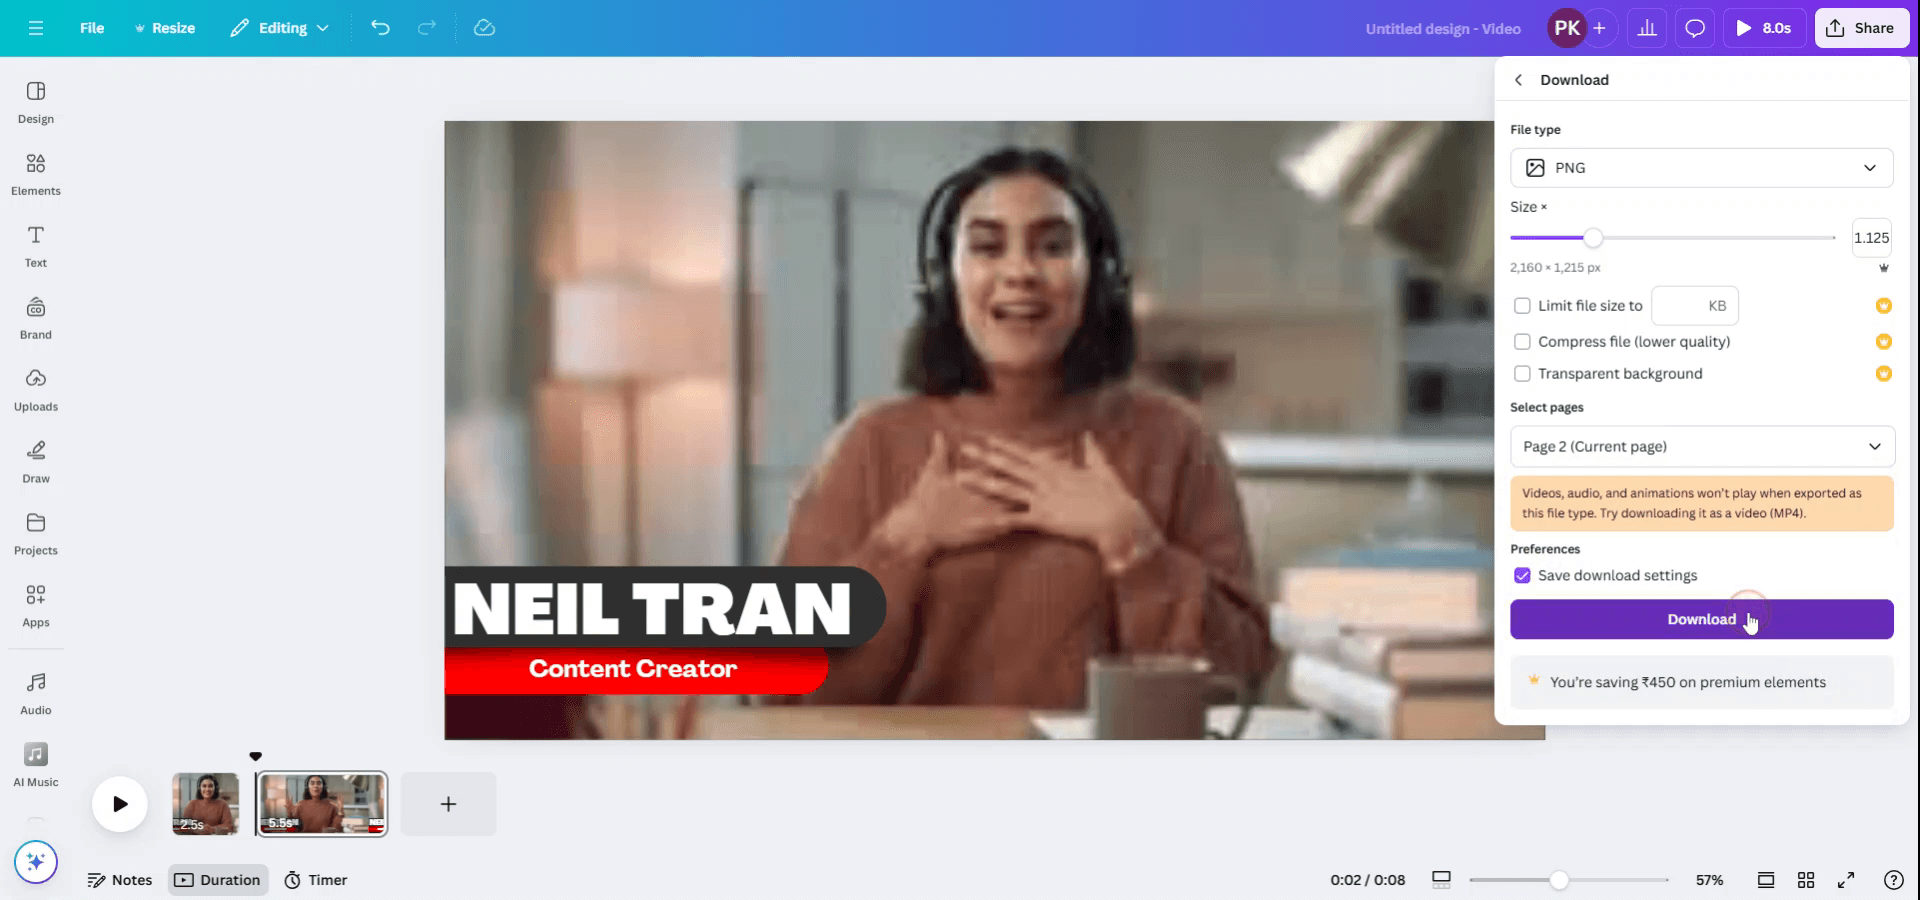
Der ausgewählte Frame wird nun auf einer neuen Seite angezeigt, etwa Seite 2. Um diesen Frame als Foto herunterzuladen, klicken Sie auf die Schaltfläche "Teilen" und wählen Sie "Herunterladen" aus dem Dropdown-Menü.
Schritt 4
Stellen Sie den Dateityp auf PNG ein und passen Sie die Größe bei Bedarf an.
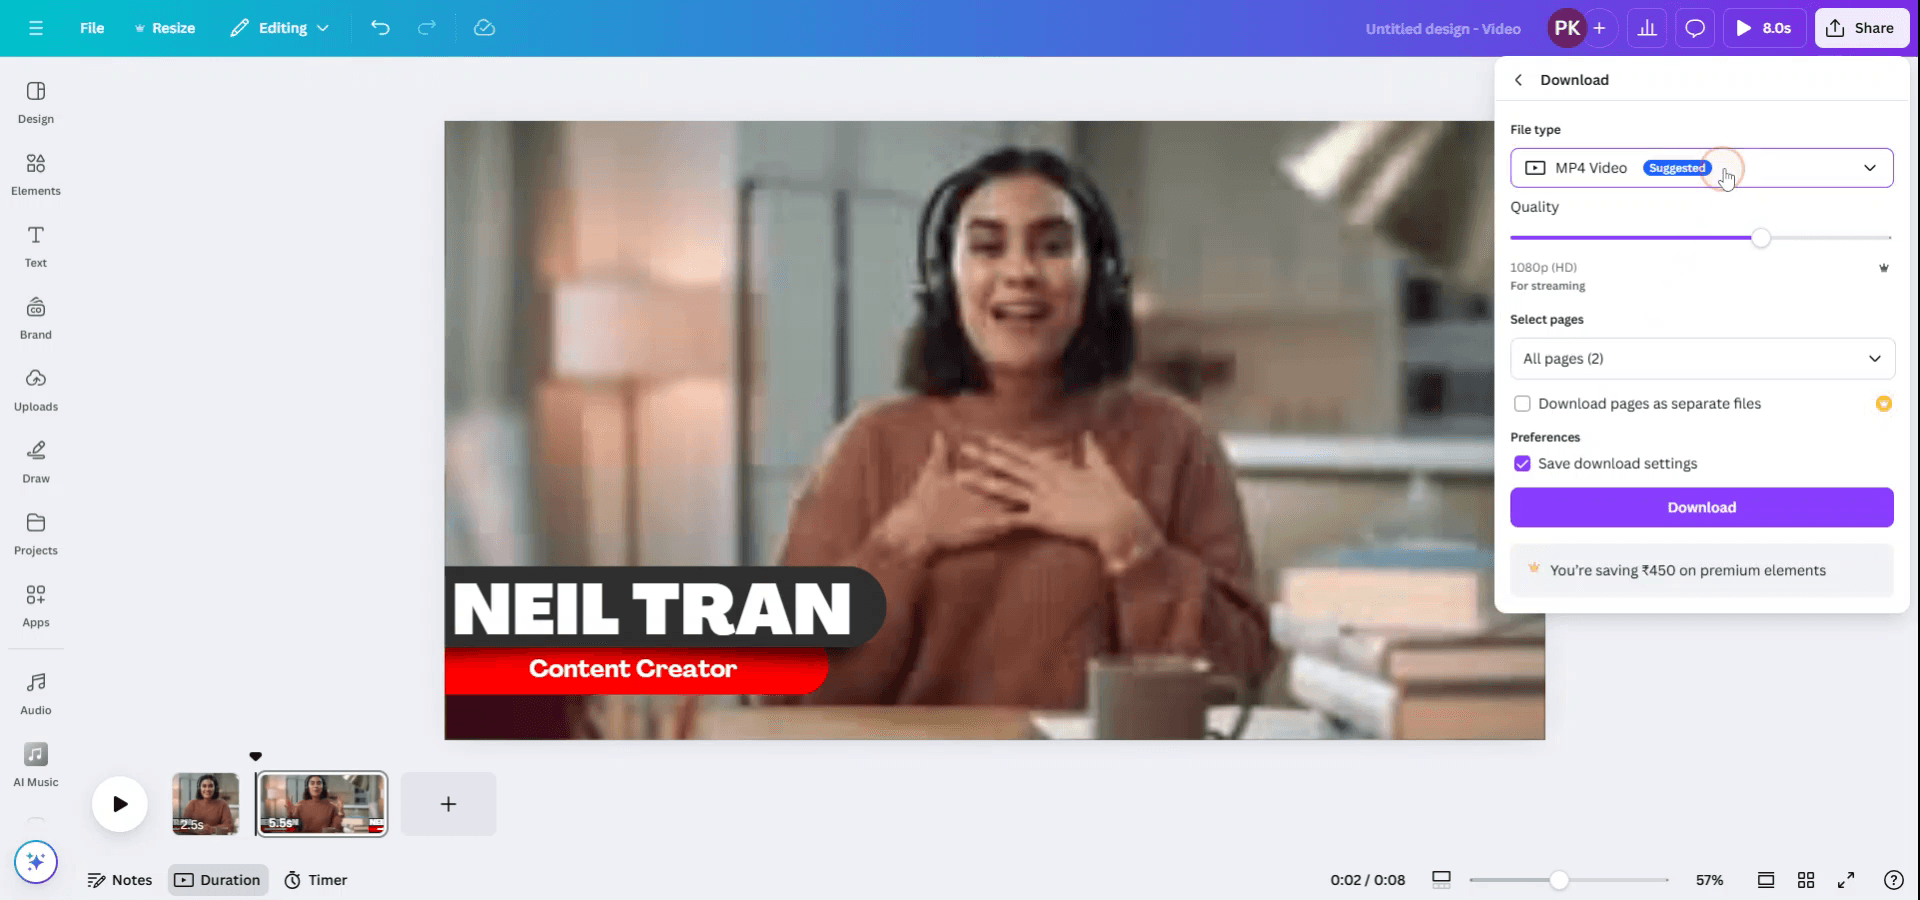
Schritt 5
Stellen Sie sicher, dass Sie die richtige Seite (Seite 2) ausgewählt haben, auf der sich das gewünschte Foto befindet, bevor Sie fortfahren.

Schritt 6
Sobald alle Einstellungen bestätigt sind, klicken Sie auf "Fertig" und dann auf "Herunterladen", um das Foto auf Ihrem Gerät zu speichern.
Profi-Tipps, um in Canva ein Foto aus einem Video zu machen
Bei dem gewünschten Frame pausieren: Spiele das Video ab und pausiere genau bei dem Frame, den du als Bild aufnehmen möchtest.
Einen Screenshot machen: Verwende die Screenshot-Funktion deines Computers oder Geräts (z. B. das Snipping Tool unter Windows, Command+Shift+4 auf dem Mac), um den Frame aufzunehmen.
Den Screenshot in Canva hochladen: Nachdem du den Screenshot aufgenommen hast, lade ihn per Drag-and-Drop oder über die Registerkarte „Uploads“ in Canva hoch.
Das Video-Bearbeitungstool verwenden: Canva ermöglicht es dir, Videos zu trimmen und zu teilen. Nutze diese Funktion, um dich auf den Teil des Videos zu konzentrieren, aus dem du ein Foto aufnehmen möchtest, bevor du den Screenshot machst.
Canva’s Bildeditor für Verbesserungen verwenden: Sobald das Bild hochgeladen ist, verwende den Bildeditor von Canva, um Helligkeit und Kontrast anzupassen und Filter für einen professionellen Look anzuwenden.
Häufige Stolperfallen und wie man sie vermeidet, wenn man in Canva ein Foto aus einem Video entnimmt
Screenshot von geringer Qualität: Wenn du einen Screenshot von einem Video mit niedriger Auflösung machst, kann die Bildqualität schlecht sein.
Lösung: Stelle sicher, dass das Video eine hohe Auflösung hat, bevor du einen Screenshot machst, damit die Bildschärfe erhalten bleibt.Unerwünschte Elemente im Frame: Manchmal werden andere Teile des Videos in dem Frame angezeigt, den du aufnehmen möchtest.
Lösung: Trimme das Video in Canva vor dem Pausieren, um den gewünschten Frame zu isolieren, oder verwende nach dem Aufnehmen des Bildes Zuschneidewerkzeuge.Die Bildgröße nicht anpassen: Nachdem du den Screenshot hochgeladen hast, vergisst du möglicherweise, ihn so zu skalieren, dass er zu deinem Design passt.
Lösung: Verwende die Größenanpassungsoptionen in Canva, um das Bild perfekt an dein Layout anzupassen.Verlust des Seitenverhältnisses: Beim Skalieren des Bildes kann das ursprüngliche Seitenverhältnis verzerrt werden.
Lösung: Halte beim Ändern der Größe die "Shift"-Taste gedrückt, um die korrekten Proportionen des Bildes beizubehalten.Dateiformat-Einschränkungen: Screenshots sind möglicherweise nicht immer im besten Format für Canva.
Lösung: Speichere Screenshots vor dem Hochladen in Canva in gängigen Bildformaten (PNG oder JPG).
Häufig gestellte Fragen zum Extrahieren eines Fotos aus einem Video in Canva
Kann ich in Canva direkt ein Foto aus einem Video extrahieren?
Nein, Canva hat keine integrierte Funktion zum Extrahieren von Fotos aus Videos. Sie müssen den Frame zuerst per Screenshot erfassen.Welche Videoformate kann ich in Canva hochladen?
Canva unterstützt Video-Uploads in MP4, MOV und anderen gängigen Videoformaten.Kann ich das Foto nach dem Erfassen aus einem Video bearbeiten?
Ja, nachdem Sie es in Canva hochgeladen haben, können Sie die Bearbeitungswerkzeuge der Plattform verwenden, um das Bild zu verbessern oder anzupassen.Gibt es eine bessere Möglichkeit, hochwertige Fotos aus einem Video zu extrahieren?
Wenn Sie ein Bild in höherer Qualität benötigen, sollten Sie vor dem Hochladen in Canva eine spezielle Video-zu-Bild-Software verwenden.Kann ich einen Frame aus einem Video für kommerzielle Zwecke verwenden?
Stellen Sie sicher, dass Sie die erforderlichen Rechte zur Nutzung des Videoinhalts haben. Canva bietet Stock-Videos und -Fotos mit kommerziellen Nutzungsrechten an, für persönliche Videos können jedoch eine Genehmigung oder Lizenzierung erforderlich sein.Wie nimmt man den Bildschirm auf dem Mac auf?
Um den Bildschirm auf einem Mac aufzunehmen, können Sie Trupeer AI verwenden. Es ermöglicht Ihnen, den gesamten Bildschirm aufzuzeichnen und bietet KI-Funktionen wie das Hinzufügen von KI-Avataren, Voiceover sowie Zoom hinein und heraus im Video. Mit der KI-Funktion zur Videoübersetzung von trupeer können Sie das Video in über 30 Sprachen übersetzen.Wie fügt man einer Bildschirmaufnahme einen KI-Avatar hinzu?
Um einer Bildschirmaufnahme einen KI-Avatar hinzuzufügen, müssen Sie ein KI-Bildschirmaufzeichnungstool. verwenden. Trupeer AI ist ein KI-Bildschirmaufzeichnungstool, mit dem Sie Videos mit mehreren Avataren erstellen können, und es hilft Ihnen auch dabei, Ihren eigenen Avatar für das Video zu erstellen.Wie nimmt man den Bildschirm unter Windows auf?
Um den Bildschirm unter Windows aufzunehmen, können Sie die integrierte Game Bar (Windows + G) oder ein fortschrittliches KI-Tool wie Trupeer AI für erweiterte Funktionen wie KI-Avatare, Voiceover, Übersetzung usw. verwenden.Wie fügt man einem Video ein Voiceover hinzu?
Um Voiceover zu Videos hinzuzufügen, laden Sie die Chrome-Erweiterung von trupeer ai herunter. Nach der Registrierung laden Sie Ihr Video mit Ton hoch, wählen Sie das gewünschte Voiceover von Trupeer aus und exportieren Sie Ihr bearbeitetes Video.Wie zoome ich in einer Bildschirmaufnahme hinein?
Um während einer Bildschirmaufnahme hineinzuzoomen, verwenden Sie die Zoom-Effekte in Trupeer AI, mit denen Sie an bestimmten Momenten hinein- und herauszoomen können, um die visuelle Wirkung Ihres Videoinhalts zu verbessern.
Weitere Fragen
Generator für technische Dokumentation
Leitfaden für Benutzerhandbücher
Wie man in Canva ein Bild in eine Ausmalvorlage verwandelt
Wie man in Canva beidseitig druckt
Verwandte Tutorials

