

So ändern Sie ein GitHub-Repository von privat zu öffentlich
Erfahren Sie, wie Sie ein GitHub-Repository über die Repository-Einstellungen von privat auf öffentlich umstellen. Folgen Sie dieser Schritt-für-Schritt-Anleitung und erstellen Sie mit Trupeer Entwickler-Guides.
Um ein GitHub-Repository von privat auf öffentlich zu ändern, befolgen Sie diese Schritte:
Zum Repository navigieren: Öffnen Sie das private Repository, das Sie auf GitHub öffentlich machen möchten.
Einstellungen aufrufen: Klicken Sie auf den Tab "Settings" oben auf der Repository-Seite.
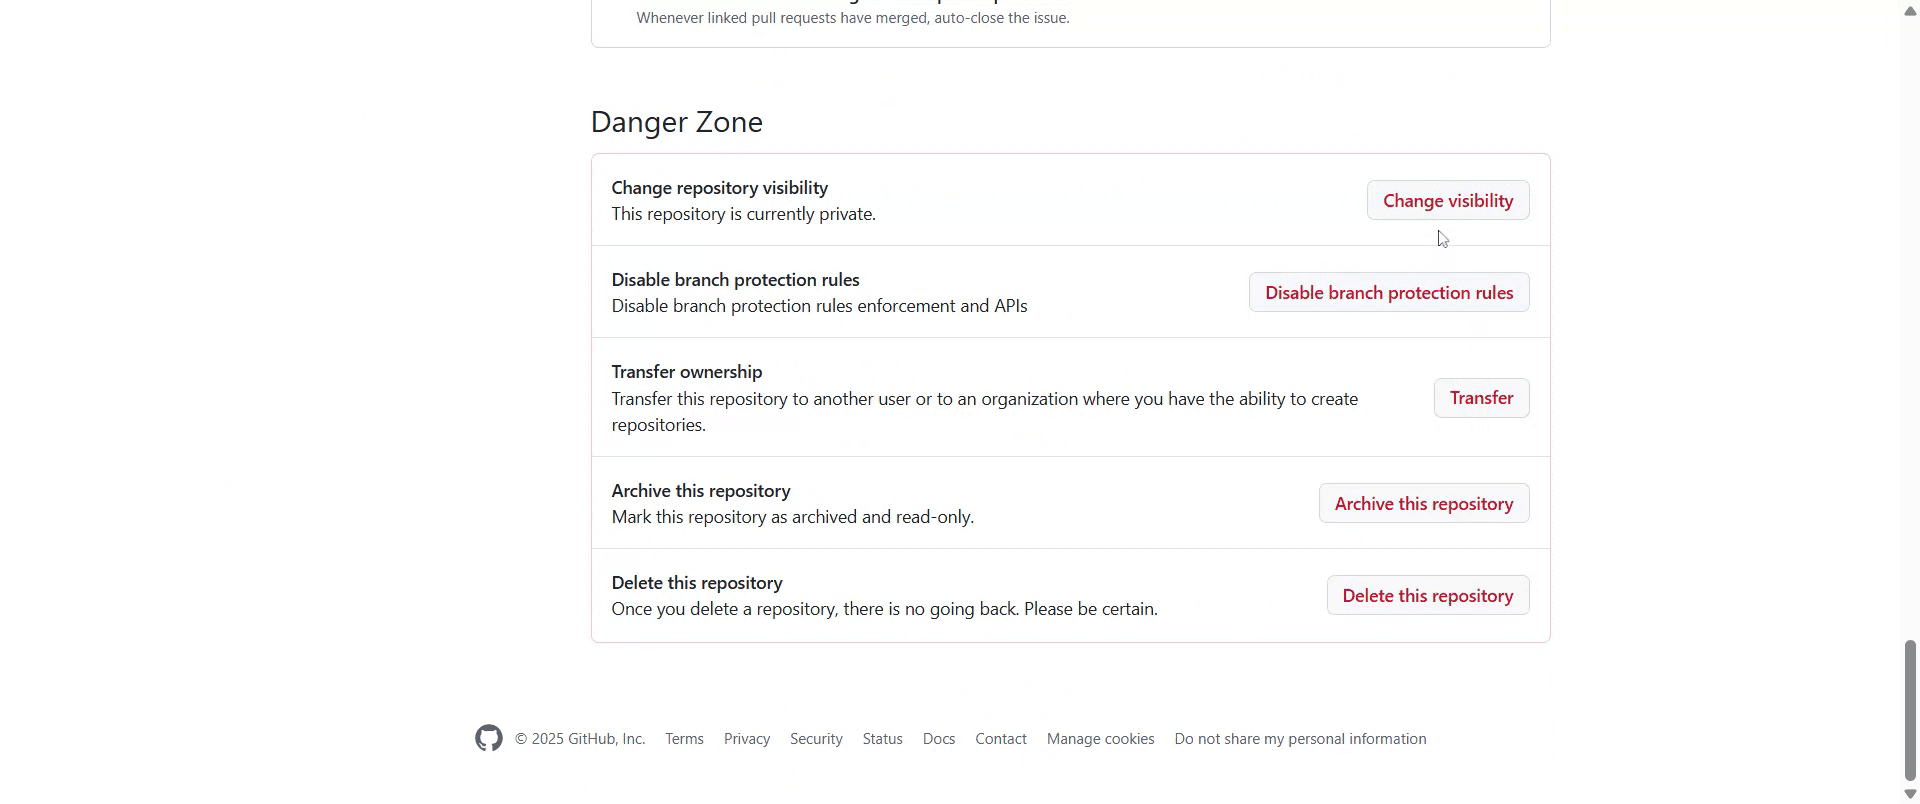
Gefahrenzone finden: Scrollen Sie auf der Einstellungsseite nach unten, bis Sie den Abschnitt "Danger Zone" finden.
Sichtbarkeit ändern: Suchen Sie innerhalb von "Danger Zone" die Option "Change repository visibility" und klicken Sie auf die danebenstehende Schaltfläche "Change visibility".
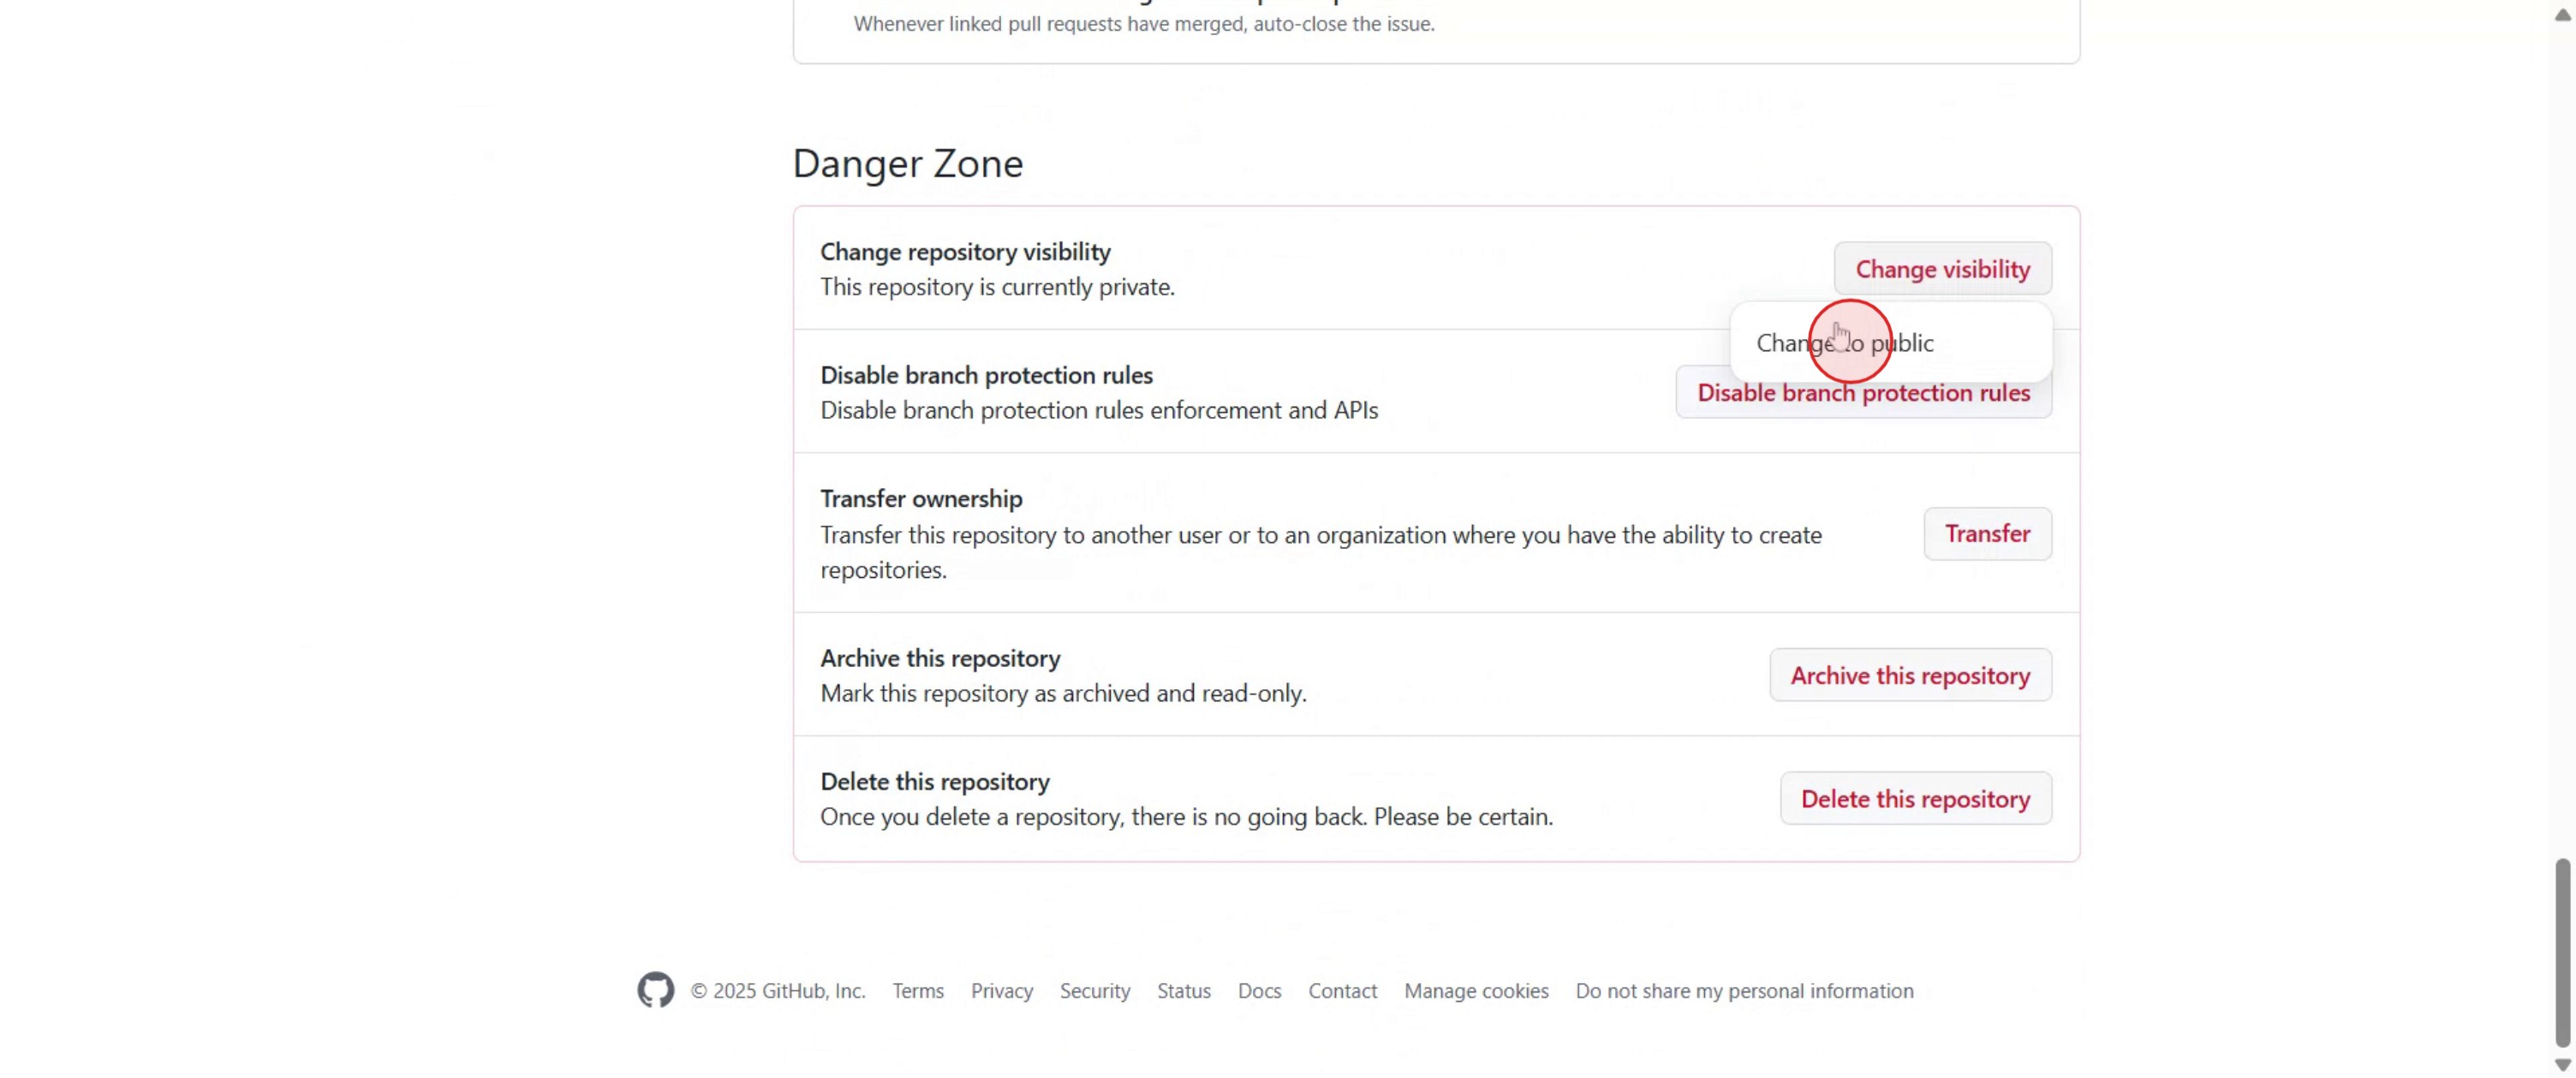
Öffentlich auswählen: Es wird ein Pop-up-Fenster angezeigt. Wählen Sie aus den angezeigten Optionen "Change to public" aus.
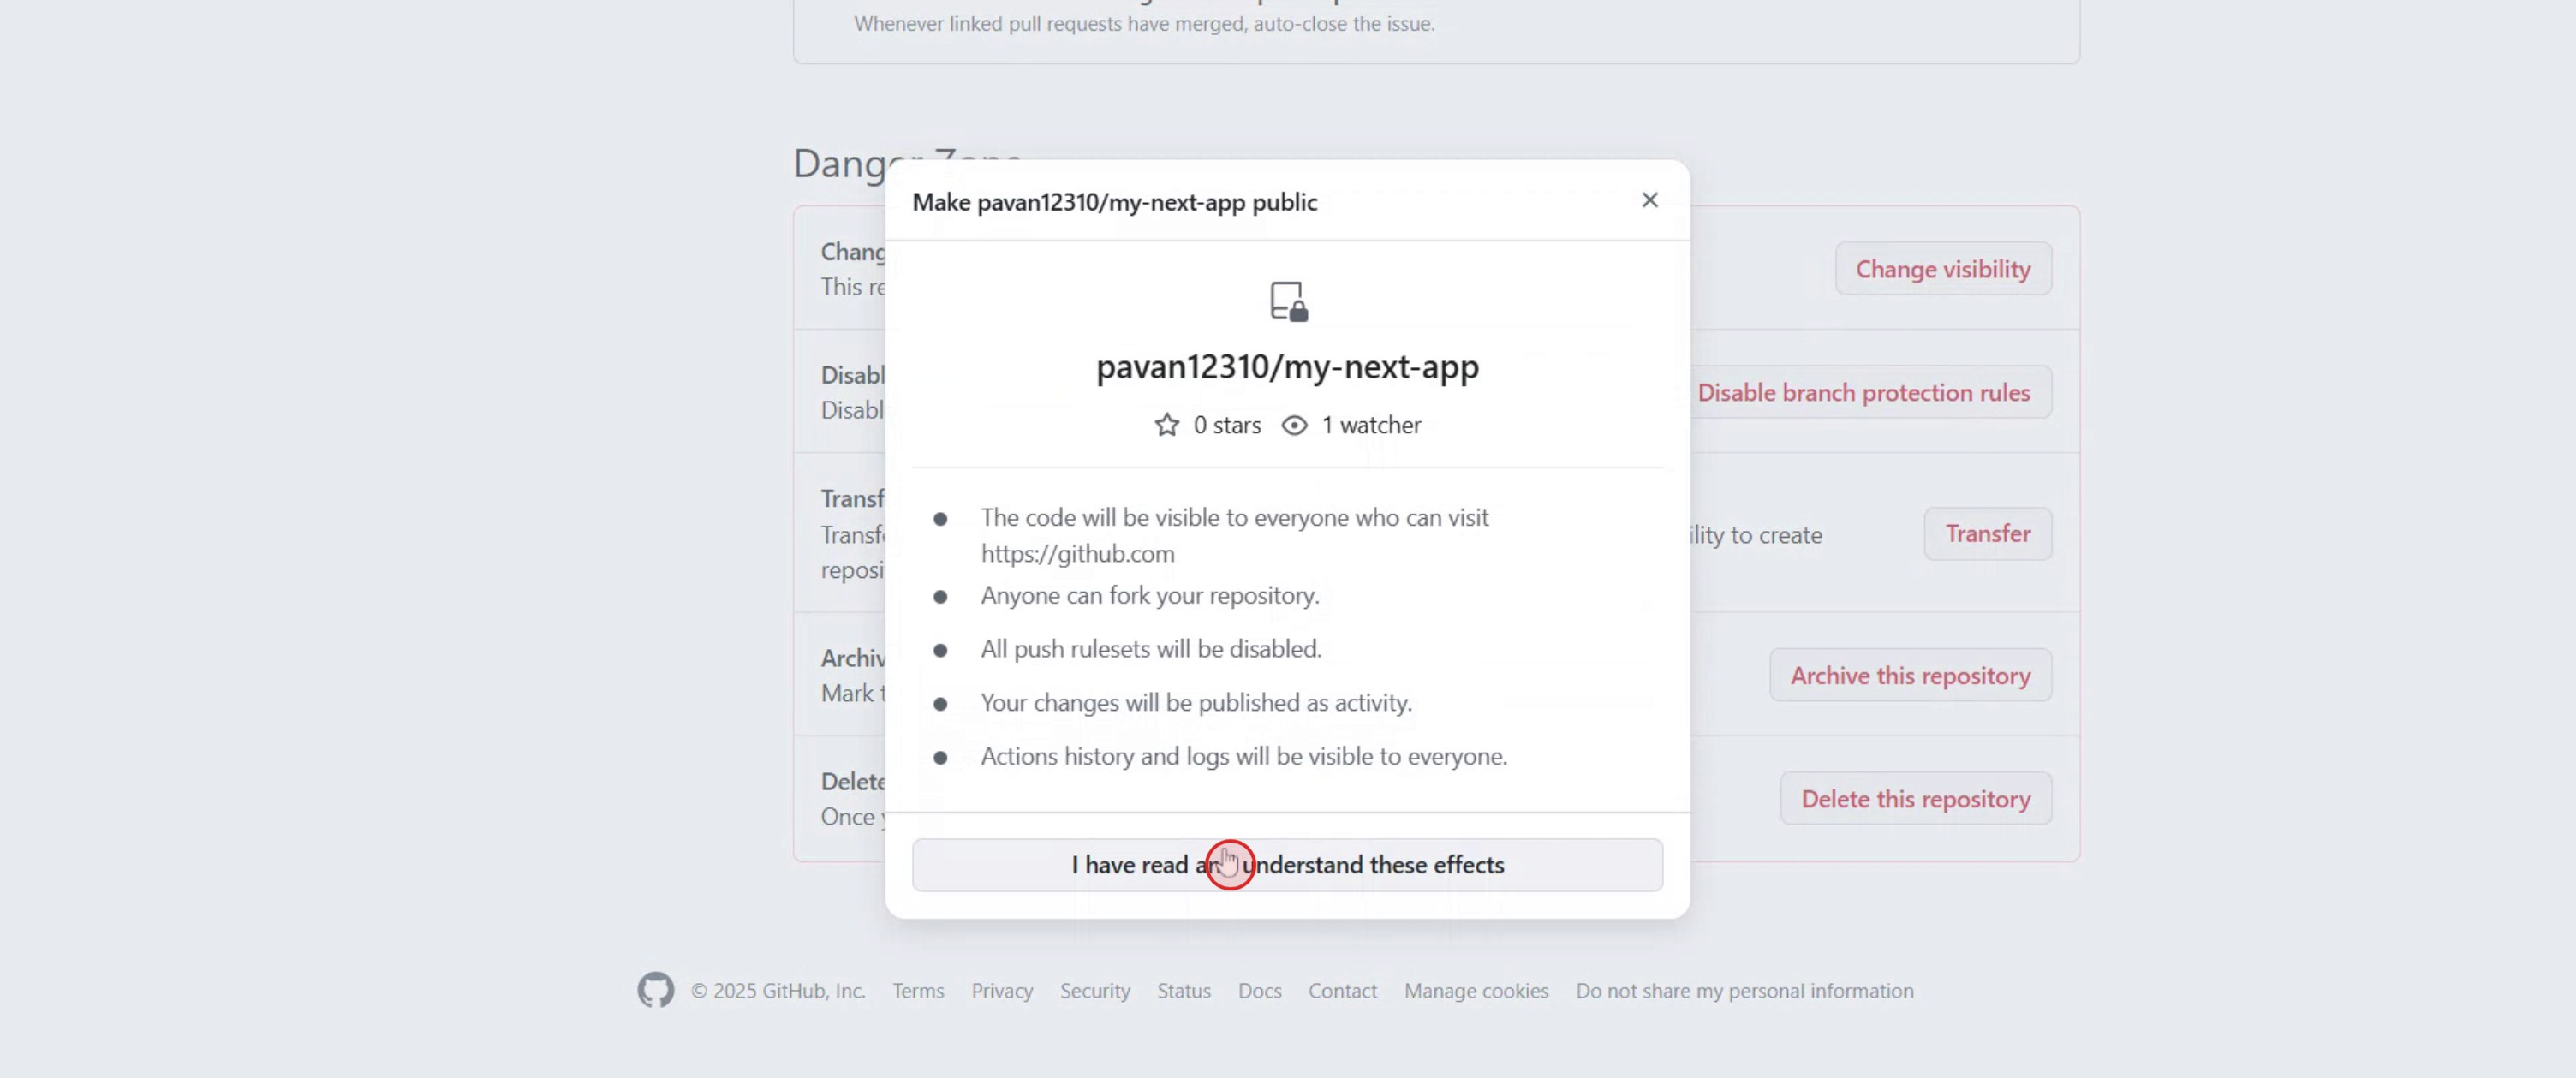
Aktion bestätigen: GitHub fordert Sie auf, Ihre Entscheidung zu bestätigen. Lesen Sie die Bestätigungsnachricht und klicken Sie auf die Schaltfläche "I understand, make this repository public", um fortzufahren.
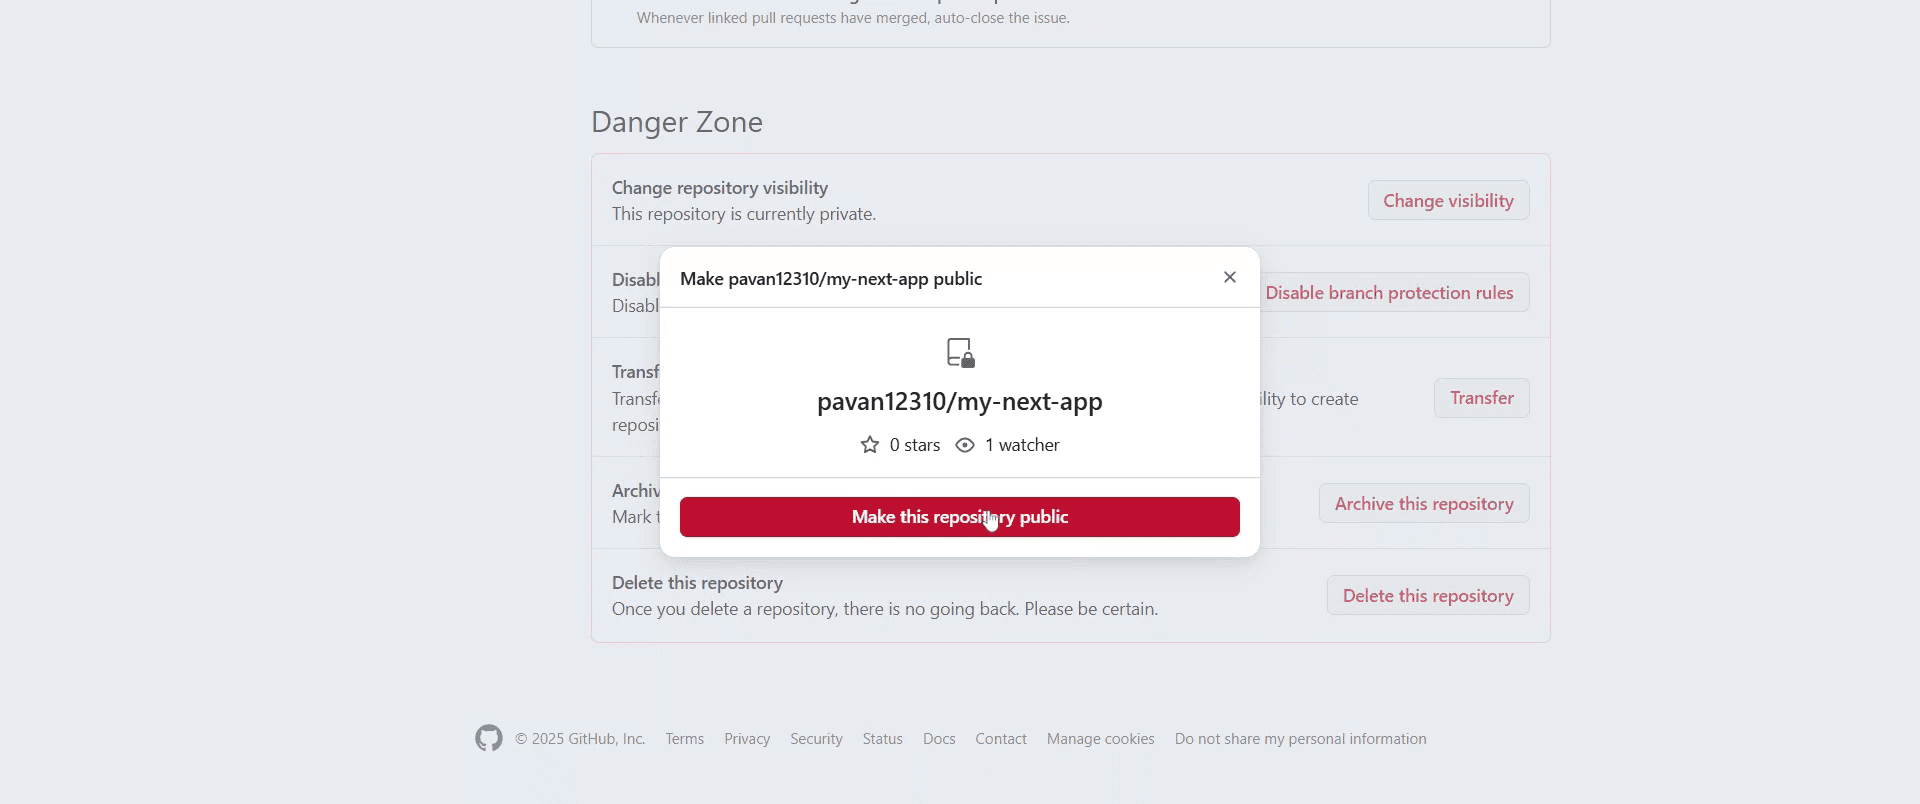
Nach der Bestätigung wird die Sichtbarkeit Ihres Repositorys aktualisiert, und es wird öffentlich zugänglich.
Schritt-für-Schritt-Anleitung: Wie Sie ein GitHub-Repository von privat auf öffentlich ändern
Schritt 1
Navigieren Sie zu dem privaten Repository, das Sie ändern möchten.

Schritt 2
Klicken Sie auf den Tab 'Settings', der sich oben rechts auf der Repository-Seite befindet.

Schritt 3
Scrollen Sie zum Abschnitt 'Danger Zone' unten auf der Einstellungsseite.
Schritt 4
Klicken Sie auf die Schaltfläche 'Change repository visibility' und wählen Sie 'Change to public' aus.
Schritt 5
Es erscheint ein Pop-up, das um Bestätigung bittet, und klicken Sie auf die Schaltfläche 'I want to make this repository public'.

Schritt 6
Klicken Sie auf die Schaltfläche 'I have read and understand these effects'.
Schritt 7
Klicken Sie auf 'Make this repository public'.
Schritt 8
Sobald das Repository öffentlich ist, sind der gesamte Code und alle Daten darin für jeden auf GitHub sichtbar.

Profi-Tipps: GitHub-Repository von privat zu öffentlich ändern
Prüfen Sie sensible Daten, bevor Sie es öffentlich machen
Überprüfen Sie Ihr gesamtes Repository auf API-Schlüssel, Umgebungsvariablen, Zugriffstoken,.env-Dateien und interne Dokumentation, bevor Sie die Sichtbarkeit ändern.Prüfen Sie die Commit-Historie, nicht nur die aktuellen Dateien
Auch wenn sensible Daten aus der neuesten Version entfernt wurden, können sie noch in früheren Commits vorhanden sein. Nutzen Sie Git-History-Tools oder die Secret-Scanning-Warnungen von GitHub.Aktualisieren Sie die README für öffentliche Nutzer
Formulieren Sie interne Notizen in eine klare Dokumentation um, die den Zweck des Projekts, die Einrichtungsschritte und die Nutzung für externe Mitwirkende erklärt.Fügen Sie vor der Veröffentlichung eine Lizenz hinzu
Ohne eine Lizenz dürfen andere Ihren Code technisch gesehen nicht legal verwenden. Wählen Sie eine geeignete Open-Source-Lizenz wie MIT, Apache 2.0 oder GPL.Überprüfen Sie die Mitwirkenden und Berechtigungen des Repositories
Stellen Sie sicher, dass alle Mitwirkenden für ein öffentliches Projekt geeignet sind, und entfernen Sie alle, die keinen fortlaufenden Zugriff haben sollten.Aktivieren Sie die Sicherheitsfunktionen von GitHub
Aktivieren Sie Dependabot-Warnungen, Code-Scanning und Secret-Scanning, um das Repository zu schützen, nachdem es öffentlich geworden ist.Erstellen Sie eine
.gitignore, falls sie fehlt
Verhindern Sie versehentliche zukünftige Commits sensibler oder unnötiger Dateien, indem Sie.gitignorekorrekt konfigurieren.
Häufige Stolperfallen beim Ändern eines GitHub-Repositories von privat zu öffentlich
Zugangsdaten versehentlich preisgeben
Dies ist der häufigste und schwerwiegendste Fehler. Sobald es öffentlich ist, können Daten schnell indexiert, geklont und zwischengespeichert werden.Annehmen, dass gelöschte Dateien für immer verschwunden sind
Gelöschte Dateien können weiterhin in der Git-Historie existieren, sofern sie nicht mit Tools zum Umschreiben der Historie ordnungsgemäß entfernt werden.Verbundene Dienste vergessen
CI/CD-Pipelines, Cloud-Anbieter und Integrationen von Drittanbietern können auch nach der Veröffentlichung weiterhin auf das Repository verweisen.Keine Lizenz enthalten
Ein öffentliches Repository ohne Lizenz schafft rechtliche Unklarheiten und schränkt die Nutzung ein.Schlechte Dokumentation für Erstnutzer
Nur intern gedachte READMEs verwirren externe Nutzer und verringern Beteiligung oder Beiträge.Einstellungen für Issues und Diskussionen ignorieren
Wenn Issues ohne Moderation aktiviert bleiben, kann dies zu Spam oder unüberschaubaren Anfragen führen.Sichtbarkeit ohne Abstimmung mit den Stakeholdern ändern
Bei Team- oder Firmen-Repositories kann das Umstellen auf öffentlich ohne Genehmigung zu Compliance- oder Richtlinienproblemen führen.
Häufige Fragen: GitHub-Repository von privat zu öffentlich ändern
1. Kann ich ein GitHub-Repository kostenlos von privat auf öffentlich ändern?
Ja. GitHub erlaubt Sichtbarkeitsänderungen von privat zu öffentlich sowohl in kostenlosen als auch in kostenpflichtigen Plänen.
2. Bleibt meine Commit-Historie erhalten?
Ja. Alle Commits, Branches und Tags bleiben unverändert, wenn Sie die Sichtbarkeit des Repositorys ändern.
3. Kann ich ein öffentliches Repository wieder auf privat zurücksetzen?
Ja, Sie können es jederzeit wieder auf privat ändern, aber bereits öffentlich geklonte oder zwischengespeicherte Daten können nicht rückgängig gemacht werden.
4. Werden öffentliche Repositories in Suchmaschinen erscheinen?
Ja. Öffentliche Repositories können von Suchmaschinen indexiert und von jedem gefunden werden.
5. Sind Forks und Sterne betroffen?
Sterne bleiben erhalten. Das Forken ist verfügbar, sobald das Repository öffentlich ist.
6. Werden Mitwirkende benachrichtigt, wenn sich die Sichtbarkeit ändert?
GitHub sendet nicht immer explizite Benachrichtigungen, daher ist es am besten, Mitwirkende manuell zu informieren.
7. Ist es sicher, ein Unternehmensprojekt öffentlich zu machen?
Nur, wenn Sie Lizenzierung, Compliance, geistiges Eigentum und sensible Daten gründlich geprüft haben.
Andere fragen auch
Generator für technische Dokumentation
Wie man ein GitHub-Repository per Link teilt
Wie man sein GitHub-Profil teilt
Verwandte Tutorials

