

Wie man Icons in Figma hinzufügt
Erfahren Sie, wie Sie in Figma mithilfe von Plugins, SVG-Uploads und Designbibliotheken Icons hinzufügen. Eine Schritt-für-Schritt-Anleitung, um Ihre UI-Designs mit benutzerdefinierten und vorgefertigten Icons zu verbessern.
Icon-Plugins verwenden:
Ein Plugin installieren: Gehen Sie im Figma-Menü zu "Plugins",
wählen Sie "Browse all plugins..." und suchen Sie nach dem gewünschten Icon-Plugin (z. B. Iconify, Material Design Icons, Font Awesome).
Das Plugin installieren: Klicken Sie auf "Install", um es zu Ihrer Figma-Datei hinzuzufügen.
Durchsuchen und hinzufügen: Starten Sie das Plugin (Rechtsklick -> Plugins -> [Plugin-Name]), durchsuchen Sie die Symbolbibliothek und klicken Sie entweder zum Importieren oder ziehen Sie das Symbol per Drag-and-drop auf Ihre Arbeitsfläche.
Anpassen: Genau wie importierte SVGs können Sie die Symbole des Plugins nach Bedarf anpassen.
Beispiel: Mit Material Design Icons: Öffnen Sie das Material-Design-Icons-Plugin, suchen Sie nach einem Symbol (z. B. "home") und klicken Sie darauf, um es zu Ihrem Design hinzuzufügen.
Schritt-für-Schritt-Anleitung: So fügen Sie Symbole in Figma hinzu
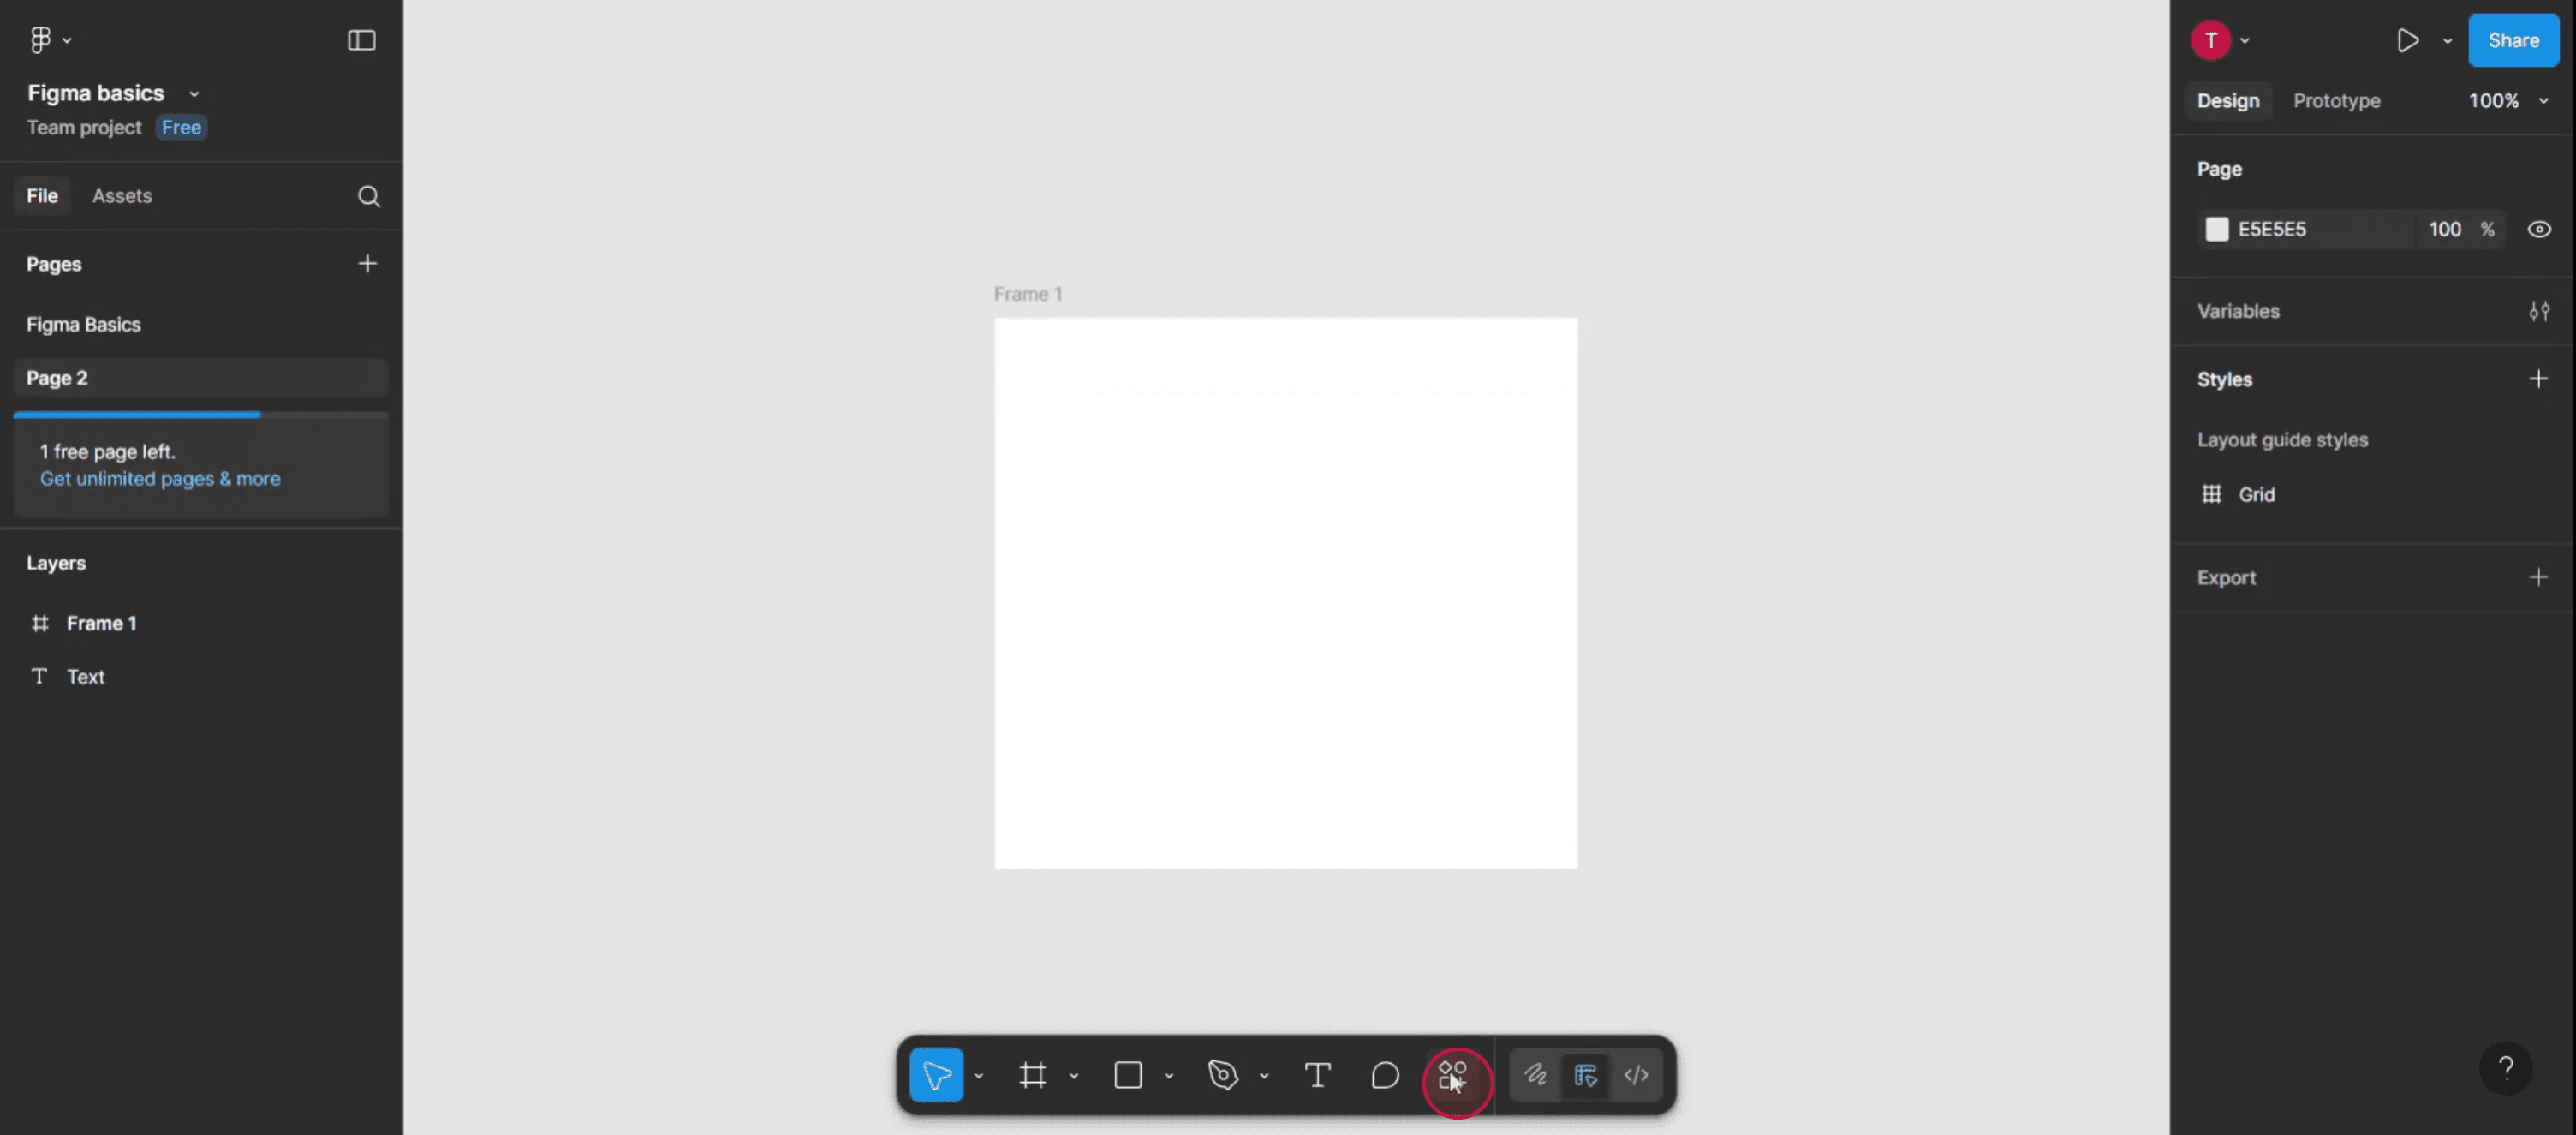
Schritt 1
Wählen Sie die Option "Actions" aus.
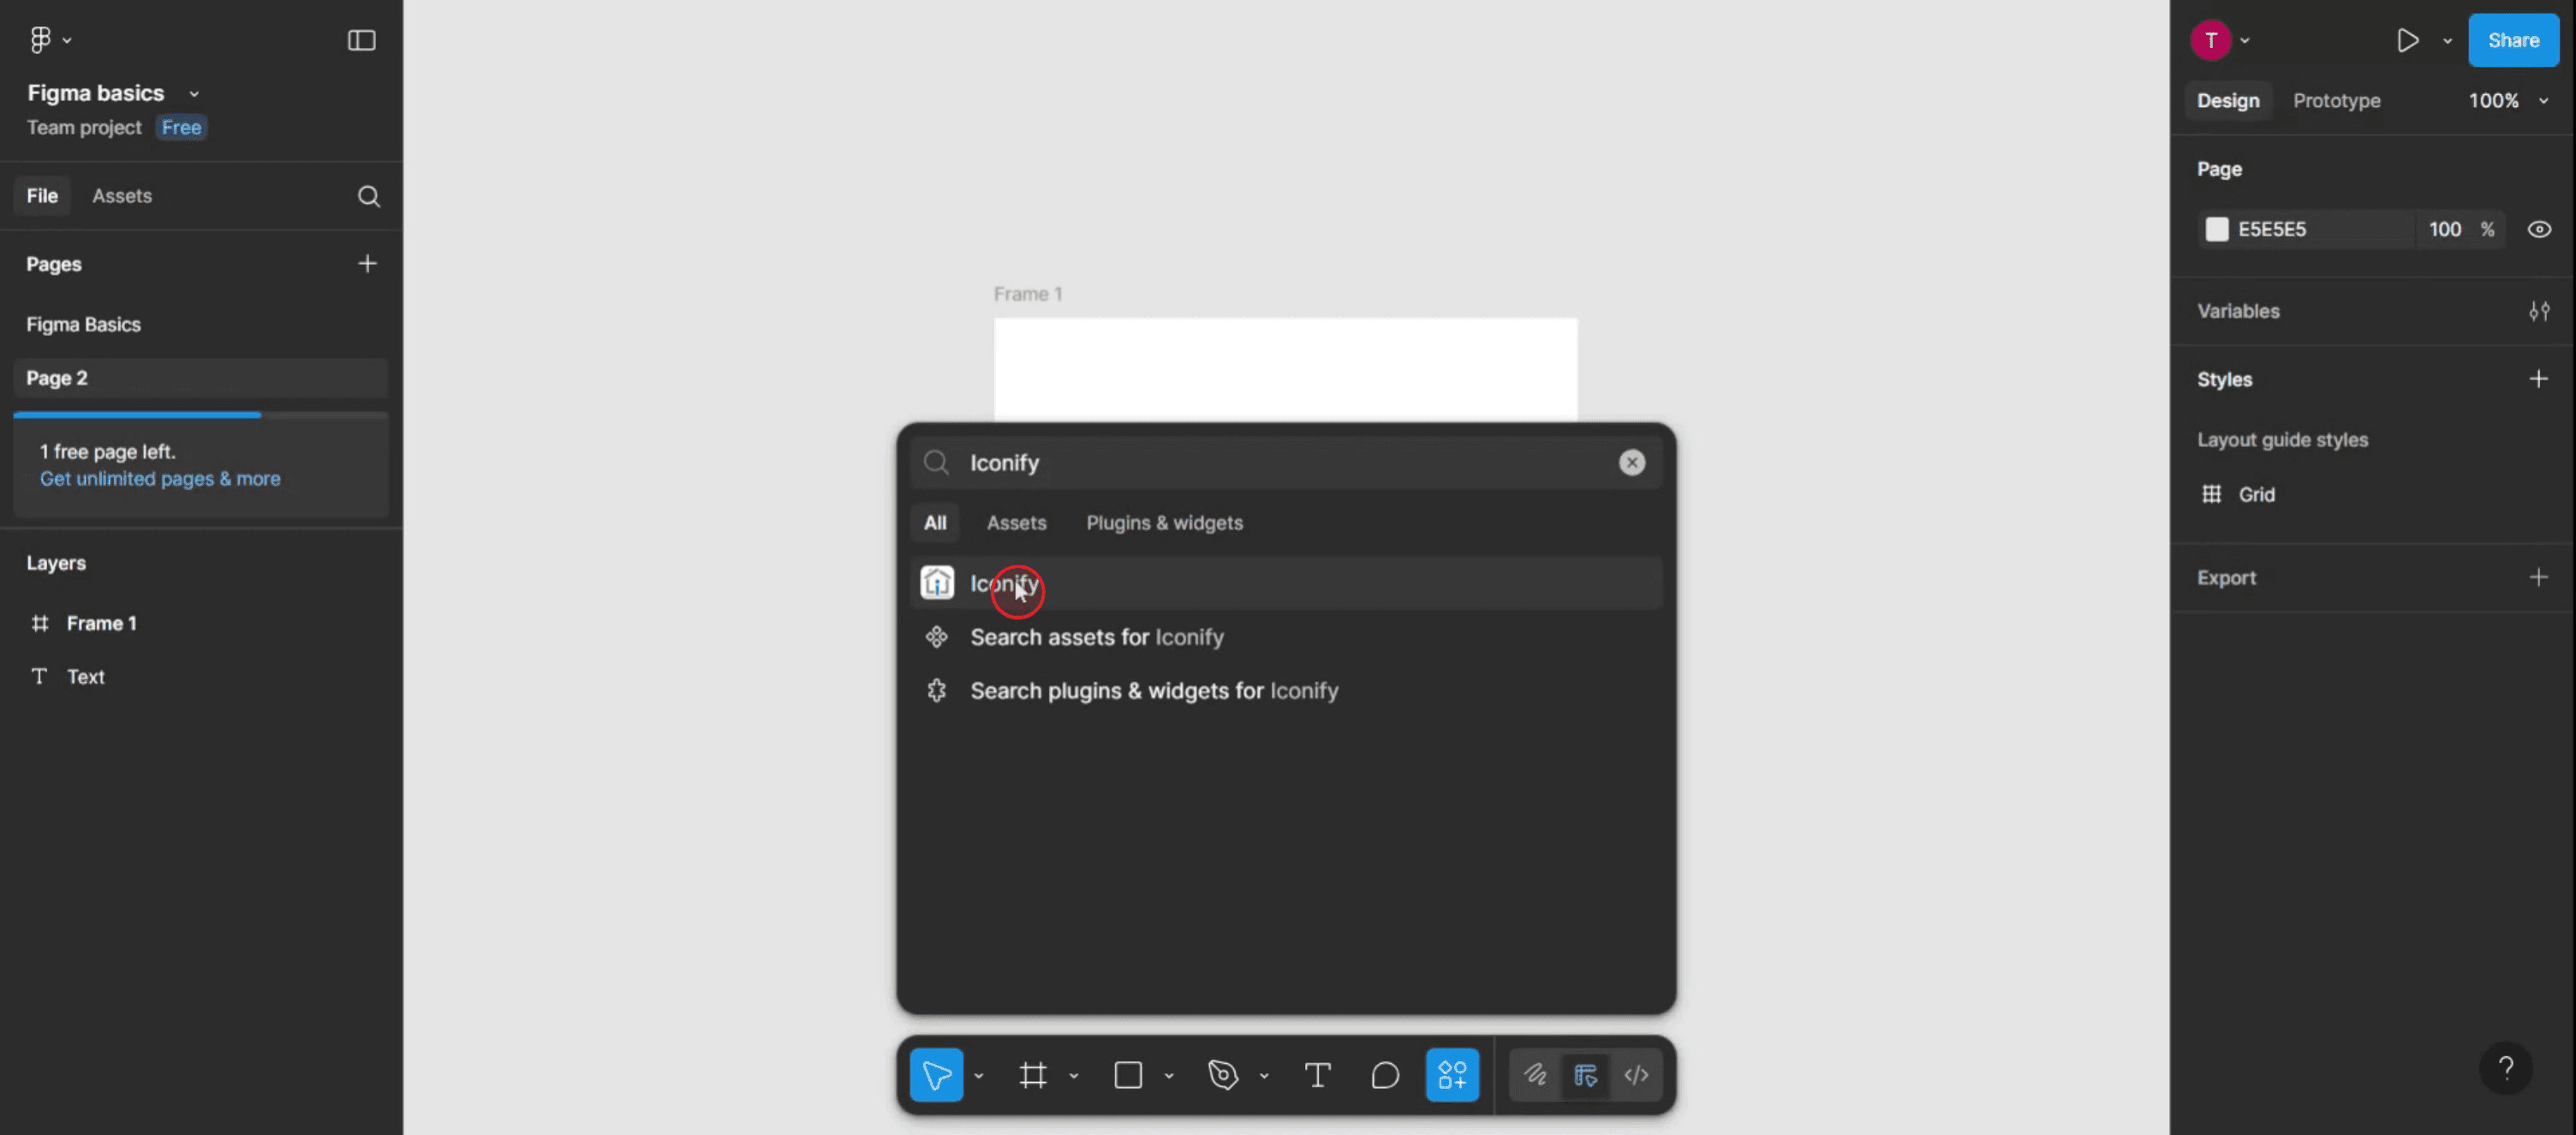
Schritt 2
Geben Sie in der Suchkonsole "Iconify" ein, um das benötigte Plugin zu finden.

Schritt 3
Nachdem die Suchergebnisse angezeigt werden, klicken Sie auf die Option "Iconify".
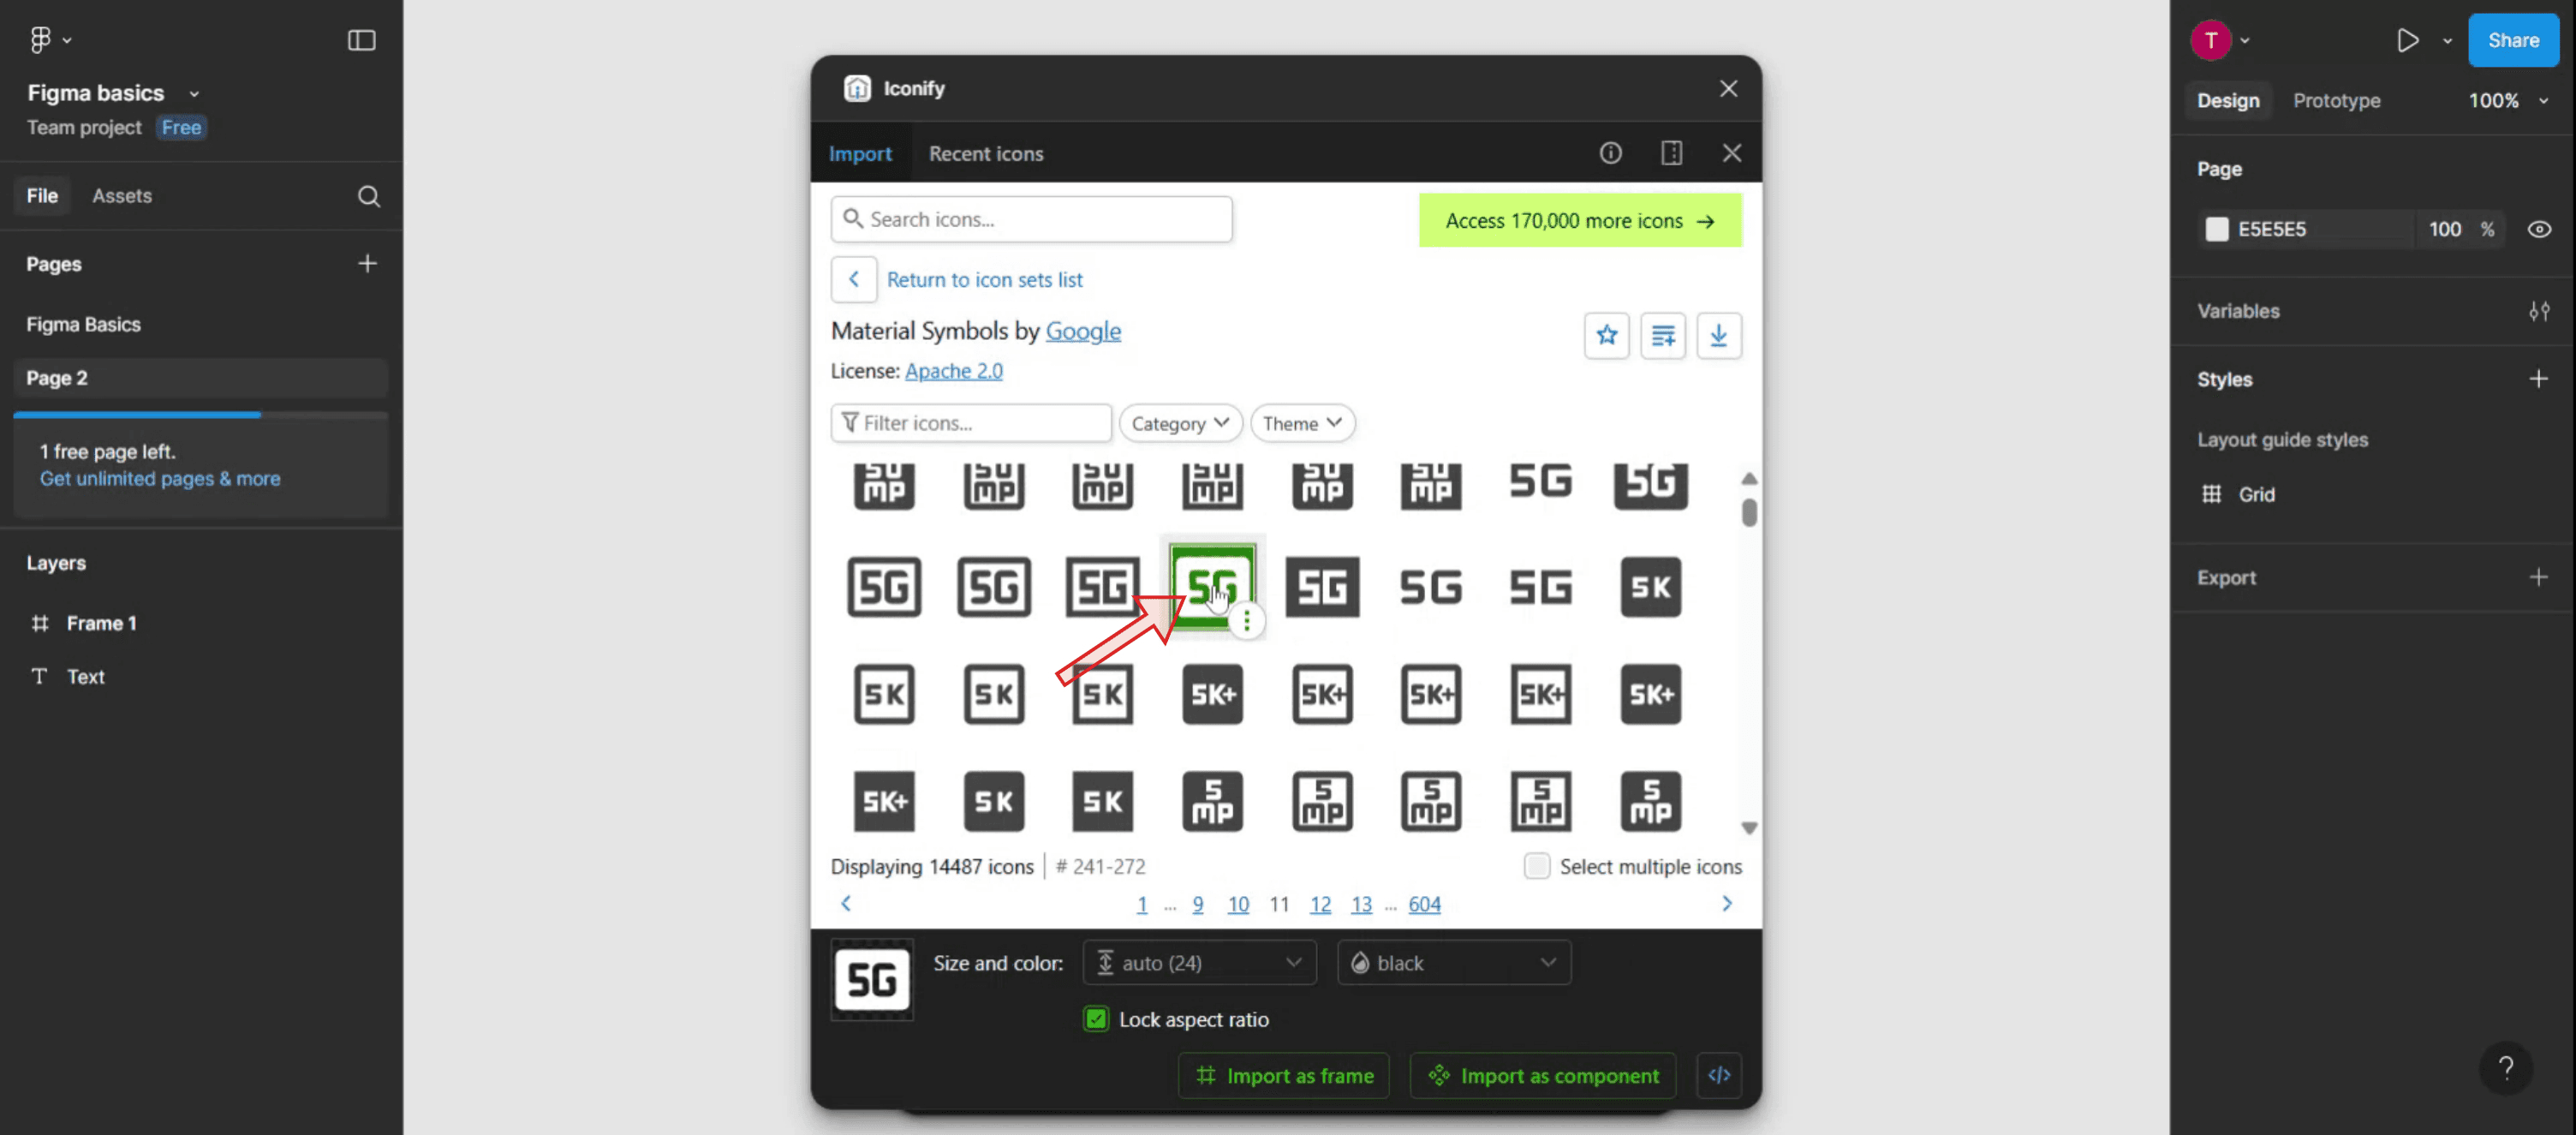
Schritt 4
Wählen Sie dann das Symbol aus,
Schritt 5
Klicken Sie auf die Option "Als Komponente importieren".
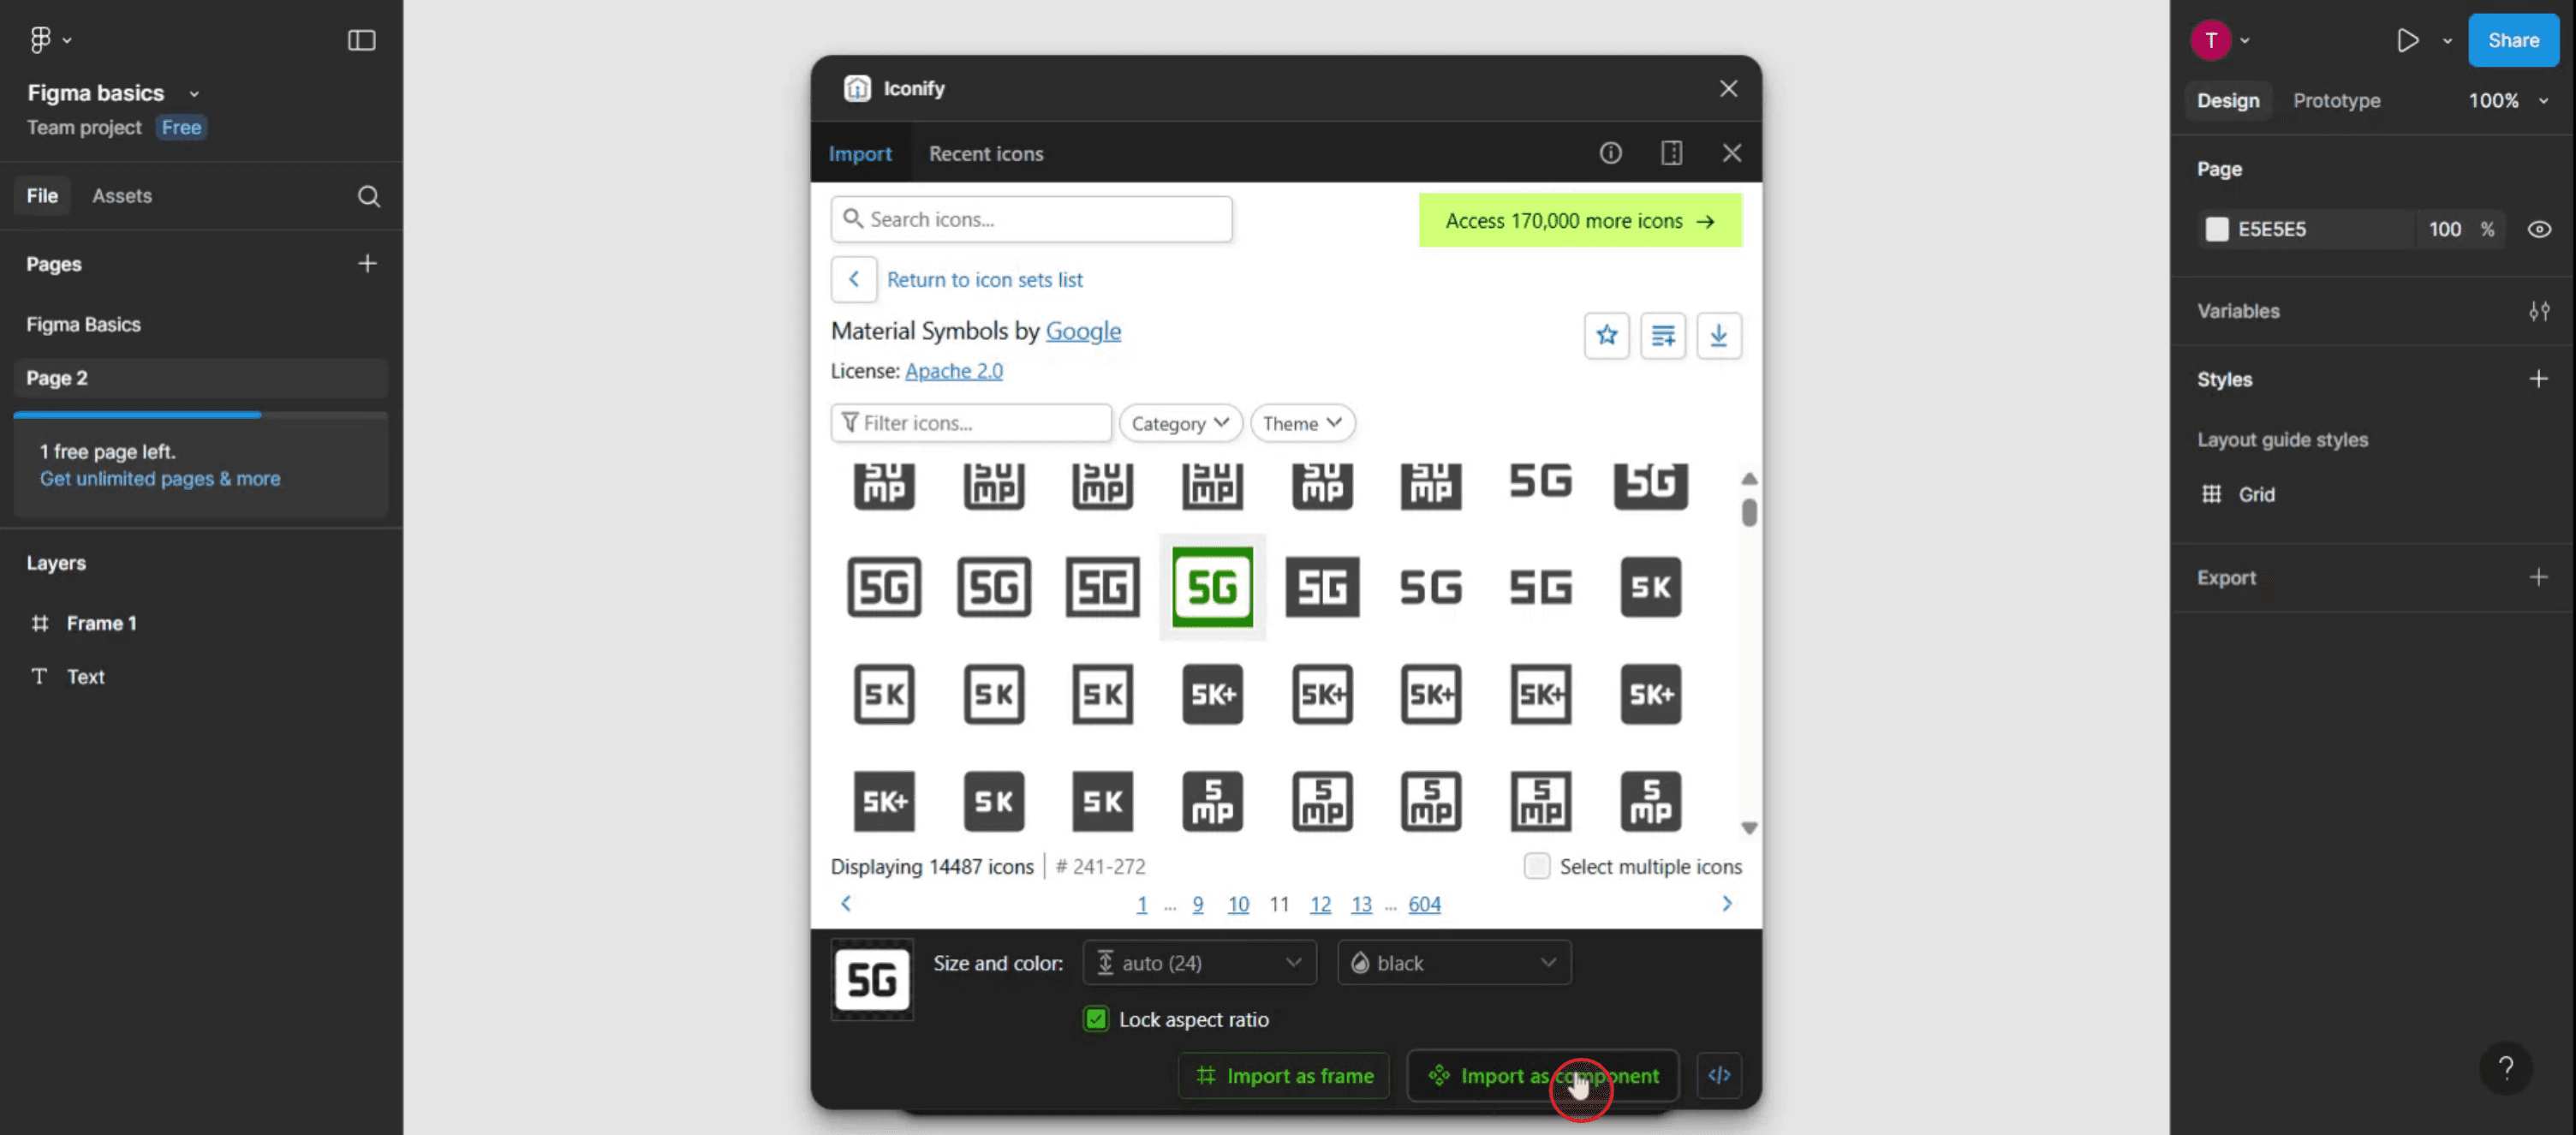
Schritt 6
Sie sehen nun, dass das Symbol zu Ihrem Frame hinzugefügt wurde. Passen Sie das Symbol bei Bedarf an, um Ihren Projektspezifikationen zu entsprechen.

Profi-Tipps zum Hinzufügen von Icons in Figma
Verwenden Sie die integrierten Icon-Plugins
Figma hat mehrere kostenlose Plugins wie „Iconify“, „Feather Icons“ und „Material Design Icons“. Um sie zu verwenden, gehen Sie zur Menüleiste, klicken Sie auf „Resources“, wählen Sie den Tab „Plugins“ und suchen Sie nach dem gewünschten Icon-Plugin. Sobald es installiert ist, können Sie Icons direkt per Drag & Drop in Ihr Design ziehen.Icons aus externen Bibliotheken kopieren
Sie können kostenlose Icon-Bibliotheken wie Font Awesome oder Google Material Icons besuchen, dann SVG-Versionen von Icons kopieren und sie in Ihre Figma-Datei einfügen. Das ist hilfreich, wenn Sie markenspezifische oder allgemein wiedererkennbare Icons benötigen.SVG-Dateien importieren
Wenn Sie Icons als SVG-Dateien auf Ihrem Computer gespeichert haben, können Sie sie ganz einfach in Figma importieren, indem Sie sie per Drag & Drop auf die Arbeitsfläche ziehen. Figma behält die Vektorqualität bei und ermöglicht einfaches Skalieren sowie Farbanpassungen.Komponenten für Konsistenz verwenden
Konvertieren Sie häufig verwendete Icons in Komponenten. So wird jede Aktualisierung automatisch auf alle Instanzen in Ihrem Design angewendet.Icons in einer Bibliothek organisieren
Erstellen Sie für Ihr Team eine geteilte Bibliothek mit Icon-Komponenten. Das fördert Konsistenz und spart Zeit, indem häufig verwendete Icons von einem zentralen Ort aus zugänglich sind.
Häufige Stolperfallen und wie man sie vermeidet
Nicht in Konturen umwandeln
Einige Icons, die aus externen Quellen eingefügt wurden, sind möglicherweise nicht bearbeitbar. Klicken Sie mit der rechten Maustaste auf das Icon und wählen Sie „Kontur umwandeln“ oder „Vereinfachen“, um es in bearbeitbare Formen umzuwandeln.Zu viele Stile verwenden
Vermeiden Sie das Mischen unterschiedlicher Icon-Stile (z. B. gefüllt, Kontur, Duoton) in einem Design. Bleiben Sie durchgehend bei einem Stil für visuelle Konsistenz.Bilder in niedriger Qualität importieren
Verwenden Sie immer SVG- oder Vektorformate statt PNGs oder JPGs, um bei jeder Größe Klarheit zu bewahren.Beim Skalieren nicht Shift gedrückt halten
Halten Sie beim Ändern der Icon-Größe die Shift-Taste gedrückt, um die Proportionen beizubehalten und Verzerrungen zu vermeiden.Vergessen, Ebenen zu benennen
Benennen Sie Ihre Icon-Ebenen oder -Komponenten immer klar. Das hilft bei der Organisation und erleichtert die Suche, besonders in größeren Designdateien.
Häufig gestellte Fragen zum Hinzufügen von Icons in Figma
Kann ich die Farbe von Icons in Figma anpassen?
Ja, wenn das Icon ein Vektor (SVG) ist, können Sie Füll- und Konturfarbe ganz einfach im Eigenschaftenbereich rechts ändern.Kosten Plugins Geld?
Die meisten Icon-Plugins wie Iconify sind kostenlos. Einige fortgeschrittene Plugins bieten möglicherweise kostenpflichtige Funktionen, aber grundlegende Icon-Bibliotheken sind normalerweise kostenlos zugänglich.Kann ich meine eigenen benutzerdefinierten Icons verwenden?
Ja, Sie können Ihre eigenen Icon-Designs in Figma importieren, indem Sie sie hochladen oder per Drag & Drop in Ihre Datei ziehen.Wie stelle ich die Konsistenz der Icons über ein Projekt hinweg sicher?
Verwenden Sie Komponenten und Stile. Erstellen Sie ein Designsystem, in dem alle Icons auf denselben Größen-, Gewichts- und Farbregeln basieren.Kann ich Icons in Figma animieren?
Sie können mit den Prototyping-Funktionen von Figma grundlegende Übergänge anwenden, aber für fortgeschrittene Animationen benötigen Sie möglicherweise Tools wie Figmotion oder exportieren Icons zur Verwendung in externen Apps.Wie nehme ich den Bildschirm auf dem Mac auf?
Um den Bildschirm auf einem Mac aufzunehmen, können Sie Trupeer AI verwenden. Es ermöglicht Ihnen, den gesamten Bildschirm aufzuzeichnen, und bietet KI-Funktionen wie das Hinzufügen von KI-Avataren, Voiceover sowie Vergrößern und Verkleinern im Video. Mit der KI-Videoübersetzungsfunktion von Trupeer können Sie das Video in über 30 Sprachen übersetzen.Wie füge ich einen KI-Avatar zu einer Bildschirmaufnahme hinzu?
Um einer Bildschirmaufnahme einen KI-Bildschirmaufnahmetool zu verwenden, müssen Sie ein. Trupeer AI ist ein KI-Bildschirmaufnahmetool, das Ihnen hilft, Videos mit mehreren Avataren zu erstellen, und Ihnen auch dabei hilft, Ihren eigenen Avatar für das Video zu erstellen.Wie nehme ich den Bildschirm unter Windows auf?
Um den Bildschirm unter Windows aufzunehmen, können Sie die integrierte Game Bar (Windows + G) oder ein fortschrittliches KI-Tool wie Trupeer AI für erweiterte Funktionen wie KI-Avatare, Voiceover, Übersetzung usw. verwenden.Wie füge ich ein Voiceover zu einem Video hinzu?
Um Videos ein Voiceover hinzuzufügen, laden Sie die Chrome-Erweiterung von Trupeer AI herunter. Nach der Anmeldung laden Sie Ihr Video mit Sprache hoch, wählen das gewünschte Voiceover von Trupeer aus und exportieren Sie Ihr bearbeitetes Video.Wie zoome ich in eine Bildschirmaufnahme hinein?
Um während einer Bildschirmaufnahme hineinzuzoomen, verwenden Sie die Zoom-Effekte in Trupeer AI, mit denen Sie an bestimmten Momenten hinein- und herauszoomen können, um die visuelle Wirkung Ihres Videoinhalts zu verbessern.
Empfohlene Lektüre
Technischer Dokumentationsgenerator
So blenden Sie Frame-Namen in Figma aus
So speichern Sie die Figma-Datei
So erstellen Sie ein Raster in Figma
Verwandte Tutorials

