

How To Chat In Figma
Learn how to communicate in Figma using comments, mentions, and cursor chat. This guide covers real-time collaboration tools to streamline design feedback.
This guide will walk you through the process of utilizing Figma's comment and collaboration features. You'll learn how to leave comments, mention team members, and share your Figma file for real-time collaboration.
Figma makes it easy to collaborate with others using three main tools: cursor chat, voice chat, and comments.
Cursor chat
Cursor chat lets you send quick text messages that follow your mouse ideal for real-time teamwork.
To turn it on: Right-click anywhere on the canvas and choose Cursor Chat, or just hit the
/key.To type: Start typing and your message will show up next to your cursor.
To reset: Press
Escto clear your current message.Note: You’re limited to 52 characters per message.
Voice chat
If you’d rather speak, Figma supports voice conversations (only on desktop and browser).
To start: Hover over your avatar, click Start conversation, and allow microphone access.
To join: Click Join conversation in the top toolbar if someone else has already started one.
Comments
Comments are great for sharing thoughts, suggestions, or feedback even when others aren’t online.
To add one: Click the 💬 icon or press
Cto enter comment mode.To pin it: Click anywhere on the canvas to place your comment.
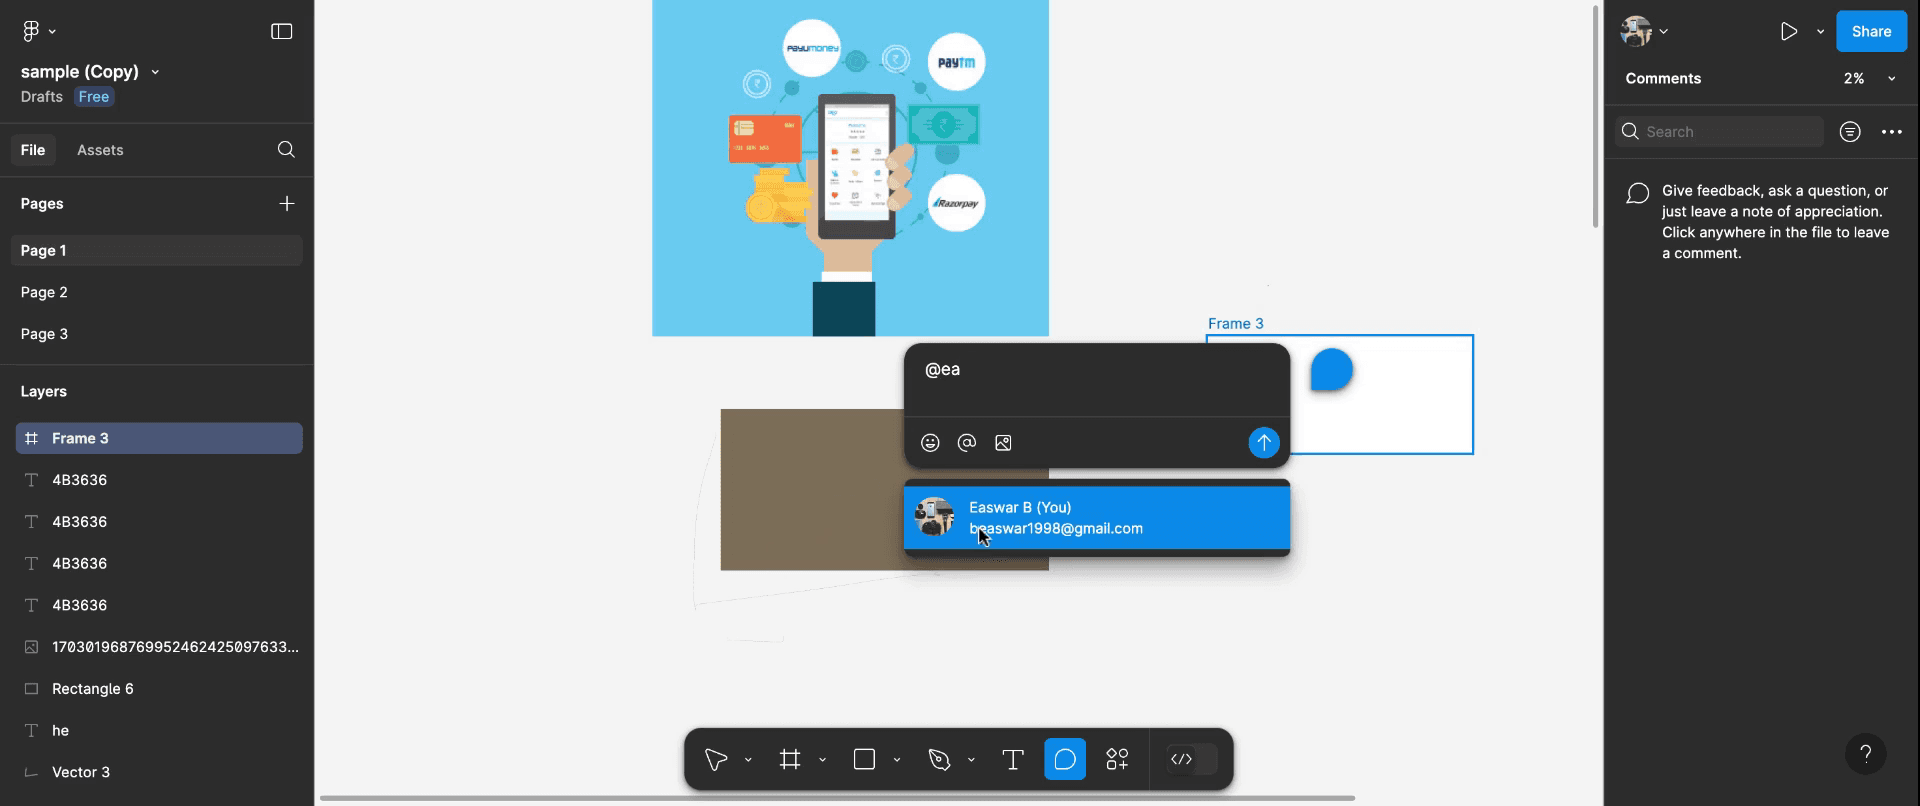
To notify someone: Use
@followed by their name to tag them and they’ll get a notification.
Step-by-Step Guide: How To Chat In Figma
Step 1
To begin with on how to chat in Figma, open a Figma file and select the comment tool, which is located at the bottom right side of the interface.

Step 2
Click anywhere on the canvas to leave a comment. You can mention a team member by name or write any text for their attention and also giving them the access to view and revert back on the comment.
Step 3
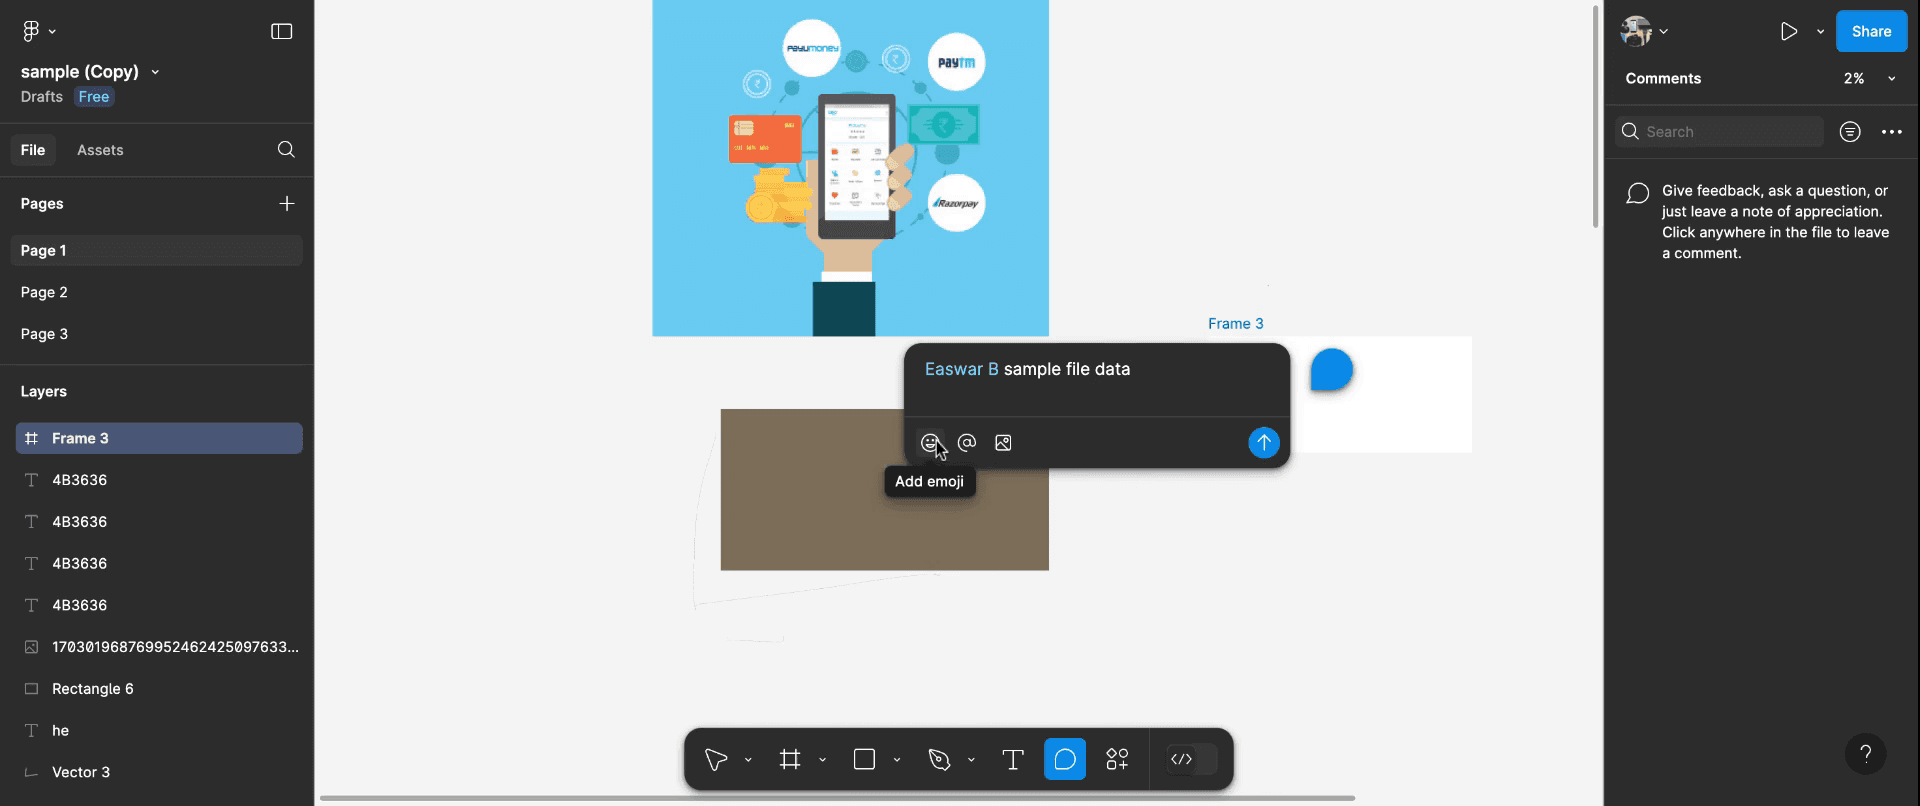
After typing your comment, you have the option to upload an attachment, add emojis, and insert images. Once you are ready, press enter to post your comment.
Step 4
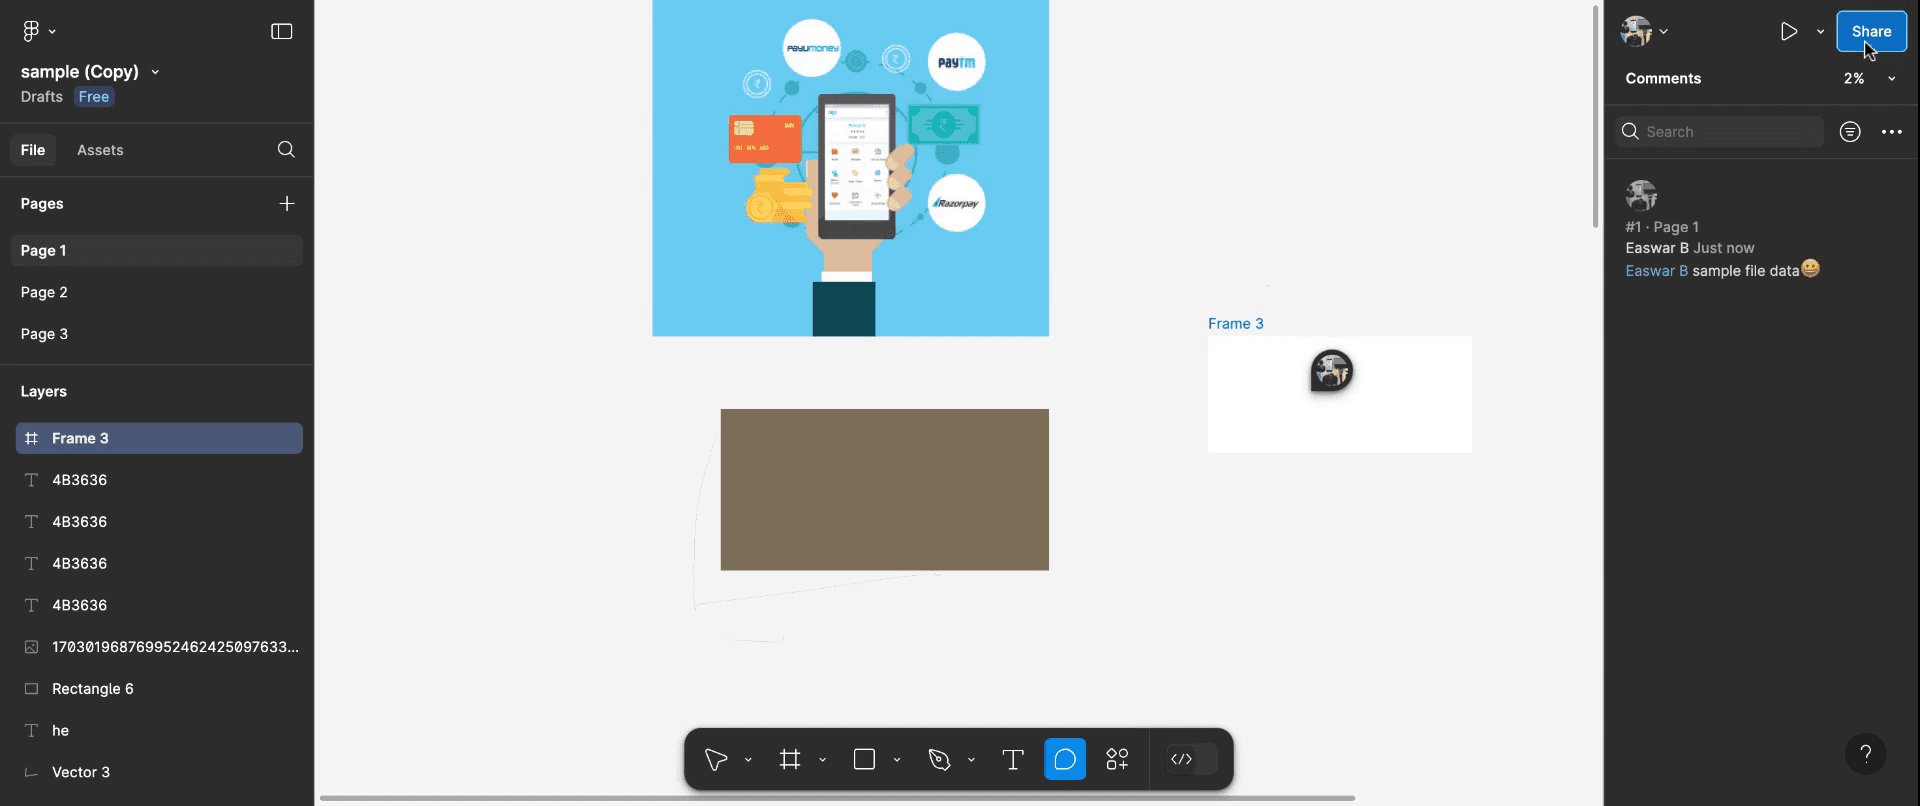
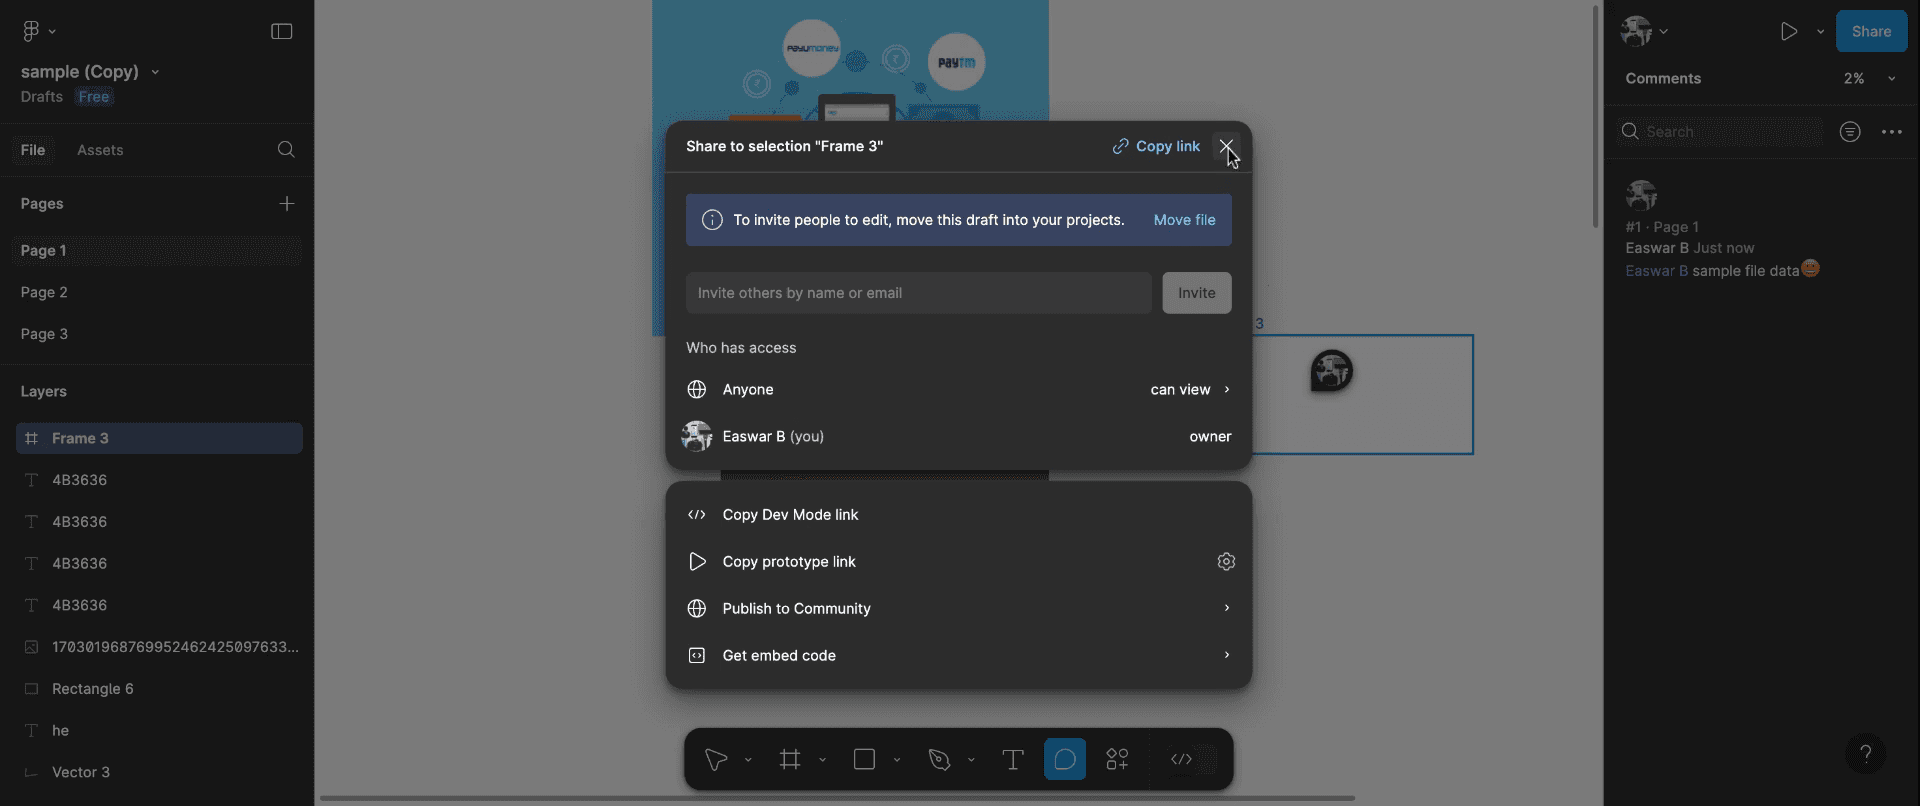
Your comment will now be visible and pinned on the canvas for easy reference. Alternatively, you can use the real-time cursor method to collaborate with others. By providing access or sharing the link, others can view or edit the file.
Step 5
You can hover over a team member's cursor during a collaborative session to see their location on the canvas while working or discussing.
Pro tips for chatting in Figma
Open the Comments Panel:
In Figma, the comment feature allows team members to leave feedback. Click on the Comment button in the top-right corner to open the comment panel.Leave Comments on Specific Elements:
To chat or comment on a specific part of the design, click on the element (shape, text, etc.) where you want to leave feedback. This pins your comment directly to that element.Tag Team Members:
Use @mentions to tag team members in comments. Simply type @ followed by their username to get their attention and notify them about specific feedback.Use Emojis or Reactions:
To quickly acknowledge feedback or express your thoughts without typing a comment, use emojis or reactions by hovering over a comment and selecting the appropriate emoji.Reply to Comments:
To engage in a conversation, reply to comments by clicking on the "Reply" button under a comment. This helps keep the feedback organized and threaded.Resolve Comments:
Once an issue has been addressed, click on the Resolve button to mark a comment as resolved. This helps keep the feedback process clean and organized.
Common pitfalls and how to avoid them for chatting in Figma
Not Using @Mentions Properly:
Fix: Always tag team members when you want them to take action or read your comment, ensuring that important feedback is not overlooked.Comment Overload:
Fix: Avoid excessive commenting. Be specific and concise, and only comment when necessary to avoid cluttering the design with too many messages.Miscommunication in Comments:
Fix: To avoid misunderstandings, be clear in your comments and avoid ambiguous language. If needed, use visual references or annotations to explain your point.Ignoring Resolved Comments:
Fix: Don't leave resolved comments hanging. Mark them as resolved once the issue has been addressed to keep the feedback process streamlined.Not Keeping Comments Organized:
Fix: Stay organized by grouping related comments together and replying in the correct threads, making it easier to track progress.
Common FAQs for chatting in Figma
Can I chat in Figma in real-time like in a messaging app?
Figma doesn't offer direct real-time chat like a messaging app, but it does have a comment feature for leaving feedback and having discussions on designs.Can I comment on a specific area of the design?
Yes, you can click on any object or area within the design and leave a comment pinned to that specific element.How do I see all comments in Figma?
You can view all comments in the Comment panel. This panel shows both resolved and unresolved comments.Can I remove or edit my comments in Figma?
Yes, you can delete your own comments by clicking on the three dots next to the comment and selecting Delete. However, you can't edit a comment once it's posted.Can I chat with multiple people in Figma?
Yes, Figma supports team collaboration, so multiple people can leave comments and reply to each other in the comment threads.How to screen record on mac?
To screen record on a Mac, you can use Trupeer AI. It allows you to capture the entire screen and provides AI capabilities such as adding AI avatars, add voiceover, add zoom in and out in the video. With trupeer’s AI video translation feature, you can translate the video into 30+ languages.How to add an AI avatar to screen recording?
To add an AI avatar to a screen recording, you'll need to use an AI screen recording tool. Trupeer AI is an AI screen recording tool, which helps you create videos with multiple avatars, also helps you in creating your own avatar for the video.How to screen record on windows?
To screen record on Windows, you can use the built-in Game Bar (Windows + G) or advanced AI tool like Trupeer AI for more advanced features such as AI avatars, voiceover, translation etc.How to add voiceover to video?
To add voiceover to videos, download trupeer ai chrome extension. Once signed up, upload your video with voice, choose the desired voiceover from trupeer and export your edited video.How do I Zoom in on a screen recording?
To zoom in during a screen recording, use the zoom effects in Trupeer AI which allows you to zoom in and out at specific moments, enhancing the visual impact of your video content
Suggested Reads
Technical Documentation Generator
How to Turn an Image into a Coloring Page in Canva
How to Print Double Sided on Canva
Related Tutorials

